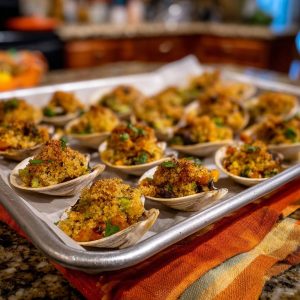
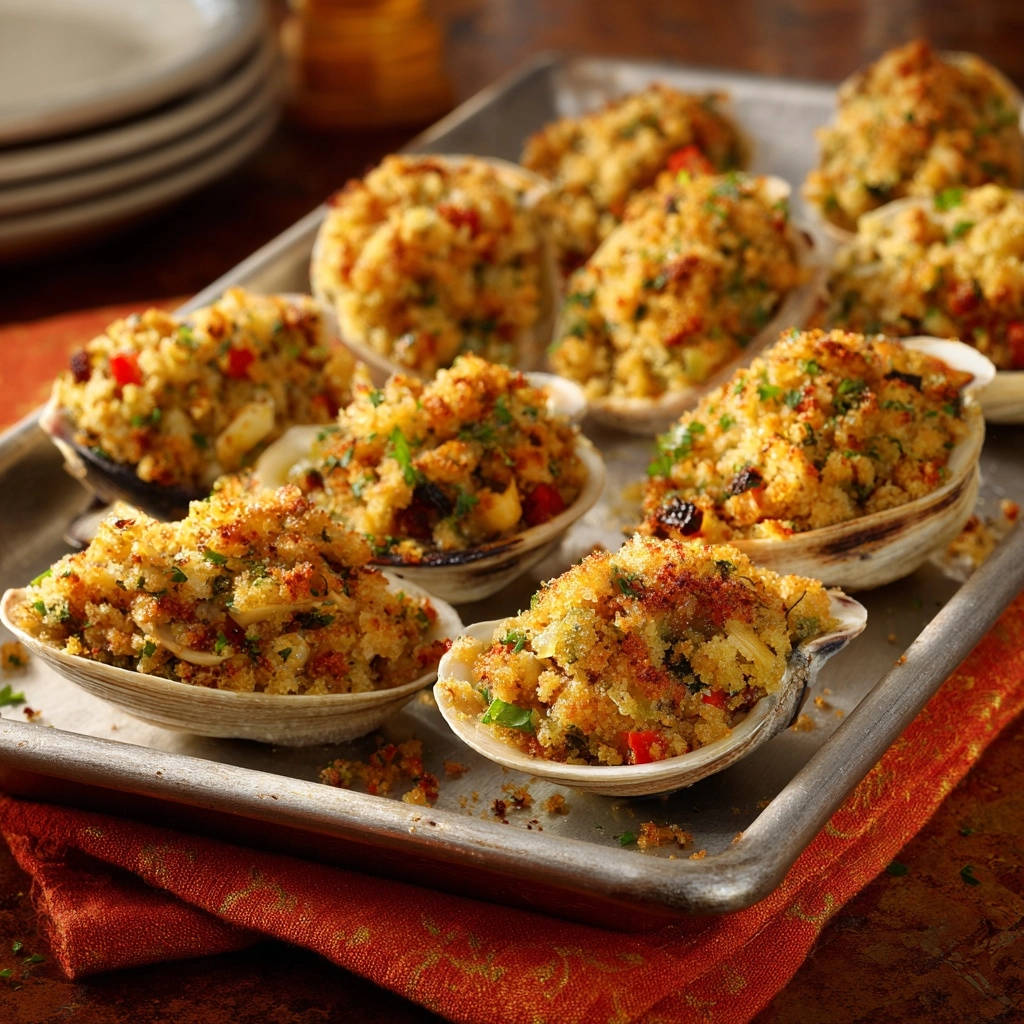
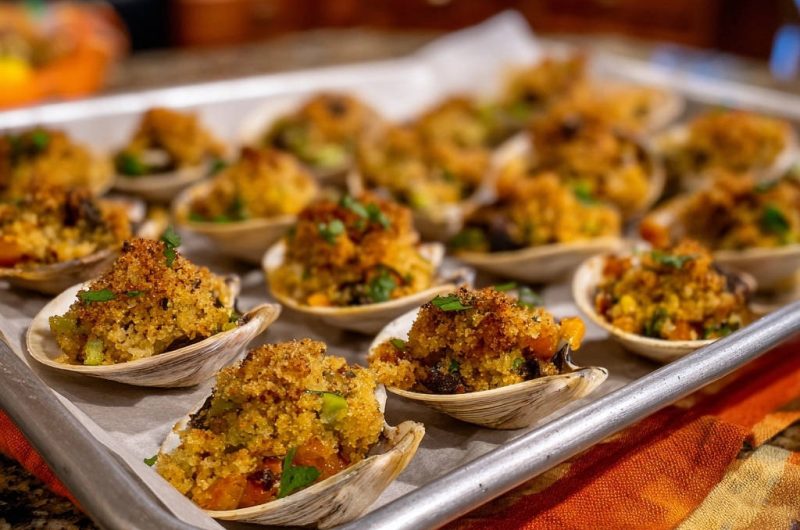
There is nothing more frustrating than putting in the effort to make Classic Baked Stuffed Clams only to pull them from the oven waterlogged and dense, missing that essential crispy crust.
As a seafood enthusiast, I cracked the code years ago: this recipe guarantees a perfect, golden, crunchy topping every single time thanks to one simple, yet critical, technique that prevents the stuffing from absorbing moisture.
It’s the reliable, restaurant-quality appetizer that builds trust with every bite, ensuring your celebration starter is nothing short of spectacular.
Tired of Soggy Clams? Why This Recipe Works Every Time
The success of baked stuffed clams hinges entirely on texture, and this method specifically solves the common problem of mushy filling by insulating the breadcrumbs before they ever encounter the moisture of the clam meat and sautéed vegetables.
Our careful preparation and two-stage cooking process delivers delicate, tender clam meat encased in an incredibly savory filling, topped with a guaranteed crisp exterior.
The “Never Dense” Secret: Preventing a Waterlogged Filling
The “golden-crunch secret” is pre-coating the Panko breadcrumbs with melted butter before mixing them into the filling.
This creates a waterproof barrier around each crumb, preventing it from absorbing any moisture released by the chopped clam meat or the reserved clam juice during the baking process, ensuring the topping remains ready to toast perfectly under the broiler.
The Perfect Appetizer: Quick Prep and Short Bake Time
Despite the sophisticated flavor, this recipe is incredibly efficient, requiring just 25 minutes of prep and a mere 12 minutes of total bake time.
It makes these stuffed clams ideal for last-minute entertaining or as an elegant starter that won’t keep you away from your guests for long.
Achieving Restaurant-Quality Flavor and Presentation
We build exceptional depth of flavor using a finely diced blend of shallots, celery, and garlic, which adds complexity without overwhelming the clam itself.
The final, brief blast under the broiler doesn’t just guarantee crunch; it develops that beautiful, deep golden-brown color that defines a truly professional presentation.
Sourcing the Best Ingredients for Irresistible Stuffed Clams
Choosing and Preparing Fresh Littleneck Clams
Always select littleneck clams, as their shells are the perfect size for individual appetizer servings and they steam quickly and consistently.
To ensure freshness, purchase clams that are tightly closed; if any are slightly open, tap them-they should snap shut immediately. Before steaming, scrub them well to remove any debris.
Why Panko Breadcrumbs Are Non-Negotiable
Panko breadcrumbs are superior to standard Italian breadcrumbs because they are coarser, flakier, and inherently dryer.
Their large, airy structure allows them to absorb the butter coating more efficiently, maximizing the fat barrier and providing a lighter, shatteringly crispy texture, rather than a dense, mealy one.
The Essential Aromatics: Shallots, Celery, and Bell Pepper
Shallots provide a refined, milder onion flavor compared to standard yellow onions, ensuring they enhance rather than dominate the delicate seafood.
Celery is vital for structure and a subtle herbaceous note, while the bell pepper (use red or orange for sweetness) balances the savory elements and adds beautiful color.
The Role of Reserved Clam Juice (or Broth)
Using the liquid reserved from steaming the clams is crucial for intensifying the rich, savory seafood flavor in the stuffing.
However, measure it carefully; you only need enough to slightly moisten the mixture so it holds its shape, never so much that the filling becomes sloppy or sticky.
Essential Tools for a Seamless Classic Baked Stuffed Clam Prep
-
Steaming Pot with a Lid
A tight-fitting lid is essential for efficiently steaming the clams in a small amount of liquid and, critically, for collecting the flavor-packed reserved clam juice.
-
Heavy-Bottomed Skillet
This ensures you can sauté the shallots and celery evenly over medium heat without hot spots, preventing the aromatics from burning before they soften.
-
Parchment Paper-Lined Baking Sheet
Lining the sheet is crucial for easy cleanup and ensures that any filling that might bubble or overflow slightly won’t stick, preserving the neat presentation.
Step-by-Step Guide: Crafting Your Classic Baked Stuffed Clams
-
Steam the Clams and Reserve the Liquid
Place scrubbed clams in a large pot with 1/2 cup of water, cover tightly, and steam over high heat for 5 to 7 minutes until they just open.
It is a non-negotiable food safety rule to discard any clams that remain closed after steaming. Strain and reserve the cooking liquid for the stuffing.
Once the clams are cool enough to handle, remove the meat, chop it finely, and then place the chopped meat back into one half of the shell.
-
Sauté the Flavor Base
Melt 1 tablespoon of butter and olive oil in a skillet over medium heat, then add the diced shallots and celery first, cooking until they begin to soften (about 5 minutes).
Next, introduce the diced bell pepper and minced garlic, cooking for only 2 more minutes until the garlic is fragrant, ensuring it doesn’t brown or become bitter.
-
The Golden Crisp Topping Secret (Binding the Panko)
Melt the remaining 3 tablespoons of butter and immediately pour it over the 1 cup of Panko breadcrumbs in a separate bowl.
Toss this mixture thoroughly for at least 30 seconds until every single crumb is glossy and thoroughly coated in fat; this preparation is the singular step that guarantees ultimate crispness.
-
Assemble the Filling Mixture
Combine the prepared Panko mixture with the chopped clam meat, the sautéed vegetable base, half of the fresh parsley, and the lemon juice.
Add 1/4 cup of the reserved clam juice (or broth) slowly; the goal is a mixture that is moist enough to pack together but still visibly crumbly-never wet or pasty.
Season the entire filling liberally with salt and black pepper now, as the flavor will be locked in once baked.
-
Stuff, Arrange, and Chill
Using a small spoon, generously mound the prepared filling mixture over each piece of clam meat sitting in its half-shell.
Press the topping down very lightly to help it adhere, then arrange the stuffed shells on your prepared baking sheet. Refrigerate the stuffed clams for at least 10 minutes; this allows the filling to firm up and hold its domed shape during cooking.
-
Two-Stage Cooking: Bake then Broil
Preheat the oven to 400°F and bake the clams for 6 to 8 minutes; this stage ensures the clam meat is perfectly heated through and the vegetables are tender.
Immediately remove the clams, switch the oven to high broil, and return the pan to the top rack, approximately six inches from the element.
Watch constantly during the broil (only 60 to 120 seconds!) until the tops are deeply golden brown and crunchy, then serve immediately garnished with the remaining parsley.
Chef’s Tips and Troubleshooting for Flawless Stuffed Clams
-
Proper Seasoning is Key
Because clams and Panko are relatively neutral ingredients, you must season the filling liberally with salt and pepper before stuffing.
Taste the mixture and adjust until the savory flavors are vibrant, remembering that the reserved clam juice itself is quite mild.
-
Do Not Overfill the Shells
While you want a generous, appealing mound of stuffing, avoid building the filling too high, as overly large mounds can become unstable and tumble over during baking.
-
Maximizing the Broil Crunch
For maximum crispness and speed, place the baking sheet on the absolute highest rack, ensuring it is 4 to 6 inches away from the broiler element.
Never walk away during this phase; the breadcrumbs, already coated in fat, transition from golden to burnt extremely quickly.
-
Troubleshooting: Why is My Filling Dry?
If, after mixing, your filling doesn’t quite stick together, add a few extra drops of melted butter or a tiny splash more of the reserved clam juice.
A dry filling won’t adhere to the shell and may result in a chalky texture after baking, so achieving that “moist but not wet” consistency is vital.
Make-Ahead Prep and Storage Solutions
How Far in Advance Can I Prepare the Classic Baked Stuffed Clams?
These are an excellent make-ahead appetizer; you can assemble the stuffed, unbaked clams completely and refrigerate them, tightly covered, for up to 24 hours.
Pre-prep allows the filling flavors to meld beautifully and saves you significant time right before your event.
Freezing Stuffed Clams: Yes or No?
Yes, you can freeze assembled, uncooked stuffed clams successfully, which is a fantastic solution for bulk preparation.
Arrange the stuffed shells on a baking sheet and flash freeze them until solid, then transfer them to an airtight freezer bag for up to two months.
Bake them directly from frozen, adding approximately 5 to 7 minutes to the initial baking stage.
Storing and Reheating Leftovers
Store any leftover baked stuffed clams in an airtight container in the refrigerator for up to three days.
The best way to restore their signature crispness is to reheat them in a preheated oven or toaster oven at 350°F for about 5 to 8 minutes; avoid the microwave, which will ruin the texture.
Perfect Pairings: How to Serve Classic Baked Stuffed Clams
Suggested Wine and Cocktail Pairings
Pairing seafood requires a wine with high acidity and dryness to cut through the richness of the butter and refresh the palate.
Opt for a bone-dry, crisp white wine such as Sauvignon Blanc, Pinot Grigio, or an unoaked Chardonnay.
Complementary Side Dish Recommendations
Since the stuffed clams are rich and savory, choose light sides that offer a contrast in both texture and flavor.
A simple side of crusty bread for soaking up any juices or a vibrant arugula salad dressed with a bright lemon vinaigrette provides the perfect foil.
FAQs About Baking and Freezing Stuffed Clams
Can I use canned clams instead of fresh?
While fresh clams provide superior texture and flavor intensity, quality canned clams are an acceptable alternative if fresh seafood isn’t accessible.
Ensure they are extremely well-drained, and utilize the clam juice from the can as the reserved liquid for the filling mixture.
What if I don’t have reserved clam juice?
If you don’t collect enough reserved clam liquid, chicken broth or a high-quality fish stock is a perfectly acceptable substitute.
Using stock will slightly decrease the intensity of the pure clam flavor, but it still provides essential moisture and a necessary savory base.
What is the minimum internal temperature for baked clams?
The standard food safety recommendation for heating cooked seafood is 145°F, but since the clams are already cooked during the steaming process, the primary goal is simply to ensure the stuffing is piping hot throughout and the vegetables are tender.
Ready to Impress? Share Your Seafood Appetizer Success!
Mastering Classic Baked Stuffed Clams truly comes down to one simple step: insulating those Panko breadcrumbs with fat, which means you never have to settle for soggy filling again.
This foolproof guide ensures your appetizer is elegant, flavorful, and reliably crispy-the perfect starter for any celebration.
I encourage you to try this technique and share your results! Let me know in the comments how beautifully golden-crunchy your clams turned out.
Classic Baked Stuffed Clams
Course: AppetizerCuisine: Italian-American cuisineDifficulty: easy18
to 24 clams (4 servings)25
minutes12
minutes37
minutesItalian-American cuisine
Ingredients
2 dozen fresh littleneck clams, cleaned
1 tablespoon olive oil
4 tablespoons unsalted butter, divided
1/2 cup finely diced celery
1/2 cup finely diced bell pepper (red or orange)
2 large shallots, minced
3 cloves garlic, minced
1/4 cup chopped fresh parsley, divided
1 tablespoon lemon juice
1 cup Panko breadcrumbs
1/4 cup reserved clam juice (or chicken broth)
Salt and black pepper to taste
Directions
- Prepare the Clams: Gently steam the clams in a large covered pot with 1/2 cup of water until they just open (about 5 to 7 minutes). Discard any clams that do not open. Carefully remove the clams and reserve the cooking liquid (clam juice). Once cool enough to handle, remove the clam meat from the shells and chop it finely. Place the clam meat back into one half of its shell, discarding the empty shell half. Arrange the filled shells on a baking sheet lined with parchment paper.
- Build the Flavor Base: In a skillet over medium heat, melt 1 tablespoon of butter and 1 tablespoon of olive oil. Add the minced shallots and celery, cooking until softened (about 5 minutes). Add the diced bell pepper and minced garlic, cooking for another 2 minutes until fragrant. Transfer this mixture to a bowl.
- The Golden Crisp Topping Secret (Binding): This is the key step to prevent sogginess. In a separate small microwave-safe bowl, melt the remaining 3 tablespoons of unsalted butter. Pour the melted butter over the 1 cup of Panko breadcrumbs in a medium bowl. Toss thoroughly until every breadcrumb is evenly coated and looks glossy. This fat coating prevents the breadcrumbs from absorbing moisture from the filling during cooking, guaranteeing a crisp exterior.
- Assemble the Filling: Add the chopped clam meat, the sauteed vegetables from Step 2, half of the chopped parsley, and the lemon juice to the breadcrumb mixture. Add 1/4 cup of the reserved clam juice (or broth) to moisten the mixture slightly, but do not make it wet or sloppy. Season liberally with salt and pepper.
- Stuff and Chill: Using a small spoon, generously mound the prepared filling mixture over each clam sitting in its half-shell. Press down lightly to adhere the topping. To help the filling set, refrigerate the stuffed clams for at least 10 minutes.
- Prep for High Heat: Preheat the oven to 400 degrees F. Bake the clams for 6 to 8 minutes just until the clams are heated through and the vegetables are tender.
- Final Crisp Stage (The Texture Lock-In): Remove the sheet pan from the oven. Switch the oven setting to high broil. Place the pan back on the top rack (approximately 6 inches from the broiler element). Watch carefully, broiling for only 1 to 2 minutes until the tops are deeply golden brown and crunchy. The pre-coated breadcrumbs will toast rapidly without drying out the clam.
- Serve immediately, garnished with the remaining fresh parsley.
Notes
- The key to crispiness is coating the Panko thoroughly in melted butter before mixing it with the moist ingredients.