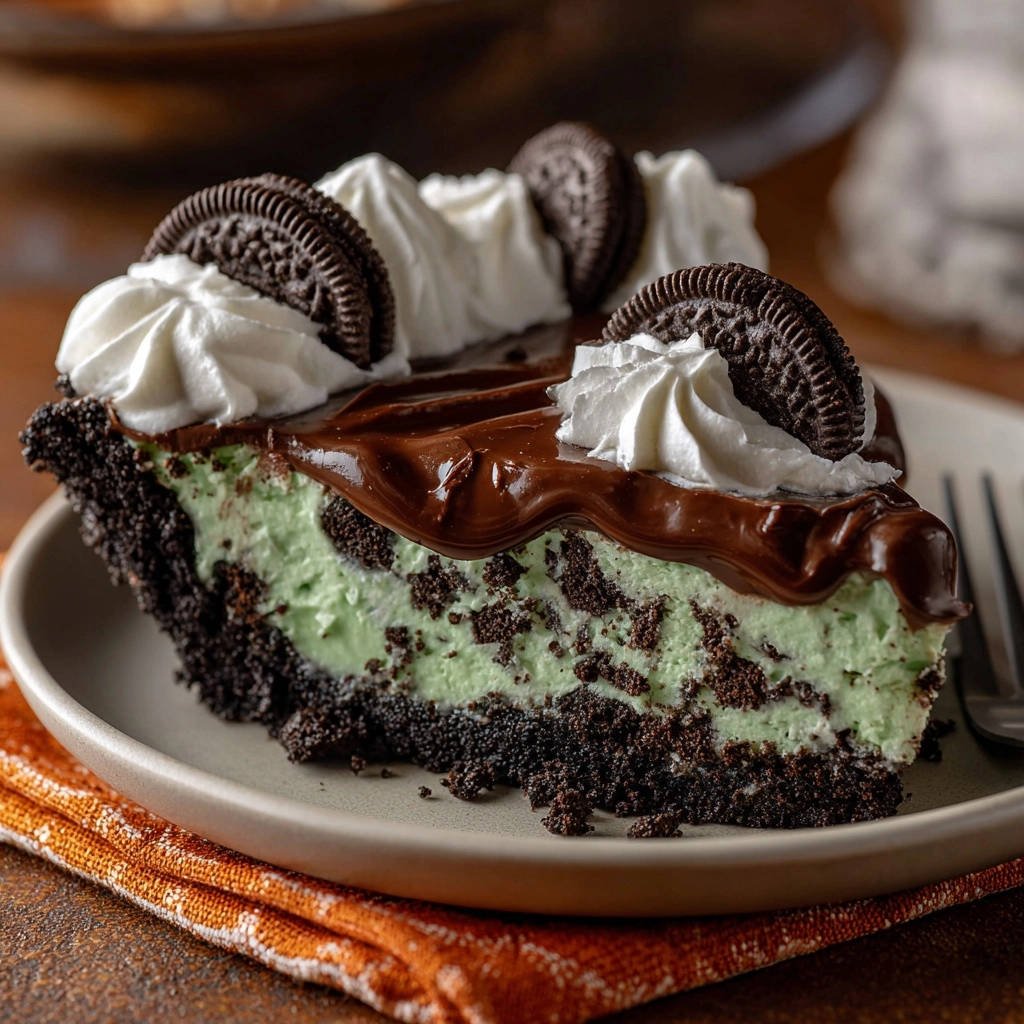
For years, I struggled to achieve that flawless, picture-perfect slice from a no-bake pie, often ending up with a delightful mess on the plate. It was frustrating, but after countless experiments, I finally perfected this incredible Dreamy Mint Chocolate Pie recipe that sets up beautifully every single time.
This isn’t just another dessert; it’s a triumph of texture and flavor, guaranteeing clean, elegant slices with minimal effort. Prepare to impress everyone with a pie that looks as fantastic as it tastes, solving that age-old no-bake pie dilemma.
Why You Need This Dreamy Mint Chocolate Pie Recipe in Your Life
This recipe stands out because it delivers on the promise of a perfectly stable, sliceable pie without any baking. You’ll achieve those coveted clean edges, transforming your dessert presentation from tricky to effortless.
Beyond its structural integrity, this Dreamy Mint Chocolate Pie offers an irresistible blend of cool, refreshing mint and rich, decadent chocolate. It’s a surprisingly simple dessert to execute, making it ideal for both seasoned bakers and beginners seeking a show-stopping treat.
Gather Your Delights: Essential Ingredients for Your Pie
Success in any recipe starts with quality ingredients. For this Dreamy Mint Chocolate Pie, each component plays a crucial role in achieving that perfect taste and texture.
The Sturdy Foundation: Crust Components
Chocolate Sandwich Cookies: Choose a brand with rich, dark chocolate flavor. Finely crushing them ensures an even texture for the crust, which is essential for holding its shape.
Unsalted Butter: Melting the butter and combining it thoroughly with the cookie crumbs creates a cohesive base. Using unsalted butter allows you to control the overall saltiness of the pie.
Minty Fresh Heart: Filling Essentials
Cream Cheese: Ensure your cream cheese is completely softened to room temperature. This is vital for achieving a smooth, lump-free filling that blends seamlessly with other ingredients.
Powdered Sugar: Also known as confectioners’ sugar, its fine texture dissolves easily, contributing to the silky-smooth consistency of the filling without any graininess.
Mint Extract: A good quality pure mint extract is key for authentic flavor. Start with the recommended amount and adjust to your preferred intensity, remembering that a little goes a long way.
Green Food Coloring (Optional): A few drops can enhance the visual appeal, giving the pie that signature minty hue. Use gel-based coloring for vibrant results without adding excess liquid.
Cold Heavy Whipping Cream: This is critical for the filling’s structure. Ensure it’s very cold to achieve stiff peaks, which provides the necessary body and prevents a runny pie.
Chocolate Sandwich Cookies (for chunks): Roughly crushing these adds delightful textural contrast and bursts of chocolate within the creamy mint filling.
Rich Finish: Topping & Garnish Accents
Chocolate Chips or Chopped Semi-Sweet Chocolate: Choose a good quality chocolate for a glossy, smooth ganache topping. Semi-sweet balances the sweetness of the pie perfectly.
Heavy Cream or Milk: This helps create a smooth, pourable chocolate topping. Heavy cream will yield a richer ganache, while milk provides a lighter version.
Whole and Crushed Chocolate Sandwich Cookies: These provide a lovely visual cue and an extra layer of chocolatey crunch for garnish.
Whipped Cream: Freshly whipped cream adds a beautiful, airy counterpoint to the rich pie, making it feel even more indulgent.
Tools for Your Dreamy Mint Chocolate Pie Adventure
Having the right tools ready ensures a smooth and efficient pie-making process. Here are the essentials:
Medium Mixing Bowl: For combining crust ingredients.
9-inch Pie Plate: The standard size for this recipe, ensuring proper crust and filling proportions.
Large Mixing Bowl: Essential for beating the cream cheese and folding in the whipped cream.
Electric Mixer (Handheld or Stand): Crucial for achieving smooth cream cheese and stiff whipped cream peaks.
Separate Chilled Bowl: For whipping the heavy cream; a cold bowl helps the cream whip faster and more effectively.
Rubber Spatula: Ideal for gently folding ingredients and smoothing the pie filling.
Small Microwave-Safe Bowl: For melting the chocolate topping.
Crafting Your Dreamy Mint Chocolate Pie: A Step-by-Step Guide to Perfection
- Building the Perfect Base: The Crust
In a medium bowl, thoroughly combine the finely crushed chocolate sandwich cookies with the melted butter. Mix until every crumb is moistened and the mixture holds together when pressed.
Press this mixture very firmly and evenly into your 9-inch pie plate, extending it slightly up the sides. A glass measuring cup or the bottom of a flat glass can help create a compact, even layer. Place the crust in the refrigerator to chill while you prepare the filling; this initial chill helps the crust set firmly, preventing crumbling when filled.
- Creating the Creamy Mint Filling
In a large mixing bowl, beat the softened cream cheese with an electric mixer until it is exceptionally smooth and creamy, with no lumps remaining. This might take 2-3 minutes, ensuring a velvety base.
Add the powdered sugar, mint extract, and a few drops of green food coloring (if using). Continue beating until all ingredients are fully incorporated, and the mixture appears light and fluffy. Scrape down the sides of the bowl to ensure even mixing.
- The Whipped Cream Wonder: Achieving Stiff Peaks
In a separate, well-chilled bowl (a metal bowl works best for staying cold), whip the very cold heavy whipping cream with your electric mixer. Begin on low speed, then gradually increase to high.
Continue whipping until stiff peaks form. This means when you lift the beaters, the cream stands straight up without collapsing. This firm, airy whipped cream is the backbone of your pie’s structure, providing essential stability so your Dreamy Mint Chocolate Pie holds its slice.
- Gently Uniting Flavors: Folding in Whipped Cream and Cookies
Using a rubber spatula, gently fold the whipped cream into the cream cheese mixture. The key here is to fold just until no white streaks remain, being careful not to deflate the airy whipped cream. Overmixing will reduce the volume and compromise the pie’s light texture.
Once mostly combined, gently stir in the crushed chocolate sandwich cookie chunks. These add a wonderful textural contrast and bursts of intense chocolate flavor throughout the minty filling.
- Filling and Smoothing: Preparing for the Chill
Carefully pour the creamy mint filling into your pre-chilled pie crust. Use your spatula to spread the filling evenly across the crust and smooth the top for a polished look.
- The Golden Rule: The Critical Chill Time for Clean Slices
This is arguably the most important step for a pie that truly holds its slice and doesn’t collapse. Loosely cover the pie with plastic wrap to prevent a skin from forming, and refrigerate it for a minimum of 6 hours.
For the absolute best results and effortless, picture-perfect slices, chill the pie ideally overnight (12 hours or more). This extended chilling time allows all the fats and proteins in the filling to thoroughly solidify, ensuring a firm, neat pie when cut. Do not rush this step!
- Crafting the Silky Chocolate Topping
Once your pie is completely chilled and firm, combine the chocolate chips (or chopped chocolate) and heavy cream or milk in a small microwave-safe bowl. Microwave in short 15-second intervals, stirring thoroughly between each, until the chocolate is completely melted and the mixture is smooth and glossy.
Allow this chocolate ganache topping to cool slightly at room temperature for about 5-10 minutes. Drizzling it while it’s still warm but not hot prevents it from melting the mint filling or running off the pie edges, ensuring a clean application.
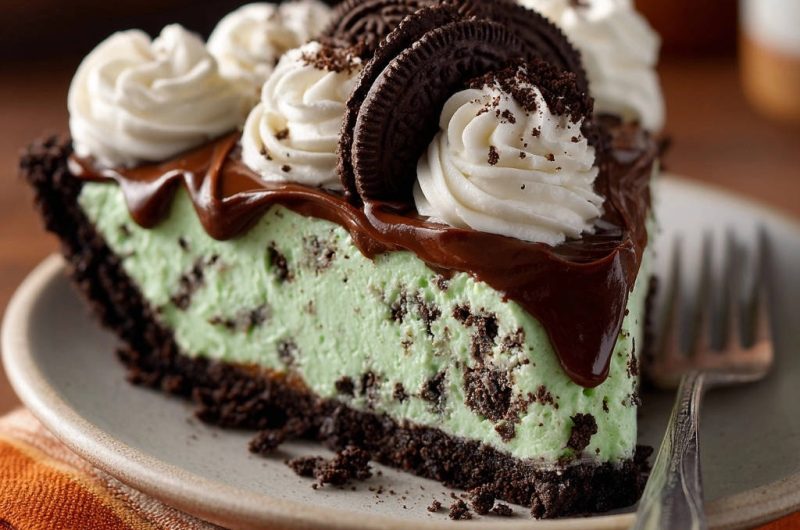
- The Grand Finale: Garnish and Serve
Drizzle the cooled chocolate topping artfully over your set Dreamy Mint Chocolate Pie. For an extra touch of elegance and flavor, decorate with additional dollops of freshly whipped cream and sprinkle with whole or crushed chocolate sandwich cookies.
For the cleanest cuts, use a sharp, thin knife dipped in hot water and wiped clean between each slice. This creates neat portions effortlessly. Slice and serve immediately to enjoy the ultimate no-bake dessert experience.
The Secret to Perfect Slices: Pro Tips for Your No-Bake Pie
Achieving a perfect, sliceable no-bake pie isn’t just about the ingredients; it’s about technique. These professional tips ensure your Dreamy Mint Chocolate Pie is a resounding success.
Mastering the Chill: Why Patience Pays Off
The single most crucial factor for a firm, sliceable pie is adequate chilling time. Rushing this step will result in a soft, messy pie. Think of it as essential setting time for all the elements to bond. For similar desserts that require proper setting, consider trying a batch of mini chocolate caramel cheesecakes that always set perfectly with patience.
The Whipping Cream Wisdom: Cold & Stable
Always start with very cold heavy whipping cream and a chilled mixing bowl and beaters. Cold cream emulsifies better and whips to stiff peaks faster, creating a more stable and airy structure for your filling. Warm cream simply won’t achieve the necessary stability.
Gentle Folding: Preserving Lightness
When incorporating the whipped cream into the cream cheese mixture, use a gentle folding technique. Overmixing will deflate the air you’ve worked hard to whip into the cream, leading to a denser, less airy pie filling that may not set as firmly.
Cream Cheese Temperature: Smooth Operator
Ensure your cream cheese is at true room temperature. This makes it soft and pliable, allowing it to beat into an incredibly smooth, lump-free consistency. Cold cream cheese will result in a lumpy filling, no matter how much you beat it.
Clean Slices Every Time: Your Knife is Key
For pristine slices, use a sharp, thin knife. Before each cut, dip the knife in hot water and wipe it clean. The warm blade helps glide through the pie without dragging, leaving behind a perfectly defined slice.
Troubleshooting Common Dreamy Mint Chocolate Pie Pitfalls
Even with the best recipes, sometimes things don’t go as planned. Here are solutions to common issues when making your Dreamy Mint Chocolate Pie.
“My Pie Didn’t Set Firmly!”
The most common culprit is insufficient chilling time. This pie requires a minimum of 6 hours, but overnight (12+ hours) is truly ideal for a firm set. Ensure your heavy cream was whipped to stiff peaks; soft peaks won’t provide enough structure. Also, make sure your cream cheese was fully softened and beaten smooth before combining.
“The Crust is Crumbly!”
A crumbly crust usually means there wasn’t enough melted butter or it wasn’t pressed firmly enough into the pie plate. Ensure all cookie crumbs are thoroughly moistened by the butter, and compact the mixture very tightly. Pre-chilling the crust briefly also helps it set before adding the filling.
“My Whipped Cream Won’t Stiffen!”
The cream likely wasn’t cold enough, or your bowl and beaters weren’t chilled. Heavy whipping cream needs to be straight from the refrigerator. Humidity can also play a role; on very humid days, it might take longer to whip, or you might consider adding a tablespoon of powdered sugar (which acts as a stabilizer) to the cream before whipping.
“The Filling is Lumpy!”
Lumpy filling is almost always due to cream cheese that wasn’t sufficiently softened or wasn’t beaten until perfectly smooth before other ingredients were added. Allow cream cheese to sit at room temperature for at least 30-60 minutes before starting, or gently warm it in a microwave for 10-15 seconds if you’re in a hurry (but be careful not to melt it).
Storing and Savoring Your Dreamy Mint Chocolate Pie
This Dreamy Mint Chocolate Pie is best enjoyed fresh, but it also stores well, making it a fantastic make-ahead dessert.
Storage Guidelines: Keeping it Fresh
Store your pie tightly covered with plastic wrap in the refrigerator for up to 3-4 days. This helps maintain its freshness, texture, and prevents it from absorbing refrigerator odors. Do not store it at room temperature, as the dairy-based filling requires refrigeration.
Make-Ahead Magic: Plan Your Dessert with Ease
This Dreamy Mint Chocolate Pie is an excellent make-ahead option. Prepare the entire pie (without the final chocolate drizzle or garnishes) up to 2 days in advance. Ensure it’s thoroughly chilled overnight before serving. This allows you to focus on other preparations on the day of your event. For another fantastic no-bake option you can prepare in advance, try this delightful easy no-bake strawberry pie.
Best Serving Practices: Presentation Matters
Serve the pie directly from the refrigerator for the best, firmest slices. If you’ve just drizzled the chocolate topping, allow it a few minutes to set slightly before slicing. For the neatest presentation, clean your knife between each slice, especially after cutting through the chocolate topping.
Dreamy Mint Chocolate Pie FAQs
Can I make this Dreamy Mint Chocolate Pie gluten-free?
Yes, absolutely! The easiest way to make this pie gluten-free is to use gluten-free chocolate sandwich cookies for both the crust and the filling chunks. Many brands now offer excellent gluten-free versions that work perfectly.
How far in advance can I make this pie?
You can make this pie completely (minus the final chocolate drizzle and garnishes) up to 2 days in advance. In fact, making it the day before ensures it has ample time to chill and set perfectly.
Can I use different cookies for the crust?
You certainly can! While chocolate sandwich cookies are classic for this chocolate mint pie, you could experiment with other varieties. Graham cracker crumbs or even chocolate wafer cookies would also make a delicious base, though the flavor profile would change. For inspiration, consider how different crusts enhance other sweet treats like an orange creamsicle pie.
What if I don’t have mint extract?
Mint extract is pretty specific, but if you’re in a pinch, you could try a tiny amount of peppermint extract (start with half the amount as it’s stronger) or even a very small dash of spearmint extract. The flavor won’t be identical, but it will still provide a fresh, minty note.
Is it possible to make this dairy-free?
Making this pie dairy-free would require several substitutions. You would need dairy-free chocolate sandwich cookies, dairy-free cream cheese (often almond or soy-based), and a dairy-free heavy whipping cream alternative (like coconut cream or a plant-based whipping cream). The texture may vary slightly with these substitutions.
Ready to Delight? Share Your Dreamy Mint Chocolate Pie Masterpiece!
You now have all the secrets to crafting a truly spectacular Dreamy Mint Chocolate Pie, one that will impress with its vibrant flavor and flawless slices. This isn’t just a recipe; it’s a guide to conquering the no-bake pie challenge and creating a dessert that’s as satisfying to make as it is to eat.
Don’t wait to try this incredible recipe! Once you’ve created your perfect pie, we’d love to see it. Share your masterpiece on social media using #DreamyMintChocolatePie and #PerfectPieSlice. And be sure to explore our other delightful recipes designed for effortless kitchen triumphs!
Dreamy Mint Chocolate Pie
Course: DessertCuisine: American CuisineDifficulty: easy8
servings25
minutes360
minutesAmerican Cuisine
Ingredients
For the Crust:
24 chocolate sandwich cookies (about 1 1/2 packages), finely crushed
1/2 cup unsalted butter, melted
For the Mint Filling:
8 ounces cream cheese, softened
1/2 cup powdered sugar
1 teaspoon mint extract
Few drops green food coloring (optional)
1 1/2 cups cold heavy whipping cream
10 chocolate sandwich cookies, crushed into chunks
For the Chocolate Topping:
1/2 cup chocolate chips or chopped semi-sweet chocolate
2 tablespoons heavy cream or milk
For Garnish:
Whole and crushed chocolate sandwich cookies
Whipped cream
Directions
- Prepare the Crust: In a medium bowl, combine the finely crushed chocolate sandwich cookies and melted butter. Mix until well combined. Press the mixture firmly and evenly into a 9-inch pie plate. Place the crust in the refrigerator to chill while you prepare the filling. This initial chill helps the crust hold its shape.
- Make the Mint Filling: In a large mixing bowl, beat the softened cream cheese until smooth and creamy. Add the powdered sugar, mint extract, and green food coloring (if using), and beat until fully incorporated and light.
- Whip the Cream: In a separate, chilled bowl, whip the cold heavy whipping cream until stiff peaks form. This step is crucial for the pie’s stability, as the whipped cream provides the structure needed to hold a firm slice.
- Combine Filling: Gently fold the whipped cream into the cream cheese mixture until just combined. Be careful not to deflate the whipped cream. Stir in the crushed chocolate sandwich cookie chunks.
- Fill the Pie: Pour the mint filling into the chilled pie crust, spreading it evenly. Smooth the top with a spatula.
- Chill Thoroughly: This is the most important step for a pie that holds its slice! Cover the pie loosely with plastic wrap and refrigerate for a minimum of 6 hours, or ideally, overnight. Allowing ample time to chill ensures the pie sets up firmly, making clean slices effortless.
- Prepare Chocolate Topping: Once the pie is fully chilled, combine chocolate chips and heavy cream or milk in a small microwave-safe bowl. Microwave in 15-second intervals, stirring between each, until melted and smooth. Let cool slightly.
- Garnish and Serve: Drizzle the cooled chocolate topping over the pie. Decorate with additional dollops of whipped cream and whole or crushed chocolate sandwich cookies. Slice and serve immediately. Thanks to proper chilling, your slices will be perfect every time!
Notes
- Thorough chilling for 6+ hours is crucial for clean, firm slices.