
I know the frustration of expecting a tender chicken dinner, only to find it dry and tough. It’s a common kitchen challenge! But after years of refining, I’ve perfected a technique for this Glazed Chicken & Creamy Rotini that guarantees perfectly tender, incredibly juicy chicken breasts every single time, making it a true weeknight game-changer.
The Glazed Chicken & Creamy Rotini Recipe That Gets Rave Reviews (Here’s Why!)
Say Goodbye to Dry Chicken: Our Secret to Unbeatable Juiciness
The core of this recipe’s success lies in a precise cooking method. We sear the chicken to lock in flavor, then gently finish it covered, ensuring a moist interior.
Crucially, a short resting period allows the juices to redistribute, preventing any dryness when sliced.
A Flavorful Glaze & Creamy Rotini That Steals the Show
The savory-sweet glaze, built right in the same pan after searing the chicken, captures all those delicious browned bits, adding incredible depth.
Paired with a rich, creamy rotini pasta base, every forkful is a perfect balance of textures and tastes.
Why This Dish is Your New Weeknight Game-Changer
Clocking in at just 35 minutes total, this Glazed Chicken & Creamy Rotini is designed for maximum flavor with minimal effort.
It’s an elevated yet approachable meal that fits seamlessly into busy weeknights, delivering gourmet taste without the fuss.
Unveiling the Stars: Ingredients for Our Glazed Chicken & Creamy Rotini
For the Irresistibly Juicy Chicken
Boneless, skinless chicken breasts are the foundation. Opt for pieces of similar thickness to ensure consistent cooking and even juiciness.
Salt, black pepper, garlic powder, and onion powder create a robust flavor base that penetrates the chicken during searing.
Olive oil is essential for achieving that beautiful golden-brown crust and contributing to the pan’s flavorful fond.
The Secret to That Sticky-Sweet Glaze
A touch more olive oil helps start the glaze, allowing the red pepper flakes to bloom and release their mild heat.
Soy sauce brings essential umami and savory depth, beautifully balanced by the natural sweetness of honey.
Apple cider vinegar introduces a crucial bright tang, cutting through the richness and enhancing overall flavor complexity.
Chicken broth provides the liquid base for the glaze, helping it reduce into a syrupy, concentrated sauce.
Crafting the Creamy Dream Pasta
Rotini pasta, with its corkscrew shape, is perfect for this dish, as its grooves effortlessly capture and hold the luxurious creamy sauce.
Unsalted butter and heavy cream (or half-and-half) are responsible for the indulgent, velvety texture of our pasta base.
Reserved pasta water, often overlooked, is a secret weapon; its starch helps emulsify the sauce, making it silky smooth and preventing it from becoming greasy.
Essential Flavor Boosters & Garnishes
Fresh chives or parsley add a vital pop of fresh, herbaceous flavor and a vibrant green visual contrast to the rich dish.
Extra red pepper flakes, reserved for garnishing, allow for personalized heat adjustment and add an appealing visual touch.
Your Kitchen Arsenal: Tools for Glazed Chicken & Creamy Rotini Success
Large Skillet (with lid): Crucial for searing chicken and building the flavorful glaze in one pan, capturing all the delicious browned bits.
Large Pot: Essential for boiling the rotini pasta to perfection, ensuring even cooking for an al dente bite.
Cutting Board & Sharp Knife: For safely prepping and slicing the chicken into uniform pieces and finely chopping fresh herbs.
Meat Thermometer: The absolute best way to ensure perfectly cooked, juicy chicken without guessing, preventing overcooking.
Whisk or Spatula: Indispensable for stirring the reducing glaze and gently tossing the creamy pasta to coat every noodle evenly.
Measuring Cups & Spoons: For accurate ingredient proportions, guaranteeing consistent results and balanced flavors every time.
Your Step-by-Step Guide to Glazed Chicken & Creamy Rotini Perfection
Prepping the Chicken for Ultimate Tenderness
Pat the chicken breasts very dry with paper towels. This crucial step is key to achieving a beautiful, even sear and crispy exterior.
Season both sides generously with salt, black pepper, garlic powder, and onion powder. Don’t be shy; proper seasoning now builds layers of flavor.
Mastering the Sear: Golden Brown & Perfectly Cooked
Heat 1 tablespoon of olive oil in a large skillet over medium-high heat until it shimmers. The high heat creates a golden crust, sealing in moisture.
Carefully place the seasoned chicken breasts in the hot skillet. Sear for 4-5 minutes per side until they develop a deep golden-brown crust, indicating rich flavor development.
Reduce the heat to medium-low, cover the skillet, and continue to cook for another 5-7 minutes, or until the internal temperature reaches 165°F. Using a meat thermometer is your best friend here; do not overcook!
The Non-Negotiable Rest: Locking in Juices
Transfer the cooked chicken breasts to a cutting board. Tent them loosely with foil and let them rest for at least 5-7 minutes.
This resting period is paramount; it allows the muscle fibers to relax and reabsorb all those incredible juices, ensuring incredibly moist and tender chicken when sliced.
While the chicken rests, utilize this time efficiently by proceeding with cooking the pasta and preparing the glaze.
Al Dente Rotini: The Perfect Pasta Base
Bring a large pot of salted water to a rolling boil. Adding salt at this stage seasons the pasta from the inside out, providing a flavorful base for your creamy sauce.
Add the rotini pasta and cook according to package directions until al dente. It should be firm to the bite, not mushy, as it will absorb more sauce later.
Before draining, carefully reserve 1 cup of the starchy pasta cooking water. This liquid will be vital for achieving a beautifully creamy and emulsified sauce.
Building the Syrupy, Flavorful Glaze
Using the same skillet from the chicken (do not clean it-those browned bits, or “fond,” are pure flavor!), add the remaining 1 tablespoon olive oil and 1/2 tablespoon red pepper flakes.
Stir in the soy sauce, honey, apple cider vinegar, and chicken broth. Bring the mixture to a gentle simmer over medium heat.
Scrape up any browned bits from the bottom of the pan as it simmers; these are packed with delicious, concentrated flavor that enhances the glaze.
Let it simmer for 3-5 minutes, stirring occasionally, until the glaze thickens slightly and achieves a syrupy, coating consistency. It should cling to a spoon.
Transforming Pasta into a Creamy Delight
In the drained pasta pot, add the butter, heavy cream (or half-and-half), and about 1/2 cup of the reserved pasta water.
Stir well over low heat until the butter melts and a light, creamy sauce forms. The pasta water helps emulsify the dairy, preventing a greasy separation.
Add the cooked rotini and half of the chopped chives or parsley. Toss to coat evenly, ensuring every spiral is bathed in the rich creaminess.
Add more reserved pasta water if needed to reach your desired consistency, and remember to season with a pinch of salt and pepper to taste.
Bringing It All Together: Assemble & Serve
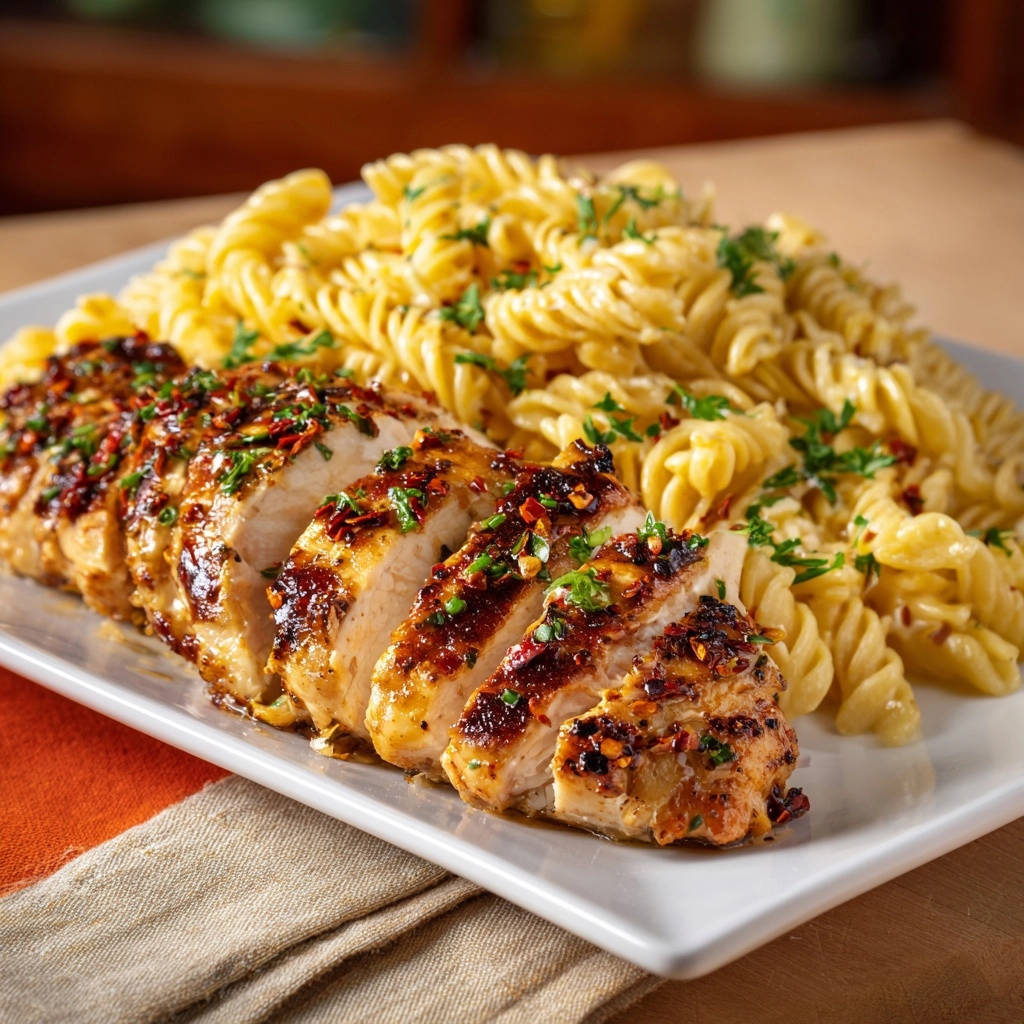
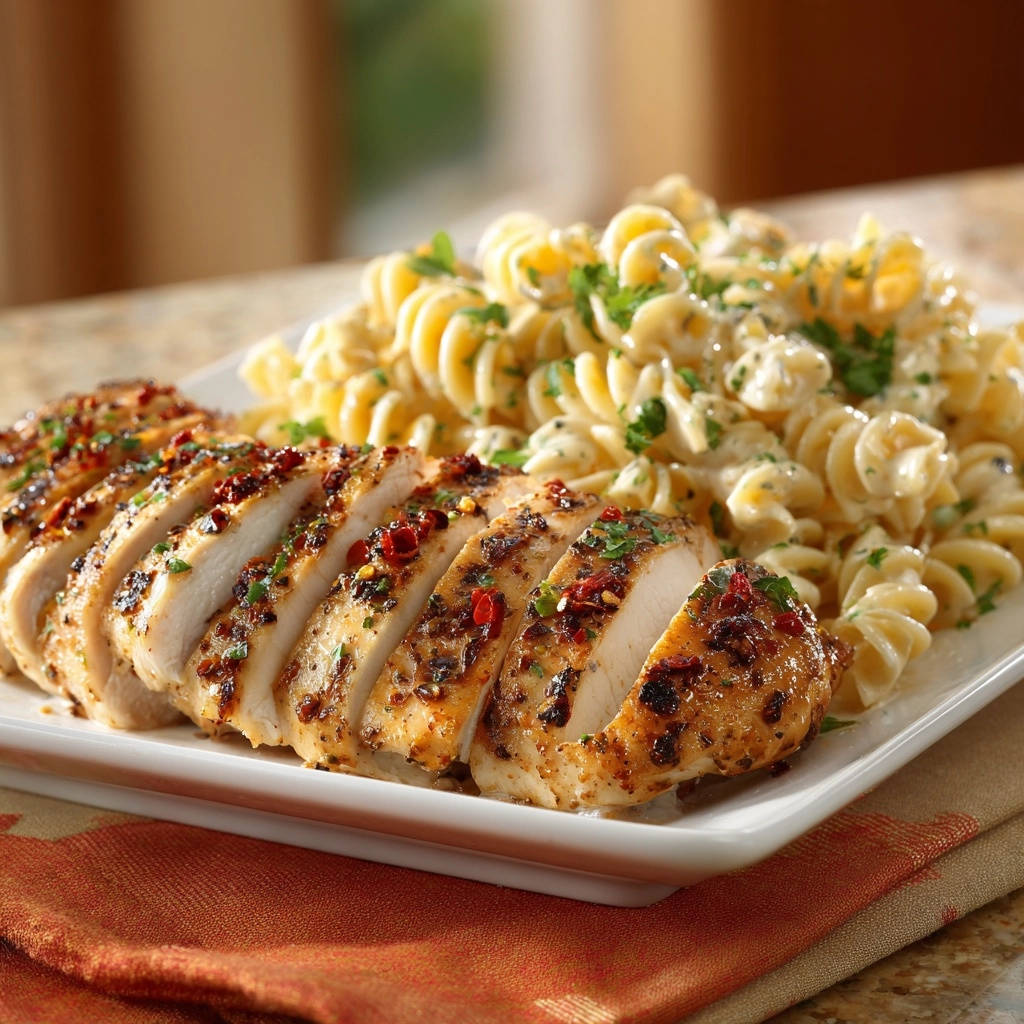
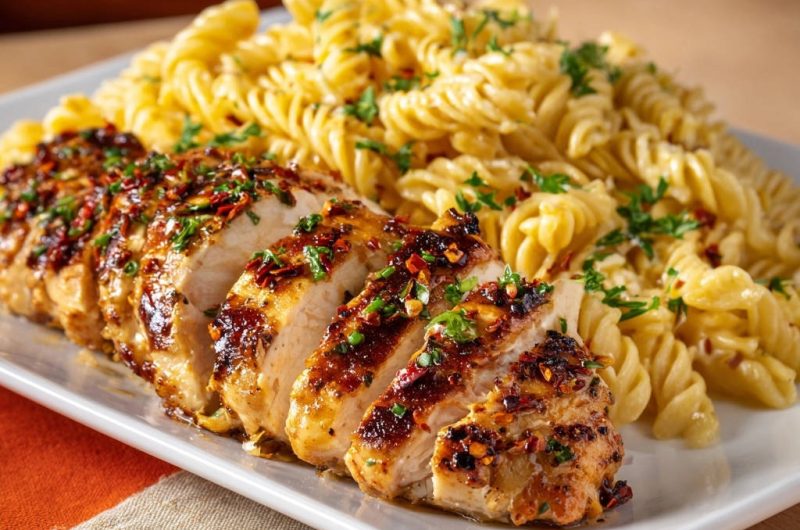
Slice the rested chicken breasts into thick, uniform pieces. You’ll observe how incredibly juicy and tender they remain after resting.
Arrange a generous portion of the creamy rotini pasta on individual plates, creating a comforting base.
Top the pasta with the perfectly sliced chicken, then generously drizzle the warm, syrupy glaze over the chicken, allowing it to cascade onto the pasta.
Garnish with the remaining red pepper flakes for a touch of heat and vibrant color, and the fresh chives or parsley. Serve immediately and savor every tender, flavorful bite of this creamy pasta dish!
Chef’s Pro Tips: Elevate Your Glazed Chicken & Creamy Rotini
Ensuring Unbeatable Chicken Juiciness
Don’t skip the rest: The 5-7 minute resting period is non-negotiable. It allows juices to redistribute throughout the chicken, preventing a dry result when sliced.
Use a meat thermometer: Cooking chicken to precisely 165°F (74°C) is key. Overcooking by even a few degrees can drastically lead to dryness, so trust your thermometer over guesswork.
Glaze Consistency: A Sticky Situation Solved
Scrape the pan: Those browned bits (fond) from searing the chicken are pure, concentrated flavor. Incorporate them fully into your glaze for maximum depth and richness.
Simmer, don’t boil aggressively: A gentle simmer allows the glaze to reduce and thicken slowly and evenly, preventing it from burning or becoming too concentrated too quickly.
Pasta Sauce Pointers for Peak Creaminess
Reserve enough pasta water: This starchy liquid is your secret weapon for emulsifying the sauce and achieving perfect creaminess without adding excessive dairy.
Don’t overcook the pasta: Al dente pasta holds up better to the rich sauce and contributes to a more satisfying, slightly chewy texture in the finished dish.
Flavor Tweaks and Spice Level Customization
Adjust red pepper flakes: For less heat, reduce the amount. For more kick, add extra flakes to the glaze or as a final garnish, controlling the spice to your preference.
Fresh herbs make a difference: While the recipe suggests chives or parsley, don’t hesitate to experiment with other fresh herbs like cilantro or basil for a different, yet equally delicious, flavor profile.
Common Culinary Conundrums: Troubleshooting Your Dish
Chicken Turned Out Dry?
This is almost always due to overcooking. Ensure you’re using a reliable meat thermometer to pull the chicken from the heat precisely at 165°F (74°C).
Allowing the chicken to rest, tented with foil, for the full 5-7 minutes is also critical for locking in those juices.
Glaze Not Quite Right?
If your glaze is too thin, simply continue to simmer it gently for a few more minutes, stirring, until it reduces to a syrupy consistency that coats the back of a spoon.
If it becomes too thick or sticky, add a tablespoon or two of chicken broth or even a splash of water to thin it out to your desired consistency.
Pasta Sauce Lacking Luster?
Ensure you’ve seasoned the pasta water adequately; bland pasta leads to a bland sauce overall.
Always taste and adjust the seasoning (salt, pepper) in the creamy rotini before serving. A little extra reserved pasta water can also help integrate flavors and add creaminess.
Beyond the Cooktop: Serving, Storing & Planning Ahead
Serving Suggestions & Perfect Pairings
This Glazed Chicken & Creamy Rotini is a wonderfully hearty and complete meal on its own.
However, it pairs beautifully with a simple side salad dressed with a light vinaigrette, or steamed green beans, asparagus, or vibrant sautéed vegetables for a fresh counterpoint.
Maximizing Freshness: Storage Tips
Store any leftover Glazed Chicken & Creamy Rotini in an airtight container in the refrigerator for up to 3-4 days.
To reheat, gently warm in a skillet over medium-low heat, adding a splash of chicken broth or water to revive the sauce and prevent the chicken or pasta from drying out.
Making Ahead: Can You Prep This Dish Early?
While best served fresh for optimal texture, you can certainly prep components ahead to save time. The glaze can be made a day in advance and gently reheated when ready to serve.
Chop your fresh herbs beforehand. Cooked chicken and pasta can be stored separately and combined just before serving for the best texture, though the creamy pasta is always superior when made fresh.
Frequently Asked Questions About Glazed Chicken & Creamy Rotini
Can I use chicken thighs instead of breasts?
Yes, absolutely! Chicken thighs are an excellent alternative and often result in even juicier chicken due to their higher fat content. Adjust cooking time slightly, as thighs may take a few minutes longer to reach 165°F (74°C). For more glazed chicken ideas, check out this sticky glazed chicken drumsticks recipe!
How can I make this dish gluten-free?
To make this recipe gluten-free, substitute the rotini pasta with your favorite gluten-free pasta variety. Ensure your soy sauce is a certified gluten-free tamari, and always double-check all other ingredient labels for hidden gluten.
Is there a dairy-free option for the pasta sauce?
Yes, you can make the pasta sauce dairy-free. Substitute the unsalted butter with a plant-based butter alternative and use full-fat coconut milk (from a can) or a rich oat milk in place of heavy cream. It will subtly alter the flavor profile but still yield a delicious and creamy result.
How spicy is this recipe?
The recipe uses 1 tablespoon of red pepper flakes, divided, which typically provides a noticeable but moderate kick for most palates. If you prefer it milder, use less (e.g., 1/2 tablespoon total). For extra heat, feel free to add more red pepper flakes, especially as a garnish.
Can I add vegetables to the rotini?
Certainly! You can easily add vegetables for extra nutrition and flavor. Sauté some spinach, mushrooms, or bell peppers with a little garlic in the skillet after the glaze is made, then stir them into the creamy rotini before serving.
Whip Up This Winner: Your Glazed Chicken & Creamy Rotini Awaits!
Now that you’re armed with all the tips, tricks, and expert guidance, you’re ready to create a truly unforgettable Glazed Chicken & Creamy Rotini. This dish promises perfectly tender chicken every time, enveloped in a tantalizing glaze and served alongside wonderfully creamy pasta.
Don’t let the fear of dry chicken hold you back any longer. Dive into this recipe and impress your family and friends with a meal that’s both elegant and effortlessly delicious.
We can’t wait to see your creations! Share your Glazed Chicken & Creamy Rotini masterpieces with us on social media using #GlazedChickenRotini and tag us in your posts. Happy cooking!
Glazed Chicken & Creamy Rotini
Course: Main CourseCuisine: International CuisineDifficulty: easy4
servings15
minutes20
minutes35
minutesInternational Cuisine
Ingredients
2 boneless, skinless chicken breasts (about 1.5 lbs total)
12 ounces rotini pasta
2 tablespoons olive oil
1 teaspoon salt, plus more for pasta water
1/2 teaspoon black pepper
1 teaspoon garlic powder
1/2 teaspoon onion powder
1 tablespoon red pepper flakes, divided
1/4 cup soy sauce (or coconut aminos)
2 tablespoons honey
1 tablespoon apple cider vinegar
1/4 cup chicken broth
2 tablespoons unsalted butter
1/4 cup heavy cream or half-and-half
2 tablespoons fresh chives or parsley, chopped (divided)
Directions
- Prepare Chicken: Pat chicken breasts very dry with paper towels. Season both sides generously with salt, black pepper, garlic powder, and onion powder.
- Sear Chicken: Heat 1 tablespoon olive oil in a large skillet over medium-high heat until shimmering. Carefully place chicken breasts in the hot skillet. Sear for 4-5 minutes per side until deeply golden brown. Reduce heat to medium-low, cover the skillet, and continue to cook for another 5-7 minutes, or until the internal temperature reaches 165°F. This is crucial for juiciness: Do not overcook!
- Rest the Chicken: Transfer the cooked chicken breasts to a cutting board. Tent loosely with foil and let them rest for at least 5-7 minutes. This resting period allows the juices to redistribute, ensuring incredibly moist and tender chicken. While the chicken rests, proceed with the pasta and glaze.
- Cook Pasta: Bring a large pot of salted water to a rolling boil. Add rotini pasta and cook according to package directions until al dente. Reserve 1 cup of the pasta cooking water before draining.
- Make Glaze: While the pasta cooks, use the same skillet from the chicken (do not clean it). Add the remaining 1 tablespoon olive oil, 1/2 tablespoon red pepper flakes, soy sauce, honey, apple cider vinegar, and chicken broth. Bring to a gentle simmer over medium heat, scraping up any browned bits from the bottom of the pan. Let it simmer for 3-5 minutes, stirring occasionally, until the glaze thickens slightly and becomes syrupy.
- Finish Pasta: In the drained pasta pot, add the butter, heavy cream, and about 1/2 cup of the reserved pasta water. Stir well until the butter melts and a light, creamy sauce forms. Add the cooked rotini and half of the chopped chives or parsley. Toss to coat evenly. Add more pasta water if needed for desired consistency. Season with a pinch of salt and pepper.
- Serve: Slice the rested chicken breasts into thick pieces. Arrange the creamy rotini pasta on plates, then top with the sliced chicken. Drizzle the warm glaze generously over the chicken. Garnish with the remaining red pepper flakes and fresh chives or parsley. Serve immediately and enjoy perfectly juicy chicken every time!
Notes
- Do not overcook chicken; internal temperature should reach 165°F. Resting chicken is crucial for juiciness.


