Oh, the dreaded dry chicken breast. We’ve all been there, haven’t we? You slice into what you hoped would be a succulent, flavorful piece of chicken, only to be met with a tough, chewy disappointment. It’s enough to make you sigh and reach for something else entirely.
But what if I told you that achieving perfectly juicy, tender glazed skillet chicken right on your stovetop is not only possible but incredibly simple? This recipe is the answer to your dry-chicken woes, delivering moist, flavorful chicken breasts coated in a gorgeous, glossy glaze, all in under 30 minutes. Say goodbye to dry, bland chicken and hello to a weeknight dinner you’ll crave!
Why You’ll Absolutely Love This Glazed Skillet Chicken
Beyond just solving the dry chicken dilemma, this recipe has so much to offer. Here are just a few reasons it’s become a staple in my kitchen:
- Never Dry Again: The secret technique ensures your chicken stays incredibly moist from the inside out.
- Speedy Dinner: From start to finish, you’re looking at about 30 minutes – perfect for busy weeknights.
- Minimal Cleanup: It’s a one-skillet wonder! Fewer dishes mean happier cooks.
- Packed with Flavor: The simple glaze is a delightful balance of sweet, savory, and tangy.
- Healthy & Wholesome: Lean protein paired with fresh spinach and tomatoes makes for a nutritious meal.
- Versatile Veggies: The spinach and tomatoes cook right in the sauce, absorbing all that delicious flavor.
Gathering Your Ingredients for Glazed Skillet Chicken
One of the beautiful things about this glazed skillet chicken recipe is that it relies on simple, common ingredients you likely already have or can easily find at any grocery store. We’re focusing on fresh components and pantry staples that come together to create magic.
Here’s a look at the key players:
- Boneless, Skinless Chicken Breasts: The star of the show! Choose two breasts that are relatively uniform in thickness. If they are very thick on one end, you might want to gently pound the thicker part to even them out slightly. This helps ensure even cooking and prevents the thinner part from drying out while the thickest part reaches temperature.
- Olive Oil: Just a tablespoon to get things started and create that initial beautiful sear on the chicken.
- Salt and Black Pepper: The essential foundational seasonings. Season generously, as much of the flavor will come from the glaze, but a well-seasoned piece of chicken is crucial.
- Fresh Spinach: Two cups might look like a lot, but spinach wilts down significantly! It adds a wonderful earthiness and vibrant color. Make sure it’s fresh and rinsed well.
- Cherry Tomatoes: Halved cherry tomatoes burst slightly as they cook in the sauce, adding little pockets of sweet, tangy goodness. Any small variety of tomato will work.
- Garlic: Just one clove, minced, but it adds so much aromatic depth to the final sauce. Use fresh garlic for the best flavor.
Now, let’s talk about the glaze components. This simple mixture is where the magic truly happens, creating that luscious, glossy coating:
- Low Sodium Soy Sauce: Provides the primary salty, umami base for the glaze. Using low sodium allows you more control over the overall saltiness of the dish.
- Balsamic Vinegar: Adds a lovely tang and a touch of dark, rich sweetness that complements the savory soy sauce beautifully.
- Honey or Maple Syrup: Either liquid sweetener works perfectly here. Honey lends a classic sweetness, while maple syrup offers a slightly different but equally delicious depth. This balances the acidity of the vinegar and helps create that glossy finish.
- Water or Chicken Broth: This thins the glaze slightly and provides the liquid needed for the chicken to finish cooking gently. Using chicken broth can add an extra layer of flavor.
- Cornstarch: Our trusty thickening agent! Mixed with a little cold water to create a slurry, it transforms the liquid glaze into a thick, glossy sauce that clings beautifully to the chicken and vegetables.
Crafting Your Glazed Skillet Chicken: Step-by-Step
Ready to make some truly incredible glazed skillet chicken? Follow these steps carefully, and you’ll be rewarded with a dinner that’s anything but dry. Remember, the key technique here is finishing the chicken in the simmering sauce – it’s a game changer for moisture!
- Prepare Your Chicken for Success: Start by preparing your chicken breasts. Pat each one thoroughly dry with paper towels. This is a really important step! Excess moisture prevents a good sear, which means you won’t get that lovely golden-brown crust that adds flavor and texture. Once dry, season both sides generously with salt and black pepper. Don’t be shy here; you want the chicken itself to be well-seasoned before the glaze is even added.
- Whisk Up the Flavor Base: In a small bowl, combine the low sodium soy sauce, balsamic vinegar, your choice of honey or maple syrup, and the water or chicken broth. Give it a good whisk until everything is well combined. This is your main glaze mixture, ready and waiting. Separately, grab a tiny bowl and whisk together the cornstarch with just 1 tablespoon of cold water until it forms a smooth, lump-free liquid. This is your cornstarch slurry, which we’ll use later to thicken the sauce. Set both bowls aside.
- Achieve That Perfect Sear: Heat the olive oil in a large skillet over medium-high heat. You want the skillet to be nice and hot so the chicken sears quickly. Test the heat by adding a drop of water – it should sizzle and evaporate quickly. Carefully place the seasoned chicken breasts into the hot skillet. Sear for about 4-5 minutes per side. The goal here is to get a beautiful golden-brown crust on the outside. Don’t worry about cooking the chicken all the way through at this stage; we’ll finish it in the sauce.
- The Secret to Juicy Chicken: Simmering in Sauce: Now for the step that banishes dryness forever! Carefully pour the prepared glaze mixture directly into the skillet around the seared chicken breasts. The sauce will start to bubble up. Bring the sauce to a gentle simmer, then immediately reduce the heat to medium-low. This lower heat prevents the sauce from reducing too quickly and keeps the cooking gentle. Cover the skillet with a lid. Let the chicken cook in this simmering sauce for about 8-10 minutes. The exact time will depend on the thickness of your chicken breasts. The chicken is done when the thickest part reaches an internal temperature of 165 degrees F (74 degrees C). Using a meat thermometer is the absolute best way to ensure it’s perfectly cooked and not overdone. Flip the chicken halfway through this simmering time so both sides absorb the flavor and moisture.
- Rest the Chicken: Once the chicken is cooked through to 165°F, remove the breasts from the skillet and place them on a clean plate. Loosely tent the plate with foil. Letting the chicken rest for a few minutes is important; it allows the juices to redistribute throughout the meat, ensuring maximum tenderness and moisture. While it rests, we’ll finish the sauce and veggies.
- Sauté the Aromatics and Veggies: With the chicken resting, add the minced garlic to the hot skillet containing the simmering sauce. Cook the garlic for only about 30 seconds, stirring constantly, until you can smell its fragrant aroma. Be careful not to burn the garlic! Immediately add the halved cherry tomatoes and fresh spinach to the skillet. Continue to cook, stirring occasionally, just until the spinach has wilted down and the tomatoes have softened slightly, which should only take about 2-3 minutes.
- Thicken the Glaze: Give your cornstarch slurry (the cornstarch mixed with cold water) a quick stir to ensure it’s still smooth. Pour the slurry into the simmering sauce in the skillet with the vegetables. Cook, stirring constantly, for about 1 minute. As you stir, you’ll see the sauce transform – it will thicken and become beautifully glossy, coating the spinach and tomatoes.
- Combine and Serve: Carefully return the rested chicken breasts to the skillet, placing them directly into the thickened glaze with the vegetables. Spoon the warm glaze and the cooked spinach and tomatoes over the chicken to coat everything beautifully. If you like, add a sprinkle of fresh chopped herbs like parsley or basil for a pop of color and freshness. Serve the glazed skillet chicken immediately over the spinach and tomatoes, making sure to spoon extra glaze from the pan over each serving.
Tips for Perfect Glazed Skillet Chicken Every Time
While this recipe is incredibly straightforward, a few extra tips can help ensure your glazed skillet chicken turns out perfectly every single time:
- Uniform Chicken Thickness: As mentioned in the ingredients, try to use chicken breasts of similar size and thickness, or pound the thicker ends slightly. This prevents uneven cooking.
- Don’t Skip the Sear: That initial sear isn’t just for looks; it locks in flavor and creates a better texture contrast.
- Invest in a Meat Thermometer: This is truly the key to perfectly cooked chicken. Remove the chicken from the heat the moment it hits 165°F (74°C) in the thickest part. Carryover cooking will often raise the temperature a degree or two as it rests.
- Adjust Glaze Sweetness/Tanginess: Taste the glaze mixture before you add the cornstarch slurry. You can add a tiny pinch more honey for sweetness or a splash more balsamic vinegar for tang, according to your preference.
- Vegetable Variations: While spinach and tomatoes are fantastic, feel free to get creative! Thinly sliced bell peppers, snap peas, or even mushrooms would work well. Add them at step 6 and cook until tender-crisp.
- Make it Spicy: For a touch of heat, add a pinch of red pepper flakes along with the garlic in step 6.
- Double the Sauce: If you plan on serving this with rice or pasta and want extra sauce, simply double the glaze ingredients while keeping the cornstarch the same, or slightly increasing it if needed for desired thickness.
What to Serve With This Delicious Dish
This glazed skillet chicken with spinach and tomatoes is a complete meal on its own, especially served right over the cooked vegetables. However, it pairs wonderfully with a variety of sides to make it even heartier. A bed of warm, fluffy rice is a classic choice, soaking up all that incredible glaze. Fluffy quinoa also makes an excellent healthy grain option.
For potato lovers, consider serving it alongside easy crispy roasted potatoes or simple mashed potatoes to soak up the sauce. A simple green salad or our refreshing easy kale salad would offer a nice textural contrast and brightness.
Your Glazed Skillet Chicken Questions Answered (FAQ)
Thinking about trying this recipe? Here are some common questions you might have:
Can I use chicken thighs instead of breasts?
Yes, absolutely! Boneless, skinless chicken thighs work wonderfully in this recipe. Thighs are generally more forgiving and less likely to dry out due to their higher fat content. The cooking time might be slightly longer, possibly 10-12 minutes in the simmering sauce, depending on their size. Cook them until they reach an internal temperature of 175°F (80°C) for the best texture.
What if I don’t have balsamic vinegar?
While balsamic vinegar adds a unique depth, you could try substituting with red wine vinegar or apple cider vinegar, perhaps reducing the amount slightly and adding a touch more honey to balance the acidity. The flavor profile will change slightly, but it will still be delicious.
How do I store leftovers?
Leftover glazed skillet chicken can be stored in an airtight container in the refrigerator for 3-4 days. The glaze will thicken as it cools. To reheat, gently warm it in a skillet over low heat, adding a splash of water or broth if the sauce is too thick, or microwave until heated through.
Can I prepare the glaze ahead of time?
Yes, you can whisk together the soy sauce, balsamic vinegar, honey/maple syrup, and water/broth ahead of time and store it in a sealed container in the refrigerator. Make the cornstarch slurry just before you’re ready to use it, as it can separate if left sitting for too long.
My sauce isn’t thickening. What went wrong?
Ensure you mixed the cornstarch with cold water before adding it; adding cornstarch directly to hot liquid can cause lumps. Also, make sure the sauce is simmering when you stir in the slurry and that you continue stirring constantly for the full minute. If it’s still too thin after a minute of simmering, you can mix up another tiny batch of slurry (maybe 1/2 teaspoon cornstarch with 1 teaspoon cold water) and stir it in, cooking for another 30 seconds to 1 minute until desired thickness is reached.
Enjoy Your Homemade Glazed Skillet Chicken!
Gone are the days of dry, disappointing chicken dinners! This glazed skillet chicken recipe is proof that a simple technique can make all the difference. With minimal effort and common ingredients, you can create a juicy, flavorful, and visually appealing meal that the whole family will enjoy.
Give this recipe a try tonight and experience the difference! I’d love to hear how it turns out for you. Leave a comment below and let me know your favorite part of this glazed skillet chicken dish. Happy cooking!
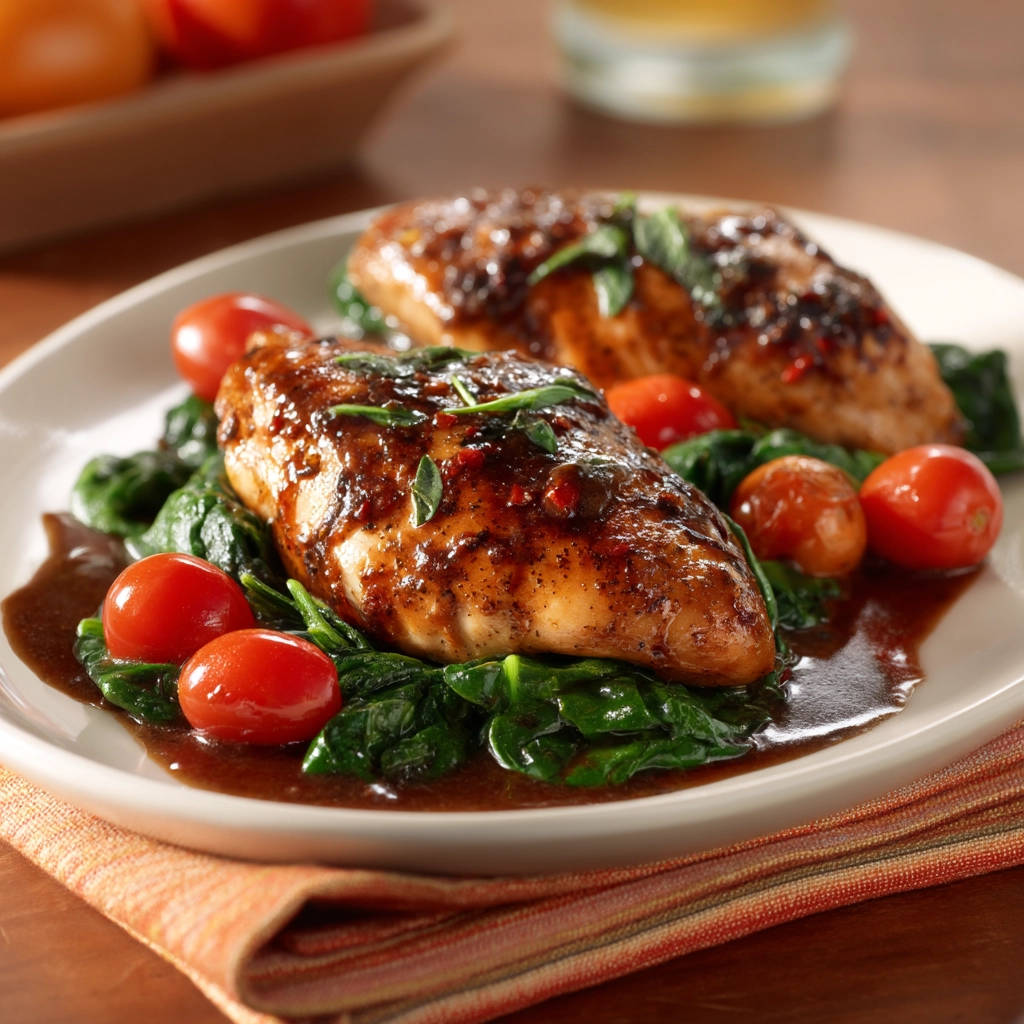
Glazed Skillet Chicken with Spinach and Tomatoes

Ingredients
- 2 boneless, skinless chicken breasts
- 1 tablespoon olive oil
- Salt to taste
- Black pepper to taste
- 2 cups fresh spinach
- 1 cup cherry tomatoes, halved
- 1 clove garlic, minced
- For the Glaze:
- 2 tablespoons low sodium soy sauce
- 2 tablespoons balsamic vinegar
- 1 tablespoon honey or maple syrup
- 1 tablespoon water or chicken broth
- 1 teaspoon cornstarch
Directions
- Season the chicken breasts generously on both sides with salt and pepper.
- In a small bowl, whisk together the soy sauce, balsamic vinegar, honey or maple syrup, and water or broth. In a separate tiny bowl, mix the cornstarch with 1 tablespoon of cold water until smooth to create a slurry. Set both aside.
- Heat the olive oil in a large skillet over medium-high heat. Once the oil is shimmering but not smoking, carefully add the seasoned chicken breasts to the skillet. Sear for 4-5 minutes per side until golden brown.
- This is the key step to avoid dry chicken: Pour the prepared glaze mixture directly into the skillet around the chicken. Bring the sauce to a gentle simmer. Reduce the heat to medium-low. Cover the skillet and let the chicken finish cooking in the simmering sauce for about 8-10 minutes, or until the internal temperature of the thickest part of the chicken reaches 165 degrees F. Cooking the chicken gently in the sauce keeps it incredibly moist. Flip the chicken halfway through this simmering time.
- Remove the chicken from the skillet and set aside on a plate. Tent loosely with foil.
- Add the minced garlic to the skillet with the sauce. Cook for 30 seconds until fragrant. Add the halved cherry tomatoes and spinach to the skillet. Cook, stirring occasionally, until the spinach is wilted and the tomatoes have softened slightly, about 2-3 minutes.
- Stir the cornstarch slurry into the simmering sauce in the skillet. Cook, stirring constantly, until the sauce thickens into a glossy glaze, about 1 minute.
- Return the chicken breasts to the skillet and spoon the glaze and vegetables over them to coat. Garnish with fresh chopped herbs if desired. Serve immediately over the spinach and tomatoes with the extra glaze from the pan.