
Imagine pulling a heavy lid off a Dutch oven to reveal beef so tender it practically shatters at the mere suggestion of a fork. The air fills with the scent of earthy chiles, warm cinnamon, and rich, savory beef broth. This isn’t just a meal; it’s a sensory experience that defines comfort food at its most elevated level.
Too often, home cooks spend hours waiting for a roast only to end up with meat that feels like chewing on a rubber band. It’s frustrating to invest time and money into a dish that turns out stringy or dry. We’re solving that “tough meat problem” today by using a specific low-and-slow braising method designed to guarantee a buttery, melt-in-your-mouth texture every single time.
The secret to this success lies in the science of the simmer. Most people make the mistake of boiling their meat, which actually causes the muscle fibers to seize up and push out all their moisture. By keeping your heat at the lowest possible setting, you allow the beef to relax into the sauce. I’ve found that salting your beef chunks at least 30 minutes before they hit the pan is the ultimate pro move, as it seasons the meat deeply while beginning to break down those stubborn proteins early.
The Science of Collagen and Low-Heat Braising
To understand why this recipe works, you have to understand what happens inside that pot. Beef chuck roast is packed with collagen, a tough connective tissue that acts like a structural cable. If you cook it too fast or at too high a temperature, those cables tighten up, resulting in that dreaded “shoe leather” texture.
When you maintain a gentle, barely-there simmer, a beautiful biological transition occurs. Around 160°F, collagen begins to melt and transform into gelatin. This gelatin is what gives the beef its succulent, silky mouthfeel and turns the cooking liquid into a rich, lip-smacking consommé. Boiling at 212°F is the enemy here; it’s simply too aggressive for the delicate process of collagen breakdown.
By keeping the temperature low, you ensure the muscle fibers don’t squeeze out their juices before the collagen has a chance to liquefy. It’s a slow dance between heat and time. You’re looking for a liquid surface that shows only an occasional bubble, rather than a rolling boil. This patience is rewarded with beef that doesn’t just fall apart—it dissolves.
Why Acidic Marinades Soften Beef Fibers
Acidity is your best friend when dealing with hearty cuts of beef. In this recipe, we use apple cider vinegar and the natural acids found in dried chiles to create a powerful tenderizing environment. These acidic elements work by weakening the surface proteins of the chuck roast before the heat even takes over.
This pre-cook “softening” allows the flavors of the cumin and oregano to penetrate deeper into the meat. It also balances the heavy fats of the beef, ensuring the final dish feels vibrant rather than greasy. Think of the vinegar as a chemical tool that paves the way for the thermal work of the braise.
Essential Components for Slow Braised Beef Birria
Quality ingredients are the foundation of a great birria. I always recommend beef chuck roast for this method because it has the perfect ratio of lean meat to fat and connective tissue. While leaner cuts might seem “healthier,” they lack the collagen necessary to create that signature velvety texture after three hours of cooking.
The chiles are equally vital. Guajillo chiles provide a beautiful deep red color and a sweet, mild heat that forms the backbone of the sauce. Ancho chiles, which are dried poblanos, add a rich, smoky depth and a hint of raisin-like sweetness. Together, they create a complex flavor profile that you simply can’t get from a standard chili powder.
Selecting the Right Beef Bone Broth
While you can use standard beef stock, switching to a high-quality beef bone broth makes a world of difference. Bone broth is simmered for much longer, meaning it’s already loaded with natural gelatin. This adds an incredible body to your consommé, making it feel thick and luxurious on the palate without needing any artificial thickeners.
The Warm Spice Profile: Cinnamon and Cloves
You might be tempted to skip the cinnamon and cloves, thinking they belong in a pie rather than a beef stew. However, in traditional Mexican braises, these warm spices provide an earthy, aromatic depth. They don’t make the dish taste like dessert; instead, they highlight the savory notes of the beef and the fruitiness of the dried chiles.
Step-by-Step: Preparing the Chile Base and Aromatics
Start by removing the stems and seeds from your dried chiles. Toast them in a dry pan for about two minutes until they smell toasted and slightly nutty. This is the Maillard reaction in action, unlocking oils and flavors that stay dormant in raw dried peppers. Once they’re fragrant, soak them in hot water until they’re soft and pliable.
When you move to the blender, don’t rush the process. Combine the chiles, onion, garlic, and spices with a cup of broth and blend until the sauce is completely smooth. You want a silky puree, not a chunky salsa. If your blender isn’t high-powered, you might even want to pass the sauce through a fine-mesh strainer to ensure there are no gritty bits of chile skin left behind.
The Searing Phase: Building a Flavor Foundation
Searing the beef is a non-negotiable step for a rich, dark consommé. Get your oil shimmering hot in a heavy Dutch oven and sear the beef chunks in batches. If you crowd the pan, the temperature will drop, and the meat will steam in its own juices rather than browning. You’re looking for a deep, dark brown crust on all sides.
That brown crust is pure flavor. It’s the result of proteins and sugars reacting to high heat, creating a complex savory base that will eventually dissolve into your braising liquid. Once the meat is seared, remove it and sauté the blended chile sauce for a couple of minutes. This “fries” the sauce, deepening the color and mellowing the raw garlic and onion flavors.
Executing the Low-and-Slow Braising Technique
Now comes the most important part: the assembly. Return the beef to the pot and pour in the remaining broth and bay leaves. Bring it to a very gentle simmer, then immediately turn your burner down to the lowest setting. Cover the pot with a tight-fitting lid to trap every drop of moisture and flavor inside.
Check the pot after about 20 minutes. You should see the occasional bubble breaking the surface, but the liquid should mostly look still. If it’s bubbling rapidly, your heat is too high. This gentle environment allows the meat to cook evenly from the outside in, preventing the exterior from becoming dry while the interior reaches that perfect fork-tender state over the next three to three and a half hours.
Troubleshooting Common Braising Obstacles
If you notice the liquid is reducing too quickly, your lid might not be tight enough. Simply add a splash more broth or water to keep the meat mostly submerged. If the meat still feels “tight” or bouncy after three hours, don’t panic. Every cow is different, and some cuts just need an extra 30 minutes to fully surrender. Keep the heat low and keep going.
If your chuck roast was particularly marbled, you might see a thick layer of red oil on top. While this “fat cap” is traditional and delicious, you can easily skim some off with a wide spoon if it looks too heavy. Save that flavored oil, though; it’s liquid gold for dipping tortillas or sautéing vegetables later!
Plating for Texture and Visual Impact
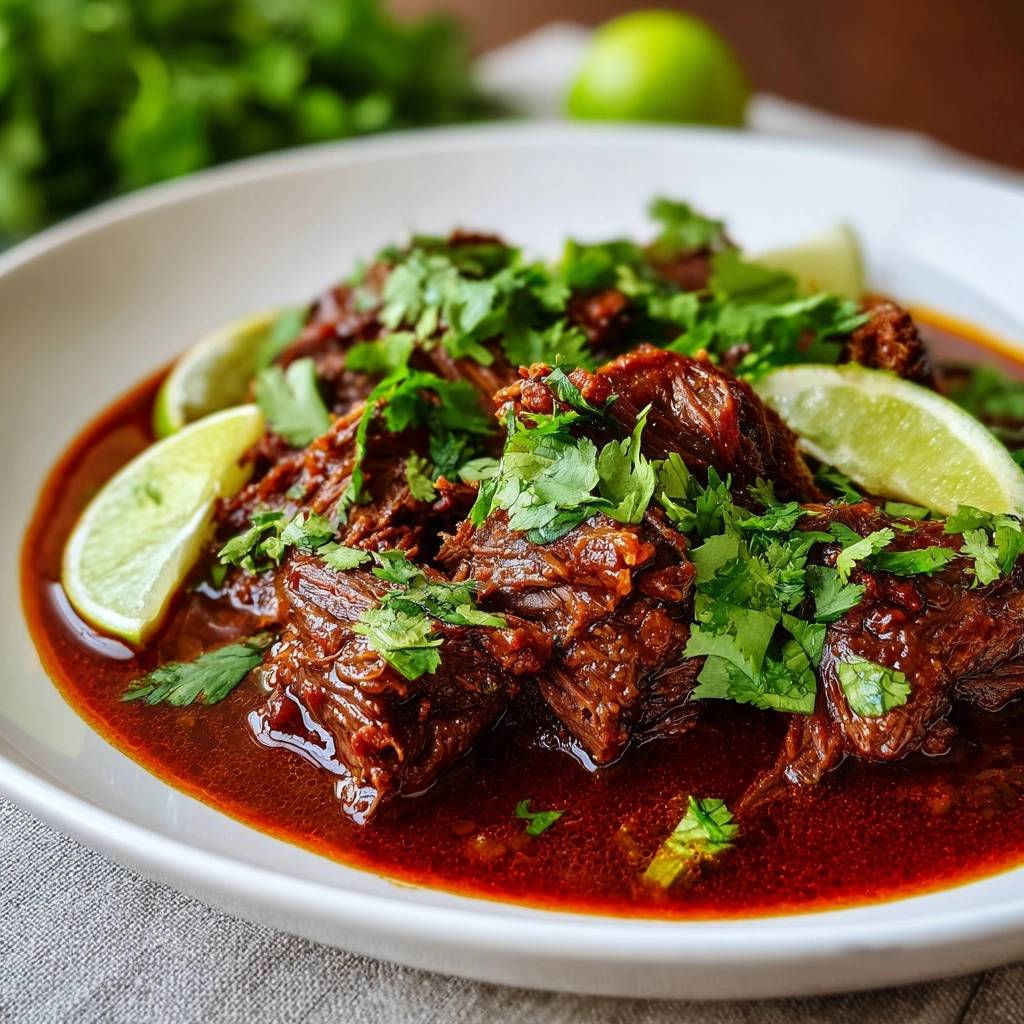
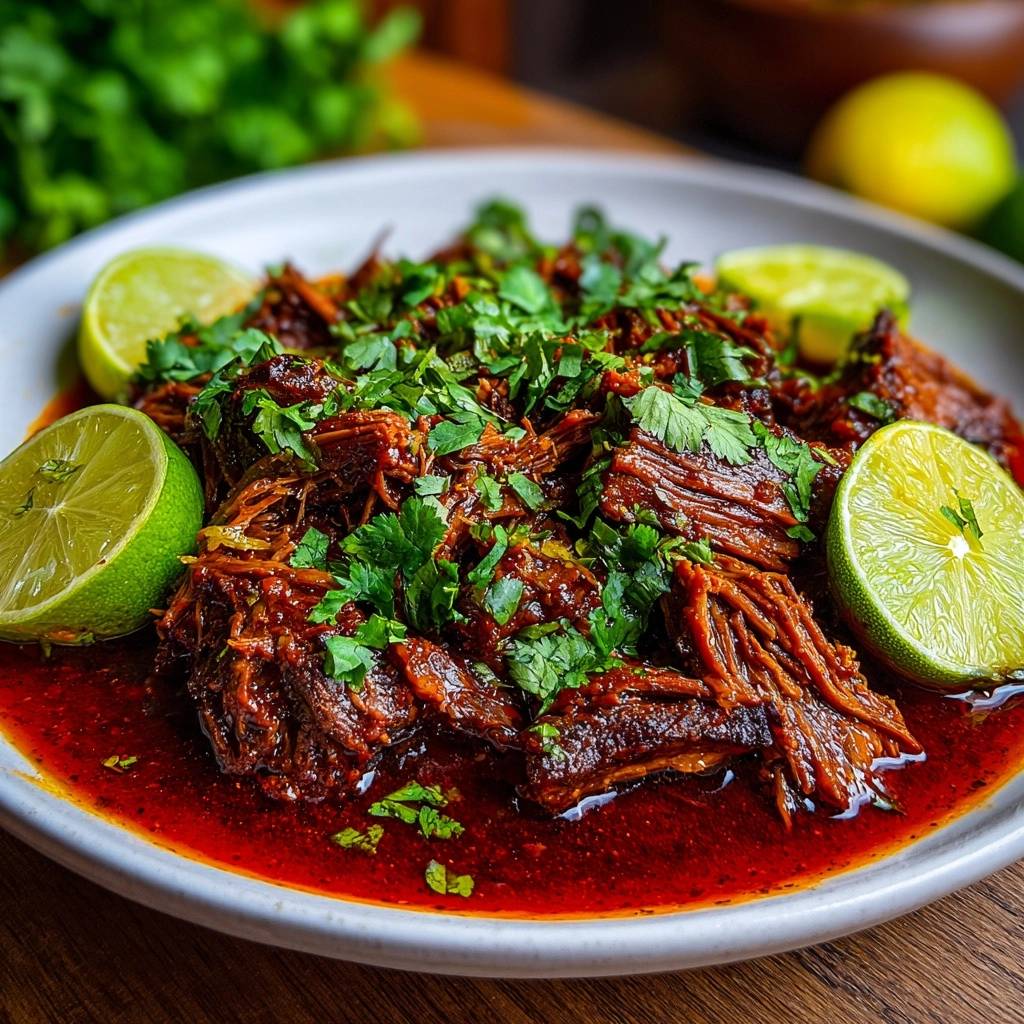
Presentation is part of the joy of Birria. Use a shallow white bowl to make the deep red color of the consommé pop. Place the large, tender chunks of beef in the center and ladle the rich broth around the base until the meat is about halfway submerged. This keeps the top of the beef visible while ensuring every bite can be swirled through the sauce.
Top the dish with a generous handful of fresh chopped cilantro. The bright, herbal notes are the perfect foil for the heavy, savory beef. Finally, tuck a few lime wedges into the side of the bowl. Squeezing fresh lime juice over the beef right before eating is essential; the acidity cuts through the richness and provides a final hit of brightness that makes the flavors sing.
Make-Ahead Strategies and Storage
Braised meats are famous for tasting even better the next day. As the dish cools, the meat actually reabsorbs some of the flavorful liquid, and the spices have more time to “marry” and mellow. If you’re making this ahead of time, let it cool slightly before transferring it to an airtight container in the fridge.
When you’re ready to reheat, do it gently on the stovetop over medium-low heat. Avoid the microwave if possible, as it can heat the meat unevenly and toughen those carefully softened fibers. If the sauce has thickened into a jelly in the fridge, that’s just the gelatin! It will melt back into a silky liquid as soon as it warms up.
Expert Tips for the Perfect Consommé
Why should I salt the meat 30 minutes early?
Salting early uses osmotic pressure to pull salt deep into the center of the beef chunks. It also helps break down some of the surface proteins, which leads to a better crust during the searing phase and more tender meat after the braise. If you salt right before cooking, the seasoning often just stays on the surface.
Can I use a Slow Cooker instead of a Dutch Oven?
Yes, you can use a slow cooker on the “Low” setting for about 8 hours. However, be aware that slow cookers don’t allow for much evaporation, so your consommé might be slightly thinner than if it were made in a Dutch oven. You may want to reduce the sauce on the stovetop for 10 minutes after the meat is done to concentrate the flavors.
What if my sauce is too spicy?
The heat level depends entirely on the specific chiles you bought. If the sauce has too much kick, try adding a small spoonful of honey or agave nectar. The sweetness helps neutralize the capsaicin. You can also stir in a bit more beef broth to dilute the spice without losing the savory depth.
How do I get the fat off the top?
The easiest way is to chill the entire pot overnight. The fat will solidify into a hard orange disc on top, which you can simply lift off and discard (or save for cooking). If you’re serving immediately, use a fat separator or gently press a paper towel against the surface of the liquid to soak up the excess oil.
Can I use other cuts of meat?
Beef short ribs or beef shanks are excellent alternatives. Both are high in collagen and fat, making them perfect for long braises. Short ribs will provide a richer, fattier flavor, while shanks will give you an even more gelatinous consommé thanks to the marrow in the bones. Avoid lean cuts like sirloin or round, as they will become very dry.
How long will leftovers stay fresh?
You can store this beef birria in an airtight container in the refrigerator for up to 4 days. It also freezes beautifully! Place the meat and liquid in a freezer-safe bag or container for up to 3 months. Just thaw it in the fridge overnight before reheating gently on the stove.

Slow Braised Beef Birria
Course: Main CourseCuisine: MexicanDifficulty: easy6
servings20
minutes3
hours180
Minutes485
kcalMexican
Ingredients
3 pounds beef chuck roast, cut into large 3-inch chunks
4 dried guajillo chiles, stems and seeds removed
2 dried ancho chiles, stems and seeds removed
1 white onion, halved
6 cloves garlic, peeled
1 tablespoon apple cider vinegar
1 teaspoon dried oregano
1 teaspoon ground cumin
1/2 teaspoon ground cinnamon
1/2 teaspoon ground cloves
4 cups beef bone broth
2 bay leaves
2 tablespoons vegetable oil
Salt and black pepper to taste
1 bunch fresh cilantro, chopped for garnish
3 fresh limes, cut into wedges for serving
Directions
- To solve the tough meat problem, start by generously salting your beef chunks at least 30 minutes before cooking. This draws moisture in and begins breaking down proteins early.
- Toast the dried chiles in a dry pan over medium heat for 2 minutes until fragrant. Soak them in hot water for 15 minutes until soft.
- In a blender, combine the soaked chiles, onion, garlic, vinegar, oregano, cumin, cinnamon, and cloves with 1 cup of the beef broth. Blend until completely smooth.
- Heat oil in a heavy Dutch oven over medium-high heat. Sear the beef chunks in batches on all sides until a deep brown crust forms. Remove meat and set aside.
- Pour the blended chili sauce into the hot pot and sauté for 2 minutes to deepen the flavor. Return the beef to the pot and add the remaining beef broth and bay leaves.
- The secret to the perfect texture: Reduce the heat to the lowest possible setting. The liquid should barely simmer, never boil. Cover tightly and cook for 3 to 3.5 hours. Boiling causes the proteins to tighten and become rubbery, while a gentle simmer allows the collagen to melt into gelatin.
- Once the meat is fork-tender and falling apart, remove the bay leaves. Taste the consommé and adjust salt if needed.
- To match the visual presentation: Place the large, tender chunks of beef in a shallow white bowl. Ladle the rich, deep red consommé around the base of the meat until it is halfway submerged.
- Top with a heavy handful of fresh chopped cilantro and tuck several lime wedges directly into the bowl. The lime juice is essential as it cuts through the richness and provides a final hit of acidity to keep the meat feeling tender.
Notes
- The secret to the perfect texture is ensuring the liquid never reaches a hard boil, which prevents the muscle fibers from seizing and becoming tough.


