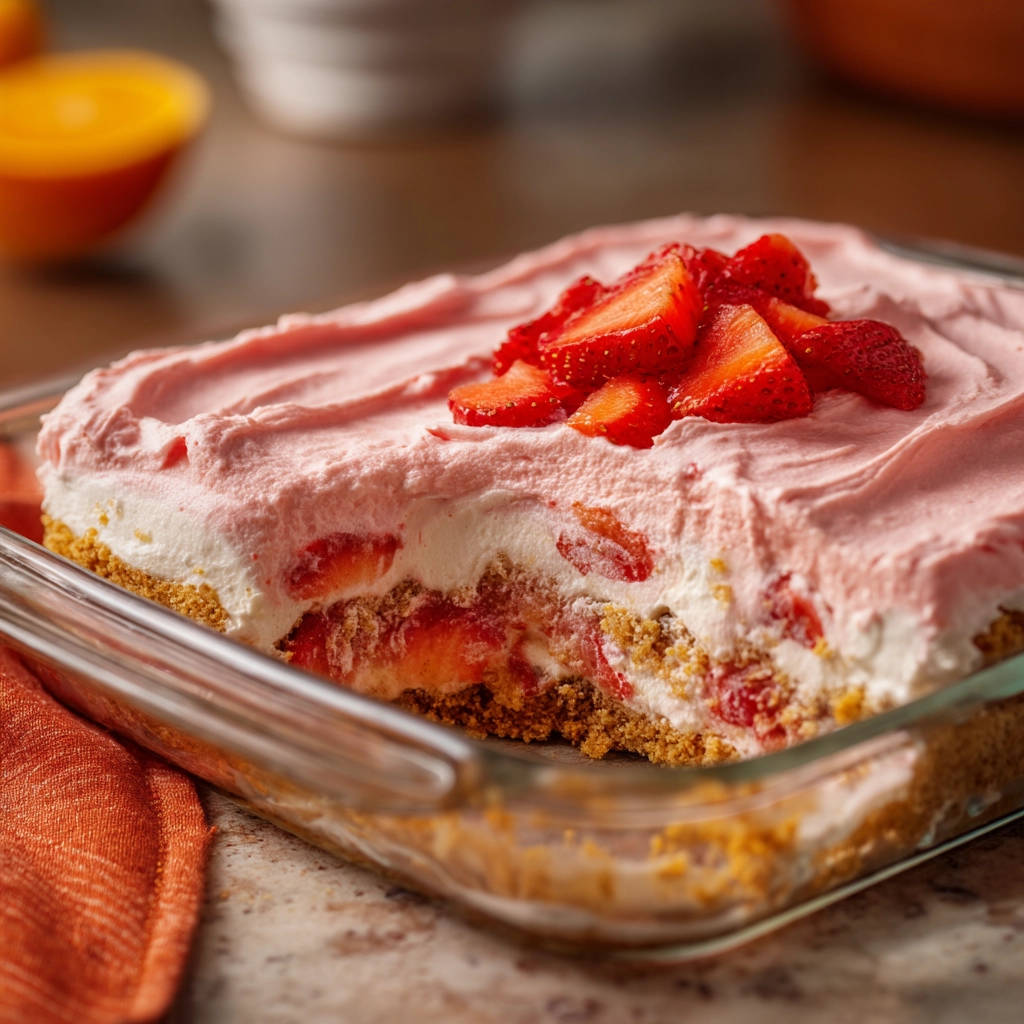
Oh, the joy of a stunning layered dessert! Those beautiful stripes of creamy filling, vibrant fruit, and that promised crisp crunch of a graham cracker crust at the bottom. It’s pure bliss, isn’t it? Until… you take that first bite, and instead of a satisfying snap, you’re met with a sad, soggy mess. Sigh. We’ve all been there, right? It’s one of the most frustrating things when making a no-bake treat!
But what if I told you there’s a simple, brilliant little trick that guarantees a perfectly firm, crunchy graham cracker base every single time you make a no-bake strawberry dessert? That’s right, no more soggy crust catastrophes! This recipe isn’t just another easy dessert; it’s a foolproof method designed specifically to conquer that common kitchen woe. Once you experience the delightful contrast of a sturdy crust against the luscious, creamy strawberry layers, you’ll never go back to the old way.
This isn’t just about preventing sogginess; it’s about creating a harmonious texture experience in every single spoonful. We’re combining the classic comfort of graham crackers with the bright, fresh taste of strawberries and a smooth, rich, creamy filling. It’s simple to make, requires zero oven time, and is absolutely perfect for potlucks, picnics, or just a sweet treat on a warm day. Let’s dive into making the ultimate no-bake strawberry dessert!
Reasons This No-Bake Strawberry Dessert is a Keeper
Why should this become your go-to no-bake treat? Because it ticks all the right boxes:
- No Baking Required: Keep your kitchen cool! Perfect for summer or when you just don’t feel like heating up the house.
- Foolproof Crust: The star of this recipe is the simple, yet revolutionary technique that ensures your graham cracker crust stays wonderfully crisp.
- Quick Prep Time: You can have this dessert assembled and ready for chilling in about 20 minutes. The longest part is waiting for it to set!
- Fresh Strawberry Flavor: It highlights the natural sweetness and vibrant color of fresh strawberries.
- Crowd-Pleaser: This creamy, fruity delight is universally loved by kids and adults alike.
- Simple Ingredients: You won’t need to hunt for obscure items; everything is readily available at your local grocery store.
Gathering Your Ingredients for This No-Bake Strawberry Delight
Alright, let’s talk about the simple heroes that come together to create this fantastic no-bake strawberry dessert. You only need a handful of items, but selecting them with a little care makes all the difference in flavor and texture. Here’s what you’ll want to have on hand:
First up, the foundation – that glorious, non-soggy crust! We rely on humble graham cracker crumbs. You can buy pre-crushed crumbs for convenience, or make your own by crushing full graham cracker sheets in a food processor or by placing them in a bag and crushing with a rolling pin. Homemade crumbs can sometimes be a bit coarser, which can add to the texture. We sweeten these crumbs just slightly with granulated sugar to enhance their natural flavor without making the crust overly sweet. The binder, and our secret weapon for crispness, is melted butter. The butter coats the crumbs, and when chilled, it solidifies, locking everything together and creating a barrier against moisture from the creamy layers. It’s crucial to use real butter for the best results and texture payoff here.
Next, the dreamy, creamy center layer. This is where the richness comes in, balanced beautifully by the tartness of the strawberries. Softened cream cheese is essential for a smooth, lump-free filling. Make sure it’s at room temperature! Beat it with powdered sugar, which dissolves easily and provides sweetness while contributing to the filling’s light texture. A splash of vanilla extract adds warmth and depth, complementing both the cream cheese and the strawberries. The lightness comes from whipped topping – the kind that comes in a tub, thawed. This gives the filling an airy quality that pairs wonderfully with the dense crust and fresh fruit.
Finally, the star of the show: the strawberries! You’ll need a generous amount of fresh strawberries. Selecting ripe, sweet berries is key to maximizing flavor. We slice most of them for the main filling and reserve a few for optional topping. To draw out some of their natural liquid – another secret for preventing sogginess – we mix the sliced strawberries with a little more granulated sugar. This process, called maceration, not only helps drain excess moisture but also concentrates the strawberry flavor slightly, making the berries even more delicious.
Here is a breakdown of the ingredients you’ll need:
- 1 and 1/2 cups graham cracker crumbs (about 10-12 full sheets)
- 1/4 cup granulated sugar (for the crust)
- 1/2 cup unsalted butter, melted
- 8 ounces cream cheese, softened (full-fat works best for richness)
- 1 cup powdered sugar (also known as confectioners’ sugar)
- 1 teaspoon vanilla extract
- 8 ounces whipped topping, thawed (like Cool Whip), divided
- 2 pounds fresh strawberries, sliced (choose ripe, vibrant red berries)
- 1/4 cup granulated sugar (for the strawberries)
Having all your ingredients prepped and measured before you start makes the assembly process incredibly smooth. Ensure your cream cheese is truly softened – leaving it on the counter for an hour or two usually does the trick. And remember to thaw the whipped topping in the refrigerator, not at room temperature, for the best consistency.
Crafting Your No-Bake Strawberry Dessert: Step-by-Step to Soggy-Free Bliss
Making this dessert is incredibly straightforward, involving just a few layers and some crucial chilling time. The key to our soggy-crust prevention method lies in the first few steps. Pay close attention to the chilling periods – they are non-negotiable for the best results!
-
Let’s start with the foundation: the graham cracker crust. Grab a medium bowl. Into this bowl, measure your graham cracker crumbs, the 1/4 cup of granulated sugar, and the glorious melted butter. Stir everything together thoroughly until the crumbs are uniformly moistened. It should look and feel like wet sand. This mixture is what will become your perfectly firm crust.
-
Now, take your 8×8 inch baking dish. Pour the crumb mixture into the dish. This is where you build your barrier against sogginess! Using the bottom of a glass or a flat-bottomed measuring cup, press the mixture down very firmly and evenly into the bottom of the dish. You want a compact layer, not a loose one. The firmer you press, the sturdier your crust will be. Once pressed, place the dish with the crust into the refrigerator. Chill it for at least 30 minutes. This dedicated chilling time is the critical step. It allows the melted butter to solidify, creating a solid structure and a natural barrier that prevents moisture from the filling from seeping into the crumbs. Don’t skip this!
-
While your crust is chilling and solidifying, let’s get the strawberries ready. In a separate bowl, gently combine your sliced fresh strawberries with the 1/4 cup of sugar. Stir them together lightly to coat. Let this mixture sit for about 10 minutes. You’ll notice the sugar starts to draw liquid out of the berries, creating a lovely strawberry syrup at the bottom of the bowl. After 10 minutes, carefully drain off this excess liquid. You can tip the bowl or use a fine-mesh sieve. Removing this extra moisture is another vital step in preventing a soggy crust and also helps concentrate the strawberry flavor within the fruit itself. Save the drained syrup if you like – it’s delicious over ice cream or pancakes!
-
With the crust chilling and strawberries prepped, move on to the creamy layer. In a large mixing bowl, beat the softened cream cheese and powdered sugar together. Use an electric mixer if you have one; it makes this step quick and ensures a super smooth, lump-free mixture. Beat until it’s completely smooth and creamy. Stir in the vanilla extract until it’s well combined, infusing that lovely aroma.
-
Now for the whipped topping. Remember, it should be thawed but still cold from the fridge. Gently fold in about half of the thawed whipped topping into the cream cheese mixture. Use a spatula and a gentle hand, cutting down through the center and scooping up from the bottom of the bowl, then folding over. Do this until the whipped topping is just incorporated. You want to keep the mixture light and airy, so avoid over-mixing or beating it aggressively.
-
Next, carefully fold the drained, sugared strawberries into the cream cheese and whipped topping mixture. Again, be gentle! You want to distribute the strawberries evenly without crushing them completely or deflating the creamy base you just made. The mixture will turn a beautiful pale pink with visible slices of fruit.
-
Retrieve your chilled graham cracker crust from the refrigerator. Carefully spread the strawberry cream cheese mixture evenly over the solid crust layer. Use a spatula to get it into the corners and create a smooth top surface.
-
We’ll use the remaining whipped topping for a beautiful finishing layer. In a small bowl, mix the remaining half of the whipped topping with a few tablespoons of crushed strawberries or some strawberry puree (you can easily make this by mashing a few berries with a fork). Mix until you get a light pink color and smooth consistency. Spread this pink whipped topping layer over the strawberry cream cheese layer. This creates a lovely visual contrast and adds another layer of creamy, slightly fruity goodness.
-
Cover the dish securely, either with plastic wrap or a lid. Place the dessert back into the refrigerator. It needs ample time to set properly – aim for at least 2 to 3 hours. For the absolute best results and the firmest crust and layers, chilling for 4 hours or even overnight is ideal. The longer it chills, the better the flavors meld, the layers solidify, and that wonderful, non-soggy crust sets up just right.
-
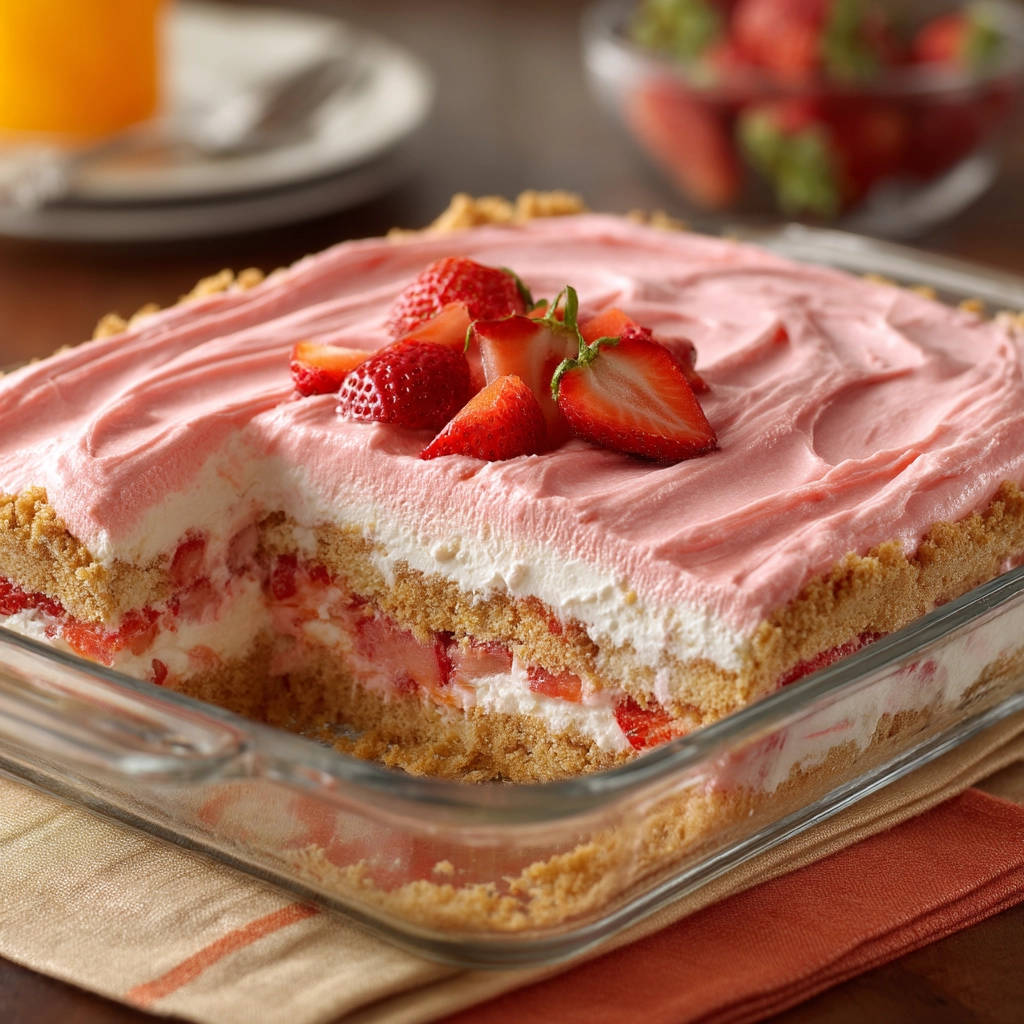
Before you serve this masterpiece, if you like, you can top it with a few extra fresh strawberry slices. This adds a final flourish of freshness and visual appeal. Then, simply slice and enjoy your perfectly layered, soggy-crust-free no-bake strawberry dessert!
Tips for Perfect No-Bake Strawberry Dessert Every Time
While this recipe is pretty straightforward, a few extra tips can help ensure your dessert is absolutely perfect:
-
Temperature is Key: Make sure your cream cheese is fully softened for a smooth filling. The melted butter for the crust should also be liquid, but not scorching hot. And ensure your whipped topping is thawed in the fridge.
-
Press That Crust: Don’t be shy when pressing the graham cracker mixture into the pan. The firmer it is, the less likely it is to crumble and, more importantly, the better the butter barrier will be.
-
Chill, Chill, Chill: We mentioned it in the steps, but seriously, don’t rush the chilling times, especially the initial crust chill. This is the absolute secret weapon against sogginess. The final chill is just as important for letting the creamy layer set properly. Overnight chilling gives the best results.
-
Drain Those Berries: Sugaring the strawberries and letting them sit before draining is crucial for removing excess liquid. This step significantly reduces the amount of moisture introduced into the creamy layer, further protecting your crust.
-
Gentle Folding: When incorporating the whipped topping and strawberries into the cream cheese mixture, use a gentle folding motion. This preserves the airiness of the whipped topping and prevents the filling from becoming dense or the strawberries from becoming mushy.
-
Alternative Crusts: While graham crackers are classic, you can experiment! Try vanilla wafers, shortbread cookies, or even chocolate cookies for a different flavor profile. Just ensure the ratio of crumbs, sugar, and butter works to create a firm base.
-
Make Ahead Magic: This dessert is fantastic for making ahead! Because it requires significant chilling time, it’s a perfect dessert to prepare the day before your event. In fact, chilling it overnight enhances the flavors and texture.
-
Storage: Keep any leftovers covered tightly in the refrigerator. It should stay delicious for 3-4 days, though the crust is always best within the first day or two after it’s fully set.
Serving Up Your Strawberry Dream
This no-bake strawberry dessert is wonderful served cold, straight from the refrigerator. It’s rich enough to stand alone, but light enough after a meal. It pairs beautifully with a simple cup of coffee or tea. For an extra touch, you could add a tiny dollop of extra whipped topping or a fresh mint sprig just before serving. It’s also a delightful finish after a light summer meal, perhaps following something like our Grilled Lemon Herb Chicken or a simple salad like our Easy Kale Salad.
Your No-Bake Strawberry Dessert Questions Answered (FAQ)
Got questions about this delicious dessert? Here are some answers to common queries:
Can I use frozen strawberries?
While fresh strawberries are highly recommended for the best texture and flavor in this specific recipe, you could use frozen sliced strawberries. However, you absolutely must thaw them completely and drain them very, very thoroughly after mixing with sugar, even more so than fresh berries, as they release significantly more liquid. The texture might be slightly softer than with fresh berries.
What kind of whipped topping should I use?
The recipe calls for a thawed whipped topping from the freezer section (like Cool Whip). You could technically make your own whipped cream, but stabilized homemade whipped cream (using gelatin or cornstarch) would be necessary to prevent the creamy layer from becoming too soft and potentially contributing to a soggy crust. For ease and reliability in a no-bake setting like this, a pre-made thawed whipped topping is often the simplest and most stable option.
How long does this dessert last in the refrigerator?
When covered properly, this no-bake strawberry dessert will last 3 to 4 days in the refrigerator. The crust is definitely at its peak crispness within the first 24-48 hours after setting.
Can I freeze this dessert?
Freezing isn’t ideal for this specific dessert. The texture of the cream cheese mixture and the thawed whipped topping can change when frozen and thawed, sometimes becoming watery or grainy. The strawberries also become much softer. It’s best enjoyed fresh from the fridge.
Can I use a different size pan?
An 8×8 inch dish works well for the specified servings and layer thickness. You could potentially use a 9×9 inch pan, but the layers will be thinner, and it might set slightly faster. A loaf pan or individual parfait dishes could also work, adjusting the chilling time as needed.
Is this recipe gluten-free?
As written, no, because it uses graham cracker crumbs, which contain wheat. To make it gluten-free, you would need to use certified gluten-free graham cracker crumbs or a different type of gluten-free cookie crumb (like gluten-free shortbread or vanilla wafers) mixed with the butter and sugar. The rest of the ingredients are typically gluten-free, but always check labels to be sure.
Why is my crust still soggy?
If you followed the steps and your crust is still soggy, double-check if you adhered strictly to the two soggy-crust prevention steps: 1) Chilling the pressed crust for at least 30 minutes before adding the filling, and 2) Thoroughly draining the sugared strawberries. Not pressing the crust firmly enough in step 1 can also contribute to sogginess.
Enjoy Your Homemade No-Bake Strawberry Dessert!
There you have it! A delightful, easy, and incredibly satisfying no-bake strawberry dessert that actually keeps its promise of a firm, delicious crust. Say goodbye to disappointing soggy bottoms and hello to perfect layers every single time. This recipe is sure to become a favorite for its simplicity, fresh flavor, and winning texture combination.
Give this No-Bake Strawberry Dessert a try the next time you’re craving something sweet and simple. I promise that little trick makes all the difference! Let me know how yours turns out in the comments below – I love hearing about your kitchen successes! Happy dessert making!
No-Bake Strawberry Dessert

Ingredients
- 1 and 1/2 cups graham cracker crumbs
- 1/4 cup granulated sugar
- 1/2 cup melted butter
- 8 ounces cream cheese softened
- 1 cup powdered sugar
- 1 teaspoon vanilla extract
- 8 ounces whipped topping divided and thawed
- 2 pounds fresh strawberries sliced
- 1/4 cup granulated sugar for strawberries
Directions
- In a medium bowl combine the graham cracker crumbs 1/4 cup granulated sugar and melted butter. Press this mixture firmly into the bottom of an 8×8 inch baking dish.
- Place the dish with the crust into the refrigerator for at least 30 minutes. This is the key step that helps prevent a soggy crust by allowing the butter to solidify and create a barrier before adding the wet layers.
- While the crust chills prepare the strawberry layer. Gently mix the sliced strawberries with the 1/4 cup granulated sugar in a bowl. Let stand for about 10 minutes then carefully drain off any excess liquid. This also helps reduce moisture that could make the crust soggy.
- In a large bowl beat the softened cream cheese and powdered sugar until smooth. Stir in the vanilla extract.
- Gently fold in half of the whipped topping into the cream cheese mixture until just combined.
- Carefully fold the drained sugared strawberries into the cream cheese and whipped topping mixture.
- Spread this strawberry cream cheese layer evenly over the chilled graham cracker crust.
- For the top layer mix a few tablespoons of crushed strawberries or strawberry puree with the remaining half of the whipped topping until light pink. Spread this over the strawberry cream cheese layer.
- Cover the dish and refrigerate for at least 2 to 3 hours or until the dessert is completely set. The longer it chills the better the layers will hold and the crust will stay firm.
- Before serving top with fresh strawberry slices if desired.