

Why This Pistachio Cheesecake Will Be Your New Favorite
The Secret to a Perfectly Smooth, Crack-Free Surface
This Pistachio Cheesecake recipe prioritizes a flawless finish using time-tested methods. We employ a gentle water bath during baking and a crucial gradual cooling process directly in the oven.
These techniques work together to prevent drastic temperature changes, which are the primary culprits behind unsightly cracks. You’ll achieve that coveted smooth, unblemished top every single time.
That Irresistible Pistachio Flavor: A Decadent Twist
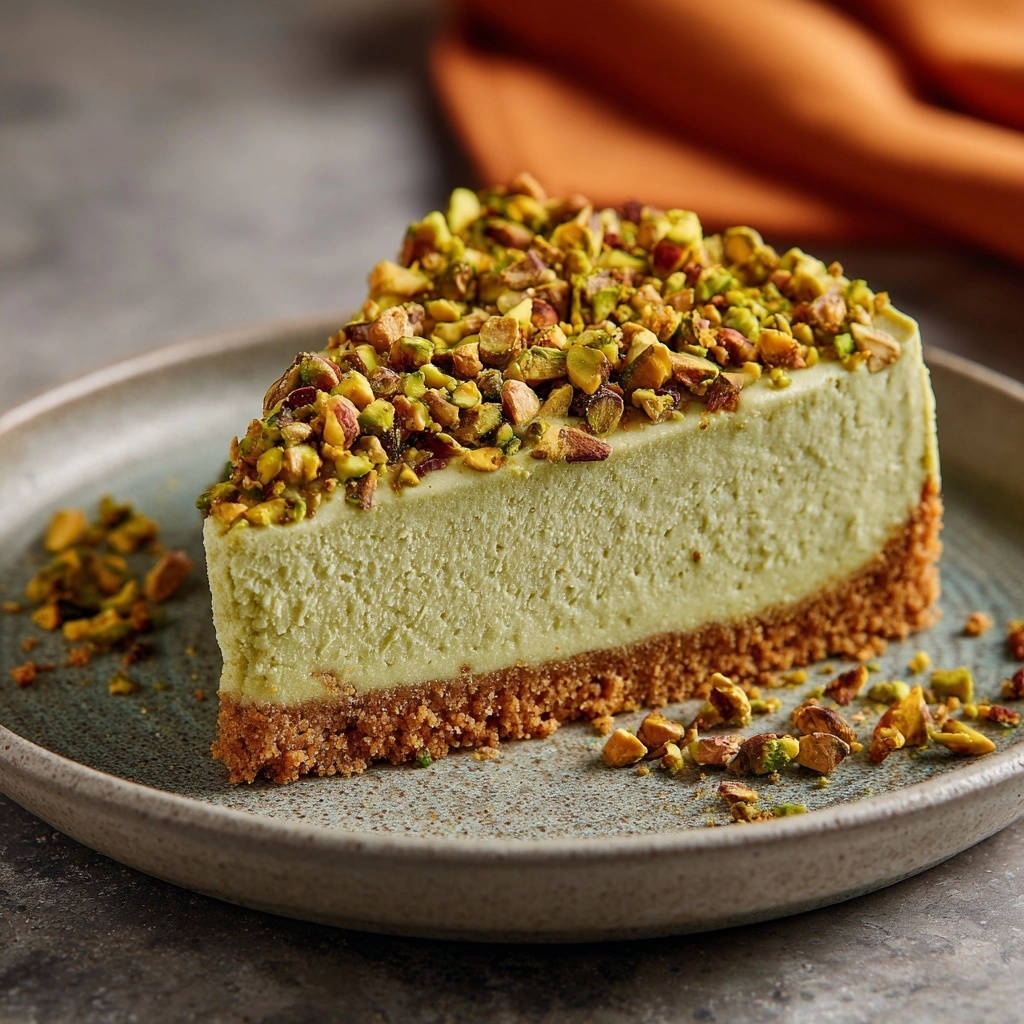
Experience the rich, nutty essence of pistachios woven throughout this creamy cheesecake. We don’t just sprinkle pistachios on top; finely ground pistachios are blended directly into the filling, infusing every bite with authentic flavor and a beautiful, subtle green hue.
The result is a sophisticated and distinctly flavored dessert that stands apart from traditional cheesecakes, offering a delightful surprise to your palate.
Effortless Elegance: A Showstopper for Any Occasion
Despite its luxurious appearance and gourmet taste, this Pistachio Cheesecake is surprisingly accessible for home bakers. The detailed, expert-guided steps ensure success, even for those new to cheesecake making.
It’s the ideal dessert for dinner parties, holidays, or any occasion where you want to serve something truly special without the stress. This cheesecake truly presents itself as a masterpiece.
Gear Up: Essential Tools for Your Cheesecake Masterpiece
The Indispensable Springform Pan (9-inch)
A 9-inch springform pan is non-negotiable for cheesecake. Its removable sides allow you to effortlessly release the delicate dessert without damaging its structure, ensuring a perfect presentation.
Look for one with a tight seal to minimize any chance of water seeping in from the water bath, even with foil protection.
Why a Water Bath Setup is Your Best Friend
You’ll need a larger roasting pan to create the crucial water bath. This pan should be wide enough to comfortably hold your springform pan with a little room around the edges.
Heavy-duty aluminum foil is also essential for securely wrapping the springform pan. This acts as a barrier, preventing water from reaching your crust and guaranteeing a perfectly baked, moist cheesecake.
Mixers and Measuring: Precision for Perfection
An electric mixer (handheld or stand mixer) is highly recommended for achieving the smooth, lump-free cream cheese base. The emphasis here is on low-speed mixing to prevent over-aeration.
Standard measuring cups and spoons, along with a large mixing bowl, will ensure you accurately portion ingredients for optimal results.
The Building Blocks of Flavor: What You’ll Need
Crafting the Perfect Graham Cracker Crust
Graham Cracker Crumbs: Finely crushed graham crackers form the classic, sturdy, and slightly sweet base that perfectly complements the creamy filling.
Granulated Sugar: A small amount of sugar enhances the sweetness of the crust, creating a balanced foundation.
Melted Unsalted Butter: The butter is crucial; it binds the graham cracker crumbs together, allowing them to be pressed into a firm, cohesive crust that won’t crumble.
The Creamy Heart: Key Filling Components
Cream Cheese (Softened): Full-fat cream cheese is the foundation, providing the characteristic rich, tangy, and undeniably creamy texture of cheesecake. Ensure it’s fully softened to room temperature for a lump-free batter.
Granulated Sugar: This provides the necessary sweetness, balancing the tanginess of the cream cheese and sour cream for a perfectly harmonious flavor profile.
Sour Cream (Room Temperature): Sour cream adds an extra layer of tangy richness and incredible moisture. It helps create that signature silky-smooth texture, so room temperature is vital for smooth incorporation.
Vanilla Extract: Pure vanilla extract deepens the overall flavor, adding a warm, aromatic note that enhances both the cream cheese and the pistachio.
Finely Ground Pistachios or Pistachio Paste: This is where our Pistachio Cheesecake gets its distinctive flavor and beautiful color. Finely grinding shelled pistachios or using high-quality pistachio paste ensures even distribution and intense nutty taste.
Large Eggs (Room Temperature): Eggs act as the primary binder for the cheesecake, providing structure and contributing to its rich, custard-like consistency. Room temperature eggs emulsify better, leading to a smoother batter.
Finishing Touches: Pistachios for Garnish
Chopped Pistachios: A generous sprinkle of roughly chopped pistachios provides a delightful textural contrast and an extra burst of nutty flavor just before serving, making for an inviting presentation.
Your Path to Pistachio Cheesecake Perfection: Step-by-Step Guide
The Foundation: A Golden Graham Cracker Crust
Preheat your oven to 350°F (175°C).
In a medium bowl, combine the finely crushed graham crackers, 1/4 cup granulated sugar, and melted unsalted butter. Mix thoroughly until the crumbs are evenly moistened.
Press this mixture firmly and evenly into the bottom of a 9-inch springform pan. Use the bottom of a glass or a flat measuring cup to compact it tightly for a sturdy base.
Bake for 8-10 minutes, just until the edges are lightly golden. Remove the crust from the oven and let it cool completely on a wire rack. This initial bake helps create a firm crust that won’t become soggy. Once cooled, lower your oven temperature to 325°F (160°C) for the cheesecake filling.
Preparing for the Water Bath Magic
To prepare for the water bath, securely wrap the outside of your cooled springform pan with two layers of heavy-duty aluminum foil.
Ensure the foil extends well up the sides of the pan and is crimped tightly to prevent any water from seeping in and ruining your crust.
Mastering the Cream Cheese Filling
Achieving Velvety Smoothness: The Cream Cheese Base
In a large mixing bowl, using an electric mixer on low speed, beat the softened cream cheese until it is completely smooth and free of any lumps. This step is crucial for an ultimately silky filling.
Gradually add the 1 cup granulated sugar to the cream cheese, continuing to beat on low speed. Mix only until just combined and smooth, making sure to scrape down the sides of the bowl frequently to ensure uniform mixing.
Infusing That Signature Pistachio Flavor
Gently mix in the room temperature sour cream and vanilla extract until they are fully incorporated into the cream cheese mixture. Avoid overmixing here, too.
Stir in the finely ground pistachios or pistachio paste. Mix just until the pistachios are evenly distributed, lending their characteristic flavor and subtle green hue to the batter.
The Gentle Egg Incorporation: Avoiding Cracks Before They Start
Add the large eggs one at a time, beating on very low speed just until each individual egg is incorporated before adding the next. This gentle approach is a cornerstone of crack prevention.
It is vital to avoid overmixing once the eggs are added; excessive air incorporation at this stage can cause the cheesecake to puff up excessively during baking, leading to cracks as it cools.
The Water Bath Assembly and Baking
Carefully pour the smooth pistachio cheesecake filling over the cooled graham cracker crust in the foil-wrapped springform pan.
Place the springform pan inside a larger roasting pan. Then, very carefully pour hot water into the roasting pan, ensuring it reaches about halfway up the sides of the springform pan.
Carefully transfer the entire roasting pan, with the cheesecake nestled inside, to the preheated 325°F (160°C) oven.
Bake for 60-70 minutes, or until the edges appear set, but the center (about 2-3 inches in the middle) still jiggles slightly when the pan is gently shaken. This delicate jiggle indicates perfect doneness.
The “Secret Weapon” Cooling Method
Once the cheesecake is baked, turn off the oven, but do not remove the cheesecake. Instead, prop the oven door open slightly and let the cheesecake cool in the water bath inside the oven for 1 hour.
This gradual cool-down is your ultimate secret weapon against cracks. It prevents the sudden temperature change that typically causes cheesecakes to contract and fissure.
Final Chilling and Presentation
After 1 hour of gradual cooling, carefully remove the springform pan from the water bath and the roasting pan. Gently remove the foil from around the pan.
Let the cheesecake cool completely on a wire rack at room temperature. Once it has reached room temperature, cover the cheesecake loosely with plastic wrap and refrigerate for at least 4 hours, or preferably overnight.
Before serving, carefully release the springform sides. Sprinkle generously with the remaining chopped pistachios for a beautiful and delicious finish.
Beyond the Recipe: Expert Tips for Flawless Cheesecake
Room Temperature Ingredients: A Non-Negotiable Start
Ensure your cream cheese, sour cream, and eggs are at true room temperature. Cold ingredients don’t emulsify properly, leading to lumps and requiring more mixing, which introduces air and can cause cracks.
Plan ahead by taking these ingredients out of the refrigerator at least an hour before you begin baking.
The Art of Gentle Mixing: Avoiding Over-Aeration
Always use the lowest speed on your electric mixer, especially after adding the eggs. Overmixing incorporates too much air into the batter, which causes the cheesecake to rise rapidly and then fall dramatically, leading to cracks.
Mix only until just combined at each stage, scraping down the bowl as needed, and resist the urge to beat vigorously.
Why a Water Bath Works Wonders for Moisture
The water bath creates a humid, gentle cooking environment, mimicking a slow steamer. This prevents the outer edges of the cheesecake from baking faster and drying out compared to the center.
It promotes even cooking and results in a wonderfully creamy texture throughout, reducing stress on the cheesecake structure as it sets.
The Gradual Cool-Down: Your Crack-Prevention MVP
Cooling the cheesecake slowly inside the turned-off oven with the door ajar is paramount. This method allows the cheesecake to slowly adjust to room temperature.
It prevents the sudden temperature shock that causes the delicate cheesecake structure to contract rapidly and crack, ensuring a beautifully smooth surface.
Don’t Rush the Chill: Patience Rewards Perfection
Chilling the cheesecake for at least 4 hours, and ideally overnight, is critical. This time allows the cheesecake to fully set, firm up, and for its flavors to meld and deepen.
Rushing this step can result in a cheesecake that is too soft, difficult to slice cleanly, and lacking in its full creamy texture and developed taste.
For Intense Pistachio Flavor: Boost with Extract
If you desire an even more pronounced pistachio flavor, particularly when using ground nuts rather than paste, consider adding 1/2 to 1 teaspoon of pure pistachio extract to the filling.
Start with a smaller amount and taste as you go, as extracts can be quite potent.
Troubleshooting Your Cheesecake: Common Pitfalls and Solutions
Why Did My Cheesecake Crack?
Cracks are commonly caused by overmixing the eggs, baking at too high a temperature, or a sudden temperature drop during cooling. Our recipe specifically counters these by emphasizing low-speed mixing, utilizing a water bath for even heat, and employing a gradual oven cool-down.
Always ensure your ingredients are at room temperature; this minimizes mixing time and the incorporation of excess air, a key factor in preventing cracks.
Is My Cheesecake Undercooked or Overcooked?
A perfectly baked cheesecake will have set edges but a slight, delicate jiggle in the center (about 2-3 inches wide) when gently shaken. If it’s too jiggly throughout, it’s undercooked.
If there’s no jiggle at all and it’s completely firm, it’s likely overcooked, which can lead to a dry texture and increased cracking.
Dealing with a Sticky or Soggy Crust
A soggy crust typically indicates water seepage from the bath. Ensure your springform pan is wrapped very securely with two layers of heavy-duty foil, leaving no gaps for water to enter.
Baking the crust for 8-10 minutes before adding the filling also helps to create a firm, protective barrier against moisture.
Serving Your Masterpiece & Keeping It Fresh
Elegant Serving Suggestions for Pistachio Cheesecake
Beyond a simple sprinkle of chopped pistachios, consider an elegant dollop of freshly whipped cream. For a touch of color and tartness, a vibrant raspberry coulis or a scattering of fresh berries like raspberries or blueberries makes a stunning accompaniment.
A delicate dusting of powdered sugar or a fine drizzle of white chocolate ganache can also elevate the presentation and flavor of your beautiful Pistachio Cheesecake.
How to Store Leftovers and Enjoy Later
To keep your Pistachio Cheesecake fresh, cover any leftovers tightly with plastic wrap or transfer slices to an airtight container. It will remain delicious in the refrigerator for up to 5-7 days.
For longer storage, individual slices can be wrapped securely in plastic wrap and then foil, then frozen for up to one month. Thaw overnight in the refrigerator before serving.
Can I Make This Cheesecake Ahead of Time?
Absolutely! This Pistachio Cheesecake is an excellent make-ahead dessert, perfect for entertaining. Its flavors actually deepen and the texture becomes even more refined after a full overnight chill in the refrigerator.
You can confidently bake it one or even two days in advance, allowing you to relax and enjoy your event without last-minute dessert stress. For another delightful make-ahead treat, consider trying these mini caramel cheesecakes, which also benefit from a good chill.
Your Questions Answered: Pistachio Cheesecake FAQs
Can I use store-bought pistachio paste instead of ground pistachios?
Yes, you can absolutely use store-bought pistachio paste. In fact, a good quality pistachio paste often provides a more intense and consistent flavor, along with a more vibrant green color. If your paste is sweetened, you might want to slightly reduce the sugar in the filling, or taste and adjust as needed.
What if I don’t have a springform pan?
While a springform pan offers the easiest release, you can use a regular 9-inch cake pan. Line the bottom and sides with parchment paper, allowing a generous overhang on two opposite sides to create “sling handles” for lifting the cheesecake out once it’s completely chilled. Just be extra gentle when removing and slicing.
Can this recipe be made gluten-free?
Yes, this Pistachio Cheesecake recipe is easily adaptable for a gluten-free diet. Simply substitute gluten-free graham crackers for the crust. Ensure all other ingredients, like vanilla extract and any store-bought pistachio paste, are certified gluten-free if that is a strict dietary requirement.
How do I know when my cheesecake is fully chilled?
Your cheesecake is fully chilled and ready to serve when it feels firm and cold to the touch all the way to the center. If it still feels soft or even slightly pliable, it needs more time in the refrigerator to properly set. Patience is key for clean, beautiful slices.
For more inspiration on nutty baked goods, you might enjoy this delicious Pistachio Loaf Cake, another fantastic way to enjoy the distinctive flavor of pistachios.
Ready to Create Your Own Flawless Pistachio Cheesecake?
This Pistachio Cheesecake recipe is more than just a list of ingredients; it’s your definitive guide to achieving a truly stunning, crack-free dessert every time. From the perfectly balanced nutty flavor to the velvety smooth texture, you’ll be amazed at the professional results you can create in your own kitchen. I encourage you to gather your ingredients and try this recipe. Share your beautiful creations and comments; I can’t wait to hear how much you love your new go-to Pistachio Cheesecake!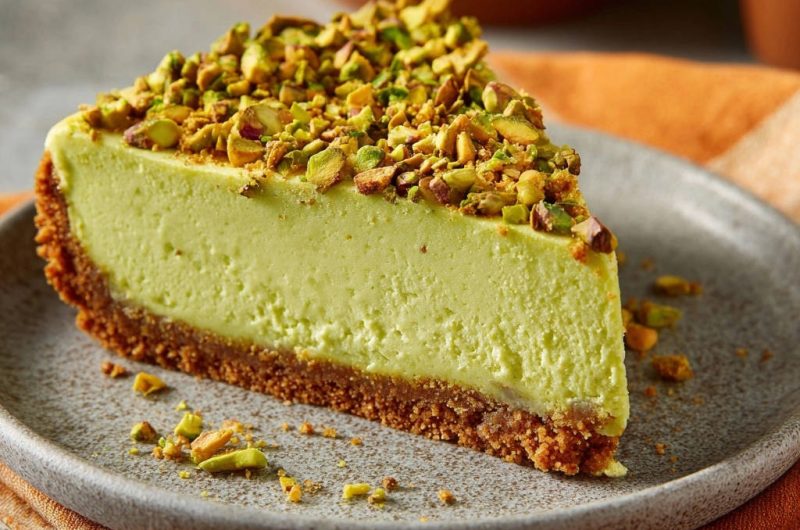
Pistachio Cheesecake
Course: DessertCuisine: American CuisineDifficulty: easy8
servings30
minutes1
hour300
minutesAmerican Cuisine
Ingredients
For the Crust:
1 1/2 cups finely crushed graham crackers
1/4 cup granulated sugar
1/2 cup unsalted butter, melted
For the Filling:
3 (8-ounce) packages cream cheese, softened to room temperature
1 cup granulated sugar
1/2 cup sour cream, at room temperature
2 teaspoons vanilla extract
1/4 cup finely ground pistachios or pistachio paste
3 large eggs, at room temperature
For the Topping:
1/2 cup chopped pistachios
Directions
- Preheat your oven to 350°F (175°C). For the crust, combine the crushed graham crackers, 1/4 cup granulated sugar, and melted butter in a medium bowl. Press the mixture firmly into the bottom of a 9-inch springform pan. Bake for 8-10 minutes, then remove from the oven and let cool completely. Lower the oven temperature to 325°F (160°C).
- Prepare your springform pan for a water bath. Securely wrap the outside of the pan with two layers of heavy-duty aluminum foil to prevent any water from seeping in. This step is essential for a crack-free cheesecake.
- In a large mixing bowl, using an electric mixer on low speed, beat the softened cream cheese until it is completely smooth. This ensures a lump-free base and is crucial for proper texture. Gradually add the 1 cup granulated sugar, continuing to beat on low speed until just combined and smooth, scraping down the sides of the bowl as needed.
- Gently mix in the room temperature sour cream and vanilla extract until fully incorporated. Stir in the finely ground pistachios or pistachio paste.
- Add the eggs one at a time, beating on very low speed just until each egg is incorporated before adding the next. Avoid overmixing once the eggs are added, as this can introduce too much air, which can cause your cheesecake to puff up and then crack as it cools.
- Pour the smooth filling over the cooled crust in the foil-wrapped springform pan. Place the springform pan inside a larger roasting pan. Carefully pour hot water into the roasting pan until it reaches about halfway up the sides of the springform pan. This water bath provides an even, moist baking environment that is key to preventing cracks.
- Carefully transfer the roasting pan with the cheesecake to the preheated 325°F (160°C) oven. Bake for 60-70 minutes, or until the edges are set but the center still jiggles slightly (about 2-3 inches in the middle) when gently shaken.
- This next step is your secret weapon against cracks: Turn off the oven, prop the oven door open slightly, and let the cheesecake cool in the water bath inside the oven for 1 hour. This gradual cooling prevents the sudden temperature change that often causes cracking.
- After 1 hour, carefully remove the springform pan from the water bath and the roasting pan. Remove the foil from around the pan. Let the cheesecake cool completely on a wire rack at room temperature. Once cooled, cover loosely and refrigerate for at least 4 hours, or preferably overnight, before releasing the springform sides.
- Before serving, sprinkle generously with the chopped pistachios. Enjoy your perfectly smooth and delicious cheesecake!


