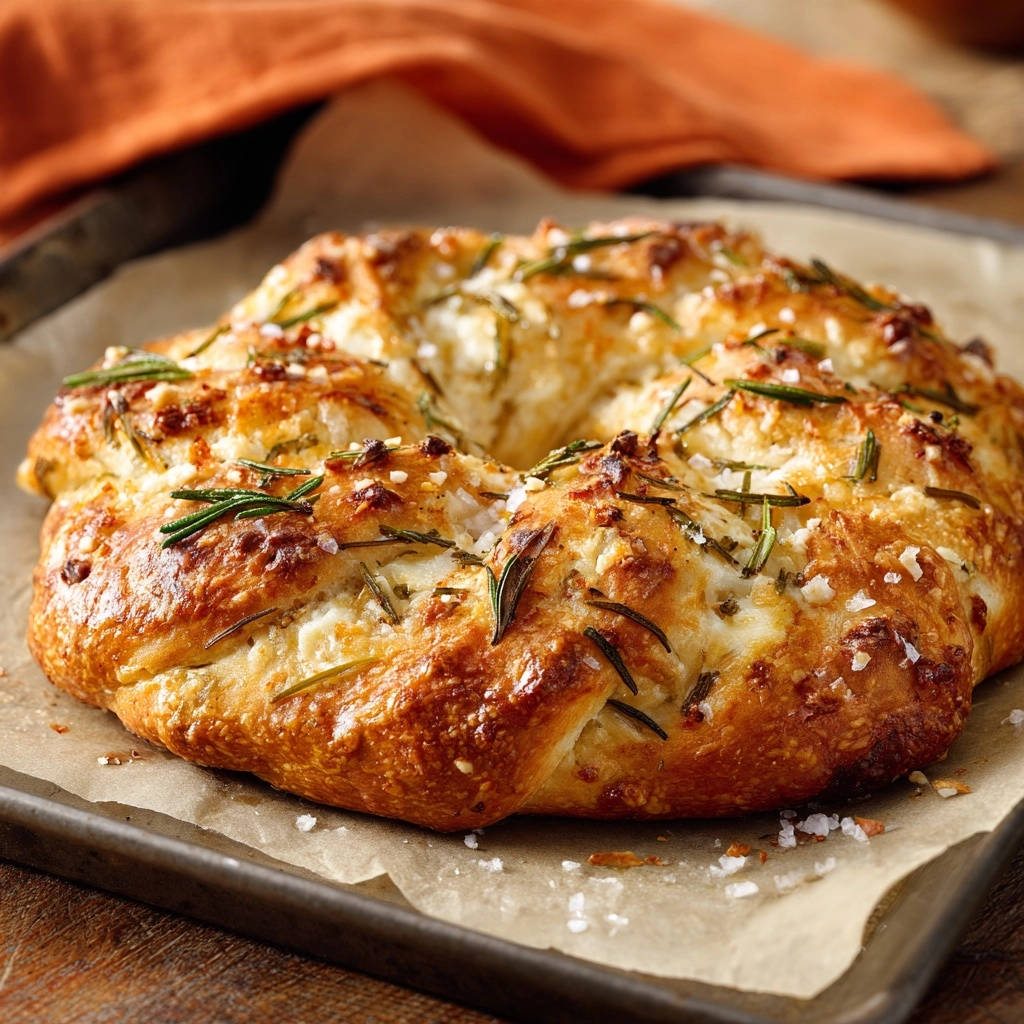
For years, my quest for homemade bread often ended in frustration – beautiful loaves on the outside, but stubbornly dry within. That all changed when I perfected this Rosemary Garlic Focaccia recipe. It’s truly a game-changer, guaranteeing an incredibly moist, tender crumb and a golden, flavorful crust every single time.
Why This Rosemary Garlic Focaccia Will Be Your New Favorite Bake
The “Never Dry” Secret: Achieving an Incredibly Moist Crumb
The secret to this focaccia’s unparalleled moistness lies in its high hydration. A wetter dough yields a more tender, open crumb, actively combating the common issue of dry, dense homemade bread. You’ll be amazed at how effortlessly it melts in your mouth.
Simplicity Meets Gourmet: Easy Steps for Stunning Results
Don’t be intimidated by the impressive appearance! This Rosemary Garlic Focaccia recipe breaks down the process into clear, manageable steps. Even if you’re a beginner baker, you’ll achieve professional-level results that taste like they came from an artisan bakery.
A Flavor Symphony: The Perfect Balance of Rosemary and Garlic
Fresh rosemary and pungent garlic are perfectly balanced in this recipe, infusing every bite with aromatic warmth. The interplay of earthy rosemary with sharp garlic creates a memorable flavor profile that’s both comforting and sophisticated, making it a crowd-pleaser for any occasion.
The Building Blocks of Flavor: Essential Ingredients for Rosemary Garlic Focaccia
Flour & Yeast: The Foundation of Structure and Rise
All-purpose flour provides the necessary gluten structure for a chewy yet tender crumb. Its versatility makes it ideal for this recipe, ensuring consistent results.
Instant yeast is incredibly convenient, allowing you to skip the proofing step and mix it directly with your dry ingredients. It ensures a reliable and robust rise, leading to that desirable airy texture.
The Magic of Olive Oil: Flavor, Moisture, and Golden Crust
High-quality extra virgin olive oil is paramount for this Rosemary Garlic Focaccia. It contributes significantly to the rich flavor, helps maintain the dough’s moisture, and plays a crucial role in developing that irresistible golden, crisp crust.
Fresh Aromatics: Rosemary & Garlic for Unforgettable Taste
Using fresh rosemary leaves is essential; their vibrant, piney aroma far surpasses dried alternatives. Similarly, freshly minced garlic delivers a punchy, savory depth that can’t be replicated by garlic powder alone. These two aromatics are the stars of this focaccia, creating its signature scent and taste.
Salt: Enhancing Every Bite
Fine sea salt is incorporated into the dough, enhancing the overall flavor and controlling the yeast activity. The final sprinkle of coarse sea salt on top provides a delightful textural crunch and bursts of savory goodness with every bite.
Gather Your Gear: Essential Tools for Focaccia Success
Large Mixing Bowl: Essential for combining ingredients and the initial proofing.
9×13 Inch Baking Pan or Large Baking Sheet: The perfect size for achieving the ideal focaccia thickness and crispy edges.
Plastic Wrap or Clean Kitchen Towel: For covering the dough during its crucial proofing stages.
Wire Rack: For proper cooling, ensuring a crisp bottom and preventing sogginess.
Whisk & Spatula: Basic tools for mixing dry ingredients and the wet dough.
Your Journey to a Perfect Rosemary Garlic Focaccia: Step-by-Step
-
Prepare the Dry Ingredients:
In a large bowl, whisk together the flour, instant yeast, granulated sugar, and 1 teaspoon of the fine sea salt. This initial step is crucial for even distribution of leavening and seasoning throughout the dough, ensuring consistent flavor in your Rosemary Garlic Focaccia.
-
Combine Wet and Dry: The High Hydration Mix:
Pour the warm water and 1/4 cup of the olive oil into the dry ingredients. Stir with a wooden spoon or spatula until just combined and no dry spots of flour remain. The dough will be very wet and shaggy at this stage; embrace this high hydration, as it is the secret to a supremely moist and airy crumb.
-
The First Rise: Patience is Key:
Cover the bowl with plastic wrap or a clean kitchen towel and let it rest in a warm place for 1 hour, or until doubled in size. A warm, draft-free environment helps the yeast activate effectively, leading to a robust rise and light texture.
-
Prepare the Pan and Transfer Dough:
Lightly oil a 9×13 inch baking pan or a large baking sheet with 1 tablespoon of olive oil. Gently transfer the risen dough to the prepared pan. The dough will be sticky, but handle it as little as possible to maintain its precious airy structure developed during the first proof.
-
Dimpling for Perfection:
Drizzle the remaining 1 tablespoon of olive oil over the top of the dough. Using your fingertips, gently press dimples all over the surface of the dough, making sure to create depressions without tearing through the dough. This characteristic focaccia technique creates those wonderful air pockets and allows the olive oil to seep in, further preventing dryness and adding rich flavor.
-
Add Aromatics: Rosemary and Garlic Infusion:
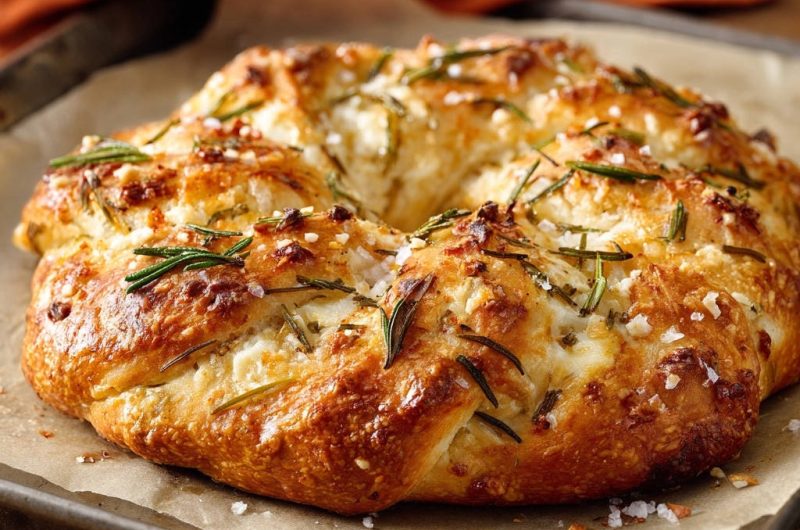
Sprinkle the minced garlic and chopped fresh rosemary evenly over the top of the dimpled dough. Press them lightly into the dough to ensure they adhere during baking and infuse the focaccia with their delightful aroma.
-
The Second Proof: Puffy and Ready:
Cover the pan loosely with plastic wrap or a clean kitchen towel and let it proof again in a warm place for another 30-45 minutes, or until noticeably puffy. This second rise is vital for developing additional lightness and the classic airy texture of a perfect focaccia.
-
Preheat Your Oven:
While the dough is proofing, preheat your oven to 400°F (200°C). Ensuring your oven is fully preheated is important for a consistent bake and excellent oven spring, resulting in a beautiful rise.
-
Final Seasoning: Coarse Sea Salt:
Once proofed, sprinkle the coarse sea salt generously over the top of the focaccia. This adds a delightful textural contrast and bursts of savory flavor, completing the signature Rosemary Garlic Focaccia profile.
-
Bake to Golden Perfection:
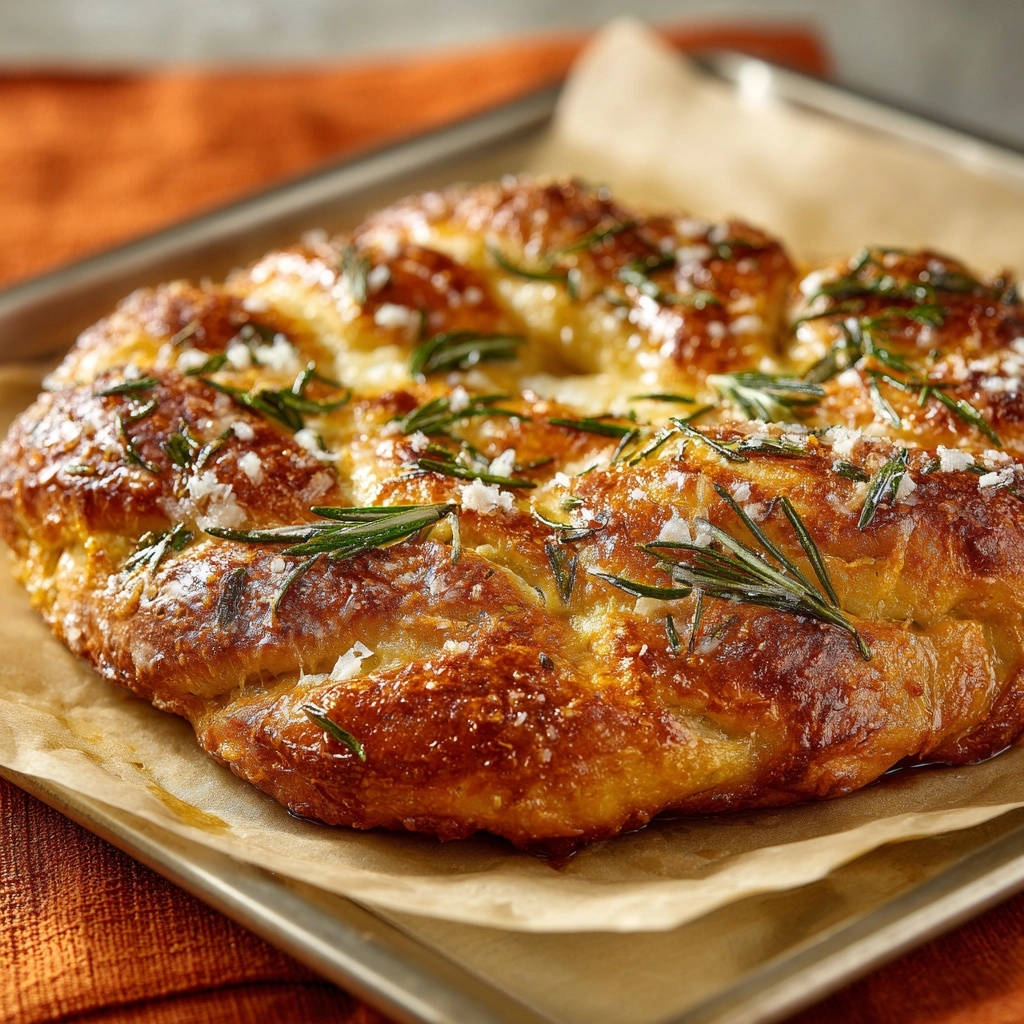
Bake for 25-30 minutes, or until the focaccia is golden brown on top and cooked through. Avoid overbaking, as this is a common cause of dry bread. A perfectly golden crust indicates the ideal bake, ensuring a moist interior and crisp exterior.
-
Cool and Serve:
Remove from the oven and transfer the focaccia to a wire rack to cool slightly. Serving warm allows you to fully appreciate the incredible moistness and aromatic flavors. Enjoy torn or sliced, savoring every tender bite!
Chef’s Secrets: Elevate Your Focaccia Baking
Don’t Fear Sticky Dough: The high hydration is essential for a moist crumb, so resist the urge to add more flour during mixing. A wet, sticky dough is exactly what you want for a truly tender Rosemary Garlic Focaccia.
Optimal Proofing Environment: A warm (around 70-75°F or 21-24°C) and draft-free spot is ideal for yeast activity, similar to what you’d want for perfect homemade loaf bread. You can create one by placing the bowl in a slightly warm (but not hot) oven that’s turned off, or near a sunny window.
The Art of Gentle Dimpling: Use flat fingertips and press down firmly but gently. The goal is to create depressions without deflating the dough too much or tearing it, which helps create those signature air pockets and pockets for the olive oil.
Trust Your Oven, Not Just the Timer: Ovens vary, so the specified baking time is a guideline. Look for a deep golden-brown color on the top and bottom, and listen for a hollow sound when tapped, indicating it’s fully cooked but not overbaked.
Cooling is Crucial: Transferring the focaccia to a wire rack immediately after baking prevents the bottom from becoming soggy from trapped steam and allows the internal structure to set properly. This ensures your focaccia retains its ideal texture.
Focaccia Fixes: Common Problems & Quick Solutions
My Focaccia is Too Dense or Dry
This is often due to over-mixing the dough, adding too much flour, or overbaking. Ensure you measure ingredients accurately (especially flour), handle the dough minimally to preserve air, and remove it from the oven as soon as it’s golden brown, not a minute longer.
It Didn’t Rise Enough
Lack of rise can be caused by inactive yeast, water that’s too hot or too cold, or a cold proofing environment. Always check your yeast’s expiration date, ensure water is within the specified temperature range, and proof in a consistently warm, draft-free spot.
Unevenly Baked or Burnt Toppings
If your oven has hot spots, rotate the pan halfway through baking to promote even browning. For burnt garlic or rosemary, ensure they are pressed gently into the dough. If necessary, loosely tent the focaccia with foil during the last 5-10 minutes of baking to protect them.
Serving Suggestions: What to Enjoy with Your Rosemary Garlic Focaccia
As an Appetizer: Serve warm with extra virgin olive oil for dipping, balsamic glaze, or pair with a silky smooth homemade hummus.
Alongside Meals: This Rosemary Garlic Focaccia is perfect with pasta dishes, hearty soups, stews, or a fresh green salad. Its rich flavor complements a wide range of main courses.
Sandwiches & Paninis: Slice it horizontally to make delicious, flavorful sandwiches filled with your favorite meats, cheeses, and vegetables. Its sturdy yet soft texture holds up beautifully.
Breakfast or Brunch: A delightful accompaniment to eggs, crispy bacon, or a fresh fruit platter, adding a savory and aromatic touch to your morning.
Storing Your Rosemary Garlic Focaccia: Keeping it Fresh
To keep your focaccia at its best, store it at room temperature in an airtight container or tightly wrapped in plastic wrap for up to 2-3 days. This helps maintain its tender crumb and prevents it from drying out.
To refresh leftover focaccia, sprinkle a little water over it and warm it in a preheated oven at 350°F (175°C) for 5-10 minutes, or until soft and fragrant again. This brings back its freshly baked texture.
Planning Ahead: Can You Make Focaccia in Advance?
Yes, you can prepare the focaccia dough a day in advance! After the first rise, instead of transferring it to the baking pan, cover the bowl tightly with plastic wrap and refrigerate for up to 24 hours. The cold temperature slows down the yeast activity, allowing for a convenient make-ahead option.
On baking day, remove the dough from the fridge, let it come to room temperature for about 1-2 hours, then proceed with shaping, dimpling, and the second proof as directed. Baked focaccia also freezes wonderfully. Once completely cooled, wrap individual slices or the entire slab tightly in plastic wrap, then in foil. Store in a freezer-safe bag for up to 3 months. Thaw at room temperature and reheat as desired for fresh-tasting results.
Your Focaccia Questions Answered
Can I Use Dried Rosemary Instead of Fresh?
While fresh rosemary provides the best flavor and aroma for Rosemary Garlic Focaccia, you can substitute dried rosemary if absolutely necessary. Use about half the amount of dried rosemary as fresh, as its flavor is more concentrated. Crush it slightly before sprinkling to release its oils.
Are There Gluten-Free Focaccia Alternatives?
Yes, it’s possible to make a gluten-free version, but it requires a specific blend of gluten-free flours, usually with xanthan gum to provide structure. The texture might differ slightly from traditional focaccia, often being a bit denser, but still delicious.
What’s the Best Temperature for Warm Water to Activate Yeast?
The ideal temperature for warm water to activate instant yeast is between 105-115°F (40-46°C). Water that’s too cold won’t activate the yeast, leading to a poor rise, and water that’s too hot can kill it, preventing any rise at all.
How Can I Make This Focaccia Even More Garlic-Forward?
To intensify the garlic flavor in your Rosemary Garlic Focaccia, you can infuse some of the olive oil with thinly sliced garlic cloves beforehand. Gently warm the olive oil with the garlic (don’t burn it!), then strain before using the infused oil. You can also add a little garlic powder to the dough mix, in addition to fresh minced garlic on top.
Ready to Bake? Share Your Rosemary Garlic Focaccia Masterpiece!
Now that you’re equipped with all the secrets to a perfectly moist, tender, and incredibly flavorful Rosemary Garlic Focaccia, it’s time to get baking! This recipe is designed for success, promising a fragrant, airy bread that will impress everyone at your table and become a staple in your home.
We’d love to see your beautiful focaccia creations! Share your photos and tag us on social media, or leave a comment below with your experience and any delicious variations you tried. Happy baking, and enjoy your sensational Rosemary Garlic Focaccia!
Rosemary Garlic Focaccia
Course: BreadCuisine: Italian cuisineDifficulty: easy8
servings20
hours25
minutesItalian cuisine
Ingredients
3 cups (360g) all-purpose flour
2 teaspoons instant yeast
1 teaspoon granulated sugar
1 1/2 teaspoons fine sea salt, divided
1 1/2 cups (360ml) warm water (105-115°F)
1/4 cup plus 2 tablespoons olive oil, divided
2 cloves garlic, minced
2 tablespoons fresh rosemary leaves, chopped
1 tablespoon coarse sea salt, for topping
Directions
- In a large bowl, whisk together the flour, instant yeast, granulated sugar, and 1 teaspoon of the fine sea salt. This blend ensures even distribution of dry ingredients.
- Pour the warm water and 1/4 cup of the olive oil into the dry ingredients. Stir with a wooden spoon or spatula until just combined and no dry spots of flour remain. The dough will be very wet and shaggy. This high hydration is key to a moist crumb.
- Cover the bowl with plastic wrap or a clean kitchen towel and let it rest in a warm place for 1 hour, or until doubled in size.
- Lightly oil a 9×13 inch baking pan or a large baking sheet with 1 tablespoon of olive oil. Gently transfer the risen dough to the prepared pan. The dough will be sticky, but handle it as little as possible to maintain its airy structure.
- Drizzle the remaining 1 tablespoon of olive oil over the top of the dough. Using your fingertips, gently press dimples all over the surface of the dough, making sure to create depressions without tearing through the dough. This helps create those characteristic focaccia air pockets and allows the olive oil to seep in, further preventing dryness.
- Sprinkle the minced garlic and chopped fresh rosemary evenly over the top of the dimpled dough.
- Cover the pan loosely with plastic wrap or a clean kitchen towel and let it proof again in a warm place for another 30-45 minutes, or until noticeably puffy.
- While the dough is proofing, preheat your oven to 400°F (200°C).
- Once proofed, sprinkle the coarse sea salt generously over the top of the focaccia.
- Bake for 25-30 minutes, or until the focaccia is golden brown on top and cooked through. Avoid overbaking, as this is a common cause of dry bread. A perfectly golden crust indicates the perfect bake.
- Remove from the oven and transfer the focaccia to a wire rack to cool slightly. Serve warm, torn or sliced, and enjoy the incredibly moist and flavorful result!
Notes
- High dough hydration and avoiding overbaking are key for a moist, tender crumb.