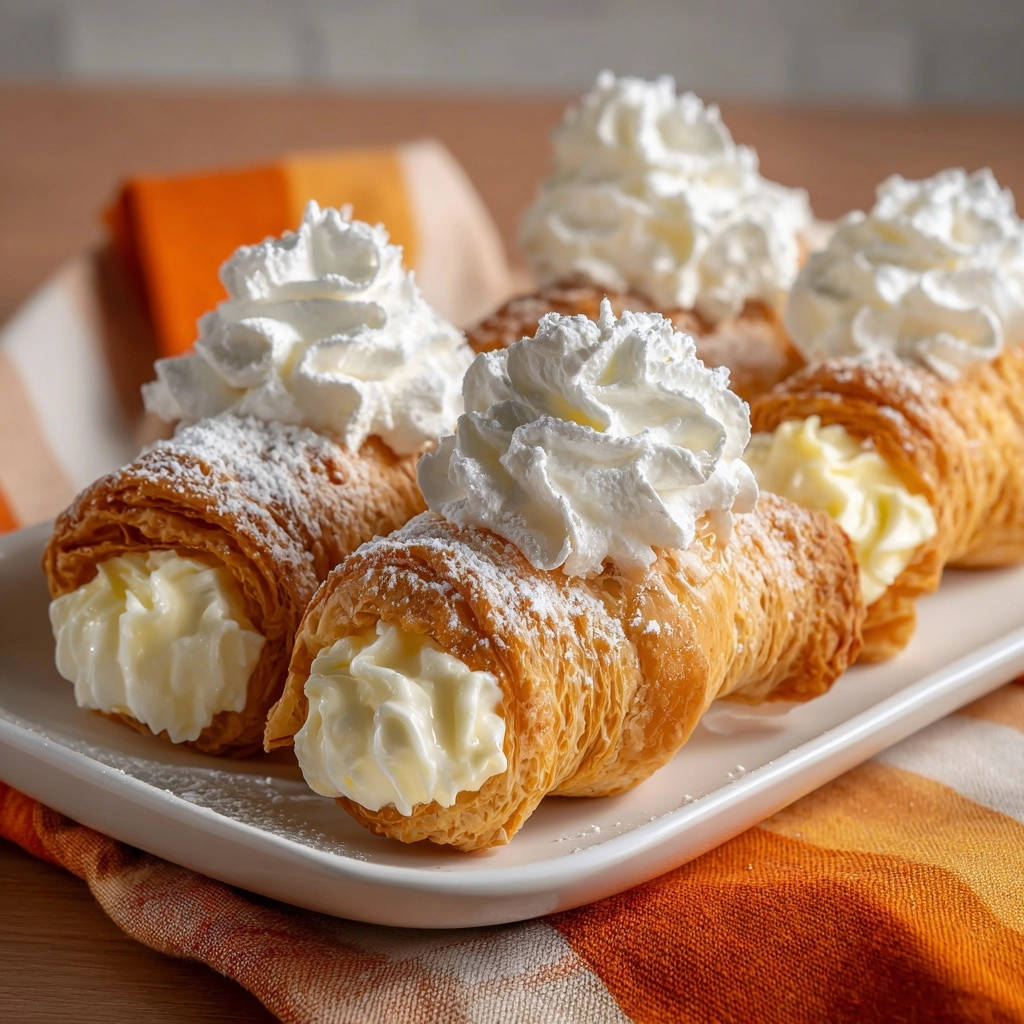
For years, I chased that elusive perfectly crisp cream horn, only to be met with disappointment as they quickly turned soft. This recipe for Flaky Cream Horns finally cracked the code, ensuring each bite offers that satisfying crunch before melting into creamy delight.
It’s not just a dessert; it’s a promise of effortless elegance and lasting crispness, making these a truly special treat for any occasion or a cherished moment all to yourself.
Why This Flaky Cream Horns Recipe Belongs in Your Kitchen
The Secret to Unbeatable Crispness, Every Single Time
The frustration of soggy cream horns is a thing of the past with this recipe. Our critical method ensures the delicate pastry shells remain gloriously flaky, thanks to a precise cooling technique.
This attention to detail prevents moisture buildup, locking in that desirable crisp texture that makes every cream horn a true indulgence.
Effortless Elegance for Any Gathering or Sweet Craving
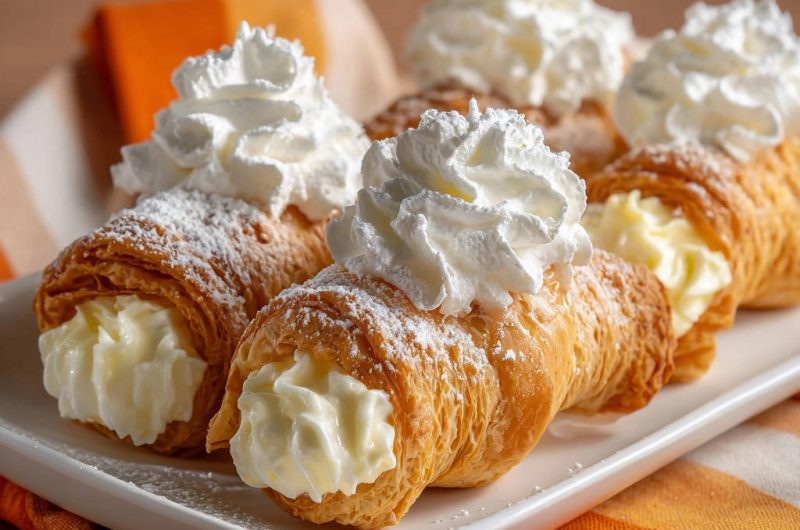
Despite their sophisticated appearance, these Flaky Cream Horns are surprisingly straightforward to prepare. They offer a gourmet dessert experience without hours of complicated steps.
Perfect for impressing guests at a dinner party or simply elevating your everyday sweet cravings, their beautiful presentation and exquisite taste make them a showstopper for any setting.
Gathering Your Essentials: Ingredients for Perfect Flaky Cream Horns
The Star of the Show: Puff Pastry Power
A good quality frozen puff pastry is your best friend here. It provides the foundational flakiness without the intensive labor of making your own dough.
Proper thawing is crucial: allow it to thaw slowly in the refrigerator or at room temperature just until pliable. This prevents tearing and ensures an even, airy bake.
Crafting the Silky Cream Cheese Filling
Softened cream cheese is essential for a lump-free, velvety smooth filling. It creates a rich, tangy counterpoint to the sweet pastry.
Powdered sugar blends seamlessly for sweetness, while vanilla extract adds a classic aromatic depth. Milk is added gradually to achieve the ideal creamy yet firm consistency that pipes beautifully and holds its shape.
Whipped Cream Perfection: Achieving Stiff Peaks
Starting with very cold heavy cream is paramount for stable, voluminous whipped cream. Cold cream whips faster and holds air better, resulting in lofty peaks.
A touch of powdered sugar and vanilla extract enhances the flavor, creating a light, ethereal topping that perfectly complements the rich cream cheese filling.
Sweet Finishing Touches: Egg Wash & Granulated Sugar
The beaten egg wash provides a beautiful golden sheen and helps the pastry brown evenly during baking. It also acts as a light adhesive for the sugar.
Granulated sugar sprinkled over the egg wash adds a delightful sugary crunch to the exterior of the baked pastry, elevating both texture and sweetness.
Step-by-Step Mastery: Creating Your Flaky Cream Horns
Preparing Your Pastry and Molds with Precision
- Preheat & Prepare:
Set your oven to 400°F (200°C) and line a baking sheet with parchment paper. If using cream horn molds, lightly grease them to ensure easy release later.
- Unfold and Cut:
Gently unfold the thawed puff pastry sheet on a lightly floured surface. Use a sharp knife or pastry wheel to cut the pastry into uniform 1-inch wide strips.
- Wrap with Care:
Carefully wrap each pastry strip around a cream horn mold. Begin at the pointed end, overlapping slightly as you work towards the wider opening. Gently press the end of the strip to secure it in place.
- Egg Wash & Sugar Sprinkle:
Arrange the wrapped molds on your prepared baking sheet. Brush each pastry horn generously with the beaten egg, then sprinkle with granulated sugar for a beautiful golden crust and added crispness.
Baking for Golden Perfection
- Oven Time:
Bake for 12-18 minutes, or until the pastry is beautifully puffed, evenly golden brown, and visibly crisp. Keep a close eye on them as baking times can vary.
The Cooling Secret: Ensuring Lasting Flakiness
- Immediate Release & Complete Cool Down:
This is crucial! As soon as they come out of the oven, immediately and gently slide the warm pastry shells off the molds. Transfer them to a wire rack and allow them to cool completely to room temperature. This step is essential for preventing sogginess and maintaining that delightful flakiness, similar to the method used for strawberry cream puff pastry bites.
Mastering the Cream Fillings
- Whip Up the Cream Cheese Filling:
While the shells cool, prepare the cream filling. In a medium bowl, beat softened cream cheese until perfectly smooth. Incorporate 1/2 cup powdered sugar and vanilla extract, beating until well combined. Gradually add milk, one tablespoon at a time, until the mixture is smooth, creamy, and firm enough to hold its shape.
- Prepare the Whipped Topping:
In a separate, very cold bowl, beat the very cold heavy cream with 2 tablespoons powdered sugar and 1/2 teaspoon vanilla extract. Continue beating until stiff peaks form, indicating a perfectly stable whipped cream.
Assembling and Serving Your Culinary Masterpiece
- Fill Just Before Serving:
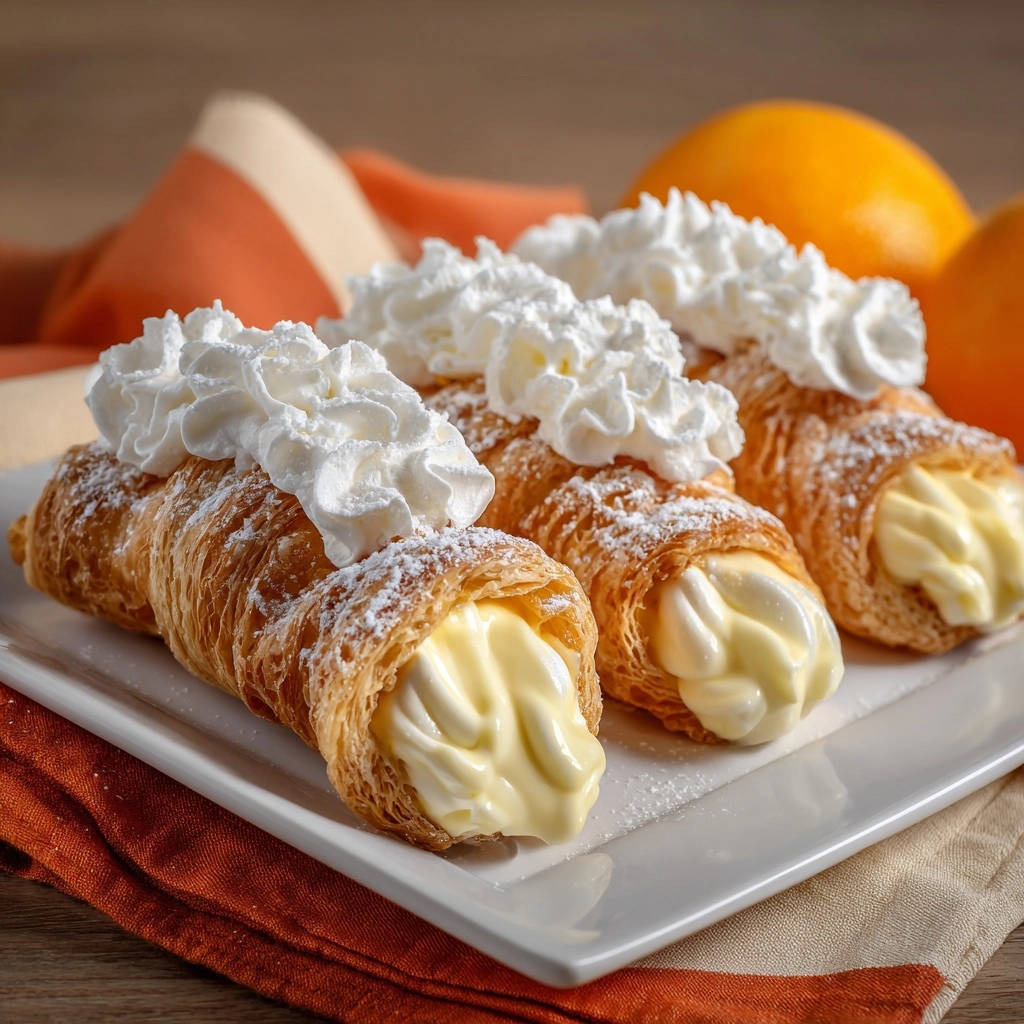
To ensure maximum crispness, fill the cooled pastry shells with the cream cheese filling just before serving. You can use a piping bag with a wide tip for a professional finish or a spoon for a more rustic look. For a generous filling, pipe from both ends.
- Top & Present:
Finish each filled cream horn with a dollop of the fresh whipped cream. Dust lightly with extra powdered sugar for an elegant presentation. Serve immediately to enjoy them at their absolute best!
Expert Tips & Tricks for Cream Horn Success
Don’t Rush the Thaw: Puff Pastry Best Practices
Puff pastry performs best when thawed gently and evenly. Rushing the thaw can make the dough sticky and prone to tearing, which affects its ability to puff beautifully.
Ideally, thaw it overnight in the refrigerator. If you’re short on time, leave it at room temperature for about 30-40 minutes until it’s pliable but still cool to the touch.
The Goldilocks Zone: Perfect Baking Temperature and Time
Baking at a high temperature (400°F/200°C) is key to achieving that characteristic puff and flakiness. The heat creates steam that lifts the layers of the pastry.
Keep a close eye on the color; they should be a rich golden brown, not just pale yellow. This indicates they are fully baked and crisp throughout.
Chilling the Cream for Fluffy Results
For the most stable and voluminous whipped cream, ensure your heavy cream, mixing bowl, and even the beaters are very cold. Pop them in the freezer for 10-15 minutes before whipping.
This super-chilled environment helps the fat molecules in the cream emulsify properly, trapping more air and creating light, stiff peaks.
Filling Timing is Everything: Preserve Crispness
The number one rule for Flaky Cream Horns is to fill them right before serving. The moisture from the cream fillings will inevitably soften the crisp pastry over time.
Pre-baking and cooling the shells allows you to prepare ahead, then assemble quickly for maximum enjoyment.
Sealing the Deal: Ensuring Pastry Strips Stay Put
When wrapping the pastry around the molds, make sure each overlap is firmly pressed onto the previous layer. Pay extra attention to the very end of the strip.
A gentle press or even a tiny dab of egg wash on the very last edge can help seal it, preventing unraveling during baking.
Troubleshooting Common Cream Horn Challenges
Why Are My Flaky Cream Horns Soggy?
The most common culprit is not fully cooling the pastry shells after baking, or filling them too far in advance. Warm pastry traps steam, leading to sogginess.
Always ensure the shells are completely cooled to room temperature before filling. Also, aim to fill them no more than an hour before serving to maintain optimal crispness.
My Pastry Isn’t Flaking Properly!
This can happen if the puff pastry was overworked, too warm during handling, or not baked at a high enough temperature. Overworking compresses the layers, hindering the puff.
Ensure your pastry remains cold and handle it minimally. Also, verify your oven temperature with an oven thermometer for accurate baking conditions.
Cream Filling Too Runny or Too Stiff?
If your cream cheese filling is too runny, gradually add a tablespoon or two more of powdered sugar until it reaches the desired firm consistency. If it’s too stiff, add milk a teaspoon at a time.
For whipped cream that won’t hold peaks, ensure your cream was very cold and you beat it long enough. If it’s still struggling, a small amount of cream of tartar can help stabilize it.
My Cream Horns Unraveled While Baking!
Unraveling often occurs if the pastry strips weren’t wrapped tightly enough or the ends weren’t properly secured. Each overlap needs to adhere well to the layer beneath it.
When you reach the end of the strip, press it firmly into the mold or dab a tiny bit of egg wash to help it stick. You can also slightly moisten the very end of the strip with water before pressing it down.
Essential Tools for Your Flaky Cream Horns Journey
Must-Have Equipment for Perfect Shaping and Filling
Having the right tools makes the process of crafting perfect Flaky Cream Horns much smoother and more enjoyable.
Cream Horn Molds: These conical metal molds are indispensable for shaping the pastry. They allow the pastry to puff outward while maintaining the iconic horn shape.
Piping Bag and Wide Tip: For a clean and professional fill, a piping bag fitted with a wide, round, or star tip makes quick work of filling the cooled shells.
Baking Sheets and Parchment Paper: Essential for even baking and preventing sticking. Parchment paper also makes cleanup a breeze.
Wire Rack: Crucial for cooling the baked shells completely, allowing air circulation on all sides to prevent condensation and maintain crispness.
Electric Mixer: Whether a stand mixer or hand mixer, this is vital for achieving perfectly smooth cream cheese filling and stiff whipped cream.
Mixing Bowls: You’ll need separate bowls for your fillings to ensure proper preparation and stability of each component.
Serving, Storing, and Enjoying Your Flaky Cream Horns
Best Ways to Serve These Delicious Treats
Flaky Cream Horns are incredibly versatile and perfect for a variety of occasions. Serve them as a light dessert after a meal, an elegant addition to a brunch spread, or the star of an afternoon tea party.
For an extra flourish, consider garnishing with fresh berries, a mint sprig, or a light drizzle of chocolate sauce. They are best enjoyed immediately after assembly for peak crispness.
How to Store Leftover Flaky Cream Horns (If Any!)
To preserve their quality, store unassembled components separately. The baked, cooled pastry shells can be kept in an airtight container at room temperature for up to 2 days.
The cream cheese filling and whipped cream should be stored in separate airtight containers in the refrigerator for up to 2 days. Once assembled, cream horns are best eaten within a few hours. If stored in the fridge, the pastry will soften.
Can You Make Flaky Cream Horns Ahead of Time?
Yes, you can absolutely prepare most components ahead of time to streamline your serving day. Bake the pastry shells up to 2 days in advance, allowing them to cool completely before storing.
Both the cream cheese filling and the whipped cream can be made 1 day ahead and kept refrigerated. This allows for quick assembly just before your guests arrive, ensuring truly fresh and delicious pastries.
Frequently Asked Questions About Flaky Cream Horns
Can I Use Store-Bought Whipped Cream for My Cream Horns?
While you can use store-bought whipped cream in a pinch, I highly recommend making your own. Homemade whipped cream is far superior in taste, texture, and stability.
Store-bought versions tend to be less stable and may deflate more quickly, potentially affecting the overall presentation and experience of your Flaky Cream Horns.
What If I Don’t Have Cream Horn Molds? Are There Alternatives?
No molds? No problem! You can fashion makeshift molds using aluminum foil. Tear off pieces of heavy-duty foil and shape them into cones.
Ensure they are sturdy enough to hold their shape during baking. Lightly grease these homemade cones before wrapping them with pastry strips.
Are Flaky Cream Horns Naturally Gluten-Free?
No, traditional Flaky Cream Horns, made with puff pastry, are not naturally gluten-free as puff pastry contains wheat flour. However, many brands now offer gluten-free puff pastry options.
If you need a gluten-free version, look for these specialized puff pastry sheets and follow the recipe as directed. Always check ingredient labels carefully.
Can I Flavor the Cream Filling Differently?
Absolutely! Get creative with your cream fillings. You can add citrus zest (lemon, orange, or lime) for a bright flavor, a teaspoon of espresso powder for a coffee twist, or even a tablespoon of cocoa powder for a subtle chocolate note.
Experiment with different extracts like almond or peppermint for unique seasonal variations that elevate your Flaky Cream Horns.
Ready to Delight? Share Your Flaky Cream Horns Masterpiece!
You now have all the secrets to crafting truly magnificent Flaky Cream Horns that stay crisp and delicious. This recipe promises not just a dessert, but a delightful experience, guaranteed to impress anyone who takes a bite.
Don’t wait to try this recipe! Bake a batch, savor the perfect crunch and creamy filling, and be sure to share your beautiful creations with us.
Flaky Cream Horns
Course: PastryCuisine: International CuisineDifficulty: easy6
servings30
minutes15
minutes45
minutesInternational Cuisine
Ingredients
1 sheet (about 9×14 inches) frozen puff pastry, thawed
1 large egg, beaten
1/4 cup granulated sugar
For the Cream Filling:
8 ounces cream cheese, softened
1/2 cup powdered sugar, plus more for dusting
1 teaspoon vanilla extract
2 tablespoons milk
For the Whipped Topping:
1 cup heavy cream, very cold
2 tablespoons powdered sugar
1/2 teaspoon vanilla extract
Directions
- Preheat oven to 400F (200C). Line a baking sheet with parchment paper. If using cream horn molds, lightly grease them.
- Unfold the thawed puff pastry sheet on a lightly floured surface. Cut it into long strips, about 1 inch wide.
- Carefully wrap each pastry strip around a cream horn mold, starting from the pointed end and overlapping slightly, working towards the wider end. Gently press the end to secure it.
- Place the wrapped molds on the prepared baking sheet. Brush the pastry with the beaten egg. Sprinkle generously with granulated sugar.
- Bake for 12-18 minutes, or until the pastry is puffed, golden brown, and crisp.
- Once baked, immediately and gently slide the warm pastry shells off the molds. Place them on a wire rack and allow them to cool completely to room temperature. This is essential for preventing sogginess later.
- While shells cool, prepare the cream filling: In a medium bowl, beat the softened cream cheese until smooth. Add 1/2 cup powdered sugar and vanilla extract; beat until well combined. Add milk one tablespoon at a time until the mixture is smooth and creamy, but still firm enough to hold its shape.
- Prepare the whipped topping: In a separate cold bowl, beat the very cold heavy cream with 2 tablespoons powdered sugar and 1/2 teaspoon vanilla extract until stiff peaks form.
- Fill the cooled pastry shells with the cream cheese filling just before serving. You can use a piping bag with a wide tip or a spoon. Fill generously from both ends if desired.
- Top each filled cream horn with a dollop of fresh whipped cream and dust lightly with extra powdered sugar for presentation. Serve immediately to enjoy maximum crispness.
Notes
- Ensure shells cool completely to prevent sogginess. Serve immediately for maximum crispness.