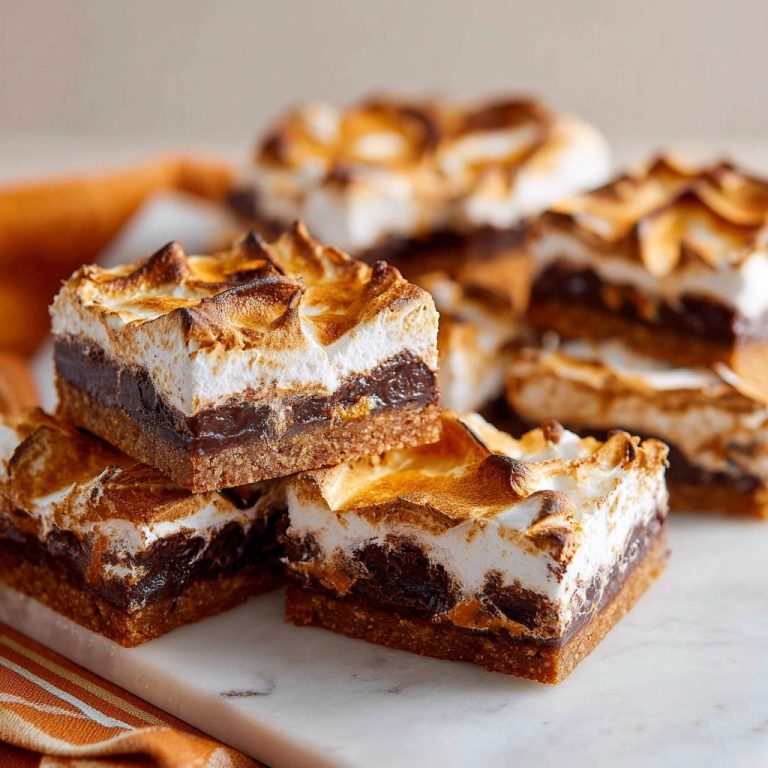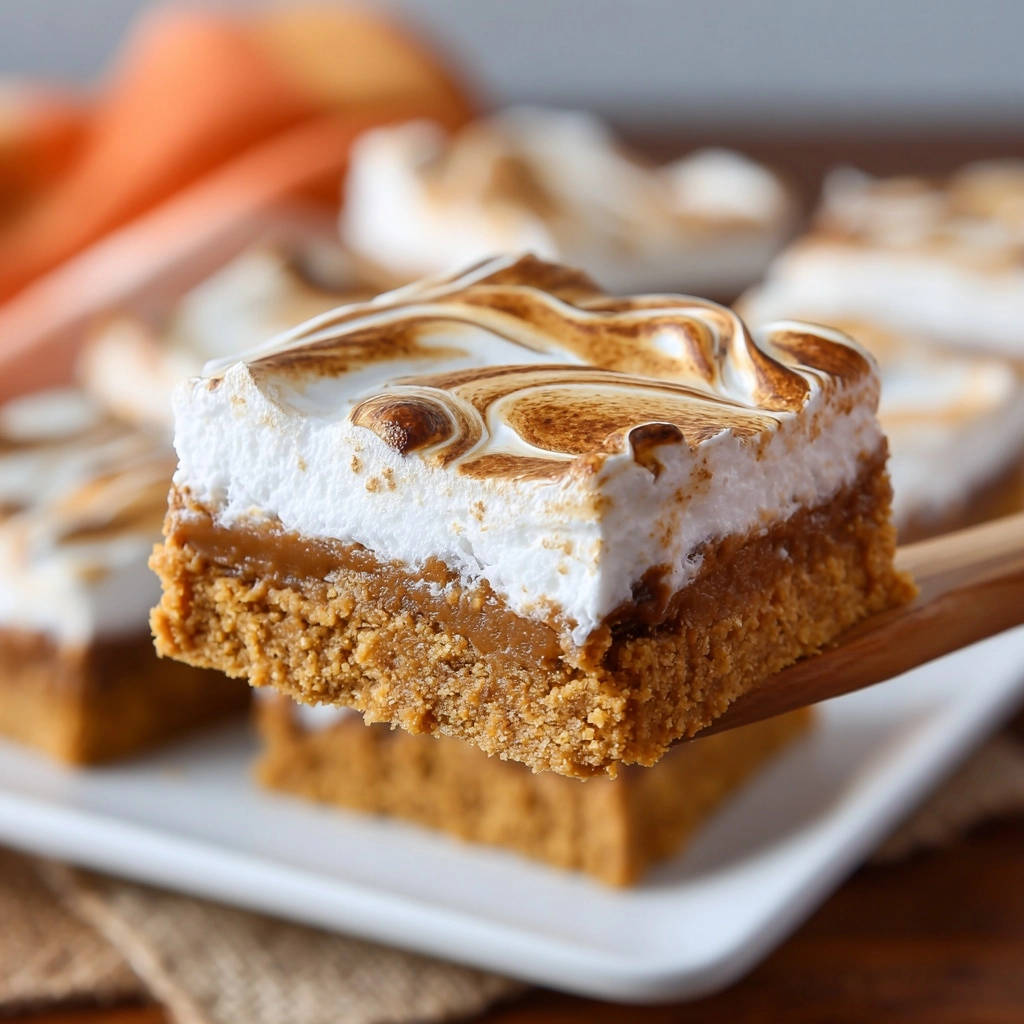
For years, I dreaded that final step when making classic dessert bars with a marshmallow topping – the broiler. It felt like a ticking time bomb, threatening to char my perfectly baked creation. But through countless batches, I’ve finally cracked the code to achieving that gorgeous, golden brown swirl for these irresistible Pumpkin Pie Bars without a single scorch mark.
This recipe isn’t just about delicious fall flavors; it’s about confidence in your kitchen, ensuring every square emerges with a beautifully toasted top and a creamy, spiced pumpkin filling nestled on a crisp graham cracker crust. Get ready to bake a treat that will impress everyone.
Beyond Basic: Why These Pumpkin Pie Bars Are a Must-Make
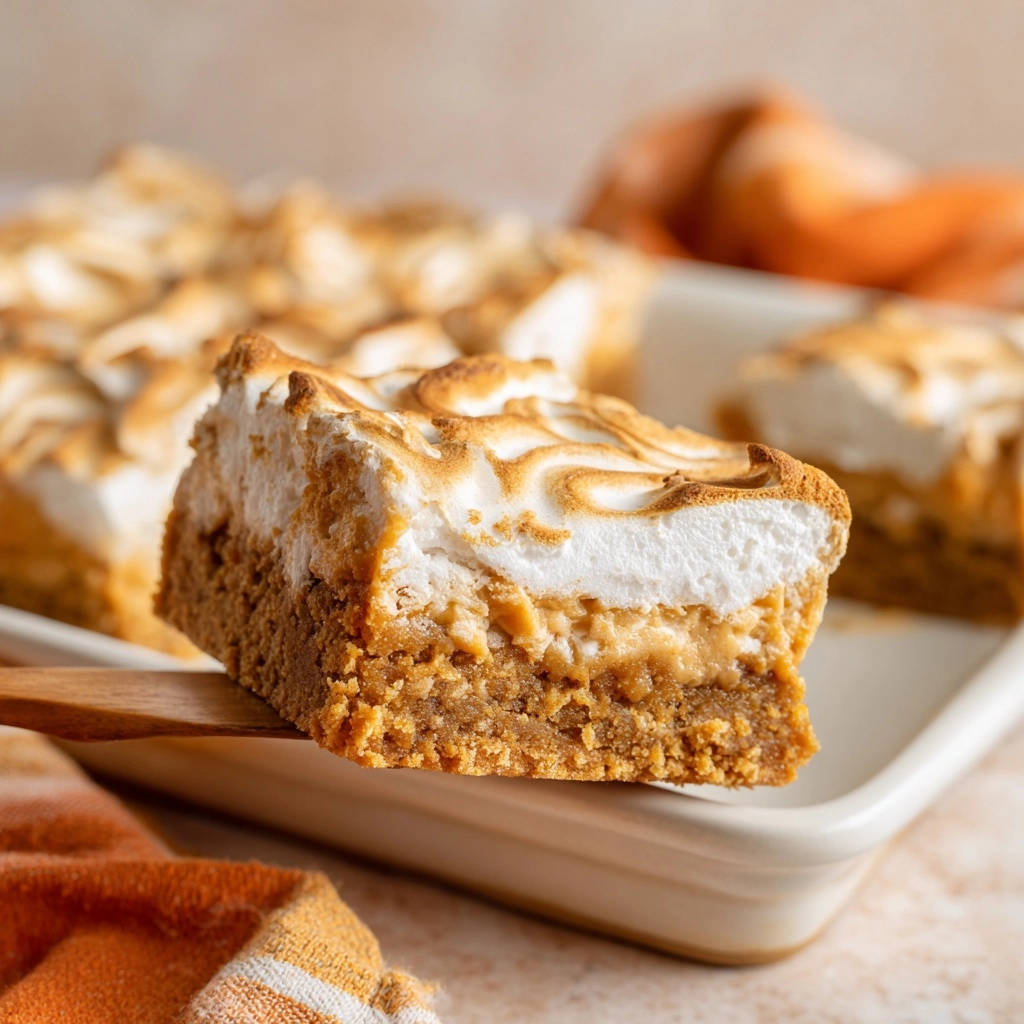
These Pumpkin Pie Bars stand out not just for their rich, autumnal flavor, but for their foolproof design. Our unique approach to the marshmallow topping ensures it’s perfectly golden and toasted, never burnt.
The crust is engineered for crispness, preventing the common soggy bottom that can plague bar recipes. Plus, their convenient bar format makes them ideal for sharing at any gathering or enjoying as a simple, satisfying dessert.
Your Kitchen Arsenal for Perfect Pumpkin Pie Bars
Having the right tools makes all the difference in achieving baking success. Here’s what you’ll need for these delightful bars:
-
8×8 Inch Baking Pan: A sturdy pan of this size ensures your bars bake evenly and come out with perfect, uniform dimensions. Choose one with straight sides for neat squares.
-
Parchment Paper: Absolutely essential! This non-stick lining ensures your bars lift out effortlessly from the pan, making cutting a breeze and preventing any sticking.
-
Medium and Large Mixing Bowls: You’ll need separate bowls for the crust and the filling to keep your workflow smooth and efficient.
-
Whisk: A good whisk is key for thoroughly combining the pumpkin filling ingredients into a silky-smooth mixture.
-
Offset Spatula or Back of a Spoon: Ideal for spreading the marshmallow creme evenly and creating beautiful swirls or peaks on top.
-
Wire Rack: Crucial for allowing the bars to cool completely and evenly, preventing condensation from making the crust soggy.
The Building Blocks: Ingredients for Your Bars
Each ingredient plays a vital role in creating the perfect texture and flavor for these Pumpkin Pie Bars.
Crust Essentials: Crunchy Foundation
Graham Cracker Crumbs: These form the classic, buttery base, providing a delightful textural contrast to the soft filling.
Granulated Sugar: A touch of sugar enhances the sweetness of the crust and helps with browning during baking.
Unsalted Butter, Melted: Butter binds the crumbs together, creating a rich, sturdy, and flavorful foundation that holds its shape beautifully.
Creamy Pumpkin Filling: Autumn’s Embrace
1 (15 ounce) can Pumpkin Puree (not pie filling): This is the heart of your pumpkin flavor. Using pure puree is critical because pie filling contains added sugars and spices, which would throw off the balance of this recipe.
1 (14 ounce) can Sweetened Condensed Milk: This ingredient provides both sweetness and that signature creamy, smooth texture to the pumpkin layer, making it set perfectly.
1 Large Egg: The egg acts as a binder, helping the filling to set firmly and preventing it from becoming crumbly after baking.
1 Teaspoon Pumpkin Pie Spice: This blend brings all the familiar warm, aromatic notes of fall. Adjust it to your preference for a bolder or subtler spice profile.
1/2 Teaspoon Vanilla Extract: A splash of vanilla enhances and rounds out all the other flavors, adding depth to the pumpkin filling.
The Star Topping: Marshmallow Creme Magic
1 (7 ounce) jar Marshmallow Creme: This sweet, sticky confection creates the iconic soft, chewy, and gloriously toasted topping. It’s chosen specifically for its spreadable consistency and rapid browning under the broiler, which is key to our unscorched secret.
Crafting Perfection: Step-by-Step Pumpkin Pie Bars Guide
Follow these precise steps to ensure your Pumpkin Pie Bars come out flawlessly every time.
-
Prep for Success: Preheat & Pan Preparation
First, set your oven to 350°F (175°C) to ensure it’s at the correct temperature when you’re ready to bake. Then, meticulously line an 8×8 inch baking pan with parchment paper, allowing a generous overhang on the sides. This overhang acts as “handles,” making it incredibly easy to lift the entire batch of bars out of the pan once cooled. Lightly grease the parchment paper to further ensure a clean release.
-
The Crust’s Foundation: Mix & Press
In a medium bowl, combine your graham cracker crumbs, granulated sugar, and the melted butter. Stir these ingredients thoroughly until all the crumbs are evenly moistened and coated with butter. This ensures a consistent and sturdy crust. Next, press this mixture firmly and evenly into the bottom of your prepared baking pan; a flat-bottomed measuring cup or the back of a spoon works well to create a compact, uniform base.
-
Initial Bake: Set the Stage
Transfer the pan with the crust into your preheated oven. Bake for 8-10 minutes, or until you see the edges turn a beautiful, light golden brown. This crucial pre-baking step is what prevents a soggy crust by setting it before the moist pumpkin filling is added. Remove the pan from the oven and set it aside to cool slightly while you prepare the filling.
-
Whip Up the Filling: Silky Smoothness
While the crust is baking, turn your attention to the filling. In a large bowl, whisk together the pumpkin puree, sweetened condensed milk, the large egg, pumpkin pie spice, and vanilla extract. Whisk vigorously until the mixture is completely smooth and all ingredients are thoroughly combined. A well-mixed filling ensures an even texture and consistent flavor in every bite.
-
Combine & Bake: Filling the Foundation
Carefully pour the silky pumpkin filling evenly over the warm, pre-baked crust in the pan. The warmth of the crust helps the filling adhere. Return the pan to the oven and bake for an additional 30-35 minutes, or until the pumpkin filling is set. You’ll know it’s ready when the center no longer jiggles significantly when you gently shake the pan; it should be firm but still look moist.
-
The Marshmallow Masterstroke: Evenly Spreading the Creme
As soon as you remove the baked bars from the oven, quickly but carefully spread the marshmallow creme evenly over the hot pumpkin layer. The heat from the bars helps the creme spread smoothly. Use an offset spatula or the back of a spoon to create delightful swirls or peaks as desired, adding visual appeal to your dessert.
-
The Unscorched Secret: Broiling for Golden Perfection
This is where our “unscorched secret” truly comes into play for your crumble bars or other treats! Move your oven rack to the highest position that still allows about 6-8 inches of space between the marshmallow topping and the broiler element; this distance is key to prevent burning. Turn your oven to the “Broil” setting (usually high heat). It’s vital to have your eyes on the pan at all times during this step.
Place the baking pan under the broiler. STAY BY THE OVEN AND WATCH CONTINUOUSLY! Marshmallow creme contains a high sugar content, which means it can go from perfectly golden to burnt in a matter of seconds. Broil for only 1-3 minutes, rotating the pan a few times as needed, to ensure even browning. You’re looking for beautifully golden brown peaks with a toasted appearance. Seriously, do not walk away, even for a second.
-
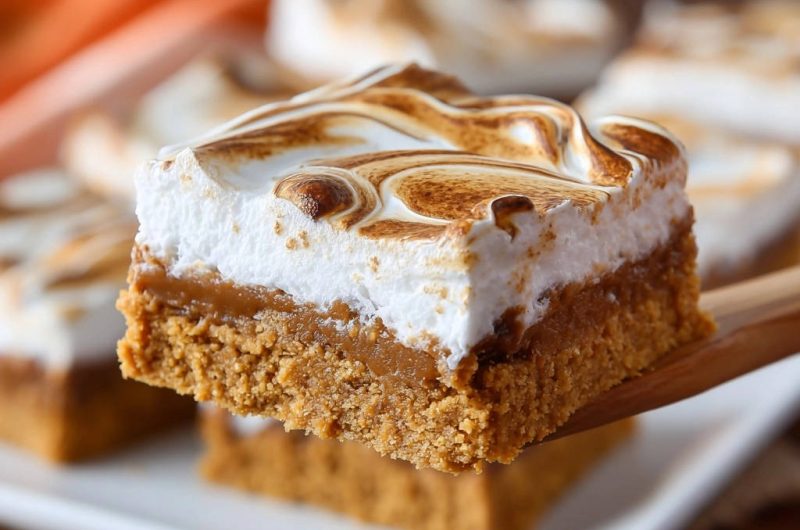
Cooling & Chilling: The Patience Pays Off
Once the marshmallow topping is perfectly toasted, remove the pan from the oven. Let the bars cool completely on a wire rack at room temperature; this takes time but is essential for the filling to fully set. For the best results and incredibly clean, neat slices, chill the bars in the refrigerator for at least 2 hours before attempting to cut them into squares. Cold bars cut much more cleanly.
Chef’s Secrets: Elevating Your Pumpkin Pie Bars
Achieving bakery-quality Pumpkin Pie Bars involves a few key insights that truly make a difference.
Mastering the Broiler: Your Golden Rule
The “stay by the oven” rule when broiling marshmallow isn’t just a suggestion-it’s paramount. Marshmallow creme has a high sugar content, meaning it caramelizes and burns incredibly fast, often in under a minute. By standing guard and rotating the pan, you ensure even, golden toasting without any dark, bitter spots.
The Importance of “Not Pie Filling”
Always opt for pure pumpkin puree, not pre-made pumpkin pie filling. Pumpkin puree is simply cooked, mashed pumpkin, giving you full control over the flavor and spice profile. Pie filling contains added sweeteners, spices, and sometimes thickeners, which would result in an overly sweet or unevenly spiced dessert when combined with this recipe’s balanced ingredients.
Why Chilling is Non-Negotiable
Chilling your Pumpkin Pie Bars for at least two hours (or longer!) in the refrigerator allows the filling to fully set and firm up. This prevents crumbling and ensures that when you cut into them, you get clean, precise squares with distinct layers. Warm bars will be messy and difficult to slice neatly.
Customizing Your Spice Blend
While pumpkin pie spice is a perfect blend, feel free to adjust it to your taste. For a warmer profile, consider adding a pinch of extra cinnamon or a whisper of ground cloves. If you prefer a brighter note, a tiny amount of fresh ginger or allspice can add delightful complexity.
Troubleshooting Common Pumpkin Pie Bar Woes
Even seasoned bakers encounter challenges. Here’s how to fix common issues with Pumpkin Pie Bars.
Problem: Soggy Crust
A soggy crust usually results from insufficient pre-baking or not pressing the crumbs firmly enough. Ensure your crust bakes until lightly golden and compacts tightly into the pan. Allowing the crust to cool slightly before adding the filling can also help prevent moisture absorption.
Problem: Marshmallow Burnt or Unevenly Toasted
This is a common issue with broilers! The key is placing your oven rack at the right height (6-8 inches from the element) and never, ever walking away. Broil for short intervals (30-second bursts), rotating the pan after each, until you achieve that perfect golden brown. Every broiler is different, so learn yours.
Problem: Filling Not Setting Properly
If your pumpkin filling remains wobbly, it likely needs more bake time. Factors like oven calibration, pan material, or even the exact moisture content of your pumpkin puree can affect setting. Continue baking in 5-minute increments until the center is mostly firm, with only a slight jiggle remaining.
Storage & Make-Ahead: Enjoying Your Bars Longer
These Pumpkin Pie Bars are so good, you’ll want to make them last!
Storing Leftover Pumpkin Pie Bars
Once completely cooled, store your Pumpkin Pie Bars in an airtight container in the refrigerator. Properly stored, they will maintain their freshness and delicious texture for up to 3-4 days. Separate layers with parchment paper if stacking to prevent sticking.
Can You Freeze Pumpkin Pie Bars?
Yes, these bars freeze beautifully! Once completely cooled and chilled, cut them into individual squares. Wrap each square tightly in plastic wrap, then place them in a freezer-safe airtight container or bag. They can be frozen for up to 1 month. Thaw individual bars in the refrigerator overnight or at room temperature for about an hour before serving.
Making Bars Ahead for Events
These Pumpkin Pie Bars are an excellent make-ahead dessert for parties or gatherings. You can bake them entirely, including the marshmallow topping, up to 1-2 days in advance. Store them chilled in the refrigerator, covered, until ready to serve. This allows the flavors to meld beautifully, making them even more delightful.
Your Questions Answered: Pumpkin Pie Bars FAQ
Here are some common questions about making Pumpkin Pie Bars, addressed by an expert.
Can I use homemade graham cracker crumbs?
Absolutely! If you’re making your own graham cracker crumbs from whole crackers, ensure they are finely crushed and measured accurately. A food processor works best for an even consistency.
What if I don’t have an 8×8 inch pan?
You can use a 9×9 inch pan, but your bars will be slightly thinner, and the baking time for both the crust and the filling might be reduced by a few minutes. Alternatively, a 9×13 inch pan can be used for a double batch, in which case you’d double all ingredients and adjust baking times accordingly.
Can I substitute other toppings for marshmallow creme?
While marshmallow creme creates the signature golden, toasted swirl that’s a highlight of these bars, you could experiment with other toppings. A dollop of whipped cream, a sprinkle of cinnamon sugar, or a drizzle of caramel (like for caramel nut squares) would offer different, but still delicious, finishes. Keep in mind, these won’t offer the unique broiled texture.
Is it possible to make these gluten-free or dairy-free?
Achieving a completely gluten-free or dairy-free version of these bars requires careful ingredient substitutions. For gluten-free, use gluten-free graham crackers for the crust. For dairy-free, look for dairy-free melted butter alternatives and dairy-free sweetened condensed milk, though these may alter the final texture and richness slightly. Dairy-free marshmallow creme options also exist. Experimentation is key!
Ready to Impress? Share Your Pumpkin Pie Bars Masterpiece!
Now that you’re armed with the secrets to perfect, unscorched Pumpkin Pie Bars, it’s time to bring this autumnal delight to life in your kitchen. Whether you’re baking for a holiday gathering or a cozy night in, these bars are guaranteed to be a hit.
Don’t forget to share your delicious creations with us! We love seeing your baking triumphs. Enjoy every sweet, spiced, and perfectly toasted bite!
Pumpkin Pie Bars
Course: DessertCuisine: American CuisineDifficulty: easy9
large bars20
minutes45
minutes60
minutesAmerican Cuisine
Ingredients
For the Crust:
1 1/2 cups graham cracker crumbs
1/4 cup granulated sugar
1/2 cup unsalted butter, melted
For the Filling:
1 (15 ounce) can pumpkin puree (not pie filling)
1 (14 ounce) can sweetened condensed milk
1 large egg
1 teaspoon pumpkin pie spice
1/2 teaspoon vanilla extract
For the Topping:
1 (7 ounce) jar marshmallow creme
Directions
- Preheat your oven to 350°F (175°C). Line an 8×8 inch baking pan with parchment paper, leaving an overhang on the sides to easily lift the bars out later. Lightly grease the parchment paper.
- In a medium bowl, combine the graham cracker crumbs, granulated sugar, and melted butter. Stir until well combined and the crumbs are evenly moistened. Press the mixture firmly and evenly into the bottom of the prepared baking pan to form the crust.
- Bake the crust for 8-10 minutes, or until lightly golden brown. Remove from the oven and set aside.
- While the crust bakes, prepare the filling. In a large bowl, whisk together the pumpkin puree, sweetened condensed milk, egg, pumpkin pie spice, and vanilla extract until smooth and well combined.
- Pour the pumpkin filling evenly over the warm, pre-baked crust.
- Return the pan to the oven and bake for 30-35 minutes, or until the filling is set and the center no longer jiggles when gently shaken.
- Remove the pan from the oven. Carefully spread the marshmallow creme evenly over the top of the hot pumpkin layer. You can use an offset spatula or the back of a spoon to create swirls or peaks as desired.
- For the perfect, unscorched topping: Move your oven rack to the highest position that still allows about 6-8 inches of space between the marshmallow topping and the broiler element. Turn your oven to the “Broil” setting (usually high).
- Place the baking pan under the broiler. STAY BY THE OVEN AND WATCH CONTINUOUSLY! Marshmallow creme can brown very quickly. Broil for 1-3 minutes, rotating the pan a few times as needed, until the marshmallow creme is beautifully golden brown with toasted peaks. Do not walk away, even for a second, as it can go from perfect to burnt in an instant.
- Remove the pan from the oven and let the bars cool completely on a wire rack before attempting to cut them. For best results and clean slices, chill the bars in the refrigerator for at least 2 hours before cutting into squares. Enjoy!
Notes
- For best results and clean slices, chill bars in the refrigerator for at least 2 hours before cutting.