
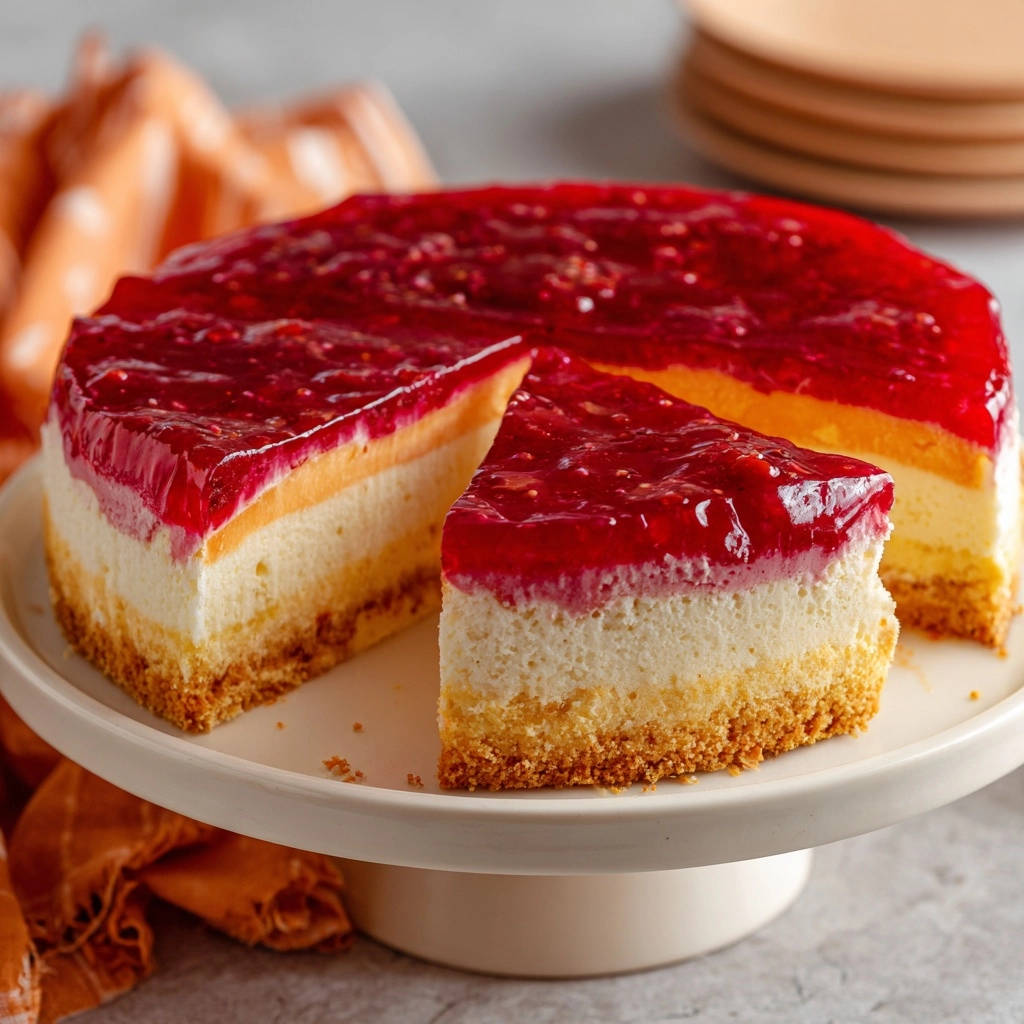
There’s nothing quite like the elegance of a perfectly smooth, unblemished cheesecake. I’ve spent countless hours in the kitchen perfecting this very skill, and this particular Raspberry Layered Cheesecake recipe is the culmination of those efforts. It’s designed to banish those dreaded cracks and deliver a show-stopping dessert every single time.
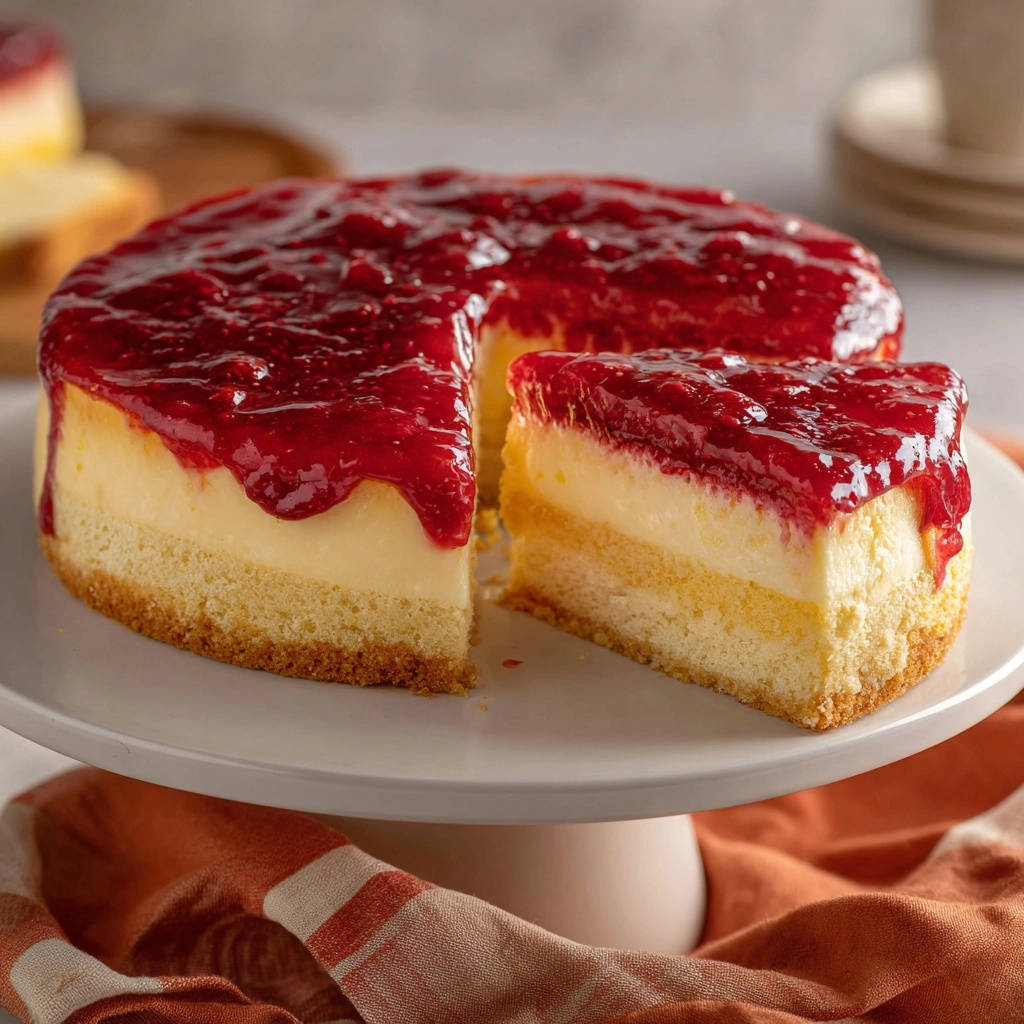
Get ready to create a dessert masterpiece that combines a buttery graham cracker crust, a velvety-smooth, rich cheesecake filling, and a bright, tangy raspberry topping, promising a truly irresistible experience for any occasion.
Beyond Basic: Why This Raspberry Layered Cheesecake Shines
This isn’t just another cheesecake recipe; it’s a meticulously crafted guide to ensure success and deliver exceptional flavor and texture. We focus on techniques that eliminate common baking frustrations.
The Promise of a Perfect, Crack-Free Top
The core of this recipe lies in its proven strategies for preventing surface cracks. From precise ingredient temperatures to controlled cooling methods, every step is designed for a flawless finish.
Rich Flavor, Balanced Sweetness: A True Crowd-Pleaser
Experience the luxurious creaminess of the filling, beautifully complemented by the vibrant tartness of fresh raspberries. This harmonious balance prevents it from being overly sweet, making it universally appealing.
Surprisingly Simple Steps for Stunning Results
Despite its impressive appearance, this Raspberry Layered Cheesecake is remarkably accessible for bakers of all levels. Our detailed instructions break down each phase, making the process straightforward and enjoyable.
Gathering Your Culinary Arsenal: Ingredients & Essential Tools
Success in baking starts with the right ingredients and equipment. Here’s what you’ll need to create this exceptional dessert.
The Building Blocks: Key Ingredients for Your Cheesecake
Quality ingredients are the foundation of any great cheesecake. Pay attention to temperatures and freshness for the best results.
For the Crust: The Foundation of Flavor
Graham cracker crumbs provide a subtly sweet, buttery base that perfectly complements the creamy filling. Melted unsalted butter binds the crumbs, ensuring a firm yet tender crust.
A touch of granulated sugar enhances the sweetness and helps achieve that golden-brown finish.
For the Creamy Filling: Room Temperature is Your Best Friend
Using softened cream cheese is non-negotiable for a lump-free, silky cheesecake. Cold cream cheese will result in a grainy texture.
Granulated sugar adds sweetness and structure to the filling. Room temperature eggs incorporate more smoothly, preventing overmixing and maintaining the cheesecake’s delicate texture.
Sour cream adds essential moisture and a subtle tang, contributing to the cheesecake’s characteristic richness and preventing it from drying out. A splash of vanilla extract deepens the flavor profile, while fresh lemon juice brightens the overall taste.
For the Vibrant Topping: Freshness Matters
Fresh or frozen raspberries both work beautifully for the topping; frozen berries simply require a slightly longer cooking time. Granulated sugar balances the berries’ tartness.
Cornstarch acts as a thickener, giving the topping a luscious, glossy consistency. A bit of water helps dissolve the cornstarch and create the desired sauce-like texture, while fresh lemon juice enhances the berry flavor.
Tools for Cheesecake Mastery: What You’ll Need
- 9-inch Springform Pan:
Absolutely essential for easy removal and presenting your cheesecake without damage. Its removable sides allow for a clean release.
- Heavy Duty Aluminum Foil:
Crucial for wrapping the springform pan to protect the cheesecake from water during the water bath baking method.
- Large Roasting Pan:
Needed to hold the springform pan for the water bath, ensuring even, gentle baking.
- Electric Mixer (Stand or Handheld):
Necessary for thoroughly blending the cream cheese and other filling ingredients to achieve that signature smooth texture.
- Medium & Large Mixing Bowls:
For preparing the crust and the cheesecake filling separately.
- Wire Rack:
For cooling the cheesecake completely at room temperature after baking, allowing air circulation for optimal setting.
- Small Saucepan:
For preparing the raspberry topping, allowing you to simmer and thicken the fruit mixture.
Crafting Your Crack-Free Raspberry Layered Cheesecake: A Master Guide
Follow these steps closely, paying attention to the details, and you’ll be rewarded with a spectacular Raspberry Layered Cheesecake.
Step 1: Pan & Oven Prep – The Crucial Foundation
Preheat your oven to 325°F (160°C). Lightly grease a 9-inch springform pan to ensure the crust doesn’t stick.
Wrap the outside of the springform pan securely with a double layer of heavy-duty aluminum foil. This creates a leak-proof barrier, preventing water from the bath from seeping into your cheesecake.
Ensure all your cheesecake filling ingredients are at room temperature. This is a critical step for a smooth, lump-free batter.
Step 2: Building the Perfect Graham Cracker Crust
In a medium bowl, combine the graham cracker crumbs, melted unsalted butter, and 2 tablespoons of granulated sugar. Mix until the crumbs are evenly moistened and resemble wet sand.
Press this mixture firmly into the bottom of the prepared springform pan. Use the bottom of a flat glass or measuring cup to create a compact, even layer.
Bake the crust for 10 minutes to set it and give it a slight crispness, then remove it from the oven and set it aside to cool slightly while you prepare the filling.
Step 3: The Creamy Filling – Secret to Smoothness (Part 1)
In a large bowl, using an electric mixer, beat the softened cream cheese on medium speed until it is completely smooth and free of any lumps. This is the first critical step for a truly smooth, crack-free cheesecake texture.
Gradually add the 1 1/2 cups of granulated sugar to the cream cheese, beating only until just combined and creamy. Be careful not to overmix at this stage, as incorporating too much air can lead to cracks later.
Step 4: Gentle Egg Incorporation for Airiness (Part 2)
Add the eggs one at a time, beating on low speed only until each egg is just incorporated into the batter. Scrape down the sides of the bowl as needed to ensure everything is evenly mixed.
Crucially, do not overmix after adding the eggs. Overmixing incorporates excess air into the batter, which expands during baking and then contracts during cooling, often leading to unsightly cracks.
Finally, add the sour cream, vanilla extract, and 1 teaspoon of fresh lemon juice, mixing on low speed until just combined. Again, avoid overmixing to maintain the delicate structure of the cheesecake batter.
Step 5: The Water Bath Method – Your Crack Prevention Shield (Part 3)
Pour the carefully prepared cheesecake batter over the pre-baked graham cracker crust in the foil-wrapped springform pan. Gently tap the pan on the counter a few times to release any large air bubbles.
Place the foil-wrapped springform pan into a larger roasting pan. Carefully pour hot water into the roasting pan until it reaches about halfway up the sides of the springform pan.
This water bath creates a moist, even heat environment, allowing the cheesecake to bake gently and prevent the edges from setting too quickly and cracking.
Step 6: Baking & Cooling with Precision (Part 4)
Carefully transfer the roasting pan with the cheesecake to the preheated oven. Bake for 60 to 75 minutes.
The cheesecake is done when the edges are set and slightly puffed, but the center (about a 2-inch circle) still jiggles slightly when the pan is gently shaken. This slight jiggle indicates perfect doneness, as it will continue to set as it cools.
Step 7: The Slow Chill – Mastering Temperature Transition (Part 5)
Once baked, turn off the oven and prop the oven door open slightly (about 3-4 inches) with a wooden spoon. Let the cheesecake cool in the oven for 1 hour.
This slow, gradual cooling process is a crucial step in preventing drastic temperature changes that can shock the cheesecake and cause cracks to form on the surface.
Step 8: Final Chill & Firmness
Carefully remove the cheesecake from the oven and lift it out of the water bath. Remove the aluminum foil from around the springform pan.
Place the cheesecake on a wire rack to cool completely at room temperature for another 1 to 2 hours. Once it has reached room temperature, cover it loosely with plastic wrap.
Refrigerate the cheesecake for at least 4 hours, or preferably overnight, until it is thoroughly chilled and firm. This extended chilling time is vital for the cheesecake to fully set, making it easier to slice and enhancing its rich, creamy texture.
Step 9: Creating the Luscious Raspberry Topping
In a small saucepan, combine the raspberries, 1/2 cup granulated sugar, cornstarch, and 1/4 cup water. Stir well to combine.
Cook over medium heat, stirring frequently, until the mixture thickens and comes to a gentle boil. The cornstarch will activate, creating a glossy, spoonable sauce.
Remove the topping from the heat and stir in 1 teaspoon of fresh lemon juice for added brightness. Allow the raspberry topping to cool completely before spreading it evenly over the thoroughly chilled cheesecake. Spreading warm topping on a cold cheesecake can cause issues.
Step 10: The Grand Reveal & Serving
Once the Raspberry Layered Cheesecake is thoroughly chilled and topped, carefully run a thin knife around the edge of the pan. This helps to loosen the cheesecake from the sides of the pan.
Gently release and remove the springform sides. Slice your beautiful cheesecake with a warm, sharp knife (run under hot water and wipe dry between slices) for clean cuts and serve immediately.
Elevate Your Cheesecake Game: Expert Tips & Tricks
Achieving cheesecake perfection is about understanding the nuances of each step. These tips will help you master your craft.
Mastering Room Temperature Ingredients
Using softened cream cheese, eggs, and sour cream is paramount. Cold ingredients don’t emulsify properly, leading to lumps in your batter and potentially an uneven texture. Plan ahead and take them out of the fridge at least 1-2 hours before baking.
The Art of Gentle Mixing: Avoiding Over-Aeration
Overmixing is the enemy of a crack-free cheesecake. Beat only until ingredients are just combined, especially after adding eggs. Excessive air whipped into the batter expands during baking and then collapses, causing cracks upon cooling.
Perfecting Your Water Bath Technique
Always use heavy-duty foil and double-wrap your springform pan to prevent leaks. Ensure the roasting pan is large enough to hold the springform comfortably without touching the sides. The water should be hot, not cold, when added to the roasting pan.
This moist environment is what allows your cheesecake to bake evenly and without cracks, a common challenge in baking, much like ensuring a never-soggy bottom for a classic apple pie.
Knowing When Your Cheesecake is Done
Trust the jiggle test! A slight wobble in the center (about 2 inches wide) indicates it’s perfect. The residual heat will continue to cook it as it cools. Overbaking leads to dry, cracked cheesecakes.
Chilling for Ultimate Firmness & Flavor
Do not rush the chilling process. A minimum of 4 hours, and ideally overnight, allows the cheesecake to fully set, firm up, and for its flavors to deepen and meld. This patience is rewarded with a superior texture and taste.
Common Cheesecake Challenges & Solutions
Even with the best intentions, baking can sometimes present challenges. Here’s how to troubleshoot common cheesecake issues.
Why Did My Cheesecake Crack?
Cracks are typically caused by overmixing the batter (especially after adding eggs), overbaking, or rapid temperature changes during cooling. Our recipe directly addresses these by emphasizing gentle mixing, the jiggle test for doneness, and the slow, gradual cooling method in the oven.
My Crust is Soggy! How to Prevent It
A soggy crust is usually due to moisture from the water bath seeping in. Ensure your springform pan is wrapped very securely with a double layer of heavy-duty aluminum foil. Pre-baking the crust also helps create a barrier against moisture.
Cheesecake Stuck to the Pan?
Always lightly grease your springform pan before pressing in the crust. After chilling, run a thin, sharp knife dipped in hot water around the edge of the cheesecake before releasing the springform sides. This creates a clean separation.
Too Sweet or Not Sweet Enough?
Sweetness is subjective. For future batches, you can slightly adjust the sugar in the filling by 1/4 cup, tasting the batter (before adding eggs) to gauge. The tartness of the raspberry topping also helps balance the sweetness of the cheesecake base.
Beyond the Bake: Storage, Make-Ahead & Serving Suggestions
Mastering this Raspberry Layered Cheesecake also means knowing how to best store and serve it.
How to Store Your Raspberry Layered Cheesecake
Store your cheesecake, covered loosely with plastic wrap, in the refrigerator for up to 5-7 days. For best flavor and texture, allow it to come to room temperature for about 15-20 minutes before serving.
Can I Make This Cheesecake Ahead?
Absolutely! This cheesecake is an ideal make-ahead dessert. You can bake and chill the cheesecake base up to 2-3 days in advance. Prepare the raspberry topping the day you plan to serve it, or even a day before, ensuring it’s completely cooled before spreading.
Freezing for Future Indulgence
Yes, you can freeze cheesecake! Once completely chilled and firm, wrap individual slices or the whole cheesecake (without the topping) tightly in plastic wrap, then again in aluminum foil. It can be frozen for up to 1 month.
Thaw frozen cheesecake slices in the refrigerator overnight. Add the fresh raspberry topping just before serving.
Creative Serving Ideas
While the raspberry topping is delicious on its own, consider serving slices with a dollop of fresh whipped cream, a sprinkle of white chocolate shavings, or even a light drizzle of a raspberry liqueur for an adult twist. For another delightful fruit-based dessert, explore our Easy Creamy Berry Crumble Cheesecake Bars.
Frequently Asked Questions About Raspberry Layered Cheesecake
Here are answers to some common questions about baking this delightful dessert.
Can I Use Frozen Raspberries for the Topping?
Yes, absolutely! Frozen raspberries work perfectly for the topping and are often more readily available year-round. There’s no need to thaw them beforehand; simply combine them with the other topping ingredients and cook as directed. The cook time might be slightly longer to account for the frozen berries’ temperature.
What If I Don’t Have a Springform Pan?
While a springform pan is ideal, you can bake this in a standard 9×13-inch baking dish for a delicious bar-style cheesecake. However, you won’t be able to use the water bath method as effectively, and cutting clean slices will be different. For alternative cheesecake styles, you might enjoy our Mini Caramel Cheesecakes which often use muffin tins.
Can I Substitute Other Fruits?
Certainly! This recipe is versatile. You can substitute other berries like strawberries, blueberries, or mixed berries for the raspberry topping. Adjust the sugar to taste based on the sweetness of your chosen fruit. Peaches or cherries also make excellent toppings when prepared similarly.
Is it Possible to Make this Gluten-Free?
Yes, you can easily make this recipe gluten-free. Simply substitute gluten-free graham crackers for the crust. Ensure all other ingredients are certified gluten-free if you have a strict dietary requirement.
Ready to Impress? Share Your Raspberry Layered Cheesecake Masterpiece!
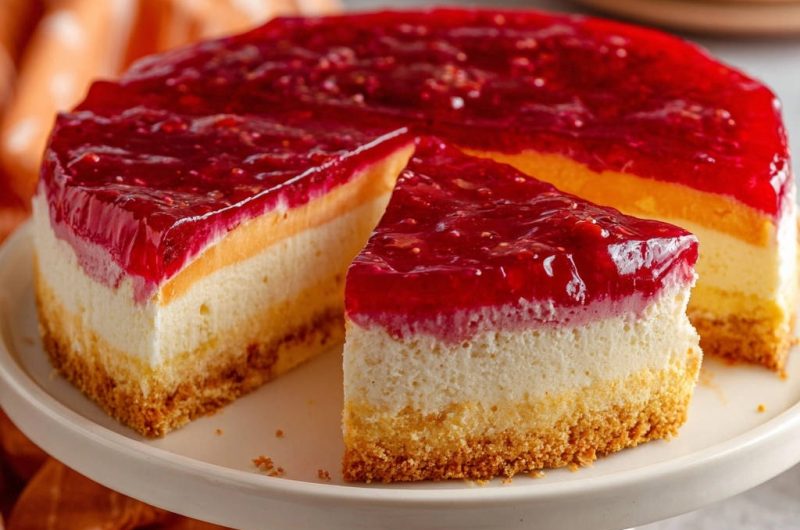
Now that you have all the insider tips and techniques, you’re ready to bake a Raspberry Layered Cheesecake that will truly impress. The satisfaction of slicing into a perfectly smooth, crack-free dessert you made yourself is unparalleled.
Don’t hesitate to share your delicious creation with friends and family. This recipe is designed not just for incredible taste, but for confident, stress-free baking. Enjoy every delectable bite!
Raspberry Layered Cheesecake
Course: DessertCuisine: American CuisineDifficulty: easy12
servings30
minutes1
hour240
minutesAmerican Cuisine
Ingredients
For the Crust:
1 1/2 cups graham cracker crumbs
1/4 cup unsalted butter, melted
2 tablespoons granulated sugar
For the Cheesecake Filling:
32 ounces cream cheese, softened to room temperature (four 8-ounce blocks)
1 1/2 cups granulated sugar
4 large eggs, room temperature
1 cup sour cream, room temperature
1 tablespoon vanilla extract
1 teaspoon fresh lemon juice
For the Raspberry Topping:
2 cups fresh or frozen raspberries
1/2 cup granulated sugar
1 tablespoon cornstarch
1/4 cup water
1 teaspoon fresh lemon juice
Directions
- Prepare Your Pan and Oven: Preheat your oven to 325 degrees F (160 degrees C). Lightly grease a 9-inch springform pan. Wrap the outside of the springform pan securely with a double layer of heavy duty aluminum foil. This will protect your cheesecake from the water bath. Ensure all your cheesecake filling ingredients are at room temperature.
- Make the Crust: In a medium bowl, combine the graham cracker crumbs, melted butter, and 2 tablespoons of sugar until well mixed. Press the mixture firmly into the bottom of the prepared springform pan. You can use the bottom of a glass to help create an even layer. Bake for 10 minutes, then remove from oven and set aside.
- Prepare the Cheesecake Filling (The Crack-Free Secret Part 1): In a large bowl, using an electric mixer, beat the softened cream cheese on medium speed until completely smooth and free of any lumps. This is crucial for a smooth texture. Gradually add the 1 1/2 cups of sugar, beating until just combined and creamy. Do not overmix.
- Incorporate Eggs Gently (The Crack-Free Secret Part 2): Add the eggs one at a time, beating on low speed just until each egg is incorporated. Scrape down the sides of the bowl as needed. Overmixing after adding the eggs can incorporate too much air, leading to cracks. Add the sour cream, vanilla extract, and 1 teaspoon of lemon juice, mixing on low speed until just combined. Do not overmix the batter.
- Bake with a Water Bath (The Crack-Free Secret Part 3): Pour the cheesecake batter over the pre-baked crust in the springform pan. Place the foil-wrapped springform pan into a larger roasting pan. Carefully pour hot water into the roasting pan until it reaches about halfway up the sides of the springform pan.
- Bake and Cool Properly (The Crack-Free Secret Part 4): Carefully transfer the roasting pan with the cheesecake to the preheated oven. Bake for 60 to 75 minutes, or until the edges are set and slightly puffed, but the center (about a 2-inch circle) still jiggles slightly when the pan is gently shaken.
- Gradual Cooling (The Crack-Free Secret Part 5): Turn off the oven and prop the oven door open slightly (about 3-4 inches) with a wooden spoon. Let the cheesecake cool in the oven for 1 hour. This slow cooling process prevents drastic temperature changes that can cause cracks.
- Final Cool and Chill: Carefully remove the cheesecake from the oven and out of the water bath. Remove the foil. Place the cheesecake on a wire rack to cool completely at room temperature for another 1 to 2 hours. Once completely cooled, cover loosely with plastic wrap and refrigerate for at least 4 hours, or preferably overnight, until thoroughly chilled and firm.
- Make the Raspberry Topping: In a small saucepan, combine the raspberries, 1/2 cup granulated sugar, cornstarch, and 1/4 cup water. Cook over medium heat, stirring frequently, until the mixture thickens and comes to a gentle boil. Remove from heat and stir in 1 teaspoon of fresh lemon juice. Allow the topping to cool completely before spreading it over the chilled cheesecake.
- Serve: Once the cheesecake is thoroughly chilled and topped, carefully run a thin knife around the edge of the pan before releasing the springform sides. Slice and serve!
Notes
- Includes a water bath and gradual cooling techniques for a crack-free finish.


