
There is nothing more frustrating than putting effort into a stunning filled dessert only to have the precious berry goodness bubble out and burn on the pan.
I spent years perfecting this recipe so that every baker, regardless of experience, can achieve that rich, molten center reliably-the key is a single, crucial sealing technique that makes this Blackberry Poppy Seed Lava Cake truly special.
Why This Blackberry Poppy Seed Lava Cake Recipe Guarantees Success
The Guaranteed Win: Solving the Messy Leak Problem
The standard way of sealing filled dough often fails under the intense pressure and steam of baking, leading to leakage and a dry cake.
For a similar baked treat, explore chocolate caramel cheesecake bars that hold their shape.
Our method focuses on thickening the filling significantly and, most importantly, utilizing a specific double-sealing pinch and twist technique that locks the berry lava inside, ensuring a clean, spectacular cut every time.
An Expert Breakdown of Time and Servings
While the overall time commitment looks long, most of it is passive waiting, allowing the dough to relax and the filling to chill, which are non-negotiable steps for texture and leak prevention.
- Prep Time: 30 minutes (plus 1 hour dough rest)
- Cook Time: 25 minutes
- Total Time: 1 hour 55 minutes
- Servings: 4
Planning for the 1-hour dough rest results in a tender, pliable dough that is far easier to stretch and seal without tearing.
The Building Blocks of Flavor: Inside Your Blackberry Poppy Seed Lava Cake
Crafting the Molten Berry Filling
The berry filling is the molten “lava” center that defines the dish, requiring careful preparation to maintain its viscosity.
Stabilizing Agents: Cornstarch and Chilling
Cornstarch slurry is crucial for viscosity; it binds the liquid released by the fruit, transforming the runny juice into a thick, glossy, molten center instead of a watery pool.
A minimum 30-minute chilling period is non-negotiable because warm or soft filling expands and forces its way out of the dough seams during baking, causing immediate leaks.
Achieving a Perfectly Tender and Fluffy Dough Base
The Role of Lukewarm Milk and Melted Butter
Using lukewarm milk aids in quickly dissolving the sugar and ensures the baking powder activates efficiently for a light rise.
Melted butter provides immediate richness and moisture, contributing to a cake-like tenderness compared to the flakiness achieved with cold, cut-in butter.
Baking Powder vs. Baking Soda
Baking powder is used exclusively because this recipe does not rely on additional acids (beyond the lemon juice in the filling) for lift, guaranteeing a uniform, fluffy texture.
The Essential Cream Cheese Glaze and Poppy Seed Finish
The glaze isn’t just decoration; the subtle tang and richness of the cream cheese perfectly balance the tartness of the blackberries.
For another taste of tropical brightness, check out these passion fruit cheesecake bars.
Using softened cream cheese over just milk is necessary because it creates an emulsified, thick glaze that holds its structure and won’t immediately slide off the warm cake, giving an appealing glossy finish.
Essential Tools for Blackberry Poppy Seed Lava Cake Success
The Right Vessels: Muffin Tins vs. Ramekins
Using a standard 12-cup muffin tin offers superior ease of handling and ensures uniform, easy-to-release shapes, which is great for beginners.
Individual ramekins (4 oz size) provide better heat retention, resulting in a slightly crispier exterior and a more classic, taller presentation.
Necessary Prep Equipment
A small saucepan for the filling preparation, allowing for controlled, even simmering.
Whisks and large mixing bowls for efficiently combining the wet and dry dough components.
A reliable rubber scraper or spatula is key for ensuring all ingredients are incorporated without activating too much gluten through excessive mixing.
Your Path to Blackberry Poppy Seed Lava Cake Perfection: A Detailed Guide
Phase 1: Stabilizing and Chilling the Filling
Combine berries, sugar, and lemon juice and bring them to a gentle simmer, allowing the fruit to soften and release its juices.
Once simmering, introduce the cornstarch slurry and stir constantly for exactly 30 seconds until the mixture significantly thickens, transforming from a liquid into a glossy, pudding-like consistency.
Immediately remove the filling from the heat and transfer it to the refrigerator; it must be completely cold and firm to the touch before you attempt the filling stage.
Phase 2: Mixing the Dough and the 1-Hour Gluten Rest
Whisk the dry ingredients thoroughly, then pour the wet ingredients (melted butter, milk, egg) into the center and mix only until a soft, slightly sticky dough forms-stop mixing immediately.
The 1-hour rest is necessary to relax the gluten strands activated during mixing, making the dough highly pliable, stretchy, and able to fully enclose the filling without tearing or snapping back.
Phase 3: The Guaranteed No-Leak Sealing Technique (The Pain-Point Solution)
Divide the rested dough into four pieces. Flatten each piece into a 5-inch circle, ensuring the center remains slightly thicker than the edges to provide strength where the filling sits.
Scoop 2-3 tablespoons of chilled filling onto the center. Bring all edges of the dough straight up to meet in the middle, and pinch the entire seam firmly shut to complete the first seal.
The Crucial Double-Seal Step: Turn the sealed dough ball seam-side down. Gently cup the ball and smooth the surface. Then, using your thumb and forefinger, pinch the sealed seam line a second time and gently twist the tiny fold of dough to create a tight, reinforced closure.
Phase 4: Baking Time and Temperature Calibration
Bake the cakes at 350°F (175°C) for 25 to 30 minutes.
The cakes are done when the tops are a light golden brown and spring back lightly when pressed; overbaking will solidify the interior, turning your molten ‘lava’ into tough jam.
Phase 5: Whisking the Creamy Glaze and Serving
Ensure the cream cheese is fully softened before combining it with powdered sugar, milk, and vanilla; whisk rigorously until the glaze is absolutely lump-free.
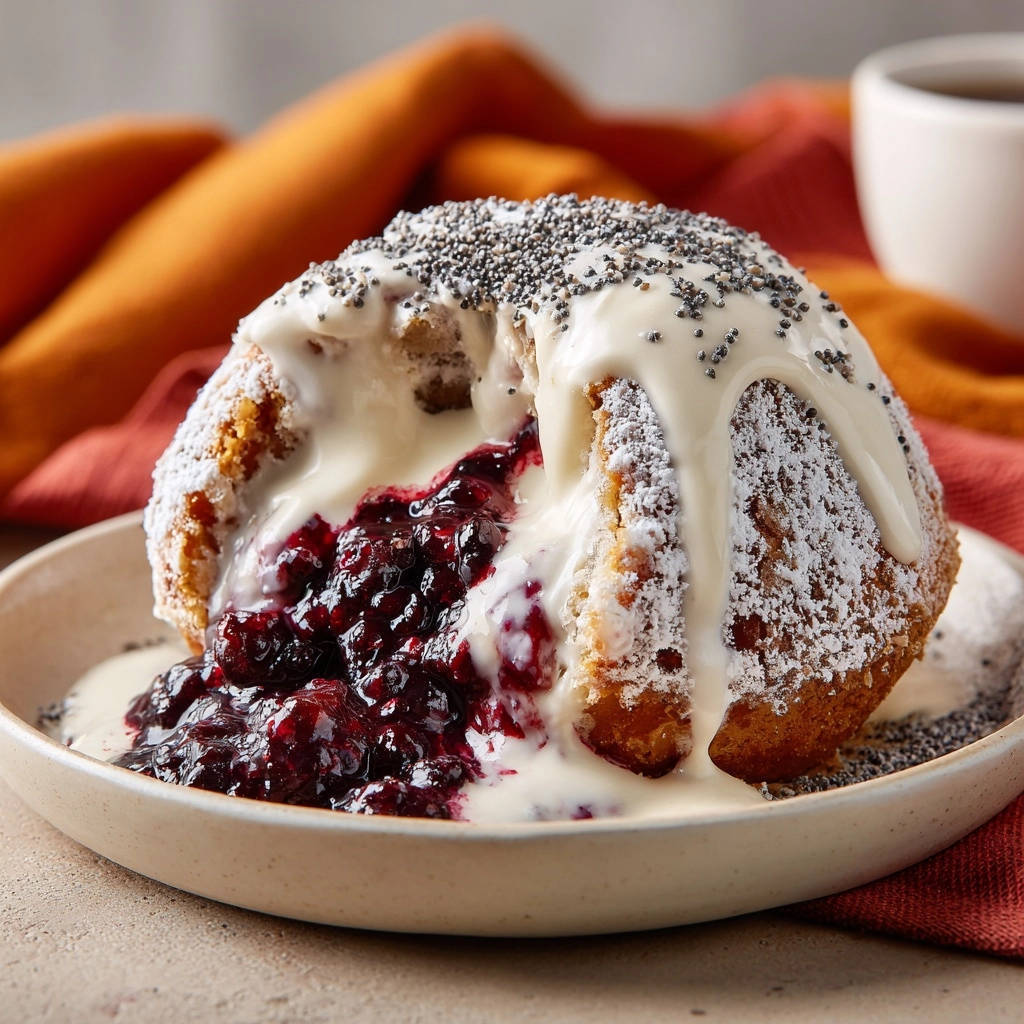
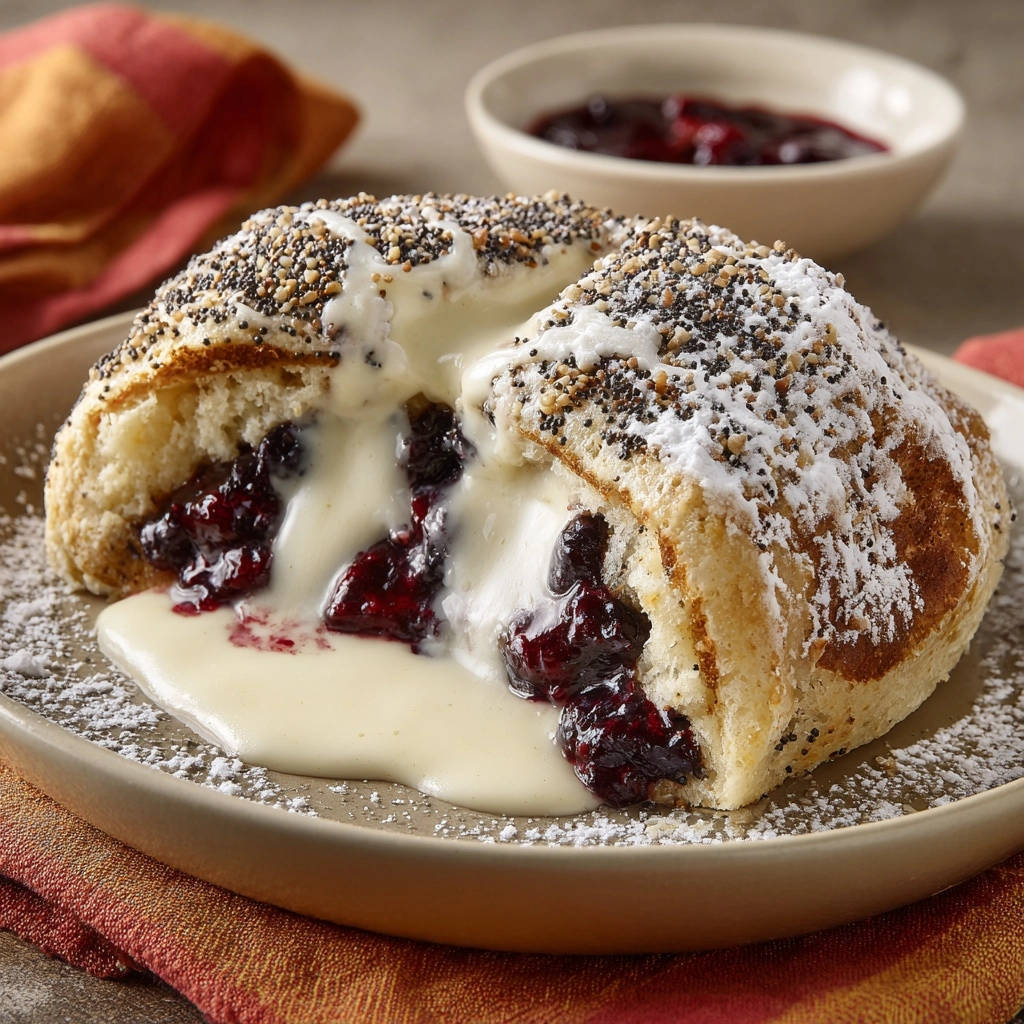
The glaze should be thick enough to hold a clear pattern when drizzled, not runny. Dust the slightly cooled cakes with powdered sugar, drizzle generously with the glaze, and finish with poppy seeds.
Chef’s Secrets: Elevate Your Blackberry Poppy Seed Lava Cake Game
Troubleshooting the Dough and Filling
Problem: The Dough Is Too Sticky: If the dough is unmanageable after the rest period, dust your work surface lightly with flour, but avoid incorporating more than 1-2 teaspoons into the dough itself, as too much flour results in an overly dense cake. The ideal texture is soft, slightly sticky, but pliable.
Problem: Filling Isn’t Thickening: This issue typically stems from insufficient simmering time after the slurry addition or the cornstarch not reaching its required temperature. Advise adding a tiny bit more slurry (1/2 tsp cornstarch mixed with 1 tsp cold water) and reheating briefly until it sets.
Handling the Glaze and Texture
Perfect Glaze Consistency: If your glaze is too thin, add powdered sugar one teaspoon at a time until it coats the back of a spoon thickly. If it is too stiff, add milk a few drops at a time; the correct consistency is viscous yet pourable.
Serving Hot vs. Warm: For the ideal experience, serve the cakes warm-about 10 minutes out of the oven. This allows the heat to slightly soften and melt the cream cheese glaze upon contact, creating a beautiful shine, while preventing the filling from scalding the eater.
Frequently Asked Questions About Baking Filled Desserts
Can I Substitute Other Berries for Blackberries?
Yes, acceptable substitutions include blueberries, raspberries, or a mix of dark cherries; the recipe is highly versatile.
If using very juicy berries (like raspberries), slightly reduce the added water in the cornstarch slurry to maintain the correct liquid balance.
How Do I Make a Gluten-Free Version of This Lava Cake?
A quality 1-to-1 gluten-free baking blend (such as Bob’s Red Mill) works successfully in this dough structure.
Be aware that GF flours absorb liquid differently, so start with slightly less milk (around 2/3 cup) and only add the remaining amount if the dough seems exceptionally dry after initial mixing.
What is the Best Way to Store Leftover Lava Cakes?
For short-term storage (2 days), keep unglazed cakes covered at room temperature; if they are glazed, refrigerate them.
For long-term storage, freeze the baked, unglazed cakes individually, wrapped tightly in plastic wrap, and reheat gently in the oven before applying fresh glaze.
Why Does My Dough Keep Tearing When I Seal It?
Tearing is almost always a sign that the dough was insufficiently rested, meaning the gluten is too tight and elastic to stretch around the filling.
Ensure you allow the full 60-minute rest period, and also verify you aren’t overfilling the 5-inch dough circle; stick strictly to the 2-3 tablespoon measurement.
Presentation and Pairing: Serving This Blackberry Poppy Seed Lava Cake Showstopper
Beyond the Glaze: Elegant Plating Ideas
Elevate the presentation by placing the warm cake on a bed of creme anglaise or simple vanilla bean sauce to catch the glaze overflow.
Garnish with a sprig of fresh mint or a dusting of microplaned lemon zest immediately before serving to provide a bright, complementary aroma.
Best Beverage Pairings
Pairing this sweet, tart treat with a strong black coffee, or even turning it into an affogato with vanilla bean ice cream, effectively cuts the richness of the cream cheese glaze.
For a celebratory feel, a slightly dry sparkling wine (Prosecco or Cava) offers effervescence that cleanses the palate between bites of the decadent Blackberry Poppy Seed Lava Cake.
Ready to Impress? Share Your Blackberry Poppy Seed Lava Cake Masterpiece!
You now hold the definitive, expert secret to achieving a perfect, molten filling every time-no more leaks, no more disappointment.
What to Try Next
Complement your blackberry poppy seed cakes with these delightful recipes.
- For a sweet and cheesy contrast, consider the Stuffed Grilled Cheese with Blueberry Sauce, featuring a fruity glaze that echoes the berry notes.
- To add a festive touch, prepare the Festive Cranberry Cheese Ball, a delightful appetizer that balances sweet and tangy flavors.
Try this recipe this weekend and share your stunning results; this foolproof Blackberry Poppy Seed Lava Cake technique is guaranteed to become your new reliable standard for every filled baked good you create.

Blackberry Poppy Seed Cake
Course: DessertCuisine: InternationalDifficulty: medium4
servings30
hours25
minutes450
kcal60
minutesPerfect your filled desserts! This recipe uses a crucial double-sealing technique to guarantee a rich, molten berry lava center without messy leaks. Topped with a luscious cream cheese glaze and poppy seeds.
Ingredients
For the Berry Filling:
1 cup mixed dark berries (Blackberries, Raspberries, Cherries)
1/4 cup Granulated sugar
1 tablespoon Lemon juice
1 teaspoon Cornstarch
1 tablespoon Water
For the Dough:
2 cups All-purpose flour
1/4 cup Granulated sugar
2 teaspoons Baking powder
1/2 teaspoon Salt
4 tablespoons Unsalted butter, melted
3/4 cup Milk, lukewarm
1 large Egg
For the Glaze and Topping:
1 cup Powdered sugar
3 tablespoons Cream cheese, softened
1 tablespoon Milk or heavy cream
1/2 teaspoon Vanilla extract
1 teaspoon Poppy seeds, for topping
Extra Powdered sugar, for dusting
Directions
- Prepare the Filling and Chill: Combine berries, sugar, and lemon juice in a small saucepan. Bring to a simmer over medium heat. In a separate small bowl, mix the cornstarch with water until smooth. Pour the cornstarch slurry into the simmering berries and stir constantly for 30 seconds until the mixture thickens significantly. Remove from heat. Cool completely, then transfer to the refrigerator for at least 30 minutes to firm up. This stabilization step is vital for preventing leaks.
- Make the Dough: In a large bowl, whisk together the flour, sugar, baking powder, and salt. In a separate bowl, whisk the melted butter, milk, and egg until combined. Pour the wet ingredients into the dry ingredients and mix until a soft, slightly sticky dough forms. Cover the bowl and let the dough rest for 1 hour at room temperature to relax the gluten, resulting in a tender texture.
- Form the Lava Cakes (The No-Leak Seal): Preheat oven to 350 degrees F (175 degrees C). Lightly flour a work surface. Divide the dough into four equal pieces. Roll each piece into a smooth ball. Using your palm or a rolling pin, flatten one dough ball into a circle approximately 5 inches wide. Scoop 2 to 3 tablespoons of the chilled, thickened berry filling into the center of the dough circle.
- The Pain-Point Solution Sealing Technique (Keeps Filling Locked In!): Bring all edges of the dough up toward the center, stretching slightly if necessary, and pinch them together tightly to completely enclose the filling. Once the dough is pinched shut, turn the sealed seam face down and gently cup the dough in your hands, smoothing the surface into a round ball. Most importantly, use your thumb and forefinger to pinch and gently twist the sealed seam a second time. This double-sealing ensures the filling cannot escape during baking. Place the sealed dumplings seam-side down in a lightly greased muffin tin or individual ramekins.
- Bake and Glaze: Bake for 25 to 30 minutes, or until the tops are golden brown and spring back lightly when touched.
- Prepare the Cream Glaze: While the cakes are cooling slightly, whisk together the powdered sugar, softened cream cheese, milk, and vanilla extract until completely smooth and thick.
- Finish and Serve: Dust the warm cakes generously with powdered sugar. Drizzle the thick cream cheese glaze over the top and immediately sprinkle with poppy seeds. Serve warm, slicing into the cake tableside to reveal the guaranteed rich, molten berry lava center.
Notes
- The 1-hour dough rest is essential for a tender texture. Ensure the berry filling is fully chilled before sealing.


