
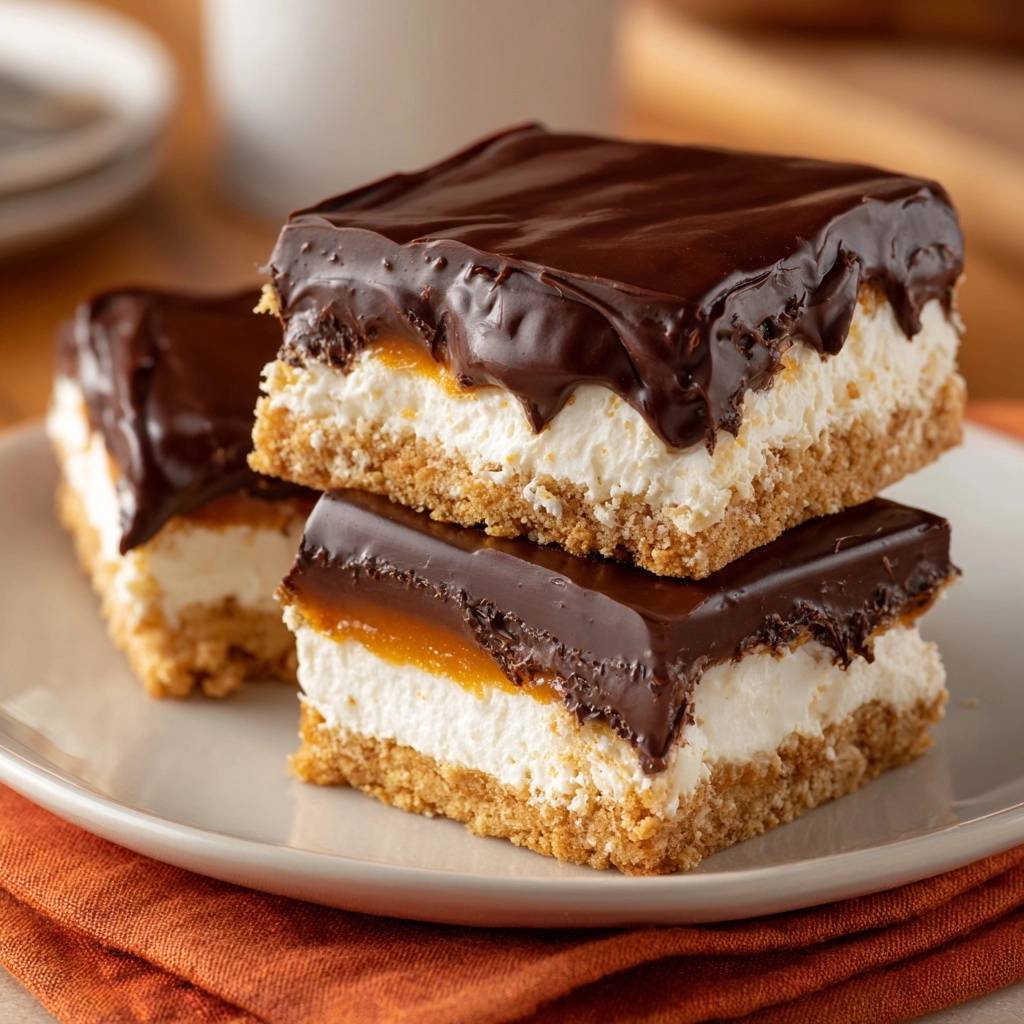
Imagine biting through a snap of glossy dark chocolate, only to sink into a pool of buttery salted caramel and a cloud of tangy, velvet-smooth cheesecake. These Chocolate Caramel Cheesecake Bars aren’t just another sugar-heavy dessert; they’re a masterclass in contrasting textures. The real star, however, is the base. Most layered bars suffer from a “soggy bottom” where the crust turns into a damp, crumbly mess after a few hours in the fridge.
We’ve all been there—you spend hours on a beautiful dessert only for the graham cracker base to lose its soul. This recipe solves that heartbreak with a dedicated “Anti-Soggy Bottom” philosophy. By focusing on structural integrity and moisture barriers, we ensure that every single bite maintains that satisfying, buttery crunch. It’s the kind of dessert that makes people stop talking the moment they take a bite because the mouthfeel is just that incredible.
The secret to this professional-grade texture is a simple but brilliant double-seal technique. Most people just press crumbs into a pan and hope for the best, but we’re going to par-bake the crust and then apply a microscopic layer of melted chocolate. This creates a waterproof shield that keeps the cheesecake moisture exactly where it belongs—in the filling—leaving your crust perfectly crisp for days.
The Architecture of a Perfect Layered Bar
Building a dessert bar that you can actually hold in your hand requires more than just a good recipe; it requires an understanding of structural engineering. When you’re dealing with heavy layers like thick caramel and dense cheesecake, the base has to be reinforced. We use a higher ratio of graham cracker crumbs to butter than usual to create a sturdy, compact foundation that won’t buckle under pressure.
Temperature gradients play a massive role in how these layers interact. If you pour warm caramel onto soft cheesecake, they’ll simply bleed together into a muddy swirl. By using “flash-freezing” intervals between layers, we ensure each component stays distinct. This creates those sharp, clean lines you see in high-end patisserie windows, where every flavor is allowed to shine individually before they harmonize in your mouth.
The Science of the Moisture Barrier
The “Double-Seal” technique is our primary weapon against sogginess. When you par-bake a graham cracker crust, the heat causes the sugar to caramelize and the butter to bind the crumbs, but the surface remains porous. If you put the cheesecake filling directly on top, the water content in the cream cheese migrates into those pores, turning the crust into mush.

By sprinkling chocolate chips over the crust the second it comes out of the oven, we use the residual heat to create a sealant. As you spread that melting chocolate, it fills every microscopic gap in the graham crackers. Once it cools and hardens, it forms a literal waterproof barrier. This is why these bars stay crunchy even on day three, whereas standard recipes fail by hour six.
Essential Components for Chocolate Caramel Cheesecake Bars
Quality ingredients are the difference between a “good” bar and a “life-changing” one. For the cheesecake layer, you must use full-fat brick cream cheese. Avoid the spreadable stuff in the plastic tubs; it contains extra air and stabilizers that will prevent your bars from setting firmly enough to slice. Room temperature cream cheese is non-negotiable here because cold cheese will leave you with tiny, stubborn lumps that ruin the silkiness.
When it comes to the heavy cream, look for a brand with at least 33% to 36% milk fat. This high fat content is what allows the cream to hold stiff peaks and provides the necessary stability for the ganache. If the fat content is too low, your ganache will be runny and your cheesecake layer will lack that luxurious, mousse-like body that makes this recipe so addictive.
Selecting the Right Chocolate and Caramel
For the ganache, semi-sweet chocolate chips are the gold standard. They provide enough bitterness to balance the sugar in the caramel without being overwhelming. If you prefer a more sophisticated, less sweet profile, you can swap in a 60% dark chocolate. However, avoid milk chocolate for the top layer, as it often lacks the structural “snap” needed for a clean bite.
The caramel layer requires a specific viscosity. If you use a thin, pourable ice cream topping, it will simply run out the sides the moment you cut a bar. You need a thick, “spoonable” salted caramel. If you’re buying it at the store, look for jars labeled as “sea salt caramel sauce” or “dulce de leche,” which have the thickness required to stay put between the cheesecake and the chocolate.
Preparing the Foundation: The Reinforced Crust
To get a crust that doesn’t crumble the moment it’s touched, you need to be firm. After mixing your crumbs, butter, and sugar, dump them into your lined pan. Don’t just use your fingers to pat it down; fingers apply uneven pressure. Instead, use the flat bottom of a metal measuring cup or a heavy glass to press the mixture into the corners and edges with significant force.
You’re looking for a compact, even sheet of crumbs. When you bake it at 350°F, keep a close eye on the oven. You aren’t looking for a dark brown color—just a light golden hue and a nutty, toasted aroma. This 10-minute bake sets the sugar and ensures the butter has fully hydrated the crumbs, creating a solid “floor” for your dessert.
Applying the Chocolate Sealant
The 120-second window after the oven dings is critical. You want to sprinkle those two tablespoons of chocolate chips while the crust is at its absolute hottest. Let them sit undisturbed for about two minutes; they will look whole but will be completely molten inside. This is the perfect time to act.
Take a small offset spatula or the back of a spoon and gently spread the chocolate. You aren’t looking for a thick layer of fudge here—you want a thin, translucent film. This film acts as the “primer” for your dessert. Once it’s spread, let the pan cool on the counter until the chocolate is no longer shiny and has fully set before adding the cheesecake.
Achieving the Aerated Cheesecake Filling
Since this is a no-bake cheesecake layer, we rely on aeration for texture rather than eggs and heat. Start by beating your softened cream cheese and powdered sugar until the mixture looks like smooth frosting. If you see any lumps, keep going before you add the other ingredients. It’s impossible to get lumps out once the liquid cream is added.
In a separate bowl, whip your heavy cream until it reaches stiff peaks—this means when you lift the whisk, the cream stands straight up without drooping. When combining the two, put down the electric mixer. Use a rubber spatula to gently fold the whipped cream into the cheese. This preserves the air bubbles you just worked so hard to create, resulting in a filling that feels light as air.
The Precision Layering Process
Patience is the most important ingredient during the assembly phase. After you spread the cheesecake filling, it needs a “flash-freeze.” Twenty minutes in the freezer creates a firm “skin” on the surface of the cheesecake. This is the secret to preventing the caramel from sinking into the white layer or creating a messy, blended look.
Once the cheesecake is firm to the touch, pour your caramel over the center and gently nudge it toward the edges. If the caramel is too stiff to spread, microwave it for just 5-10 seconds—it should be movable but not hot. After the caramel is level, return the pan to the freezer for another 15 minutes. This sets the caramel so the warm ganache can glide right over the top without picking up any amber streaks.
Crafting the Glossy Ganache Topping
A perfect ganache is a beautiful emulsion of fat and water. When you pour the hot cream over your chocolate chips, let it sit for a full five minutes. This allows the heat to penetrate the center of the chips. If you stir too early, the chocolate will cool the cream down too fast, and you’ll end up with grainy bits of un-melted chocolate.
When you start whisking, start in the very center of the bowl using small, circular motions. As the emulsion forms, you’ll see a dark, glossy “nucleus” appear. Gradually widen your circles until all the cream is incorporated. This technique prevents you from whipping air into the chocolate, ensuring a mirror-like finish that looks like it came from a professional bakery.
Temperature Control and the 6-Hour Set
It is incredibly tempting to cut into these bars after an hour, but you must resist. During the 6-hour (or overnight) chill, several things happen. The fats in the cream cheese and butter solidify, providing the “snap” and “bite” that makes these bars handheld. The flavors also have time to meld; the salt from the caramel begins to season the cheesecake, and the vanilla becomes more pronounced.
Rushing the process is the number one reason for “collapsing bars.” If the fats haven’t fully crystallized, the weight of the chocolate and caramel will cause the cheesecake to squish out the sides when you try to slice them. An overnight chill is the safest bet for a perfect result. It transforms the texture from a soft pudding into a dense, sliceable delight.
Troubleshooting Common Texture Issues
If you find your caramel layer sliding out when you take a bite, it usually means the caramel was either too thin or the bars weren’t chilled long enough. Always ensure you’re using a thick, jarred caramel rather than a syrup. If the cheesecake feels lumpy, it’s almost always because the cream cheese was too cold when you started. Next time, leave it on the counter for at least two hours.
If your top chocolate layer cracks when you bite into it, the ganache might have had too much chocolate and not enough cream. The 3-to-1 ratio of chocolate to cream in this recipe is designed to stay slightly flexible even when cold. Also, make sure you aren’t using “candy melts” or “almond bark,” as these are designed to dry very hard and will definitely crack when sliced.
Professional Slicing Techniques for Clean Layers
To get those stunning, sharp edges, you need to use the “Hot Knife” method. Fill a tall glass with very hot water. Dip a long, sharp chef’s knife into the water for 30 seconds until the blade is warm. Wipe the blade completely dry with a clean towel and make one long, smooth slice through the bars. Do not saw back and forth; just press down firmly.
The heat from the blade melts the fats in the chocolate and cheesecake just enough to glide through without dragging the layers. Crucially, you must clean and re-heat the knife between every single cut. If you don’t, the chocolate residue from the first cut will smear onto the white cheesecake of the second cut, ruining those beautiful, distinct layers.
Make-Ahead Strategy and Storage Logistics
These bars are the ultimate make-ahead dessert because they actually improve with a little time. You can fully assemble them up to two days before your event. Keep them in the pan, covered tightly with plastic wrap, to prevent them from picking up any “fridge smells.” Only lift them out and slice them right before you’re ready to serve.
If you have leftovers, store them in an airtight container in the refrigerator for up to five days. You can also freeze these bars! Wrap individual slices in plastic wrap and then place them in a freezer bag. They will stay fresh for up to three months. To eat, just thaw a slice in the fridge for about an hour. Because of our chocolate moisture barrier, the crust will still be crunchy even after freezing.
Expert Tips for Success
Always use a parchment paper “sling.” By leaving an overhang of paper on two sides of the pan, you can simply lift the entire block of bars out once they are set. This is much easier than trying to dig the first square out of a corner, which almost always results in a crumbled mess. It also gives you a flat surface for those professional-looking cuts.
Don’t skip the salt! If your caramel isn’t already “salted,” add a pinch of flaky sea salt to the cheesecake mixture or sprinkle a little over the caramel layer. Salt is the magic ingredient that cuts through the richness of the chocolate and the sugar of the caramel, making the whole dessert feel balanced rather than cloying. Finally, when whipping your cream, stop the moment the peaks stand up; over-beating will turn your cream into butter, giving the cheesecake a greasy mouthfeel.
Alternative Crust Variations
While graham crackers are the classic choice, you can easily swap them out for other dry cookies. Chocolate wafers make for a stunning “triple chocolate” experience, while digestive biscuits offer a slightly less sweet, more wheaty flavor that pairs beautifully with the caramel. Just keep the butter and sugar ratios the same to ensure the crust remains stable.
For a similar savory bake, consider the cheesy caramelized onion bake.
Adjusting Sweetness Levels
If you prefer a dessert that isn’t a total sugar bomb, there are easy ways to dial it back. Use a 70% cocoa dark chocolate for the ganache to add a sophisticated bitterness. You can also reduce the powdered sugar in the cheesecake layer by a quarter cup without affecting the structure. A final sprinkle of Maldon sea salt on top of the finished ganache also does wonders for balancing the sweetness.
How do I store these bars and can I freeze them?
Store these bars in an airtight container in the refrigerator for up to 5 days. For longer storage, you can freeze them for up to 3 months. Wrap individual slices tightly in plastic wrap and place them in a heavy-duty freezer bag. Thaw in the refrigerator for 1-2 hours before serving. Thanks to the chocolate moisture barrier, the crust will remain crisp even after thawing.
Why did my cheesecake layer turn out lumpy?
Lumpy cheesecake is almost always caused by using cream cheese that is too cold. When cold cream cheese is beaten, it breaks into tiny firm beads that are nearly impossible to smooth out once other ingredients are added. Always ensure your cream cheese is completely at room temperature (soft to the touch) before you begin. If you’re in a rush, you can microwave the unwrapped blocks for 15-20 seconds on low power.
Can I use a different type of cookie for the crust?
Yes! You can substitute the graham crackers with an equal weight of chocolate wafers, digestive biscuits, or even vanilla wafers. The key is to ensure they are ground into a fine crumb so they can be packed tightly. Keep the butter and sugar measurements the same, as these are the “glue” that holds your alternative crust together during the par-baking process.
Why is my caramel layer leaking out when I cut the bars?
This usually happens for two reasons: the caramel was too thin or the bars weren’t chilled long enough. Ensure you are using a thick, jarred caramel sauce (the kind that holds its shape on a spoon) rather than a thin syrup. Additionally, if the bars haven’t chilled for at least 6 hours, the caramel won’t have reached the proper temperature to stay firm during slicing.
What can I use if I don’t have an offset spatula?
If you don’t have an offset spatula, the back of a large metal spoon is your best friend. It has a smooth, curved surface that works well for spreading the chocolate seal and the cheesecake layer. For the ganache, you can also simply tilt the pan from side to side to let gravity do the work, which often results in an even smoother finish than using a tool.
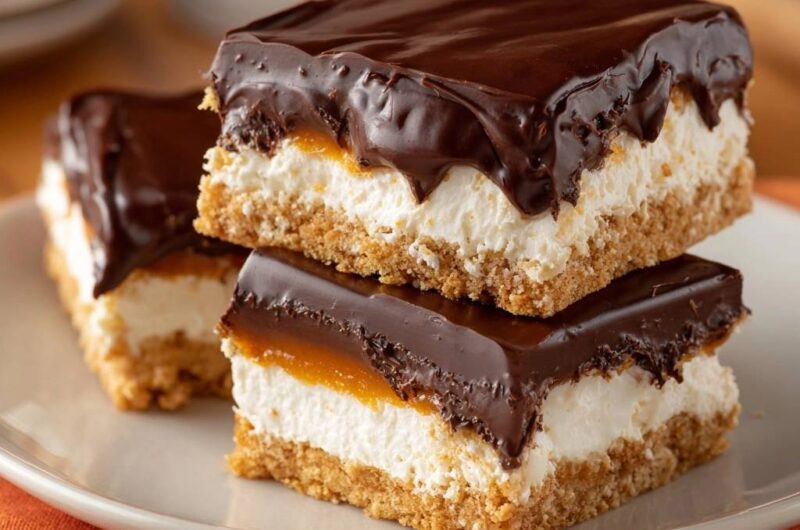
How do I get perfectly clean layers like in the photos?
The secret is the “Hot Knife” technique. Dip a sharp chef’s knife into a tall glass of very hot water, wipe it completely dry, and make one clean slice. The heat of the blade slices through the chocolate and caramel like butter. You must clean the knife and re-dip it in hot water between every single cut to prevent the layers from smearing into each other.
Cheesecake Bars
Course: DessertCuisine: AmericanDifficulty: medium12
servings30
minutes10
minutes410
kcal360
MinutesA decadent layered dessert featuring a sturdy graham cracker crust, a chocolate moisture barrier, creamy no-bake cheesecake, salted caramel, and a rich chocolate ganache topping.
Ingredients
2 1/2 cups graham cracker crumbs (extra for a thick, sturdy base)
3/4 cup unsalted butter, melted
1/4 cup granulated sugar
16 oz cream cheese, softened to room temperature
1 cup powdered sugar
1 tsp vanilla extract
1 1/2 cups heavy cream, divided (1 cup for cheesecake, 1/2 cup for ganache)
3/4 cup thick, salted caramel sauce (store-bought or homemade)
1 1/2 cups semi-sweet chocolate chips (extra for the crust seal and thick topping)
Directions
- Preheat your oven to 350°F (175°C). Line an 8×8 inch baking pan with parchment paper, leaving an overhang on all sides for easy removal.
- In a bowl, combine graham cracker crumbs, melted butter, and granulated sugar. Press the mixture very firmly into the bottom of the prepared pan using the bottom of a flat measuring cup.
- Bake the crust for 10-12 minutes until golden and fragrant. Remove from the oven. Immediately sprinkle 2 tablespoons of chocolate chips over the hot crust. Let them sit for 2 minutes, then spread the melting chocolate into a thin, even layer with an offset spatula. This creates the “Anti-Soggy” moisture barrier. Let the crust cool completely.
- In a large bowl, beat the softened cream cheese, powdered sugar, and vanilla until completely smooth and aerated.
- In a separate chilled bowl, whip 1 cup of heavy cream to stiff peaks. Gently fold the whipped cream into the cream cheese mixture until no streaks remain.
- Spread the cheesecake mixture evenly over the cooled, chocolate-sealed crust. Use a spatula to smooth the top. Place in the freezer for 20 minutes to firm up the surface.
- Gently pour the thick caramel sauce over the chilled cheesecake layer. Spread it carefully to the edges. Return to the freezer for another 15 minutes; this prevents the caramel from bleeding into the chocolate layer.
- To make the ganache, heat the remaining 1/2 cup heavy cream in a small saucepan until it just begins to simmer. Pour over the remaining chocolate chips in a heat-proof bowl. Let sit for 5 minutes, then whisk from the center outward until glossy and thick.
- Pour the chocolate ganache over the cold caramel layer. Tilt the pan to let the chocolate flow to the edges for a smooth, professional finish.
- Refrigerate for at least 6 hours, or preferably overnight. To serve, lift the bars out using the parchment paper. Use a sharp knife dipped in hot water (and wiped dry between cuts) to achieve the clean, distinct layers shown in the image.
Notes
- The secret to clean layers is using a sharp knife dipped in hot water and wiped dry between every cut. Ensure the caramel layer is firm before adding the ganache to prevent bleeding.


