
Why do most people fail at this dish? You spend three hours waiting for a cozy dinner, only to bite into a piece of beef that feels like a pencil eraser. It’s frustrating, but the fix isn’t about adding more ingredients; it’s about mastering the physics of the pot.
The secret to melt-in-your-mouth beef is a specific low-and-slow braising technique that breaks down tough connective tissue without boiling the moisture out of the muscle fibers. When you control the temperature correctly, you aren’t just cooking meat; you’re transforming it into something buttery and rich.
The real trick starts before the heat even touches the pan. You must pat the beef cubes completely dry with paper towels. If the surface is wet, the meat steams instead of searing, and you’ll lose that deep, savory crust that defines a world-class stew.
The Science of Tenderness in Beef Stew
Understanding the biology of your ingredients changes how you cook. Beef chuck is packed with muscle fibers held together by a tough protein called collagen. If you cook this meat quickly over high heat, those fibers tighten up like a wrung-out sponge, pushing all the moisture out and leaving you with dry, leathery chunks.
However, when you maintain a steady, low temperature between 160°F and 180°F, a beautiful chemical transformation occurs. Over several hours, that stubborn collagen slowly melts into gelatin. This gelatin coats the muscle fibers, providing that luxurious, lip-smacking mouthfeel we crave in a savory beef stew.
Therefore, boiling is the enemy of tenderness. If the liquid in your pot is bubbling violently, the temperature is too high. This causes the muscle fibers to contract violently, resulting in the “dry but wet” texture where the meat is submerged in liquid but feels parched in your mouth. A gentle, barely-there simmer is your best friend.
Why Chuck Roast is the Superior Choice
Don’t be tempted by leaner, more expensive cuts like sirloin or round. These lack the necessary fat and connective tissue to survive a long simmer. Without that “white spiderweb” of intramuscular fat known as marbling, the meat will simply disintegrate into dry shreds rather than staying in succulent cubes.
When you’re at the butcher counter, look for a chuck roast with heavy marbling throughout. This fat acts as an internal basting system. As it melts, it keeps the meat lubricated and adds an incredible depth of flavor to the surrounding broth that leaner cuts just can’t provide.
Essential Components for a Rich Savory Base
A great stew relies on a foundation of high-quality liquids and aromatics. I always recommend using a high-quality beef bone broth rather than standard stock. Bone broth has a higher protein content, which contributes to a silkier, more substantial body in the final sauce.
The vegetables aren’t just side players; they are structural elements. Cutting your carrots into thick, two-inch chunks ensures they don’t turn into mush during the three-hour journey. They should be soft enough to cut with a spoon but firm enough to hold their shape alongside the beef.
Dried thyme and rosemary provide an earthy, woodsy backbone that permeates the meat. In addition, bay leaves add a subtle floral note that lightens the heavy, savory profile. These herbs need time to release their oils, which is why we add them right at the beginning of the simmer.
The Role of Acidity and Umami
Tomato paste is a concentrated “umami bomb” that adds a savory depth you can’t get from fresh tomatoes. When you sauté it for a minute before adding liquids, it caramelizes and loses its raw, metallic edge. This creates a complex flavor profile that evolves and deepens over the hours.
Acidity is equally important to balance the richness of the beef fat. Using a cup of dry red wine provides a sharp contrast that cuts through the heavy flavors. If you prefer not to use wine, a splash of extra broth mixed with a teaspoon of balsamic vinegar at the end can provide a similar brightening effect.
Phase One: The Maillard Reaction and Fond
The Maillard reaction is the chemical process that occurs when proteins and sugars are exposed to high heat, creating that dark, flavorful crust on the meat. This isn’t just about color; it’s the primary source of the stew’s savory “meatiness.”
To achieve this, your pan must be hot and your meat must be dry. If you skip the paper towel step, the surface moisture will turn to steam, preventing the temperature from rising high enough to brown the beef. You’ll end up with gray meat and a bland sauce.
As you sear, you’ll notice brown bits sticking to the bottom of the Dutch oven. This is called “fond.” Don’t scrub it away! These caramelized bits are pure flavor gold. They will eventually dissolve into your braising liquid, giving the sauce its characteristic dark mahogany color and intense flavor.
Batch Searing to Prevent Steaming
Patience is a virtue when searing beef. If you dump all two and a half pounds of meat into the pot at once, the temperature of the oil will plummet. Instead of searing, the meat will release its juices and begin to boil in its own liquid.
Work in small batches, giving each cube enough space to breathe. You’re looking for a deep, dark brown crust on at least two sides. If the meat looks gray or pale, leave it alone for another minute. That crust is the difference between a “good” stew and a “legendary” one.
Phase Two: Building the Braising Liquid
Once the meat is seared and removed, it’s time to deglaze the pot. Pouring in your liquid while the pan is hot allows you to scrape up all that precious fond with a wooden spoon. This step ensures every bit of flavor from the searing process is integrated into the sauce.
The “flour bridge” technique is a pro move for a glossy finish. By sprinkling flour over the sautéed vegetables before adding the broth, you create a roux-like base. This stabilizes the sauce, ensuring it thickens evenly without the lumps often found in stews thickened at the very end.
For an even more flavorful base, explore hearty beef stew recipes that build depth.
Phase Three: The Low and Slow Simmer
This is the most critical phase for achieving that “no more tough meat” result. Once you’ve combined your ingredients, bring the liquid to a boil, then immediately drop the heat to the lowest setting. You want a “bare simmer,” which means only one or two bubbles should break the surface every few seconds.
A tight-fitting lid is essential here. It traps the steam inside, creating a moist micro-environment that prevents the liquid from evaporating too quickly. This gentle steaming effect helps the beef fibers relax and absorb the seasoned broth, ensuring every bite is juicy.
Timing the Vegetable Additions
Many people make the mistake of adding potatoes at the very beginning. By the time the beef is tender, the potatoes have disintegrated, turning the stew into a grainy mess. Instead, use the “staggered entry” method.
Add your baby red and yellow potatoes at the 90-minute mark. This gives them exactly enough time to become fork-tender while remaining whole. The starch they release during the final hour of cooking acts as a natural thickener, giving the sauce a velvety, rich consistency.
Troubleshooting Common Stew Obstacles
If your sauce feels too thin after three hours, don’t panic. Simply remove the lid and let it simmer for an extra 15 minutes. This evaporates excess water and concentrates the flavors. Alternatively, a small cornstarch slurry can fix the texture in seconds without changing the taste.
If the meat is still tough at the three-hour mark, it simply needs more time. Every cow is different, and some cuts have more stubborn connective tissue. Keep the heat low and give it another 30 minutes. Increasing the heat will only make the problem worse by drying out the fibers.
Sometimes a stew can taste “flat” or overly heavy. This is usually a lack of salt or acid. A tiny pinch of finishing salt or a teaspoon of lemon juice right before serving can “wake up” the flavors, making the savory notes pop against the richness of the beef.
Make-Ahead Strategies and Storage
It’s a culinary fact: beef stew tastes better the next day. As the stew cools, the muscle fibers in the beef act like a sponge, pulling the seasoned braising liquid back into the center of the meat. This “re-absorption” process intensifies the flavor and improves the texture.
If you’re making this ahead of time, let it cool completely at room temperature before moving it to the fridge. When you’re ready to eat, reheat it slowly on the stovetop over medium-low heat. Avoid the microwave if possible, as it can heat the meat unevenly and make it rubbery.
Optimal Pairings for a Hearty Meal
A stew this rich needs a partner to soak up the sauce. A thick slice of crusty sourdough bread is the classic choice. The slight tang of the bread complements the savory beef, and the airy crumb is perfect for cleaning your bowl.
If you want to balance the meal, serve it with a simple bitter green salad. Arugula or radicchio tossed in a light vinaigrette provides a crisp, refreshing contrast to the earthy, warm notes of the root vegetables and slow-cooked beef.
Expert Tips for Visual Presentation
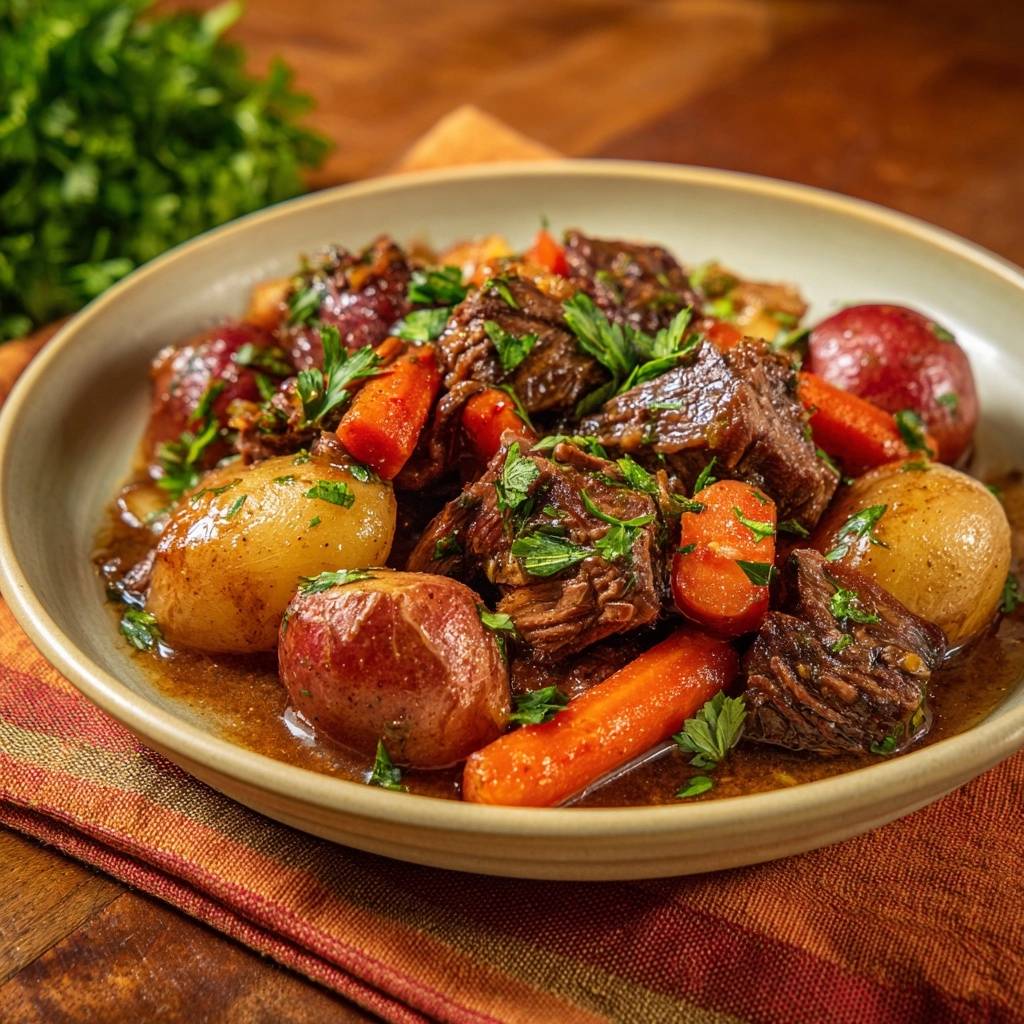
Beef stew can often look a bit “brown-on-brown.” To make it visually appealing, use the “garnish heavy” rule. A generous handful of freshly chopped Italian parsley adds a vibrant green pop that makes the dish look fresh and inviting.
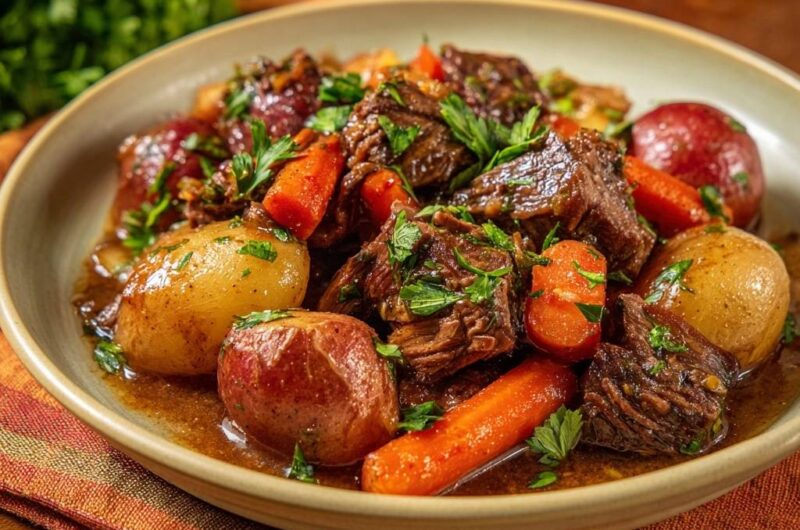
Serve the stew in shallow bowls rather than deep ones. This allows the beautiful colors of the red and yellow potato skins and the bright orange carrots to peek through the dark sauce, showcasing the variety of textures in every serving.
Frequently Asked Questions
How should I store leftovers and does this freeze well?
Store leftovers in an airtight container in the refrigerator for up to 4 days. This stew actually freezes quite well for up to 3 months. However, be aware that potatoes can sometimes become slightly grainy after thawing. To fix this, reheat the stew slowly on the stovetop and stir gently to re-incorporate the starches into the sauce.
Why is my beef still tough after cooking for three hours?
If the meat is tough, it almost always means the collagen hasn’t finished breaking down into gelatin. This can happen if the cut of meat was particularly lean or if the simmer was too low. The solution is simply more time. Continue simmering on low for another 30 to 45 minutes and check it again. It will eventually yield and become tender.
Can I use a different cut of meat if I can’t find chuck roast?
If chuck roast isn’t available, the best substitute is bone-in short ribs or beef oxtail. Both have the high fat and collagen content required for a long braise. Avoid “stew meat” packages at the grocery store if possible, as these are often a mix of different scraps that cook at different rates, leading to some pieces being tender while others stay tough.
What can I use instead of red wine?
You can easily substitute the red wine with an equal amount of high-quality beef broth. To mimic the acidity that wine provides, add one tablespoon of balsamic vinegar or red wine vinegar to the pot when you add the broth. This ensures the stew remains balanced and doesn’t taste overly heavy or one-dimensional.
My stew sauce is too greasy, how do I fix it?
If you notice a layer of yellow fat floating on top, you can easily skim it off with a wide spoon while the stew is simmering. If you have time, chilling the stew overnight makes this even easier; the fat will solidify into a hard white layer on top that you can simply lift off and discard before reheating.
Beef Stew
Course: Main CourseCuisine: AmericanDifficulty: medium6
servings20
minutes3
hours410
kcal180
MinutesA hearty and comforting beef stew designed to eliminate tough meat through precise temperature control and searing. Large chunks of beef chuck are braised with root vegetables and aromatic herbs for a deep, savory flavor profile.
Ingredients
2.5 pounds beef chuck roast, cut into large 1.5 to 2-inch cubes
1 pound baby red and yellow potatoes, kept whole
4 large carrots, peeled and cut into thick 2-inch chunks
1 large yellow onion, diced
3 cloves garlic, minced
2 tablespoons all-purpose flour (for thickening)
3 cups high-quality beef bone broth
1 cup dry red wine (or extra broth)
2 tablespoons tomato paste
2 tablespoons vegetable oil
1 teaspoon dried thyme
1 teaspoon dried rosemary
2 bay leaves
Salt and black pepper to taste
1/2 cup fresh Italian parsley, roughly chopped for garnish
Directions
- Pat the beef cubes completely dry with paper towels. This is the first step to avoiding tough meat; moisture on the surface steams the meat instead of searing it. Season generously with salt and pepper.
- Heat oil in a large heavy-bottomed pot or Dutch oven over medium-high heat. Sear the beef in small batches until a deep, dark brown crust forms on all sides. Do not crowd the pan or the temperature will drop, leading to gray, leathery meat. Remove beef and set aside.
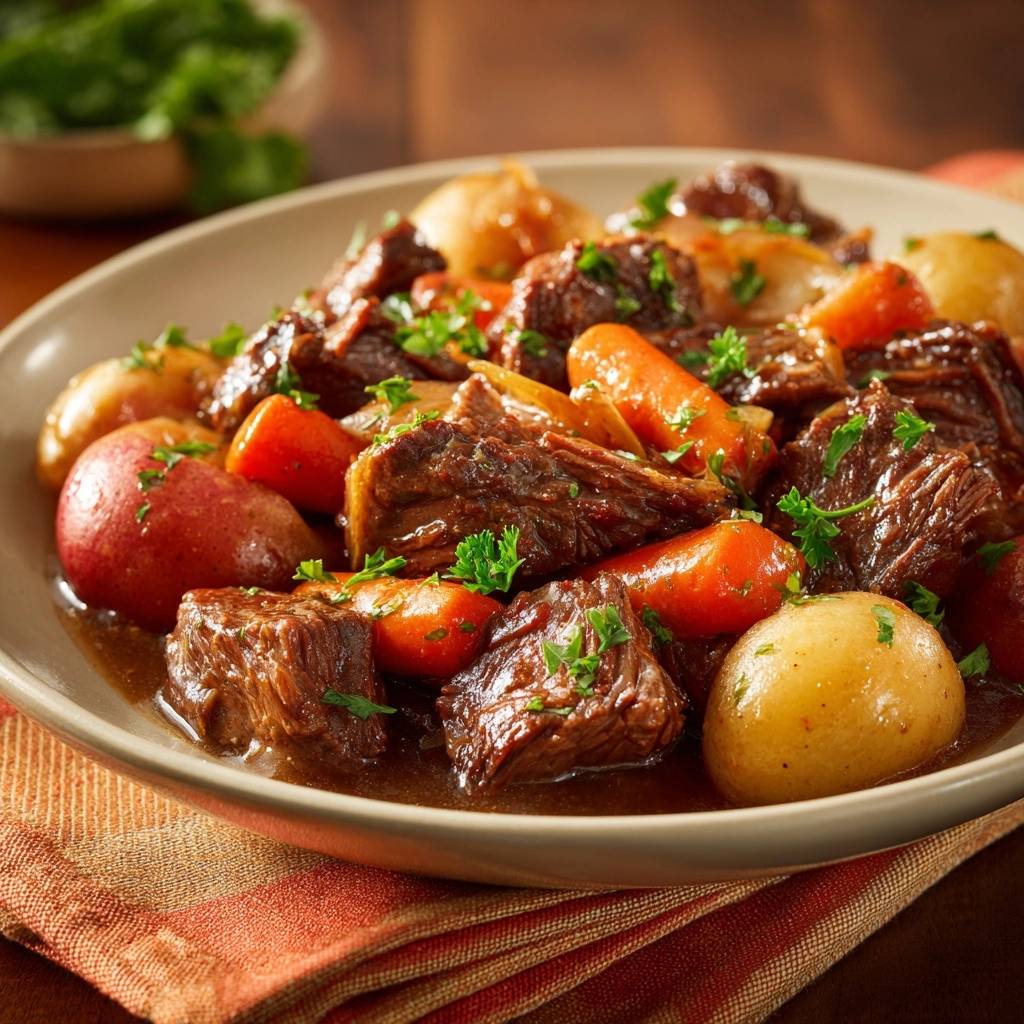
- In the same pot, add the onion and carrots. Cook for 5 minutes until the onion is translucent. Stir in the garlic and tomato paste, cooking for 1 minute. Sprinkle the flour over the vegetables and stir for 2 minutes to cook out the raw flour taste; this ensures the silky, glossy sauce consistency seen in the image.
- Pour in the red wine (or 1 cup of broth) and use a wooden spoon to scrape up all the brown bits (fond) from the bottom of the pot.
- Return the beef and any accumulated juices to the pot. Add the remaining broth, thyme, rosemary, and bay leaves. The liquid should not fully submerge the meat; a true braise uses partial submersion for better texture.
- Bring the liquid to a very gentle simmer, then immediately turn the heat to the lowest setting. Cover with a tight-fitting lid.
- The “No More Tough Meat” Secret: Maintain a bare simmer where only a few bubbles break the surface. If the liquid boils, the muscle fibers will contract and turn into rubber. Let it braise for 1.5 hours.
- After 1.5 hours, add the whole baby potatoes to the pot. Submerge them slightly in the liquid. Cover and continue to simmer for another 1 to 1.5 hours. Adding potatoes later prevents them from disintegrating while the meat reaches peak tenderness.
- Check the beef at the 3-hour total mark. It should pull apart easily with a fork. Remove the bay leaves.
- Serve in shallow bowls, ensuring each portion has a mix of red and yellow potatoes and thick carrot chunks. Garnish heavily with fresh chopped parsley to provide the vibrant green contrast shown in the image.
Notes
- The secret to tender meat is maintaining a bare simmer; boiling the liquid will cause the muscle fibers to become tough and rubbery. Adding potatoes halfway through prevents them from becoming mushy.


