
The biggest frustration with braised chicken is ending up with rubbery, soggy skin that slides right off the meat. You want that deep, mahogany crust that crackles when your fork hits it, but usually, the liquid in the pan turns the skin into a damp mess. This recipe solves that dilemma by using a specific high-heat searing technique and a shallow-liquid oven finish. You get the best of both worlds: meat that is succulent and falling off the bone, paired with skin that stays shatteringly crisp.
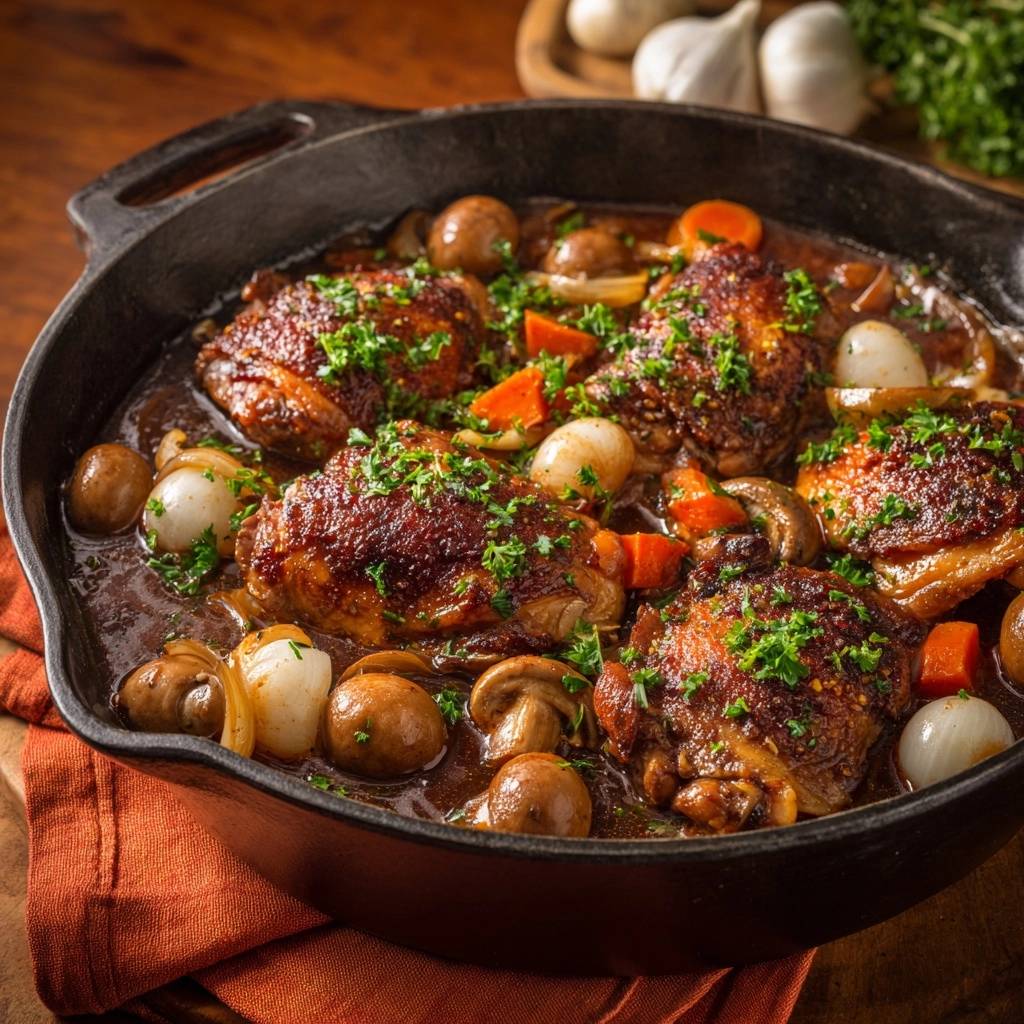
The secret lies in the contrast of textures and the intensity of the glaze. By the time you pull this cast iron skillet out of the oven, the mushrooms have soaked up the savory beef stock and the pearl onions have turned buttery soft. The sauce isn’t just a thin broth; it’s a rich, dark reduction that clings to the vegetables. It’s a sophisticated, one-pan meal that feels like high-end French bistro cooking but fits perfectly into a busy weeknight schedule.
For a similar braised chicken thigh experience with a touch of sweetness, try braised chicken thighs with carrots.
I’ve found that the absolute key to success is the “liquid line” rule. If you submerge your chicken, you’re boiling the skin, which is the fastest way to ruin the texture. Instead, we keep the liquid halfway up the thighs, leaving the skin exposed to the dry, circulating heat of a 400°F oven. This ensures the fat continues to render and the skin stays crispy while the dark meat braises underneath. It’s a total game-changer for your Sunday dinner rotation.
The Mechanics of Shatteringly Crispy Braised Skin
Achieving that perfect crunch starts long before the chicken hits the pan. You have to deal with surface moisture first. If there’s even a hint of water on the skin, the chicken will steam rather than sear. I always recommend patting the thighs extremely dry with paper towels until the skin feels tacky. This allows the Maillard reaction to happen immediately, creating those complex, savory flavors and that beautiful dark brown color we’re after.
Bone-in, skin-on thighs are non-negotiable for this dish. The bone acts as a heat conductor, cooking the meat from the inside out and keeping it juicy during the long braise. More importantly, the skin provides the fat needed to sauté the vegetables later. As the chicken sears, the subcutaneous fat renders out, flavoring the entire base of the dish. Without that skin, you lose the primary source of flavor and the satisfying textural contrast that makes this recipe famous.
Temperature control is your best friend here. You want the pan hot enough to sizzle loudly the moment the meat touches the surface. However, you don’t want it smoking so much that the oil breaks down. A steady, medium-high heat allows the fat to melt away slowly while the proteins brown. This creates a structural barrier on the skin that helps it resist the steam from the braising liquid later in the process.
Why High-Heat Searing Prevents Rubbery Texture
When you sear the chicken for a full 8 to 10 minutes, you aren’t just browning the surface; you’re transforming the fat. This extended time in the pan renders out the soft, flabby layer of fat beneath the skin. Therefore, when the chicken eventually goes into the oven, there’s no “rubber” left to chew through. You’re left with a thin, parchment-like layer of skin that crisps up beautifully under the oven’s dry heat.
Essential Components for a Deep Umami Glaze
The flavor of this braise depends heavily on the quality of your liquids. While most chicken recipes call for chicken stock, I use a rich beef stock here. The beef stock provides a much deeper color and a more robust, savory backbone that stands up to the earthy mushrooms. It creates a dark, glossy glaze that looks incredible against the golden-brown chicken. If you use a low-sodium version, you have more control over the final seasoning as the sauce reduces.
Smoked paprika is my “secret” ingredient for the skin. It doesn’t just add a hint of woodsy flavor; it provides a deep reddish-brown hue that mimics hours of slow roasting. When combined with the balsamic vinegar in the sauce, it creates a complex profile that tastes expensive. You’ll notice the sauce has a “sticky” quality to it, which comes from the natural sugars in the tomato paste and vinegar caramelizing together in the skillet.
Fresh herbs make a massive difference in the final presentation. While dried thyme is great for the long cook because it can withstand the heat, fresh parsley added at the very end provides a necessary pop of brightness. It cuts through the richness of the rendered chicken fat and the heavy beef reduction. Always use flat-leaf Italian parsley if you can find it, as it has a more robust flavor than the curly variety.
Selecting Mushrooms and Pearl Onions
Button mushrooms are the workhorses of this dish because they act like little sponges. They soak up the beef stock and balsamic vinegar, becoming flavor bombs by the time the dish is finished. If you want to save time on the pearl onions, don’t try to peel them dry. Drop them into boiling water for 30 seconds, then shock them in ice water. The skins will slip right off with a simple squeeze, saving you twenty minutes of tedious prep work.
The Role of Balsamic Vinegar and Tomato Paste
Acidity is what prevents a rich braise from feeling too heavy on the palate. The balsamic vinegar provides a sharp tang that balances the fat from the chicken thighs. Additionally, the tomato paste acts as a thickener and a color booster. As it cooks in the hot fat, it loses its raw metallic taste and develops a sweet, concentrated flavor that helps the sauce coat the back of a spoon perfectly.
Step-by-Step: Mastering the Two-Stage Cook
The process begins with the sound of a heavy sizzle. Once you place those seasoned thighs into the hot oil, leave them alone. It’s tempting to peek, but moving the meat prevents that even, mahogany crust from forming. You’ll know it’s ready to flip when the chicken releases easily from the pan. If it sticks, it’s telling you it needs another minute to finish rendering that fat.
After the chicken is seared and set aside, the vegetables take center stage. You’ll see a layer of liquid gold in the bottom of your skillet—that’s the rendered chicken fat. Sauté the mushrooms and onions in this fat until they are golden and fragrant. The smell at this stage is incredible, as the earthy mushrooms begin to brown and the onions soften. This is where the foundation of your sauce is built.
Deglazing is the most satisfying part of the cook. When you pour in the liquid, the pan will hiss and release all those browned bits stuck to the bottom. This is called the “fond,” and it’s concentrated flavor. Use a wooden spoon to scrape every bit of it into the sauce. Once the liquid has reduced by about a third, it will look dark and syrupy, which is exactly what you want before the chicken goes back in.
Phase 1: Rendering and Developing the Crust
Start with a cold skillet if you’re worried about the fat not rendering, but for this specific high-heat method, a preheated cast iron is best. The goal is a 10-minute sear on the skin side. You are looking for a color that is darker than golden—think of a well-worn penny. This deep color ensures the flavor is locked in and the texture will survive the upcoming oven time.
Phase 2: Building the Aromatic Braising Base
Once the chicken is out, toss in your carrots, onions, and mushrooms. Don’t crowd the pan too much; you want them to brown, not steam. When you add the garlic and tomato paste, cook them just until the garlic is fragrant and the paste turns a shade darker. This “toasting” of the tomato paste removes the acidity and brings out the natural sweetness that thickens the glaze.
Phase 3: The Uncovered Oven Finish
When you return the chicken to the pan, nestle the thighs into the vegetables but keep the skin above the liquid. This is the most important step. The 400°F air in the oven will circulate around the exposed skin, dehydrating it further and making it incredibly crunchy. Meanwhile, the bottom half of the chicken is submerged in the simmering sauce, becoming tender and infused with the thyme and balsamic flavors.
Troubleshooting Common Braising Pitfalls
If you find your sauce is too thin after the oven time, don’t panic. Simply remove the chicken to a plate and set the skillet back on the stovetop over high heat. Boil the sauce for 3 to 5 minutes until it reaches your desired thickness. This won’t hurt the vegetables, and it will concentrate the flavors even further. Just remember to put the chicken back in briefly to warm through before serving.
On the other hand, if the skin is darkening too quickly in the oven, you can loosely drape a piece of foil over the top. However, make sure the foil isn’t touching the skin, or it will trap steam and soften the crust. Usually, the 20-minute mark is the sweet spot where the meat hits 165°F and the skin is perfectly browned. Using a meat thermometer is the best way to ensure you don’t overcook the thighs while waiting for the sauce to thicken.
Optimal Side Dishes for Rich Braises
You need something to catch all that delicious dark gravy. Garlic mashed potatoes are the classic choice because the creamy texture balances the acidity of the balsamic sauce. If you prefer something lighter, buttered egg noodles work beautifully. They have a wide surface area that holds onto the mushrooms and pearl onions, ensuring you get a bit of everything in every single bite.
A crusty loaf of sourdough is also a fantastic companion. There is nothing quite like using a piece of warm bread to swipe up the last bits of the beef and mushroom reduction from the bottom of the skillet. If you want a green vegetable on the side, try some simple roasted asparagus or a crisp green salad with a light lemon vinaigrette to provide a fresh contrast to the rich, savory chicken.
Make-Ahead Strategies and Storage
This dish actually tastes even better the next day as the flavors in the sauce continue to meld. However, the skin will naturally lose its crunch in the refrigerator. To store, place the chicken and sauce in an airtight container for up to three days. I don’t recommend freezing this specific dish because the mushrooms can become a bit watery and the pearl onions may lose their structure upon thawing.
When you’re ready to eat leftovers, avoid the microwave at all costs if you want to save the skin. Instead, place the chicken in an air fryer at 375°F for about 5 minutes. This will heat the meat through while reviving that “shatteringly crisp” texture. Alternatively, you can put it back in a 400°F oven for 10 minutes. Heat the sauce separately in a small saucepan on the stove until it’s bubbling, then pour it around the chicken.
Expert Troubleshooting and Technique FAQ
Can I use chicken breast instead of thighs?
I don’t recommend using chicken breasts for this specific braising method. Breasts are very lean and will dry out long before the sauce has time to reduce and the vegetables have softened. Thighs have enough fat and connective tissue to stay moist and tender during the 45-minute cooking process. If you must use breasts, you would need to significantly reduce the oven time, which would result in a thinner, less flavorful sauce.
What if I don’t have a cast iron skillet?
A heavy-bottomed stainless steel skillet or an oven-safe Dutch oven will work perfectly fine. The main requirement is that the pan can go from the stovetop directly into a 400°F oven. Avoid using non-stick pans, as they generally aren’t rated for high oven temperatures and they don’t allow for the same level of “fond” development on the bottom of the pan, which is essential for the sauce.
How do I get the onions perfectly tender but not mushy?
The key is the size of the onion and the timing of the sauté. By using whole pearl onions and browning them quickly in the chicken fat, you create a seared exterior that helps them hold their shape. They will continue to soften during the 20-minute oven finish, but they won’t break down into the sauce. If you use regular diced onions, they will disappear into the gravy, which tastes good but lacks the visual appeal of this dish.
Can I substitute the red wine?
Absolutely. If you prefer not to use red wine, you can substitute it with an equal amount of pomegranate juice or simply use extra beef stock. If you use extra stock, add a small squeeze of fresh lemon juice or an extra teaspoon of balsamic vinegar at the end. You need that hit of acidity to cut through the richness of the chicken fat and balance the savory notes of the mushrooms.
Why is my sauce too salty?
Sauce saltiness usually happens because the stock reduces and concentrates the salt already present. To prevent this, always start with a low-sodium beef stock. You can always add more salt at the very end after tasting the finished sauce. If it’s already too salty, try adding a splash of water or a little more balsamic vinegar; the acidity can help mask the over-salted flavor without thinning the sauce too much.
Braised Chicken Thighs
Course: Main CourseCuisine: AmericanDifficulty: medium4
servings15
minutes45
minutes510
kcal60
MinutesA savory one-pan meal featuring bone-in chicken thighs, earthy mushrooms, and sweet pearl onions braised in a deep beef stock and red wine reduction designed to keep the skin crispy while the meat stays tender.
Ingredients
4 large bone-in, skin-on chicken thighs
1 cup whole pearl onions, peeled
8 ounces whole button mushrooms
2 large carrots, sliced into thick rounds
3 cloves garlic, smashed
1 ½ cups rich beef stock (for deep color)
½ cup dry red wine (optional, for acidity and color)
1 tablespoon tomato paste
1 tablespoon balsamic vinegar
2 tablespoons olive oil
1 teaspoon dried thyme
1 teaspoon smoked paprika (for the deep red-brown skin tone)
Salt and black pepper to taste
Fresh parsley, finely chopped for garnish
Directions
- Preheat your oven to 400°F (200°C).
- Pat the chicken thighs extremely dry with paper towels. Season the skin side with salt, pepper, and a dusting of smoked paprika.
- Heat olive oil in a large oven-proof cast iron skillet over medium-high heat. Place chicken skin-side down.
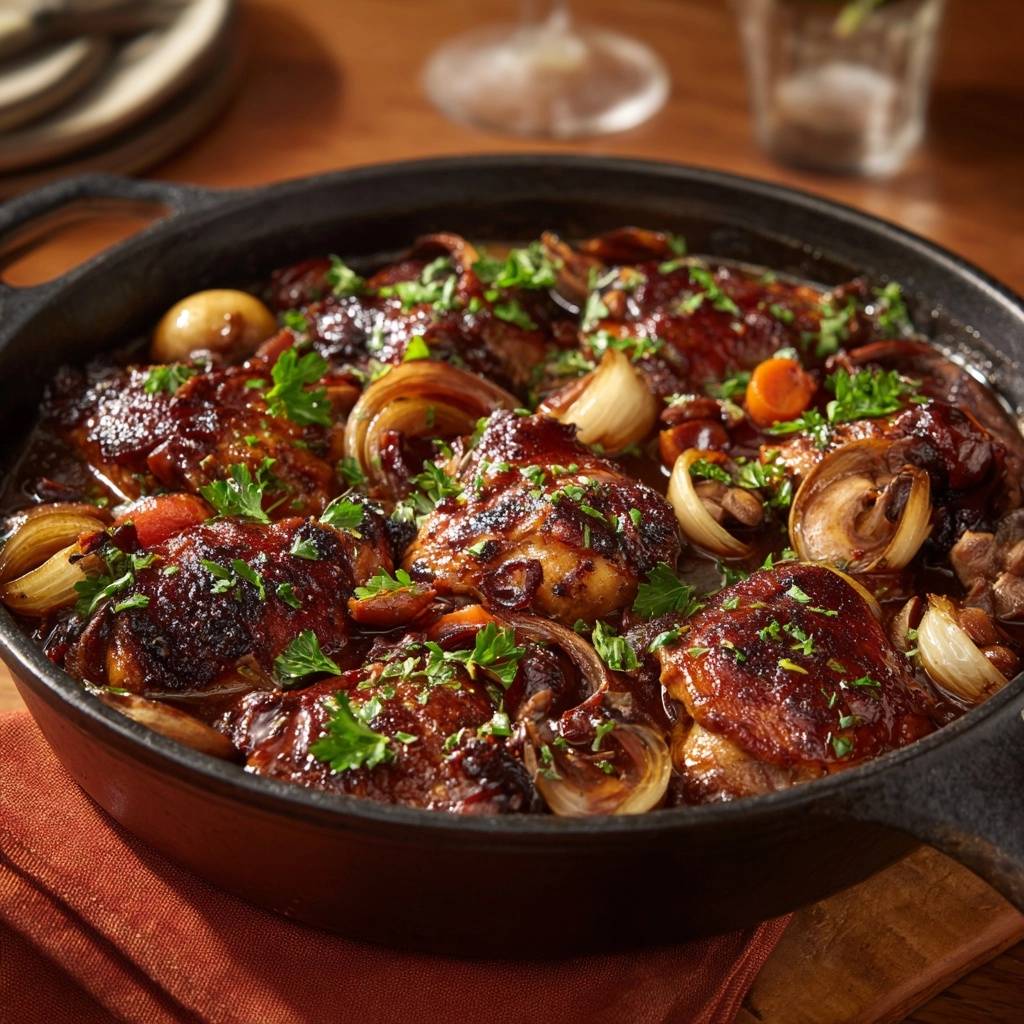
- Sear the chicken for 8 to 10 minutes without moving it. This renders the fat and creates the deep mahogany crust shown in the image. Flip and sear the bottom for 2 minutes, then remove chicken to a plate.
- In the same skillet, add the mushrooms, pearl onions, and carrots. Saute for 5-7 minutes in the chicken fat until the onions are translucent and mushrooms are browned.
- Stir in the garlic and tomato paste, cooking for 1 minute. Deglaze the pan with the red wine (or a splash of stock), scraping the bottom to release the fond.
- Stir in the beef stock, balsamic vinegar, and thyme. Bring to a simmer and let the liquid reduce by one-third to create a thick, dark gravy.
- Return the chicken to the skillet, placing it skin-side UP. Ensure the liquid reaches no more than halfway up the chicken; the skin must remain completely dry and exposed.
- Transfer the skillet to the oven. Bake uncovered for 20-25 minutes. This oven finish is essential to maintain the “shatteringly crisp” skin while the bottom braises in the sauce.
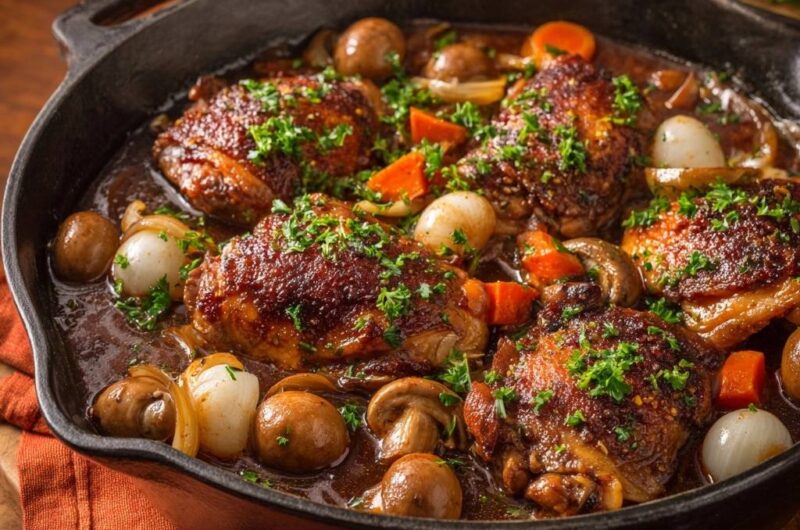
- Remove from the oven. The sauce should be thick and bubbling. Garnish heavily with fresh chopped parsley and serve directly from the cast iron skillet.
Notes
- To ensure the skin remains crispy, make sure the braising liquid does not cover the top of the chicken thighs. Patting the skin extremely dry before searing is essential for the mahogany crust.


