
There’s nothing more disappointing than anticipating a comforting plate of Cheesy Baked Chicken & Rice, only to find the chicken has dried out and the rice is undercooked. I’ve personally navigated that kitchen frustration countless times, but after much experimentation, I finally perfected a method that guarantees every bite is juicy, tender, and infused with incredible flavor.
Finally: The Secret to Juicy Chicken & Flavorful Rice
This recipe for Cheesy Baked Chicken & Rice solves the common dilemma of tough chicken and bland rice often found in baked dishes. It transforms these challenges into a triumph of texture and taste, proving that comfort food doesn’t have to be complicated.
The secret lies in a quick, initial sear of the chicken, a technique that locks in natural juices and builds a foundational layer of savory flavor. This crucial step ensures the chicken stays incredibly tender as it finishes cooking gently within the moist rice environment.
For more tender chicken bites, explore cheesy chicken spaghetti bake techniques.
Beyond the perfectly cooked ingredients, this is a true one-pan meal, meaning minimal cleanup and maximum convenience. Everything cooks together, allowing the flavors to meld beautifully, creating a harmonious and deeply satisfying dish.
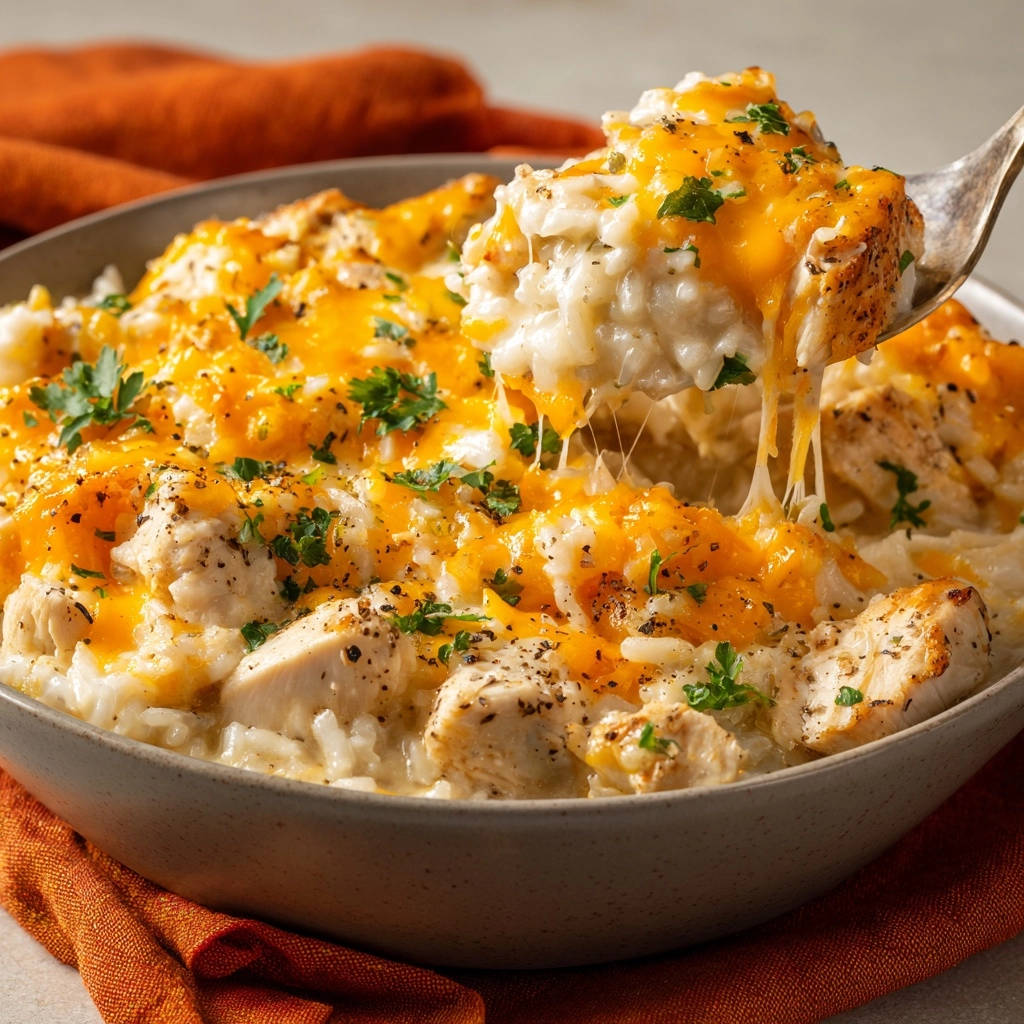
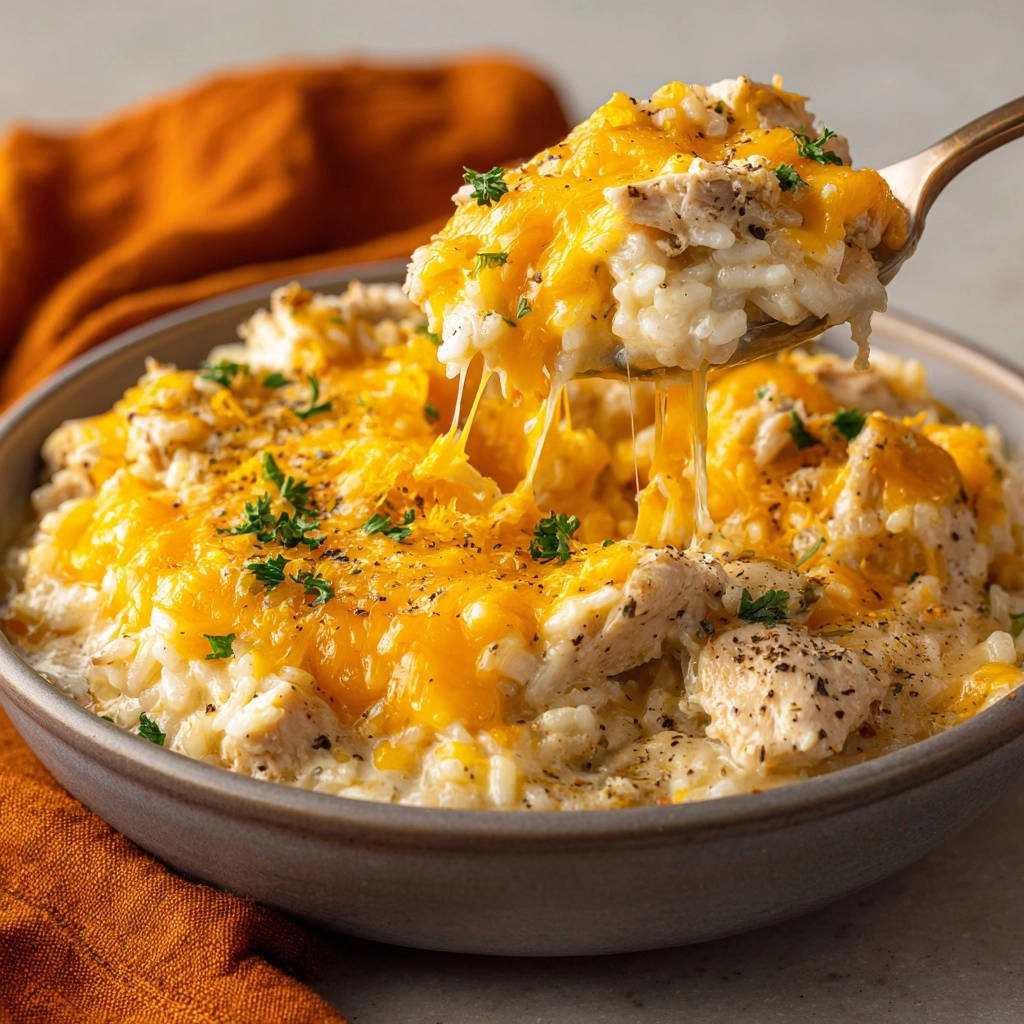
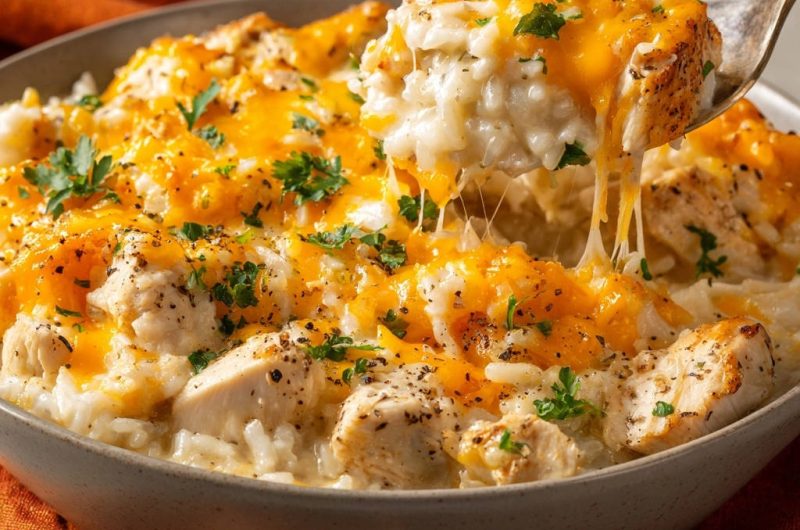
The crowning glory is a golden, bubbly layer of melted cheddar, adding that irresistible, creamy, and comforting cheesy finish that makes this dish an instant family favorite.
Essential Tools for Your Cheesy Baked Chicken & Rice Adventure
Having the right tools makes all the difference in achieving kitchen success and minimizing stress. Here are the essentials for your Cheesy Baked Chicken & Rice:
Large Oven-Safe Skillet: This is your star player, enabling you to sear the chicken on the stovetop and then seamlessly transfer the entire dish to the oven for baking. A good cast iron or stainless steel skillet with an oven-safe handle works perfectly.
Oven-Safe Lid or Aluminum Foil: Crucial for trapping steam and moisture during the initial baking phase. A tight seal ensures the rice cooks evenly and the chicken remains tender.
Cutting Board & Sharp Knife: Essential for safely and efficiently preparing your chicken breasts into uniform pieces, which promotes even cooking.
Measuring Cups & Spoons: Accuracy is key, especially for the rice and liquid ratio. Precise measurements guarantee the perfect texture for your tender rice.
Wooden Spoon or Spatula: Ideal for stirring ingredients without scratching the surface of your skillet and for gently nestling the chicken.
From Pantry to Perfection: Gathering Your Ingredients
The Heart of the Meal: Chicken Breasts
Boneless, skinless chicken breasts are our choice for lean protein and quick preparation. Cutting them into uniform 1-inch pieces is essential for consistent searing and ensures every piece finishes cooking perfectly tender within the baked rice.
The Foundation: Long Grain White Rice
Uncooked long grain white rice forms the fluffy, tender base of this comforting dish. It’s ideal for absorbing the savory chicken broth and maintaining distinct grains. Avoid instant or minute rice, as these will yield a dramatically different and less desirable texture.
Flavorful Liquid: Chicken Broth
Chicken broth is paramount for infusing deep, savory flavor into every grain of rice and piece of chicken. We recommend a low-sodium variety, allowing you full control over the final seasoning of your Cheesy Baked Chicken & Rice.
The Cheesy Finish: Shredded Cheddar
Shredded cheddar cheese melts into a golden, bubbly, and incredibly satisfying topping. Its sharp, creamy notes are fundamental to the “cheesy” aspect of this Cheesy Baked Chicken & Rice. For the best melt and flavor, we highly recommend freshly shredding your cheddar from a block rather than using pre-shredded options, which often contain anti-caking agents.
Essential Seasonings: Salt & Pepper
Simple yet powerful, salt and freshly ground black pepper elevate the natural flavors of the chicken and rice. They are foundational to the seasoning. Always taste and adjust as you go, and remember to save some extra pepper for a final garnish.
Freshness & Garnish: Parsley
Fresh chopped parsley is more than just a garnish; it adds a vibrant pop of color and a crucial note of herbaceous freshness. This bright flavor provides a delightful contrast to the rich, cheesy elements of the dish.
Cooking Fat: Oil
A tablespoon of cooking oil, such as olive or vegetable oil, is vital for achieving that perfect initial sear on the chicken. It also lightly toasts the rice, contributing to the overall depth of flavor in this one-pan masterpiece.
Mastering the Method: Juicy Chicken, Tender Rice, Cheesy Finish
-
Preheat Your Oven:
Preheat your oven to 375°F (190°C) well in advance. Ensuring the oven is at its target temperature from the start is critical for consistent baking and prevents the dish from drying out or cooking unevenly.
-
The Searing Secret: Brown the Chicken:
Heat 1 tablespoon of cooking oil in a large oven-safe skillet over medium-high heat until shimmering. Add the chicken pieces in a single layer, making sure not to overcrowd the pan, and sear for 2-3 minutes until lightly browned on one side.
This quick sear is the magic trick for this Cheesy Baked Chicken & Rice! It creates a flavorful crust and, most importantly, locks in the natural juices, guaranteeing the chicken remains incredibly tender through the baking process. Do not cook the chicken through at this stage.
Remove the seared chicken from the skillet and set it aside on a clean plate, leaving any savory drippings in the pan.
-
Toast the Rice for Depth:
Add 1.5 cups of uncooked long grain white rice directly to the same skillet. Stir the rice continuously for about 1 minute, allowing it to lightly toast in the residual oil and flavorful chicken bits.
Toasting the rice before adding liquid develops a subtle nutty flavor and helps the grains cook up individually and fluffier, preventing them from becoming sticky or clumpy.
-
Build the Liquid Base:
Carefully pour in 2.5 cups of chicken broth, then stir in 0.5 teaspoon of salt and 0.25 teaspoon of black pepper. Bring this mixture to a gentle simmer over medium heat, then immediately remove the skillet from the heat.
Bringing the liquid to a simmer ensures the rice begins cooking at the proper temperature, setting the stage for perfectly tender grains without overcooking the chicken later.
-
Nestle the Chicken:
Return the seared chicken pieces to the skillet, nestling them evenly into the rice and broth mixture. Ensure that most of the chicken pieces are submerged in the liquid.
Submerging the chicken allows it to finish cooking gently via steaming and absorption, infusing it with the broth’s flavor and maintaining its exceptional juiciness.
-
Cover and Bake (Initial Phase):
Cover the skillet tightly with an oven-safe lid or heavy-duty aluminum foil. Transfer the covered skillet to your preheated oven and bake for exactly 20 minutes.
A tight cover is paramount for trapping steam, which is essential for cooking the rice thoroughly and ensuring the chicken stays moist and tender.
-
The Cheesy Integration:
After 20 minutes, carefully remove the skillet from the oven using oven mitts. Uncover it and gently stir the rice and chicken to evenly distribute the moisture and ingredients. Then, sprinkle 1 cup of the shredded cheddar cheese evenly over the top.
This mid-bake stir ensures even cooking and allows the cheese to melt beautifully into the dish during the final stage.
-
Uncover and Finish Baking:
Return the uncovered skillet to the oven and continue baking for an additional 10-15 minutes. The Cheesy Baked Chicken & Rice is ready when the rice is tender, all the liquid is absorbed, and the cheese is melted, bubbly, and lightly golden brown on top.
Baking uncovered for this final period allows the cheese to develop that irresistible golden crust and ensures any remaining liquid fully evaporates, leaving you with perfectly cooked rice.
-
Rest and Garnish:
Remove the skillet from the oven and let it stand, uncovered, for 5 minutes. This crucial resting period allows the flavors to deepen, the rice to firm up slightly, and any remaining liquid to be fully absorbed, resulting in the best possible texture.
Garnish your magnificent Cheesy Baked Chicken & Rice with the remaining 0.5 cup of shredded cheddar cheese, a generous sprinkle of fresh chopped parsley, and extra black pepper for a final, aromatic flourish before serving hot.
Unlock the Ultimate Flavor: Expert Tips for Success
Elevate your Cheesy Baked Chicken & Rice from good to unforgettable with these expert insights and tricks:
Complementary Dishes
Round out your meal with these dishes that pair well with chicken and rice.
- For a refreshing option, try this Grilled Chicken Pasta Salad, featuring tender chicken and a satisfying mix of textures.
- If you’re craving something warm and savory, consider these Cheesy Garlic Pull-Apart Rolls, perfect for soaking up extra sauce.
Don’t Skip the Sear: The initial searing of the chicken pieces is much more than just browning. It’s the critical step that creates a flavorful crust and, most importantly, locks in the natural moisture. This ensures your chicken remains incredibly juicy and tender throughout the entire baking process, preventing the dreaded dry chicken.
Measure Rice & Broth Accurately: Precision is paramount when cooking rice. Using exact measurements for both the long grain white rice and chicken broth is crucial for achieving that perfect, fluffy texture. Too much liquid will result in mushy rice, while too little will leave you with crunchy, undercooked grains. Stick to the recipe’s ratio for guaranteed success.
Resist Peeking (During Initial Bake): It can be tempting to lift the lid and check on your dish, but for the first 20 minutes of baking, keep that skillet tightly covered. Lifting the lid releases essential steam that is actively cooking the rice and keeping the chicken moist. Trust the process; the steam is doing its job!
Let it Rest: The 5-minute resting period after removing the skillet from the oven is non-negotiable. This brief pause allows the rice to fully absorb any remaining liquid, firming up to an ideal texture. It also gives the chicken’s juices time to redistribute, leading to a more evenly cooked and intensely flavorful dish. Patience truly pays off here.
Freshly Shredded Cheese is Best: While convenient, pre-shredded cheese often contains anti-caking agents like cellulose. These can prevent the cheese from melting as smoothly and evenly as desired, sometimes leaving a grainy or less appealing texture. For the creamiest, most luscious, and beautifully bubbly cheese topping, take a few extra minutes to shred your own cheddar from a block.
What to Serve with Your Cheesy Baked Chicken & Rice
This Cheesy Baked Chicken & Rice is a hearty and complete meal on its own, but a few simple sides can beautifully complement its rich flavors and textures.
For another satisfying chicken dish, check out this grilled chicken burrito bowl.
Simple Green Salad: A crisp, fresh green salad with a light vinaigrette offers a refreshing contrast to the creamy, savory main dish. Its acidity cuts through the richness, balancing the meal.
Steamed or Roasted Vegetables: Brightly colored vegetables like steamed broccoli florets, tender green beans, or perfectly roasted carrots and crispy chickpeas (discover our recipe for perfect roasted carrots and crispy chickpeas here) add valuable nutrients and a pop of color. A squeeze of lemon over the vegetables enhances their natural flavors.
Garlic Bread: For those who enjoy extra indulgence, a side of warm, crusty garlic bread is perfect for soaking up any delicious cheesy sauce or savory juices left in the pan. Alternatively, a light and refreshing crisp coleslaw could be a great choice too.
Make-Ahead & Storage Solutions for Busy Weeknights
Storing Leftovers Safely
Allow any leftover Cheesy Baked Chicken & Rice to cool completely to room temperature before storing. Transfer it to an airtight container and refrigerate promptly. It will remain delicious and safe to eat for 3-4 days.
Reheating for Best Results
To reheat individual portions, place them in a microwave-safe dish and warm until heated through. Adding a small splash of chicken broth or water before microwaving can help prevent the rice from drying out. Alternatively, for larger portions, place them in a baking dish, cover tightly with foil, and reheat in a preheated oven at 300°F (150°C) until warmed through.
Freezing this Cheesy Baked Chicken & Rice is not recommended. The texture of the rice can become mushy upon thawing and reheating, and the cheese may not retain its ideal consistency.
Troubleshooting Common Cheesy Baked Chicken & Rice Issues
My Chicken is Still Dry!
To avoid dry chicken in your Cheesy Baked Chicken & Rice, ensure you only lightly brown the chicken during the initial sear, not cook it through. The primary cooking happens in the oven. Crucially, confirm that the chicken pieces were mostly submerged in the broth during the initial covered bake. The steam and surrounding liquid are vital for maintaining tenderness.
The Rice is Mushy or Undercooked?
Achieving perfect rice texture relies on an accurate liquid-to-rice ratio. Double-check your measurements for both chicken broth and rice. If the rice is mushy, you might have used too much liquid, or your skillet lid wasn’t tight enough, allowing too much condensation to drip back. If it’s undercooked, verify your oven temperature with an oven thermometer and ensure the skillet was indeed tightly covered for the full initial baking time.
My Cheese Isn’t Melty or Bubbly.
If your cheese topping isn’t beautifully melted and bubbly, it usually points to an oven that wasn’t hot enough during the final uncovered bake. Additionally, make sure the cheese was sprinkled evenly across the surface. For the best melt and texture, remember that freshly shredded cheddar cheese always performs better than pre-shredded varieties, which often contain anti-caking agents that hinder smooth melting.
Frequently Asked Questions About Cheesy Baked Chicken & Rice
Can I Use Chicken Thighs Instead of Breasts?
Yes, absolutely! Boneless, skinless chicken thighs are an excellent alternative. They tend to be more forgiving and naturally retain even more moisture, resulting in an incredibly juicy outcome. You may need to adjust the searing time slightly, but the overall baking duration should remain similar.
Can I Make This with Brown Rice?
While adapting this recipe for brown rice is possible, it’s not directly recommended for this version. Brown rice requires significantly more liquid and a longer cooking time compared to white rice. To use brown rice, you would need to increase the chicken broth and extend the initial covered baking time considerably, altering the recipe’s specific balance for optimal results.
What if I Don’t Have an Oven-Safe Skillet?
No oven-safe skillet? No problem! You can still enjoy this delicious Cheesy Baked Chicken & Rice. Simply sear the chicken and toast the rice in a regular large skillet on the stovetop. Then, transfer the ingredients, including the broth, to a 9×13 inch baking dish before proceeding with the covered and uncovered baking steps as outlined.
Can I Add Other Vegetables?
Yes, adding other vegetables is a fantastic idea for extra nutrition and flavor! Quick-cooking vegetables like frozen peas, corn kernels, or finely diced bell peppers can be stirred into the rice and chicken mixture along with the cheese during step 8. They will cook through perfectly during the final uncovered baking phase.
Is This Recipe Gluten-Free?
Yes, this Cheesy Baked Chicken & Rice recipe is naturally gluten-free, provided your chicken broth is certified gluten-free. Always double-check the labels of all your ingredients to ensure they meet your dietary needs.
Your New Favorite One-Pan Meal Awaits!
You’ve now unlocked the secret to consistently juicy chicken and perfectly tender, cheesy rice, all beautifully cooked in one glorious pan. This Cheesy Baked Chicken & Rice recipe isn’t just another meal; it’s a testament to how simple, expert techniques can deliver truly extraordinary and comforting results.
Go forth, gather your ingredients, and prepare to impress your family and friends with a dish that will undoubtedly earn a permanent spot in your regular rotation. We encourage you to try it tonight and savor every delicious bite!
Cheesy Baked Chicken Rice
Course: Main CourseCuisine: AmericanDifficulty: easy4
servings15
minutes35
minutes650
kcal50
minutesDiscover the secret to perfectly juicy, tender chicken every time with this comforting baked chicken and rice dish. A quick sear ensures moisture, while a cheesy finish makes it a family favorite. Simple to prepare, this one-pan meal is packed with flavor and makes weeknight dinners a breeze.
Ingredients
1.5 pounds boneless, skinless chicken breasts, cut into 1-inch pieces
1 tablespoon cooking oil
1.5 cups uncooked long grain white rice
2.5 cups chicken broth
0.5 teaspoon salt
0.25 teaspoon black pepper, plus more for garnish
1.5 cups shredded cheddar cheese
2 tablespoons fresh parsley, chopped, for garnish
Directions
- Preheat your oven to 375°F (190°C).
- This is where we lock in the juiciness! Heat the cooking oil in a large oven-safe skillet over medium-high heat. Add the chicken pieces in a single layer and sear for 2-3 minutes until lightly browned on one side. Do not cook through. This quick sear creates a flavorful crust and helps the chicken retain moisture later. Remove the chicken from the skillet and set aside.
- Add the uncooked rice to the same skillet, stirring for about 1 minute to lightly toast it in any remaining oil and chicken bits.
- Pour in the chicken broth, then stir in the salt and 0.25 teaspoon of black pepper. Bring the mixture to a simmer, then immediately remove from heat.
- Nestle the seared chicken pieces evenly into the rice and broth mixture in the skillet. Ensure the chicken pieces are mostly submerged in the liquid.
- Cover the skillet tightly with an oven-safe lid or aluminum foil.
- Transfer the covered skillet to the preheated oven and bake for 20 minutes.
- After 20 minutes, carefully remove the skillet from the oven. Uncover it and gently stir the rice and chicken. Sprinkle 1 cup of the shredded cheddar cheese evenly over the top.
- Return the uncovered skillet to the oven and bake for an additional 10-15 minutes, or until the rice is tender, the liquid is absorbed, and the cheese is melted and bubbly. The chicken will finish cooking gently within the moist rice environment, ensuring it stays incredibly tender.
- Remove from oven, let stand for 5 minutes. Garnish with the remaining 0.5 cup of shredded cheddar cheese, a sprinkle of fresh parsley, and extra black pepper before serving.
Notes
- For extra flavor, consider lightly browning the chicken pieces before adding them to the skillet. Toasting the rice helps it absorb more flavor from the broth.


