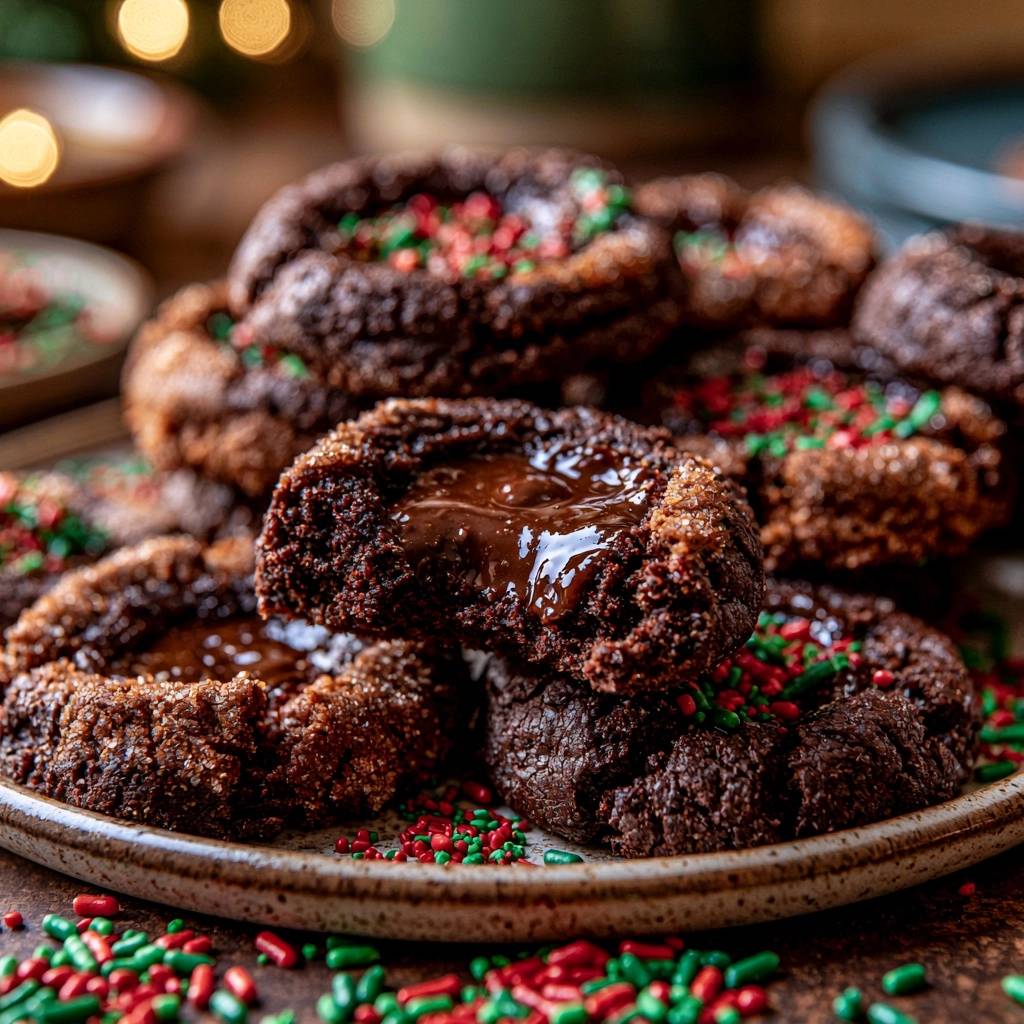
Imagine biting into a cookie that offers a distinct, sugary crunch on the outside before giving way to a deep, fudgy center that flows like warm lava. Most thumbprint cookies suffer from a tragic flaw: the center is often doughy or, worse, the filling leaks through a soft bottom, leaving you with a sticky mess. These Molten Chocolate Thumbprint Cookies solve that problem with a clever structural hack that ensures a crisp base and a gooey heart.
The secret lies in the “Anti-Soggy Bottom” technique, which uses a strategic two-stage bake to seal the dough before the moisture of the ganache ever touches it. By pre-baking the chocolate base, you create a firm crust that acts as a foundation. This means you get all the decadence of a molten dessert with the handheld convenience of a classic holiday biscuit. It is the ultimate upgrade for anyone tired of weeping fillings and soft, underdone centers.
To pull this off perfectly, you have to pay attention to the temperature of your ingredients and the timing of the second bake. I have found that using a cold measuring spoon to re-press the wells immediately after the first bake is the pro move. This creates a smooth, defined “cup” for your chocolate ganache, ensuring the filling stays exactly where it belongs without soaking into the crumb. You are going to love how professional these look on a dessert platter.
The Science of Structural Integrity in Chocolate Dough
Creating a cookie that can hold a heavy pool of ganache requires more than just a standard sugar cookie base. In this recipe, the ratio of cocoa powder to all-purpose flour is carefully balanced to provide a sturdy, shortbread-like structure. Cocoa powder is naturally drying, which actually works in our favor here by preventing the dough from spreading too thin in the oven. This keeps the “walls” of your thumbprint thick and secure.
The choice of an egg yolk over a whole egg is a deliberate culinary decision for texture. While egg whites provide lift and a crisp, airy snap, the yolk is packed with fats and lecithin. This results in a richer, more tender crumb that mimics a truffle. Because the yolk provides less moisture than a whole egg, the dough remains dense enough to hold its shape during the indentation process without cracking or collapsing under the weight of the chocolate filling.
Why Sifting Cocoa Powder is Non-Negotiable
Cocoa powder is notoriously hydrophobic, meaning it hates water and loves to clump together in little dry pockets. If you skip sifting, those clumps will remain hidden in your dough. When you go to press your thumb or a spoon into the center, those air pockets and dry clumps create weak points. This leads to structural collapse or unsightly cracks that allow the ganache to seep out during the final flash-bake.
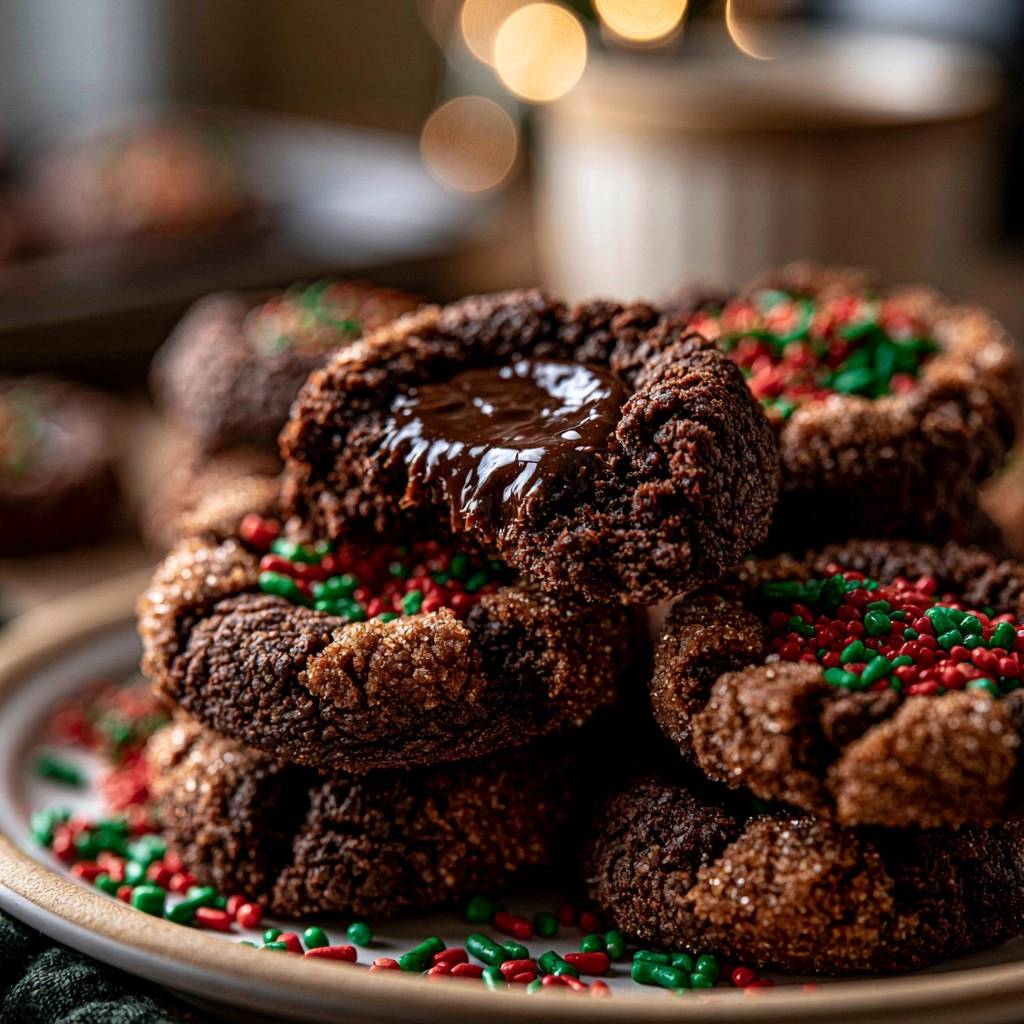
Sifting ensures that the cocoa is perfectly aerated and distributed throughout the flour. This creates a uniform dough that expands evenly. When the heat hits the butter and sugar, a well-sifted dough creates a tight, consistent crumb. This consistency is what allows the cookie to act as a waterproof vessel for the molten chocolate center you are about to pour inside.
The Role of Turbinado Sugar as a Moisture Barrier
Rolling the dough in coarse turbinado or sanding sugar isn’t just for the beautiful, sparkling aesthetic. These large sugar crystals serve a vital physical purpose. Because they don’t melt as quickly as granulated sugar, they create a thermal shield around the exterior of the cookie. This helps the edges set firmly while the interior stays soft and fudgy.
Furthermore, the sugar coating acts as a secondary moisture barrier. It creates a textured surface that prevents the wet ganache from migrating into the cookie crumb. As the cookies cool, the sugar provides a delightful crunch that contrasts beautifully with the silky smooth chocolate. It is a sensory experience that elevates a simple cookie into a gourmet treat.
Essential Components for Molten Chocolate Thumbprint Cookies
Quality matters when you are working with so few ingredients. For the base, 100% unsweetened cocoa powder provides that deep, dark color and intense chocolate flavor. If you use a Dutch-processed cocoa, you will get an even darker, smoother flavor profile, though standard natural cocoa works perfectly well here. The bitterness of the cocoa is essential to balance the sweetness of the sugar coating.
The heavy cream is the engine behind the “molten” effect. You need a high fat content (at least 36%) to ensure the ganache stays fluid. If you try to use milk or half-and-half, the filling will likely become watery or soak directly into the cookie base, ruining that “lava” texture. The fat in the cream stabilizes the chocolate, keeping it glossy and soft even after the cookies have cooled to room temperature.
Selecting the Right Chocolate for the Ganache
While it is tempting to reach for a high-end chocolate bar, standard semi-sweet chocolate chips are actually the hero of this recipe. Chocolate chips contain stabilizers like soy lecithin that help them hold their shape under heat. When we perform the two-minute flash-bake, these stabilizers prevent the ganache from breaking or becoming too thin and running over the edges of the cookie.
If you prefer to use a baking bar, make sure to chop it very finely so it melts evenly when the hot cream is poured over it. Avoid using milk chocolate for the filling, as the higher sugar and lower cocoa butter content can make the ganache overly sweet and prone to seizing. Semi-sweet provides that perfect “grown-up” chocolate flavor that pairs so well with the festive sprinkles.
Temperature Control: Softened Butter vs. Melted Butter
When a recipe calls for softened butter, it usually means around 65°F. If your butter is too warm or greasy, the cookies will spread into flat pancakes in the oven, and your thumbprint well will disappear. You want the butter to be pliable enough to hold a fingerprint but still cool to the touch. This allows the butter to trap tiny air bubbles during the creaming process, which gives the cookie its structure.
Be careful not to over-cream the butter and sugar. If you beat the mixture for too long, you incorporate too much air. While that is great for a sponge cake, it is disastrous for a thumbprint cookie. Too much air causes the dough to puff up aggressively in the oven, which fills in the hole you worked so hard to create. Aim for a light and fluffy texture, but stop as soon as the color lightens slightly.
Step-by-Step: Executing the Two-Stage Bake
The process begins by rolling your dough into consistent one-inch balls. You will notice the dough feels firm and slightly tacky, which is exactly what you want. As you roll them in the coarse sugar, press gently so the crystals adhere to every surface. When you place them on the parchment, give them plenty of space. Even though these don’t spread much, they need airflow to crisp up properly.
Using a rounded measuring spoon to create the well is much more effective than using your thumb. A spoon creates a perfectly symmetrical, deep reservoir with smooth sides. This uniformity ensures that every cookie holds the same amount of ganache and bakes at the same rate. If the dough feels like it is sticking to the spoon, a tiny dip of the spoon into flour or cocoa powder will solve the problem instantly.
Phase One: Setting the Foundation
The first ten minutes in the oven are all about architecture. During this time, the flour hydrates and the proteins in the egg yolk set. You are looking for the dough to lose its shiny, raw appearance and take on a matte finish. The edges should look set, but the center might still look a little soft. This is the “Anti-Soggy Bottom” magic happening; you are cooking the base through so it can support the wet filling.
When you pull the tray out after ten minutes, don’t be alarmed if the centers have puffed up slightly. This is completely normal. While the cookies are still hot and pliable, take your measuring spoon and gently re-press the centers. This “double-press” technique reinforces the well and packs the crumb down, creating a dense, sturdy floor for the ganache that won’t let any liquid through.
The Precision Indentation Technique
Speed is your friend during the indentation phase. You want to work quickly while the cookies are hot so the dough doesn’t crack. If you wait too long and the cookies start to cool, the edges will become brittle. By pressing them while they are straight out of the oven, you are essentially “cauterizing” the interior of the well, creating a smooth surface that the ganache will sit upon beautifully.
Once the wells are re-defined, it is time for the ganache. Use a small spoon or even a piping bag to fill each hole to the brim. The ganache should be warm and glossy. If it has started to set in the bowl, give it a quick five-second zap in the microwave. Immediately add your festive sprinkles while the chocolate is wet so they stick perfectly and don’t bounce off the surface.
Phase Two: The Ganache Flash-Bake
The final two minutes in the oven are the most critical part of the entire recipe. This isn’t about cooking the dough further; it is about “flashing” the ganache. This brief burst of heat bonds the chocolate to the walls of the cookie and creates a slight skin on the very top of the filling. This skin protects the molten center, keeping it liquid and gooey underneath.
Do not be tempted to leave them in longer than two minutes. If you overbake at this stage, the heavy cream in the ganache will begin to evaporate, and you will end up with a firm, truffle-like center instead of a molten one. As soon as the timer dings, remove the tray. The cookies will be very soft at this point, so let them rest on the hot baking sheet for at least ten minutes to firm up before moving them.
Troubleshooting Common Thumbprint Failures
If your cookies are cracking significantly when you first press the indentation, your dough might be too cold or a bit too dry. This often happens if the flour was packed too tightly into the measuring cup. To fix this, you can knead a teaspoon of room-temperature milk into the dough to add a bit of elasticity. Alternatively, let the dough balls sit at room temperature for five minutes before pressing to soften the fats.
Another common issue is the ganache “breaking” or looking oily. This usually happens if the heavy cream was boiling too hard when it hit the chocolate. You want a gentle simmer, not a rolling boil. If your ganache looks split, add a teaspoon of room-temperature cream and whisk vigorously. The extra liquid helps re-emulsify the fats and sugars, restoring that beautiful, glossy sheen we are looking for.
Preventing Cracks During the Pressing Stage
Cracks are the enemy of a molten center because they act as drainage pipes for your filling. To prevent them, ensure your dough is cohesive and smooth before you start rolling. If you see cracks forming as you roll the balls, spend an extra few seconds warming the dough between your palms. The heat from your hands will soften the butter just enough to create a smoother surface.
If a crack does appear after you press the spoon in, simply use your finger to gently pinch the dough back together. Since the cookies are rolled in coarse sugar, these little repairs are easily hidden. The sugar acts as a camouflage, so don’t stress about perfection. As long as the “cup” is sealed, your molten center will stay perfectly contained.
Fixing a Runny or Seized Ganache Filling
A runny ganache usually means there was too much cream or the chocolate didn’t have enough cocoa butter. If your ganache seems too thin to stay in the cookie, let it sit on the counter for ten minutes to thicken up before filling the wells. It should be the consistency of thick honey. If it is still too thin, whisk in a few more chocolate chips while the mixture is still warm.
Seized chocolate, which looks grainy and clumpy, happens if a drop of water gets into the bowl or if the chocolate overheats. To rescue seized chocolate, you can sometimes whisk in a tiny bit of vegetable oil or more warm cream. However, the best way to avoid this is to ensure your bowl and whisk are bone-dry before you start. Chocolate and water are famous enemies in the kitchen.
Flavor Variations and Seasonal Adaptations
While red and green sprinkles are perfect for the holidays, these cookies are versatile enough for any occasion. For a sophisticated twist, skip the sprinkles and top the warm ganache with a tiny pinch of flaky sea salt. The salt cuts through the richness of the chocolate and makes the flavors pop. You could also add a half-teaspoon of espresso powder to the dry ingredients to create a mocha-flavored base.
If you want a minty version, add a drop of peppermint extract to the ganache. For a crunchier texture, you can roll the dough balls in finely chopped walnuts or pecans instead of the turbinado sugar. Just keep in mind that nuts don’t provide the same moisture barrier as sugar, so you might want to reduce the first bake by one minute to ensure the base doesn’t get too dry with the added protein of the nuts.
Storage Logistics and Texture Preservation
To keep these cookies at their best, store them in a single layer in an airtight container. If you stack them, the ganache centers might stick to the bottoms of the cookies above them, ruining the look. They will stay fresh at room temperature for about three days. If you live in a very humid environment, the sugar crust might soften slightly over time, but the flavor will remain excellent.
I don’t recommend refrigerating these cookies, as the cold air can cause the chocolate ganache to bloom or turn greyish. It also hardens the fats in the cookie, making it lose that tender, melt-in-your-mouth quality. Keep them on the counter in a cool, dry spot for the best texture. If the centers firm up too much for your liking, a five-second zap in the microwave will bring that molten texture right back.
Freezing the Dough vs. Freezing the Finished Cookie
If you want to plan ahead, freezing the dough is the way to go. You can roll the balls and coat them in sugar, then freeze them on a tray before transferring them to a zip-top bag. When you are ready to bake, just add two minutes to the initial bake time. This ensures you always have fresh, warm cookies on hand for unexpected guests.
Freezing the finished, filled cookies is a bit trickier. While the cookie base freezes well, the ganache can sometimes lose its glossy finish or become grainy upon thawing. If you must freeze them, do a “flash freeze” on a flat tray first so the ganache is solid, then wrap them individually. Thaw them at room temperature and give them a very brief warm-up in the oven to restore the molten center.
Expert Troubleshooting and Technical FAQ
Can I use a sugar substitute for the rolling process?
You can use a granulated sugar substitute like erythritol for the rolling process, but keep in mind that it won’t provide the same “moisture barrier” as turbinado sugar. Most sugar substitutes melt at lower temperatures or don’t crystallize the same way, so you might lose that signature crunch. If you use a substitute, ensure it is a “granulated” version rather than a powdered one to maintain as much texture as possible.
Why did my ganache sink into the bottom of the cookie?
This usually happens if the first bake wasn’t long enough or if the indentation was pressed too thin at the bottom. If the “floor” of your cookie is too thin, the heat from the second bake allows the ganache to soak through the pores of the dough. Make sure your initial bake is a full ten minutes and that you leave at least a quarter-inch of dough at the bottom of the well when pressing.
How do I achieve a perfectly centered well every time?
The trick is to ensure your dough balls are perfectly round and smooth before you press. If the ball is lopsided, the spoon will naturally slide to one side. Place the ball on the baking sheet, then use your thumb and forefinger to “steady” the sides of the cookie as you press the measuring spoon straight down into the center. This prevents the dough from blowing out on one side and keeps the well perfectly centered.
Can I substitute the heavy cream with a non-dairy alternative?
Yes, but you must use a high-fat alternative like full-fat canned coconut milk (the thick part at the top). Lower-fat milks like almond or oat milk are too watery and will cause the ganache to be runny or soak into the cookie. Coconut cream provides the necessary fat to keep the ganache stable and molten. Just be aware that it will add a slight coconut flavor to your chocolate filling.
What is the best way to reheat these to restore the molten center?
The best method is a very brief stint in the microwave. Place one or two cookies on a plate and heat for only 5 to 8 seconds. You don’t want to cook the cookie further; you just want to vibrate the fat molecules in the ganache to turn them back into a liquid state. Alternatively, you can pop them into a 300°F oven for 2 or 3 minutes, which will crisp up the sugar crust while softening the center.
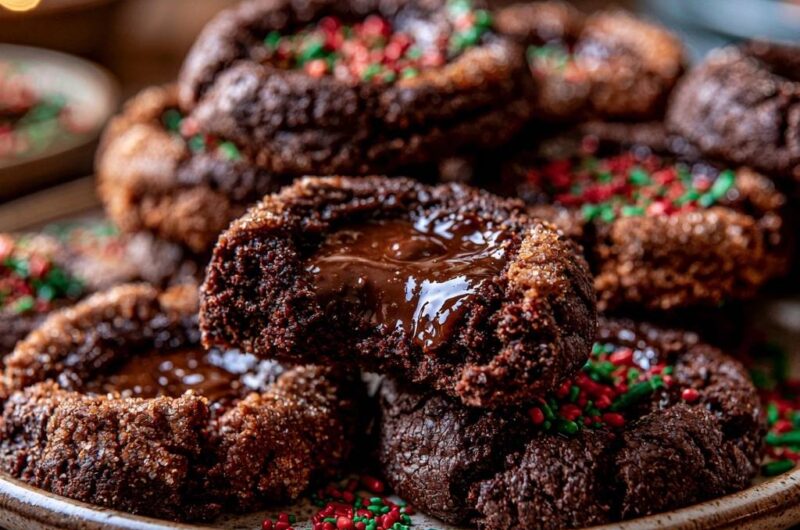
Molten Chocolate Thumbprint Cookies
Course: DessertCuisine: AmericanDifficulty: easy24
cookies20
minutes12
minutes32
Minutes165
kcalAmerican
Ingredients
1/2 cup unsalted butter, softened
2/3 cup granulated sugar
1 large egg yolk
1 teaspoon vanilla extract
1 cup all-purpose flour
1/3 cup unsweetened cocoa powder
1/4 teaspoon salt
1/2 cup coarse turbinado or sanding sugar for rolling
2/3 cup semi-sweet chocolate chips
1/4 cup heavy cream
Red and green festive sprinkles
Directions
- Preheat your oven to 350 degrees F. Line a baking sheet with parchment paper.
- In a large bowl, cream together the butter and granulated sugar until light and fluffy. Beat in the egg yolk and vanilla extract.
- Sift together the flour, cocoa powder, and salt. Gradually add the dry ingredients to the wet mixture until a firm, cohesive dough forms.
- Roll the dough into 1-inch balls. Roll each ball thoroughly in the coarse sanding sugar. This creates the textured, sparkling crust seen in the image and acts as a moisture barrier.
- Place balls 2 inches apart on the baking sheet. Use the back of a rounded measuring spoon to press a deep, wide indentation into the center of each ball.
- Bake for 10 minutes. This initial bake sets the structure of the cookie base and ensures the bottom is fully cooked and crisp before the wet filling is added.
- While the cookies are in their first bake, make the ganache: Heat the heavy cream in the microwave until it begins to simmer (about 30-45 seconds). Pour over the chocolate chips, let sit for 1 minute, then whisk until glossy and smooth.
- Remove cookies from the oven. If the centers have puffed, gently re-press the indentation with the measuring spoon.
- Spoon the warm chocolate ganache into each well. Immediately top with red and green festive sprinkles.
- Return the cookies to the oven for exactly 2 minutes. This “flash-bake” sets the ganache just enough to create that molten, lava-like texture shown in the image without soaking into the cookie base.
- Let the cookies cool on the baking sheet for at least 10 minutes. This allows the crust to firm up while the center remains gooey and molten.
Notes
- The coarse turbinado sugar acts as a moisture barrier. The final two-minute flash-bake is essential to set the ganache without making the cookie base soggy.