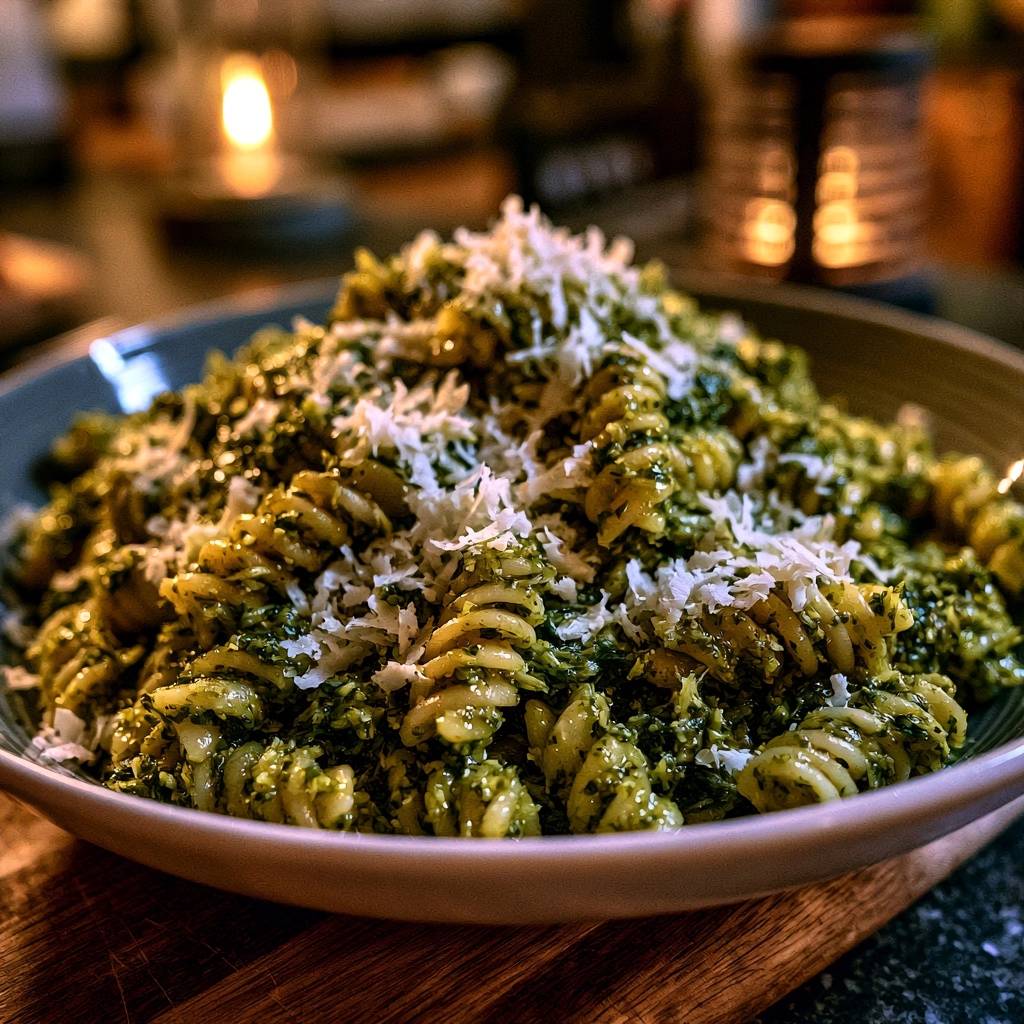
Forget those sad, oily puddles at the bottom of your pasta bowl. You know the ones—where the herbs float aimlessly in a sea of grease while the noodles sit naked and bland. A truly great pesto should be a thick, textured coat of armor that clings to every single ridge and spiral of the pasta. It should feel substantial, rustic, and intensely green, offering a punch of fresh basil and salty cheese in every bite.
The secret to this restaurant-quality finish isn’t just about the ingredients; it’s about the physics of the emulsion. Most home cooks treat pesto like a salad dressing, but it’s actually a structural component of the dish. By focusing on a high ratio of solids to oil and using a specific tempering technique, you create a sauce that grips the pasta rather than sliding off it. We’re aiming for a dense, herb-heavy coating that looks as vibrant as it tastes.
I’ve found that the real “aha!” moment comes when you stop over-processing the basil. If you blend it into a smooth liquid, you lose the surface area needed for the sauce to “grab” the noodle. The secret is keeping the basil in tiny, visible flecks. This creates a coarse, rustic texture that acts like Velcro for your fusilli, ensuring that the flavor stays on the fork and off the bottom of the plate.
The Anatomy of a Non-Watery Pesto Sauce
To achieve a sauce that doesn’t separate, you have to understand the science of emulsion. Pesto is a mixture of fats (olive oil and cheese) and solids (basil and nuts). Without a binding agent, the oil will naturally pull away from the herbs, leaving you with a broken sauce. The starch from the pasta water acts as that essential bridge, knitting the oil and the solids together into a creamy, unified coating.
The ratio of solids is equally important. By using a generous amount of toasted pine nuts and freshly grated Parmesan, you increase the friction of the sauce. These tiny particles create a “grip” on the pasta surface. When you toss the pasta vigorously, these solids wedge themselves into the grooves of the noodle, preventing the oil from slicking right off. It’s the difference between a sauce that sits on top and a sauce that becomes part of the pasta.
Why Fusilli is the Superior Shape for Pesto
Geometry plays a massive role in how we experience flavor. Fusilli, with its corkscrew or “auger” shape, is the ultimate vessel for a rustic pesto. Those deep, winding channels are designed to trap the coarse bits of garlic and pine nut paste that we’ve worked so hard to create. As you toss the pasta, the pesto gets driven deep into the spirals, ensuring a high sauce-to-pasta ratio in every mouthful.
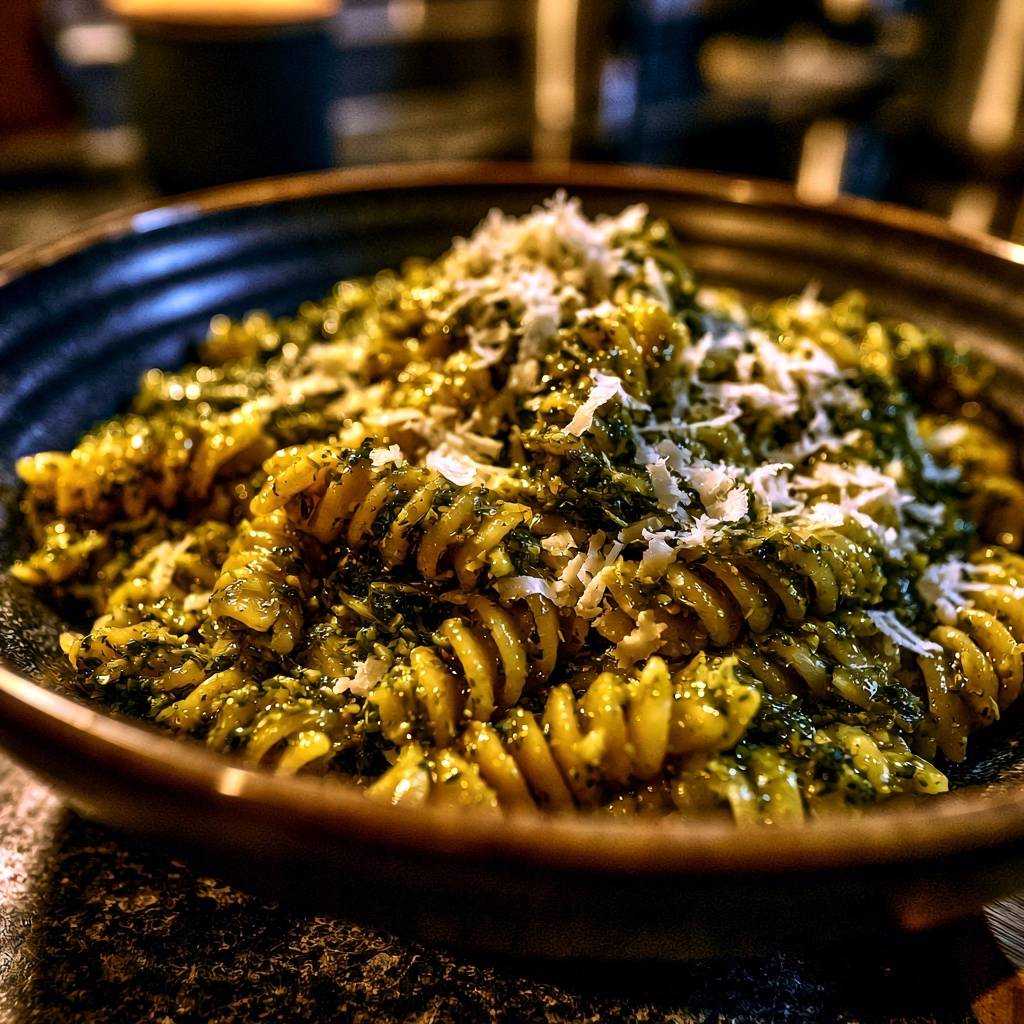
Compare this to a smooth shape like spaghetti or penne. On a smooth surface, a thick, rustic pesto has nothing to hold onto and often ends up clumped at the bottom of the bowl. The twists of the fusilli act like little scoops, capturing the herb-heavy texture and holding it tight. If you want that “thick-coated” look, the corkscrew is your best friend.
Essential Components for Rustic Basil Pesto Fusilli
When a recipe has so few ingredients, the quality of each one is magnified. You can’t hide behind a long list of spices here. For the basil, you want three cups of leaves packed so tightly they’re practically bruised. This ensures the sauce is herb-forward rather than oil-forward. If you measure loosely, you’ll end up with a thin, greasy mess that lacks that signature punchy green flavor.
The olive oil is your primary flavor carrier, so this is the time to pull out the good stuff. Look for a high-quality extra virgin olive oil that smells peppery and fresh. Since we aren’t cooking the sauce, the raw flavor of the oil will be front and center. A cheap, bitter oil will ruin the delicate sweetness of the basil, while a premium one will make the whole dish sing with richness.
Selecting and Prepping Fresh Basil Leaves
Genovese basil is the gold standard for pesto because of its sweet, peppery profile and tender leaves. However, the biggest mistake people make is using damp basil. If there is even a hint of water on those leaves after washing, your pesto will turn into a watery soup. Use a salad spinner or pat them dry with paper towels until they are bone-dry to ensure the oil can properly coat the herb fragments.
To keep that vibrant green color from turning a muddy brown, work quickly. Basil oxidizes when exposed to air and heat. By pulsing the ingredients and keeping the processing time short, you minimize the heat generated by the blades. Some chefs even chill their food processor blade in the freezer for ten minutes before starting to keep everything cool and bright.
The Role of Toasted Pine Nuts and Pungent Garlic
Never use raw pine nuts. Toasting them in a dry pan for just two or three minutes transforms them from bland and soft to nutty, crunchy, and aromatic. This heat releases the natural oils within the nut, which helps thicken the final pesto. Those toasted oils add a layer of depth that balances the sharp bite of the raw garlic and the salty cheese.
Speaking of garlic, three cloves is usually the sweet spot for a pound of pasta. You want the garlic to be a supporting actor, not the lead. Since it stays raw, its pungency is quite strong. By pulsing the garlic with the nuts first, you ensure it’s pulverized into a fine paste that distributes evenly, preventing anyone from biting into a large, spicy chunk of raw garlic.
Parmesan Quality: Why Pre-Grated is Forbidden
If you buy the pre-shredded cheese in a green can or a plastic bag, your pesto will never reach its full potential. Pre-grated cheeses are coated in cellulose (wood pulp) to keep them from clumping in the package. This coating prevents the cheese from melting properly and creates a grainy, sandy texture in your sauce. It’s a total dealbreaker for a smooth emulsion.
Buy a wedge of high-quality Parmesan and grate it yourself using the fine side of a box grater or a microplane. This fresh cheese will be soft, moist, and ready to melt into the starchy pasta water. It provides the “glue” that holds the rustic basil flecks to the fusilli. Plus, the flavor of freshly carved cheese is infinitely more complex and salty.
Step-by-Step: Achieving the Perfect Emulsion
The key to a rustic texture is avoiding the “liquefy” button on your food processor. You aren’t making a smoothie; you’re making a coarse herb paste. Start by pulsing your toasted pine nuts and garlic until they look like wet sand. This creates the base of your texture. Once that’s ready, drop in your dry basil leaves along with the salt and pepper.
Pulse the basil only until it’s finely chopped. You should still see distinct, tiny pieces of leaf. If you over-process at this stage, the basil will release too much moisture and turn into a dark green liquid. The goal is a “visible herb texture” where the basil looks like confetti, not a puree. This is what gives the dish its “rustic” character and helps it cling to the pasta.
Building the Coarse Texture in the Processor
Once your basil is chopped, it’s time for the “Drizzle Phase.” Switch your processor to its lowest setting and slowly pour the olive oil in a thin, steady stream. This slow addition allows the oil to wrap around the solid particles of nut and herb. If you dump the oil in all at once, it will likely separate, leading to that oily puddle we’re trying to avoid.
Stop the processor the second the oil is incorporated. The mixture should look thick and chunky, almost like a tapenade. At this point, it might look too thick to be a pasta sauce, but don’t worry. We are going to loosen it up later with the pasta water. For now, you want a concentrated, heavy paste that smells incredibly potent.
The Hand-Folding Technique for Cheese
This is a crucial pro tip: do not add the Parmesan cheese to the food processor. The spinning blades can create enough friction heat to slightly melt the cheese, turning your pesto into a gummy, rubbery mass. Instead, scrape your pesto base into a large mixing bowl and fold the grated cheese in by hand using a spatula.
Folding by hand preserves the individual grains of the cheese. This adds to the rustic mouthfeel and ensures the cheese only begins to melt when it hits the hot pasta. This technique keeps the sauce “open” and textured, allowing it to better trap the starchy water in the next step. It’s a small change that makes a massive difference in the final consistency.
The Starch Secret: Using Pasta Water as a Bridge
Starchy pasta water is often called “liquid gold” in Italian kitchens, and for good reason. As the fusilli cooks, it releases starches into the water. This cloudy liquid is a powerful emulsifier. When you add it to the pesto, the starch molecules act as a bridge, bonding the hydrophobic olive oil to the hydrophilic (water-loving) surface of the pasta.
Without this water, the oil would simply sit on the surface of the noodle. With it, the sauce transforms into a creamy, cohesive coating that defies gravity. It’s the secret to getting that thick, opaque look where the sauce seems to be part of the noodle itself. Always reserve at least a cup of water before draining—you won’t need it all, but you’ll be glad you have it.
Timing the Drain and the Toss
Timing is everything. You want your pasta to be slightly undercooked (true al dente) because it will continue to soften as you toss it with the sauce. Drain the pasta and immediately dump it into the bowl with the pesto. Do not rinse the pasta! You need those surface starches to be hot and active to create the bind.
Add about a quarter cup of the reserved water and start tossing vigorously with tongs. You want to be quite aggressive here for about 60 seconds. This motion beats the water and oil together, creating the emulsion on the fly. The residual heat from the pasta will gently melt the hand-folded Parmesan, thickening the sauce until it perfectly coats every spiral of the fusilli.
Troubleshooting Your Pesto Consistency
If your pasta looks dry or the sauce is clumping in one spot, it’s “too tight.” This usually happens if the pasta was drained too thoroughly or if you used a very high-protein pasta. The fix is simple: add another tablespoon of pasta water and toss again. The extra moisture will loosen the cheese and spread the herbs more evenly.
On the flip side, if you see oil pooling at the bottom, your emulsion has “broken.” This often happens if the pasta wasn’t hot enough or if you didn’t toss it vigorously enough. To fix a broken sauce, add a small handful of extra grated Parmesan and a splash more water, then toss like crazy. The extra cheese provides more solids to soak up the excess oil and re-establish the bind.
Flavor Variations and Ingredient Swaps
While pine nuts are traditional, they can be pricey. You can achieve a similarly rustic texture using toasted walnuts or even pistachios. Walnuts add a slightly earthy bitterness that pairs beautifully with the basil, while pistachios offer a buttery richness and a stunning bright green hue. Just make sure to toast them first to maintain that essential crunch.
If you want to brighten the dish, a little lemon zest folded in at the very end adds a beautiful citrus note that cuts through the heavy Parmesan. For those who like a bit of heat, a pinch of red pepper flakes added during the pulsing phase provides a subtle back-of-the-throat warmth. Just avoid adding watery ingredients like lemon juice directly to the pesto, as it can cause the color to fade.
What to Serve with Rustic Basil Pesto Fusilli
Because this pasta is quite rich and herb-heavy, it pairs best with simple, bright sides. Roasted cherry tomatoes are a classic choice; their acidity and sweetness provide a perfect foil to the salty Parmesan. You can roast them with a little garlic and olive oil until they burst, then pile them right on top of the finished fusilli for a pop of color.
A crisp arugula salad is another fantastic option. The peppery bite of the greens and a simple lemon vinaigrette help cleanse the palate between bites of the dense, creamy pasta. If you want more vegetables, sautéed zucchini ribbons or blanched green beans can be tossed directly into the pasta during the final mixing stage for added texture and nutrition.
Storage and Make-Ahead Instructions
Pesto is always best the moment it’s made, but you can store the sauce itself for up to three days. To prevent it from turning brown, put the pesto in a small jar and pack it down to remove air bubbles. Pour a thin layer of olive oil over the top to create an airtight seal. This prevents oxidation and keeps the basil looking bright green.
If you have leftover pasta, be careful when reheating. High heat will cause the cheese to break and the oil to separate, leaving you with a greasy mess. Instead, reheat it in a pan over very low heat with a splash of water or milk. Stir constantly just until it’s warm. This gently thins the sauce back to its original creamy consistency without destroying the emulsion.
Expert Tips for Restaurant-Quality Presentation
To get that professional “high mound” look, use a large carving fork or tongs to twirl a portion of the fusilli in the bowl before transferring it to the plate. Release it slowly so it stands tall rather than spreading out. This keeps the heat trapped inside the pasta and makes the dish look much more appetizing.
The final touch is the “snowy layer” of cheese. Use a microplane to grate a fresh cloud of Parmesan directly over the plated pasta. This fine, lacy cheese catches on the rustic bits of basil and creates a beautiful visual contrast. A final crack of black pepper and a few small, whole basil leaves on top will make it look like it came straight out of a high-end Italian bistro.
Frequently Asked Questions
Can I use a mortar and pestle instead of a food processor?
Absolutely! In fact, that is the traditional way to make pesto. Using a mortar and pestle will give you an even more rustic texture because you are crushing the fibers rather than cutting them. It takes more physical effort, but the flavor is often more intense because the crushing action releases more aromatic oils from the basil and garlic.
Why is my pesto bitter?
Bitterness usually comes from over-processing the extra virgin olive oil. High-speed blades can break the oil’s molecular bonds, releasing bitter polyphenols. To avoid this, always use the lowest setting on your processor and only blend the oil for the shortest time possible. Also, ensure your pine nuts aren’t rancid, as old nuts can also impart a bitter aftertaste.
Can I freeze the finished pasta?
I don’t recommend freezing the pasta once it’s tossed with the sauce. The fusilli will become mushy when thawed, and the pesto emulsion will completely break, leaving the dish oily and grainy. However, you can freeze the pesto sauce by itself in ice cube trays. Once frozen, transfer the cubes to a bag. Just thaw a few cubes and toss with fresh pasta for a quick meal.
How do I keep the basil from turning dark green or brown?
Oxidation is the enemy of green pesto. To keep it bright, ensure your basil is dry before processing and work quickly to minimize heat. Some people blanch their basil in boiling water for 5 seconds and then shock it in ice water before making the pesto. This “sets” the chlorophyll, keeping the sauce neon green for days, though it does slightly change the fresh flavor.
Is there a nut-free alternative that still provides the rustic crunch?
Yes, toasted sunflower seeds or pumpkin seeds (pepitas) are excellent nut-free substitutes. They provide a similar fat content and a great “rustic” crunch when pulsed into the sauce. Just be sure to toast them first to bring out their flavor, as raw seeds can taste a bit “green” and overpower the basil.
Rustic Basil Pesto Fusilli
Course: Main CourseCuisine: ItalianDifficulty: easy4
servings10
minutes12
minutes22
Minutes510
kcalItalian
Ingredients
1 pound (16oz) fusilli pasta
3 cups fresh basil leaves, tightly packed
3/4 cup freshly grated Parmesan cheese, plus extra for garnish
1/2 cup pine nuts, toasted
3 cloves garlic, peeled
1/2 cup extra virgin olive oil (high quality)
1/2 teaspoon sea salt
1/2 teaspoon cracked black pepper
1/2 cup reserved starchy pasta water
Directions
- Boil the Pasta: Bring a large pot of heavily salted water to a boil. Cook the fusilli according to package directions until just al dente.
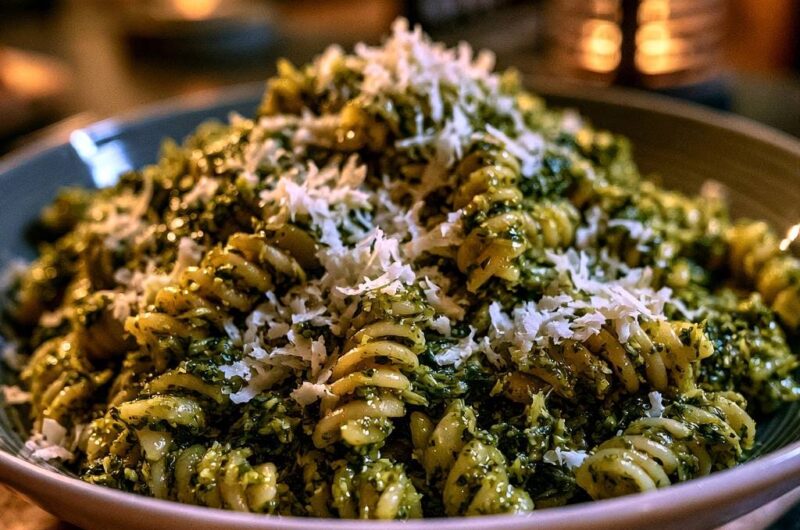
- Prepare the Pesto Base: While the pasta cooks, place the toasted pine nuts and garlic in a food processor. Pulse until they form a coarse paste. Add the basil leaves, salt, and pepper. Pulse until the basil is finely chopped but not a liquid purée-you want the visible herb texture shown in the image.
- Emulsify: With the processor running on low, slowly drizzle in the olive oil. Once combined, transfer the mixture to a large mixing bowl and fold in the 3/4 cup of Parmesan cheese by hand. This keeps the cheese from melting prematurely and maintains the thick, rustic consistency.
- The Starch Secret: Before draining the pasta, dip a measuring cup into the pot and reserve 1 cup of the cloudy, starchy pasta water.
- The Bind: Drain the pasta and immediately add it to the bowl with the pesto. Add 1/4 cup of the reserved pasta water.
- Toss Vigorously: Using tongs or a sturdy spoon, toss the pasta vigorously for 60 seconds. The residual heat and the starch in the water will act as a bridge between the oil and the pasta, creating a thick, creamy bind that clings to the grooves of the fusilli. If the sauce is too tight, add another tablespoon of pasta water.
- Finish: Plate the pasta in a high mound. Top with a generous, snowy layer of finely grated Parmesan cheese to match the visual presentation. Serve immediately.
Notes
- The secret to the thick consistency is folding the Parmesan cheese in by hand and tossing the pasta vigorously with reserved starchy water for 60 seconds to create a creamy bind.