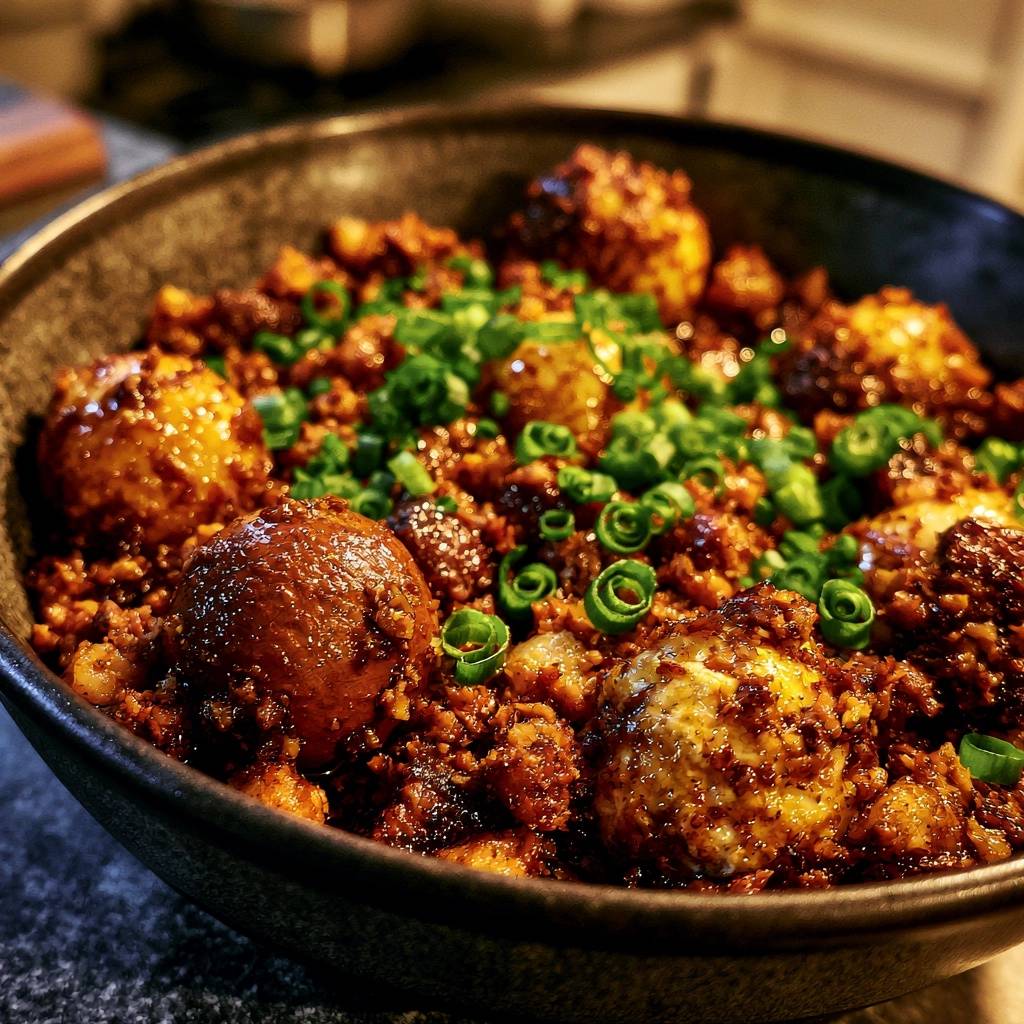
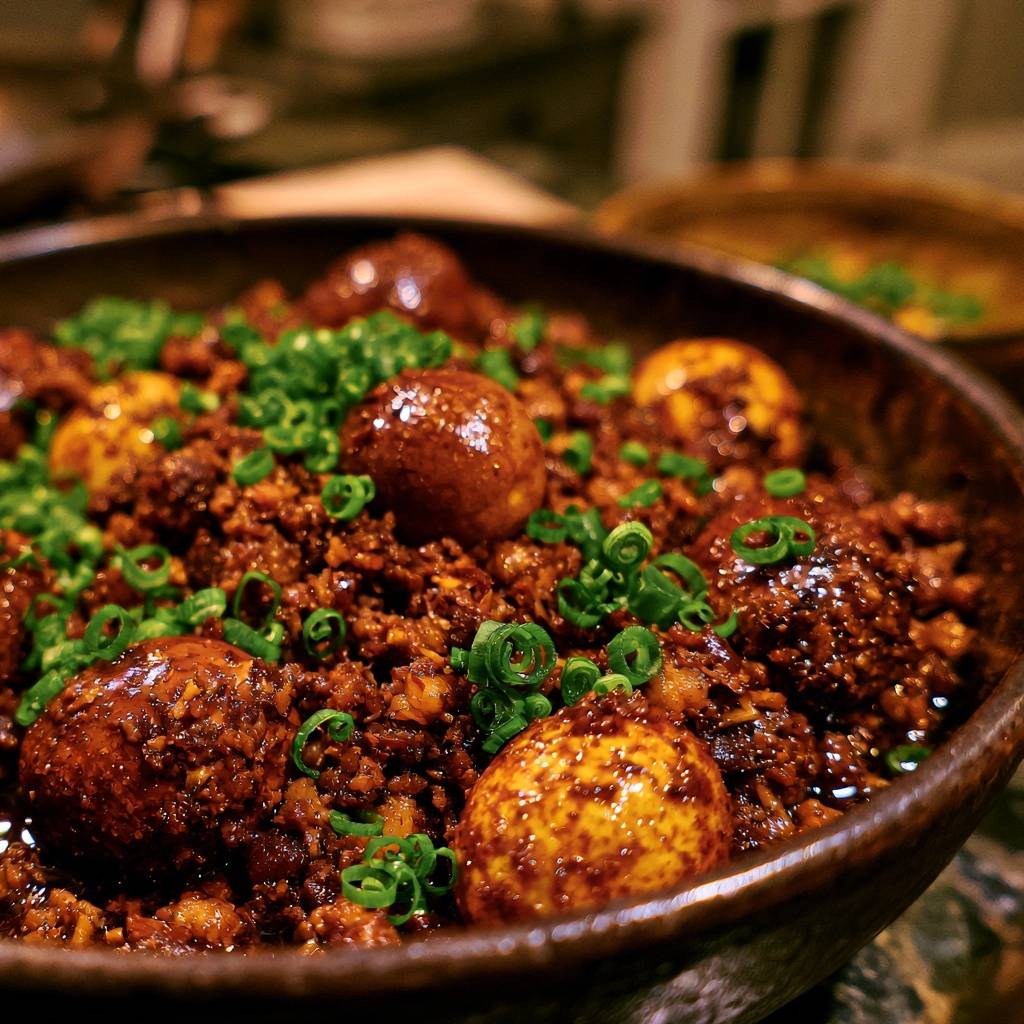
Imagine a bowl where the beef is so deeply caramelized it shatters slightly between your teeth, releasing a flood of salty, sweet umami. Beside it sit eggs with a mahogany, wrinkled exterior that looks like burnished leather but yields to a tender, jammy center. The vibrant green of fresh scallions cuts through the rich, dark glaze, creating a visual contrast that promises a complex balance of flavors. This isn’t just a quick weeknight meal; it’s a masterclass in texture that turns humble ground beef into a gourmet experience.
The secret to this dish lies in the “Tiger Skin” egg, a traditional technique where boiled eggs are fried until the outer whites blister and puff. This creates a micro-porous surface that acts like a sponge, soaking up the braising liquid in a way a smooth egg never could. When you pair these textured eggs with beef that has been seared until crispy, you create a dish that hits every sensory note. It’s the ultimate comfort food, providing warmth and depth that feels like it took hours to develop, even though it comes together in under an hour.
To achieve that perfect result, you must master the moisture levels. If your eggs are even slightly damp when they hit the hot oil, they’ll steam rather than fry, and the oil will splatter aggressively. I always recommend patting the peeled eggs with a fresh paper towel and letting them air-dry for five minutes before frying. This small step ensures you get that signature “tiger” texture—a golden, crinkly skin that is the hallmark of a truly authentic braised egg bowl.
The Science of the Tiger Skin Technique
Flash-frying a boiled egg might seem unusual, but the physics behind it are fascinating. When the smooth, protein-rich surface of a boiled egg hits high-heat oil, the remaining moisture evaporates almost instantly. This rapid steam release forces the outer layer of the egg white to expand and pull away from the rest of the egg, creating tiny pockets and a blistered, uneven surface. This is the “Tiger Skin” effect, named for the mottled, golden-brown pattern that emerges.
This textured exterior is essential for the braising stage because it increases the surface area of the egg significantly. A standard smooth egg white is relatively hydrophobic, meaning the watery braising sauce simply slides off. However, a blistered egg skin is highly absorbent. Those tiny ridges and pores trap the dark soy and oyster sauce glaze, allowing the flavors to penetrate deep into the white during the short simmering period. The result is an egg that is intensely flavorful on the outside while remaining soft and supple on the inside.
Why Soft-Boiling is Non-Negotiable
The 6.5-minute egg is the golden standard for this recipe because it accounts for thermal carry-over. You aren’t just boiling the egg; you are frying it and then simmering it in beef broth. If you start with a hard-boiled egg, the subsequent cooking stages will turn the yolk into a chalky, grey orb and the whites into a rubbery mess. By starting with a soft-boiled egg and immediately shocking it in ice water, you preserve a liquid gold center. This yolk eventually mingles with the beef glaze, creating a rich, creamy sauce that coats every grain of rice.
Essential Components for the Beef Braise
Quality ingredients are the backbone of a successful braise, starting with the beef itself. I strongly recommend using an 80/20 fat ratio for your ground beef. While lean meat might seem like a healthier choice, it lacks the fat necessary to achieve a truly crispy sear. That fat also emulsifies with the soy sauce and beef broth, creating a luxurious mouthfeel. Lean meat tends to become dry and grainy during the simmering process, whereas the 80/20 blend remains succulent and tender.
The choice of soy sauce is equally critical. This recipe calls for dark soy sauce, which is thicker, less salty, and much darker than the standard variety. It contains molasses, which provides that deep, mahogany color and a hint of sweetness. If you use only regular light soy sauce, your dish will be overly salty and lack the rich, lacquered appearance seen in professional kitchens. The dark soy sauce is what transforms the beef and eggs from a pale brown to a stunning, glossy dark amber.
Aromatics: The Ginger and Garlic Foundation
Preparing your aromatics correctly changes the entire flavor profile of the beef. I prefer grating the ginger rather than mincing it because it breaks down the tough fibers and releases more juice. This creates more surface area, allowing the ginger’s spicy heat to meld seamlessly into the beef fat. When you add the garlic and ginger to the pan, you are “blooming” them. This process toasts the aromatics in the hot fat, extracting fat-soluble flavor compounds that wouldn’t be released if they were simply boiled in the broth later.
Umami Boosters: Oyster Sauce and Beef Broth
Oyster sauce acts as the primary thickening agent and umami powerhouse in this glaze. Its syrupy viscosity helps the sauce cling to the craggy surface of the “tiger” eggs and the crispy beef crumbles. When combined with beef broth, it creates a savory base that is rich without being heavy. If you are using store-bought broth, opt for a low-sodium version. This gives you total control over the salt levels, as the soy sauce and oyster sauce already provide a significant amount of salinity.
Step-by-Step: Preparing the Savory Braised Egg
The most technical part of this recipe is the egg-frying stage. After drying your eggs thoroughly, heat the oil until it shimmers. Carefully lower the eggs into the pan; they should sizzle immediately. Use a pair of tongs or a slotted spoon to keep the eggs moving constantly. You want them to roll around the pan so they brown evenly on all sides. If they sit in one spot for too long, the skin might stick to the pan and tear, ruining the aesthetic.
Watch for the visual cues: the whites will start to turn a pale gold, and then small bubbles and wrinkles will appear. This usually takes about two to three minutes. You aren’t looking for a deep brown at this stage, as the dark soy sauce will provide the color later. You are simply looking for that blistered, “tiger skin” texture. Once they look like wrinkled gold nuggets, remove them from the oil and set them on a plate. The kitchen will smell slightly nutty, a sign that the proteins in the egg white have caramelized perfectly.
Developing Texture in the Minced Beef
To get the best texture from your minced beef, you must embrace the “hard sear.” When you add the beef to the skillet, spread it out into a flat layer and then leave it alone. Resist the urge to stir it constantly. By letting it sit undisturbed for three to four minutes, you allow the Maillard reaction to occur. This is the chemical reaction between amino acids and reducing sugars that gives browned food its distinctive, savory flavor. You want the bottom of the beef to become dark brown and slightly crispy.
Once that bottom layer is crusty, break the beef apart into small crumbles. You will notice a transition from the dull grey of steamed meat to a vibrant, deep brown. Don’t drain the fat that renders out unless it is excessive. That fat is liquid gold; it carries the flavors of the beef and will eventually help thicken the sauce into a glossy glaze. The goal is to have a mix of tender beef and crispy bits, providing a variety of textures in every spoonful.
The Low-Heat Braising and Glazing Process
After the beef is browned and the aromatics are fragrant, it’s time to transition from high-heat frying to low-heat braising. Pour in your liquids and bring the mixture to a gentle simmer. This is when you return the fried eggs to the pan. Lower the heat immediately. High heat at this stage will toughen the eggs and cause the sauce to break. You want a slow, steady bubble that gently coaxes the flavors into the “tiger skin” of the eggs.
Use a large spoon to continuously baste the eggs with the sauce. This ensures they develop an even, dark color and don’t dry out on the top. As the sauce simmers, the water in the broth evaporates, concentrating the sugars and proteins into a thick, glossy glaze. You’ll know it’s ready when the sauce coats the back of a spoon and the beef crumbles look lacquered. The eggs should now be a deep, rich mahogany, standing out beautifully against the dark beef mixture.
Troubleshooting Rubbery Eggs and Thin Sauces
If your egg skin peels off in the pan, it’s usually because the pan wasn’t hot enough or the eggs were still damp. To prevent this, ensure the oil is shimmering before adding the eggs. If the skin does tear, don’t worry; the dish will still taste great. Just be more careful when tossing them in the sauce. If your sauce remains too thin after ten minutes of simmering, you can increase the heat slightly for the last two minutes to speed up the reduction. Avoid using a cornstarch slurry if possible, as a natural reduction provides a much cleaner, more intense flavor.
If you find the beef has become too salty, you can balance it out with a small splash of water or an extra teaspoon of brown sugar. The sugar acts as a foil to the salt, rounding out the sharp edges of the soy sauce. Another trick is to serve the dish with plenty of unseasoned steamed rice, which will naturally dilute the intensity of the braise as you eat. Always taste the sauce before the final simmer to ensure the balance of sweet and savory is to your liking.
Optimal Pairings for the Beef Bowl
While steamed white jasmine rice is the traditional base, this beef and egg mixture is surprisingly versatile. Thick, chewy udon noodles are a fantastic alternative, as the glossy sauce clings to the noodles beautifully. For a nuttier flavor profile, try serving it over quinoa or brown rice. Because the dish is quite rich and fatty, it benefits immensely from an acidic side dish. A quick pile of cucumbers pickled in rice vinegar and a pinch of sugar provides a refreshing crunch that cleanses the palate between bites.
Storage and Reheating for Meal Prep
This dish is a meal prepper’s dream because the flavors of the beef actually deepen after 24 hours in the fridge. However, reheating requires a delicate touch to avoid overcooking the eggs. I recommend storing the eggs and beef together in an airtight container for up to three days. When reheating, avoid the microwave if you want to keep the yolk soft. Instead, place the beef and eggs in a small pan with a splash of water, cover with a lid, and steam over low heat until warmed through. This gentle method preserves the texture of the “tiger skin” and the creaminess of the yolk.
Expert Tips for Visual Presentation
Presentation is all about contrast. Use a deep, ceramic bowl to help retain the heat of the braise. Start with a generous bed of rice, then spoon the beef and plenty of glaze over one side. Nestled the mahogany eggs on top, perhaps slicing one in half to reveal the jammy interior. The final, most important step is the garnish. Use a heavy hand with the sliced green onions. The bright, grassy green against the dark, glossy beef makes the dish pop visually and provides a necessary fresh crunch that balances the cooked textures.
How long can I store the Savory Braised Egg and Minced Beef Bowl?
You can store the beef and eggs in an airtight container in the refrigerator for up to 3 days. The flavors actually meld and improve overnight. However, I do not recommend freezing this dish. The texture of the fried egg whites becomes spongy and unpleasant once thawed, and the soft-boiled yolk will lose its creamy consistency.
Why are my braised eggs rubbery instead of tender?
Rubbery eggs are usually the result of overcooking during the initial boiling phase or simmering the braise at too high a temperature. Ensure you only boil the eggs for 6.5 minutes and immediately shock them in ice water. When braising, keep the heat on the lowest setting possible. The goal is to warm the eggs and let them absorb color, not to cook them further.
Can I use a different meat instead of ground beef?
Yes, ground chicken or ground turkey works well as a substitute. However, since these meats are leaner than 80/20 beef, you may need to add an extra tablespoon of oil to the pan to ensure the meat browns properly and doesn’t stick. Ground lamb is another excellent, flavorful option that pairs beautifully with the ginger and garlic aromatics.
What is the best way to peel soft-boiled eggs without tearing them?
Peeling soft-boiled eggs can be tricky. The best method is to crack the shell gently all over and then peel them under a thin stream of cool running water or submerged in a bowl of water. The water helps get between the membrane and the egg white, allowing the shell to slip off smoothly. Older eggs also tend to peel more easily than very fresh ones.
My sauce is too salty, how can I fix it?
If the sauce is too salty, do not add more salt-based seasonings. Instead, add a tablespoon of water or unsalted beef broth to dilute the mixture. A small squeeze of lime juice or a teaspoon of rice vinegar can also help mask the saltiness by adding acidity. Serving the dish with a larger portion of plain, unsalted rice is the easiest way to balance the flavors during the meal.
Can I make this dish spicy?
Absolutely. While the recipe includes an optional teaspoon of chili crisp, you can increase the heat by adding fresh Thai bird’s eye chilies to the garlic and ginger sauté. You can also drizzle extra chili oil over the finished bowl. The richness of the beef fat and the creaminess of the egg yolk handle high levels of heat very well.
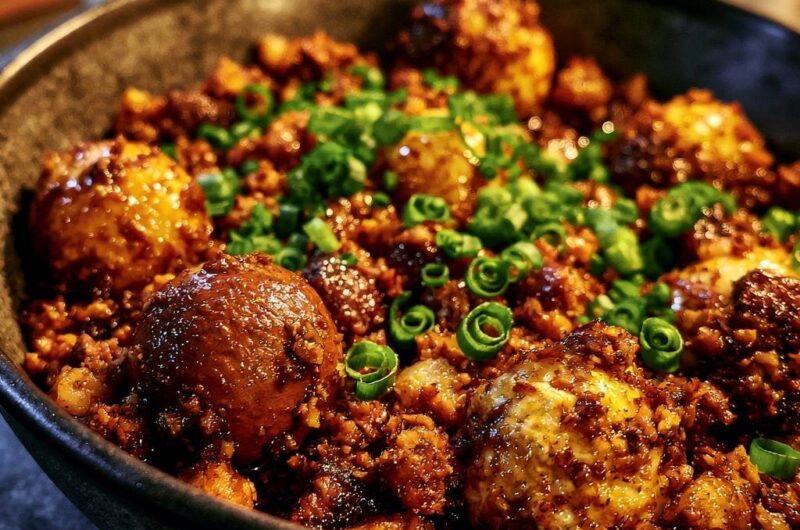
Savory Braised Egg and Minced Beef Bowl
Course: Main CourseCuisine: Asian FusionDifficulty: easy4
servings15
minutes25
minutes40
Minutes410
kcalAsian Fusion
Ingredients
1 pound ground beef (80/20 for better texture)
6 large eggs, soft-boiled (6.5 minutes) and peeled
3 cloves garlic, minced
1 tablespoon fresh ginger, grated
1/4 cup dark soy sauce (for the deep color shown)
2 tablespoons oyster sauce
2 tablespoons brown sugar
1/2 cup beef broth
1 teaspoon chili crisp or red pepper flakes (optional, for the visible spice flecks)
1 teaspoon sesame oil
1/2 cup sliced green onions
3 tablespoons vegetable oil (for frying eggs)
Directions
- Pat the peeled soft-boiled eggs completely dry with a paper towel. In a small skillet or wok, heat 2 tablespoons of vegetable oil over medium-high heat. Fry the whole eggs for 2-3 minutes, rolling them constantly, until the whites develop a golden, slightly blistered “tiger skin” texture. Remove and set aside.
- In a large skillet, heat the remaining 1 tablespoon of oil over medium-high heat. Add the ground beef and cook until deeply browned and crispy. Do not drain all the fat; it carries the umami flavor. Cook until no pink remains and it reaches 160°F (71°C).
- Add the garlic and ginger to the beef, sautéing for 1 minute until fragrant.
- Stir in the dark soy sauce, oyster sauce, brown sugar, and beef broth. Bring to a simmer.
- To ensure the eggs stay tender, reduce the heat to low. Add the fried eggs to the beef mixture. Spoon the sauce and beef over the eggs continuously.
- Simmer gently for 8-10 minutes. The sauce should reduce into a thick, dark, glossy glaze that coats the beef crumbles and clings to the textured surface of the eggs.
- Stir in the sesame oil and chili crisp.
- Serve in deep bowls over steamed rice. Garnish heavily with fresh green onions to provide the bright contrast seen in the image.
Notes
- The flash-fry technique creates a micro-porous surface on the egg whites which allows the sauce to penetrate deeply during the short simmer.