
For years, the greatest enemy of my perfect dinner was a soggy bottom crust. It is incredibly frustrating to pull a beautiful, golden pot pie from the oven only to find a mushy base.
This recipe for Classic Creamy Chicken Pot Pie finally delivers the perfect result, thanks to one critical technique: the strategic blind bake. We are building a rich, thick filling that requires a sturdy, anti-soggy crust foundation.
The Crisp-Crust Method: Why This Classic Pot Pie Works Every Time
The Anti-Soggy Secret: The Power of Blind Baking and Docking
Docking, or piercing the crust with a fork, is essential because it allows steam to escape during the initial bake. This prevents the dough from bubbling up and keeps the base flat.
We then blind bake the bottom crust for 15 minutes before adding any filling. This crucial step sets the gluten structure and bakes off excess moisture, guaranteeing a flaky, crisp base that stands up to the creamy filling.
Hearty, Rich Filling Without the Watery Mess
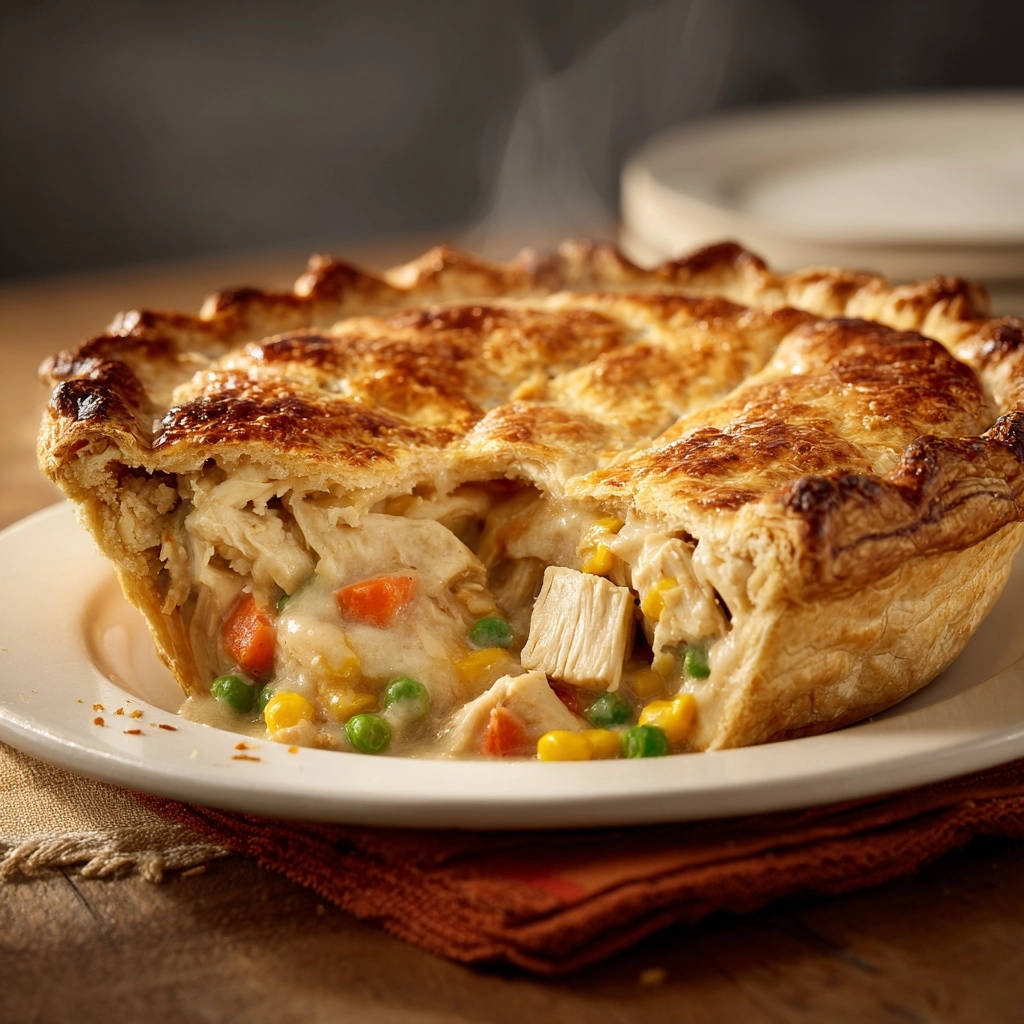
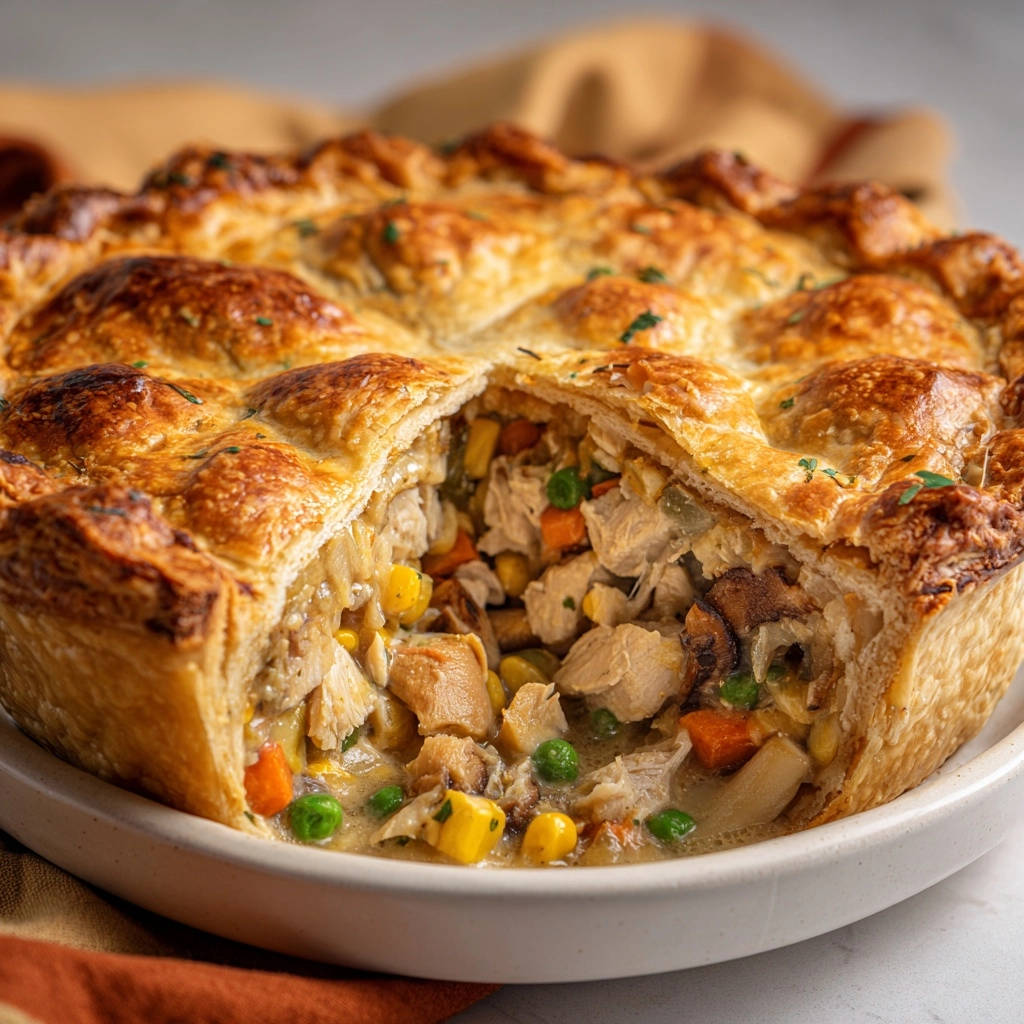
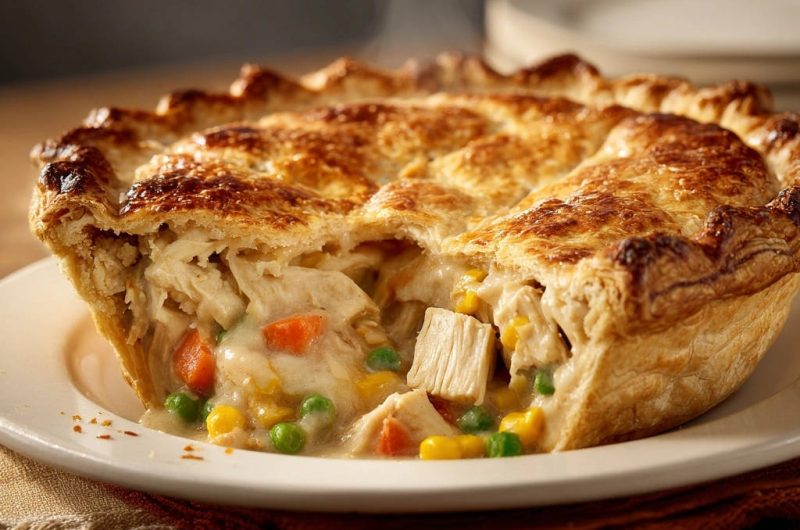
The texture of the filling is just as critical as the crust. A true Classic Creamy Chicken Pot Pie must have a thick, luscious sauce.
We start with a meticulously measured roux-equal parts butter and flour-which must be cooked properly. Simmering the liquid mixture until it achieves a true gravy-like consistency ensures it holds its shape perfectly when sliced after resting.
Perfect Comfort Food: Prep Time, Cook Time, and Accessibility
Despite its luxurious taste, this recipe is designed for maximum efficiency, totaling about 1 hour and 15 minutes from start to finish. We utilize pre-cooked chicken and ready-made refrigerated crusts.
This approach dramatically cuts down on active kitchen time, making this ultimate comfort food achievable even on a weeknight.
Sourcing Flavor: Essential Ingredients for the Classic Creamy Chicken Pot Pie Base
The Foundation: Premade vs. Homemade Crust Decisions
Using two refrigerated 9-inch pie crusts is the fastest route to success and provides reliable consistency. They are sturdy enough to withstand the blind baking process.
If you prefer a homemade flaky crust, simply ensure your dough is chilled and pricked thoroughly before following the blind-baking steps outlined in the instructions.
Building the Perfect Roux: Butter and Flour Ratios
The roux is the thickening agent, and an exact ratio is non-negotiable for a perfect sauce. We use 1/2 cup (one stick) of butter to 1/2 cup of all-purpose flour.
Cooking this paste for a full minute, stirring constantly, is necessary to cook out the raw flour taste. This ensures the final sauce is savory, not pasty.
Achieving Creaminess: Broth and Dairy Ratios (3:1 Liquid)
The total liquid content is 4 cups, consisting of 3 cups of high-quality chicken broth and 1 cup of dairy. The broth carries the majority of the savory flavor.
Using heavy cream yields a decadently rich and dense filling, while whole milk produces a lighter, but still satisfyingly creamy texture.
The Core Filling: Chicken, Veggies, and Seasoning Depth
Start with 1 1/2 pounds of pre-cooked chicken, shredded or cubed, to prevent excess moisture from leaching into the sauce during the final bake. Using pre-cooked protein is a non-negotiable time-saver.
The two cups of frozen mixed vegetables add traditional color and nutrients, requiring no chopping or prep time. Dried thyme and onion powder provide the classic, warm flavor profile expected in a quintessential chicken pot pie filling.
Mastering the Method: Step-by-Step Guide to Classic Creamy Chicken Pot Pie
- Phase 1: Preparing the Crust for Crispness (Steps 1 & 2)
Preheat your oven to a high 425°F and fit one crust into your 9-inch pie dish, crimping the edges for a seal. Crucially, pierce the bottom and sides thoroughly-this is known as docking-to allow steam to escape.
Line the dough with parchment paper and fill it with pie weights or dried beans, covering the base completely. Blind bake for exactly 15 minutes; this sets the gluten and dries out the crust, achieving that reliable anti-soggy base.
Remove the weights and paper, and immediately reduce the oven temperature to 375°F while you prepare the filling.
- Phase 2: Developing the Thick, Rich Filling (Steps 3, 4, & 5)
In a large saucepan, melt the 1/2 cup butter over medium heat, then whisk in the 1/2 cup flour. Cook this roux for 1 minute until it forms a thick paste, ensuring you remove the raw flour taste.
Slowly whisk in the chicken broth and then the milk until the sauce is completely smooth and lump-free. Bring the mixture to a simmer, whisking frequently until it achieves a thick, gravy-like consistency.
This initial thickening is vital as it prevents the final baked product from being watery. Once thickened, remove from heat and stir in the salt, pepper, thyme, onion powder, pre-cooked chicken, and frozen mixed vegetables.
- Phase 3: Assembly, Egg Wash, and Final Bake (Steps 6, 7, & 8)
Pour the thick, warm chicken filling into the blind-baked bottom crust, distributing it evenly. Lay the second pie crust over the top, carefully crimping and sealing the edges of both crusts firmly together to prevent leaking.
Use a sharp knife to cut several steam vents in the top crust; this allows pressure to release and prevents the crust from cracking unevenly. Brush the entire surface thoroughly with the beaten egg wash for a uniform, deep golden brown finish.
Bake at 375°F for 30 to 35 minutes, or until the top is golden and the filling is actively bubbling. If the crust edges darken too quickly, cover them loosely with strips of aluminum foil.
For another delightful take on achieving that perfect crisp crust, check out this plum tart recipe.
The most important final step is the 15-minute resting time before slicing and serving. This mandatory cool-down period allows the thick filling to set completely, ensuring you get perfectly clean, beautiful slices.
Elevating Your Pot Pie: Chef’s Tips and Troubleshooting Guide
Ingredient Substitutions for Dietary Needs (Gluten-Free, Dairy-Free)
Gluten-Free Flour: Use a high-quality 1:1 gluten-free baking blend for the roux. You may find that the sauce takes a minute or two longer to achieve the required thickness.
Dairy Alternatives: Substitute whole milk with oat or cashew milk for a neutral flavor. For maximum richness, pair it with full-fat canned coconut cream in place of heavy cream.
Perfecting the Egg Wash for Maximum Golden Shine
A simple egg wash is made by whisking one egg with one teaspoon of water or milk until perfectly smooth. The water or milk helps break down the proteins, ensuring a more even coat.
Brush the crust lightly and evenly across the entire surface. Avoid pooling the egg wash along the crimped edges, as this can make them tough.
When to Use Aluminum Foil: Preventing Edge Burn
Pot pies often brown on the edges significantly faster than the center, especially due to the high fat content in pie crusts. Check the pie around the 20-minute mark.
If the edges are already a deep golden color, use strips of foil to gently tent and shield them, allowing the center to continue baking uninhibited.
Troubleshooting: Why Is My Filling Still Watery? (Roux Mistakes)
A thin, watery filling almost always means the roux was not allowed to simmer and thicken properly in Phase 2. The heat must be high enough to activate the starch.
Ensure that you bring the broth and dairy mixture to a full, gentle simmer, and let it bubble for at least two minutes until it reaches that distinct gravy-like consistency before mixing in the solids.
Troubleshooting: The Pot Pie Didn’t Slice Cleanly
If your filling oozes out the moment you cut into the pie, you skipped the 15-minute resting time. Starch-based fillings are still liquid when they first come out of the oven.
The period of cooling is essential for the structure of the sauce to stabilize and set firmly, ensuring beautiful, clean slices.
Make Ahead Magic: Storage, Freezing, and Serving Guide
Can I Assemble the Classic Creamy Chicken Pot Pie the Day Before?
Yes, this Classic Creamy Chicken Pot Pie can be assembled up to 24 hours in advance. Prepare the filling and assemble the pie in the blind-baked crust.
Do not apply the egg wash; cover the assembled pie tightly with plastic wrap and refrigerate. Add the egg wash immediately before baking, and expect to add 10 to 15 minutes to the total cook time since the filling will be cold.
Best Practices for Freezing (Baked vs. Unbaked)
Freezing the pot pie unbaked often yields a superior final texture, especially concerning the top crust. Assemble the entire pie, then wrap it tightly in plastic and foil, and freeze for up to three months.
To bake from frozen, remove the wrapping, apply the egg wash, and bake at 375°F for 60-75 minutes, shielding the edges with foil as needed. Baked pot pies can also be frozen, then thawed and reheated at 350°F until warmed through.
Perfect Pairings: What to Serve Alongside this Rich Meal
Because the pot pie is rich, creamy, and hearty, the best sides offer brightness and contrast.
A simple mixed greens salad with a bright lemon vinaigrette to cut the richness.
Steamed green beans or lightly roasted asparagus.
A side of creamy mashed potatoes (for extra indulgence, or skip if maximizing the pot pie experience).
Pot Pie FAQs: Quick Answers to Common Baking Questions
What is the difference between whole milk and heavy cream in the pot pie sauce?
Heavy cream contains significantly more fat, resulting in a denser, profoundly rich filling that feels ultra-luxurious. Whole milk provides a creamy texture but results in a slightly lighter, more subtle sauce.
Can I use leftover roasted turkey instead of chicken?
Absolutely, leftover roasted turkey is a fantastic, flavorful substitute for the chicken. Just ensure the turkey is properly shredded or cubed and any residual dry meat is mixed thoroughly with the warm filling for maximum moisture absorption.
How do I know when the roux is cooked long enough?
The roux is ready when it transitions from a raw white color to a pale blonde and starts to smell faintly nutty. It must cook for at least 60 seconds after the flour is fully incorporated into the butter to eliminate the chalky flavor.
Ready to Impress? Share Your Classic Creamy Chicken Pot Pie Masterpiece!
Mastering the Classic Creamy Chicken Pot Pie is all about confidence and technique, and now you hold the secret to the infallible, anti-soggy crust. Follow the steps precisely, especially the blind bake and the crucial resting time, and you are guaranteed a crisp, flaky slice every single time.
This is truly the ultimate comfort meal, rich with savory flavor and warm spices. I encourage you to try this method and witness the magic firsthand-you will never struggle with a mushy bottom crust again!
Chicken Pot Pie
Course: Main CourseCuisine: AmericanDifficulty: medium6
servings30
minutes45
minutes650
kcal60
minutesThe key technique for a perfect pot pie is blind baking the bottom crust. This recipe guarantees a crisp, golden base supporting a rich, hearty chicken and vegetable filling. Get ready for the perfect, non-soggy slice every time.
Ingredients
1 1/2 pounds cooked chicken breast, shredded or cubed
2 cups mixed frozen vegetables (carrots, peas, corn blend)
1/2 cup butter (1 stick)
1/2 cup all-purpose flour
3 cups chicken broth
1 cup whole milk or heavy cream
1 teaspoon dried thyme
1/2 teaspoon onion powder
1 teaspoon salt, plus more to taste
1/2 teaspoon black pepper
2 refrigerated 9-inch pie crusts (or homemade double crust dough)
1 egg, beaten (for egg wash)
Directions
- Prepare the Crust for Blind Baking Preheat oven to 425 degrees F. Place one pie crust into a 9-inch pie dish. Crimp the edges. Crucially, pierce the bottom and sides thoroughly with a fork (this is called docking).
- The Anti-Soggy Solution Cover the dough with parchment paper and fill with pie weights, dried beans, or rice. Blind bake the bottom crust for 15 minutes. This sets the gluten and removes excess moisture before the filling goes in, guaranteeing a crisp base. Remove from the oven, remove the weights and paper, and set aside while you prepare the filling. Reduce the oven temperature to 375 degrees F.
- Start the Roux In a large saucepan or Dutch oven, melt the butter over medium heat. Whisk in the flour until a thick paste (the roux) forms. Cook the roux for 1 minute, stirring constantly.
- Build the Sauce Slowly whisk in the chicken broth and then the milk until the sauce is smooth. Bring the mixture to a simmer, whisking frequently. It should thicken quickly to a gravy-like consistency. Simmer for 2 minutes. This initial thickening prevents the sauce from being watery and ensures a firm texture after baking.
- Finish the Filling Remove the sauce from the heat. Stir in the salt, pepper, thyme, and onion powder. Fold in the cooked chicken and the frozen mixed vegetables.
- Assemble the Pie Pour the thick chicken filling into the blind-baked pie crust. Place the second pie crust over the top. Crimp and seal the edges of the top and bottom crusts firmly together. Cut several slits in the top crust to allow steam to escape.
- Achieve Golden Color Brush the top crust evenly with the beaten egg wash.
- Bake Bake the pot pie for 30 to 35 minutes at 375 degrees F, or until the top crust is deep golden brown and the filling is bubbling hot. If the edges begin to brown too quickly, cover them loosely with aluminum foil.
- Rest Allow the pot pie to rest for at least 15 minutes before slicing and serving. This resting time helps the filling set completely, resulting in clean slices.
Notes
- The critical step is blind baking (docking and baking) the bottom crust for 15 minutes to prevent sogginess. Allow the pie to rest 15 minutes before serving.


