
I remember my early attempts at cheesecake bars, often resulting in a disappointingly dense or even cracked texture instead of that dreamy, creamy bite. It took me countless trials to master the art, and now I’m thrilled to share the secrets behind truly exceptional
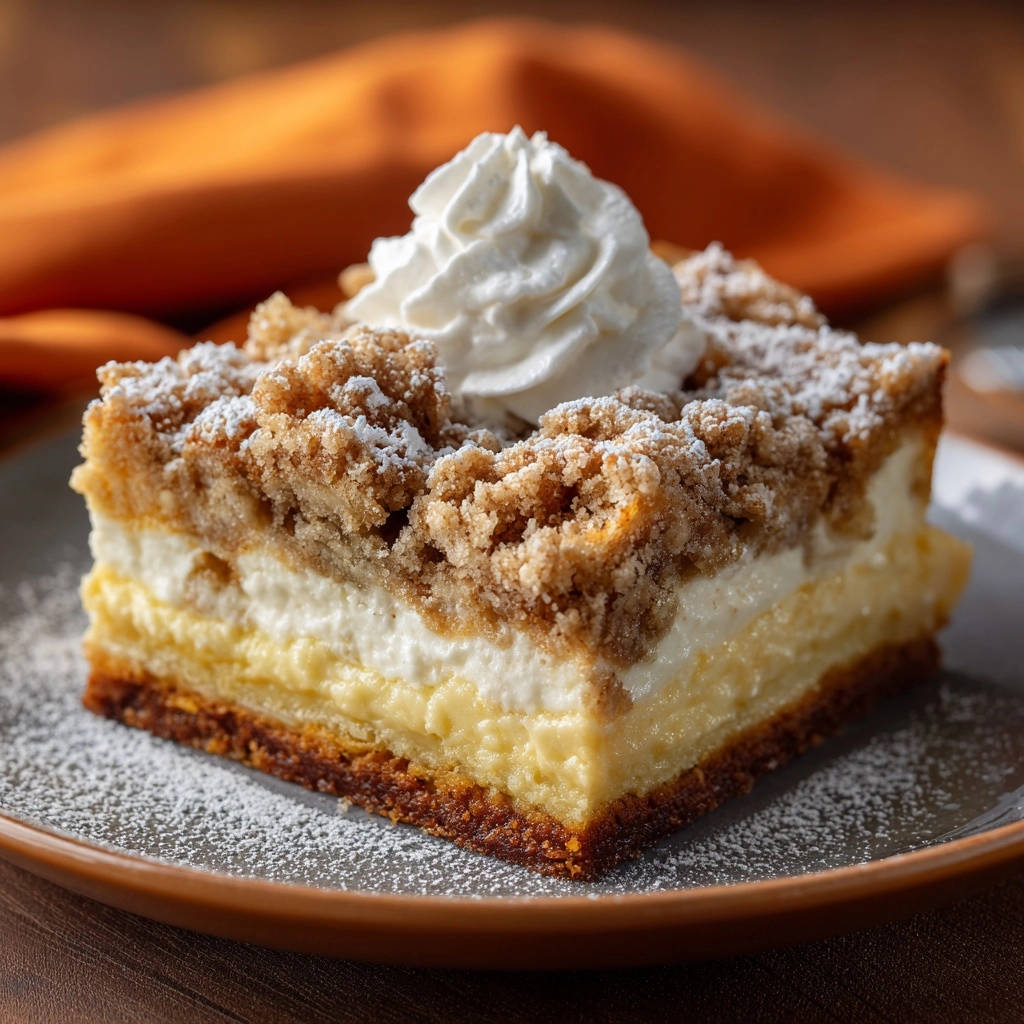
Classic Crumb Cheesecake Bars
that promise a perfect, velvety smooth filling every single time.This recipe isn’t just about ingredients; it’s about a subtle shift in technique that guarantees a melt-in-your-mouth experience, topped with a sweet, buttery crumble. Prepare to impress everyone with these irresistibly easy-to-make, consistently perfect dessert bars.
Beyond Basic: Why These Cheesecake Bars Will Be Your New Favorite
Ditch the Density: Achieving That Dreamy, Creamy Texture
The hallmark of a truly great cheesecake is its incredibly smooth, light, and creamy texture, free from denseness or cracks. Our recipe’s secret lies in specific mixing techniques and a gradual cooling process post-baking.
This method prevents the temperature shock that often leads to a heavy or cracked finish, ensuring your bars are consistently melt-in-your-mouth perfect.
The Perfect Balance of Sweet and Tangy
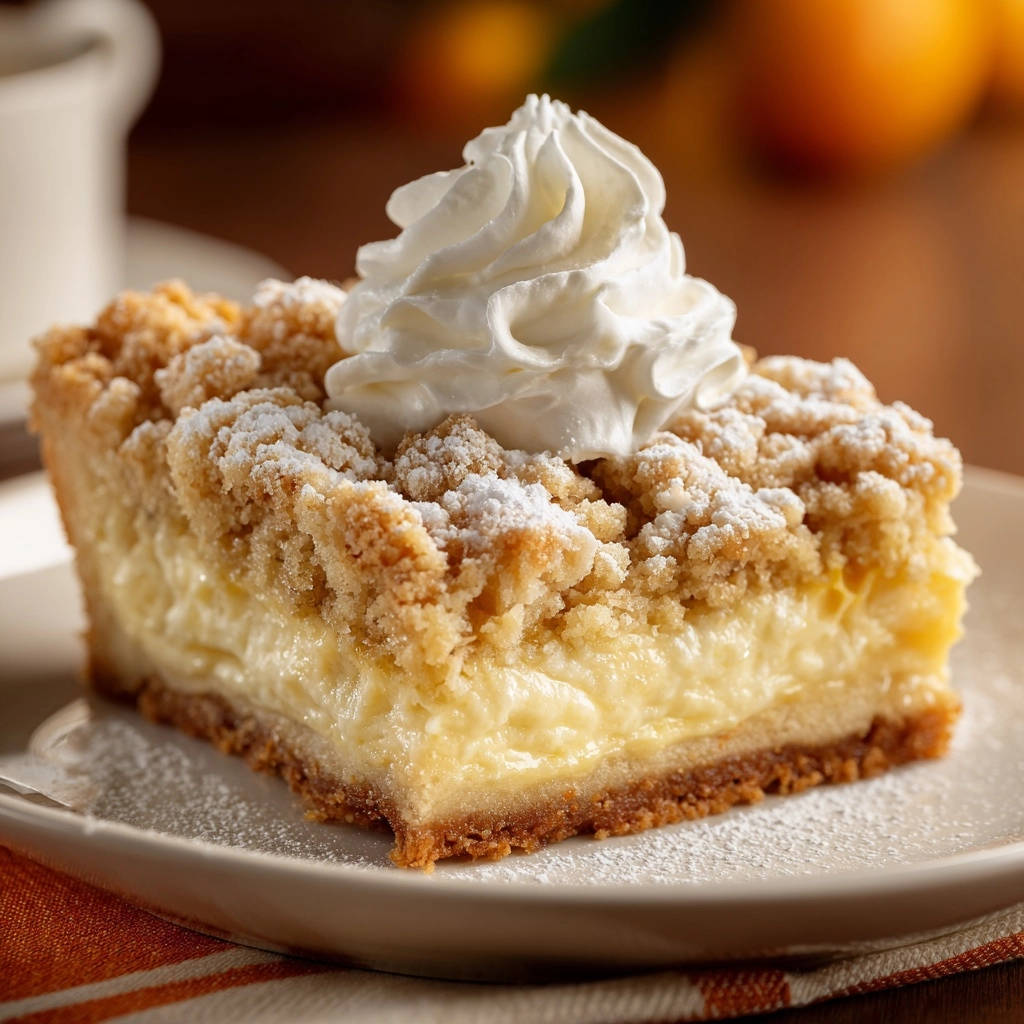
These bars strike an exquisite balance between the sweet, buttery graham cracker crust and crumble topping, and the rich, subtly tangy cheesecake filling. Each bite offers a delightful interplay of textures and flavors.
The optional garnishes of powdered sugar and whipped cream add a final touch of sweetness and lightness, elevating the experience.
Effortless Elegance for Any Occasion
Despite their impressive appearance and gourmet taste, these cheesecake bars are surprisingly straightforward to prepare. They require no water bath and minimal fuss.
This makes them an ideal choice for a casual weeknight treat or an elegant dessert to share at special gatherings, proving that delicious doesn’t have to mean difficult.
A Crowd-Pleasing Classic with a Twist
Combining the beloved comfort of a classic cheesecake with the irresistible texture of a crumb bar creates a truly unique dessert. It’s a nostalgic treat that appeals to all ages.
These
Classic Crumb Cheesecake Bars
offer a familiar yet exciting twist on two dessert favorites, making them an instant hit at any table.The Building Blocks of Bliss: Key Ingredients for Classic Crumb Cheesecake Bars
For the Irresistible Graham Cracker Crust
The foundation of any great bar is a sturdy, flavorful crust.
Graham Cracker Crumbs: These provide a sweet, slightly spiced base that holds together beautifully.
Granulated Sugar: Adds a touch of extra sweetness, complementing the crackers.
Melted Unsalted Butter: The crucial binder that creates a firm, rich crust, ensuring it doesn’t crumble apart when sliced.
Crafting the Velvety Cheesecake Filling
The quality of your filling ingredients directly impacts the creaminess of your cheesecake.
Cream Cheese (Softened): Room temperature cream cheese is paramount for a lump-free, silky smooth filling. It blends easily and whips up airy.
Granulated Sugar: Sweetens the tangy cream cheese, creating that signature cheesecake flavor.
Large Eggs (Room Temperature): Like cream cheese, room temperature eggs emulsify better, contributing to a smooth, uniform texture and preventing curdling.
Vanilla Extract: A staple for warmth and classic dessert aroma.
Sour Cream or Heavy Cream: Adds a lovely tanginess and richness, ensuring the cheesecake remains incredibly moist and smooth.
The Crumble Topping: A Sweet, Buttery Crown
This topping provides a delightful contrast in texture and bursts of buttery sweetness.
All-Purpose Flour, Brown Sugar, Granulated Sugar: Form the bulk of the crumble, providing structure and layered sweetness. The brown sugar adds a deep, molasses note.
Ground Cinnamon: Infuses a warm, inviting spice that pairs perfectly with the sweet crust and tangy filling.
Cold Unsalted Butter (Cubed): Keeping the butter cold is essential for creating distinct, coarse crumbs that become wonderfully crisp when baked. It prevents the mixture from turning into a paste.
Optional Garnishes for a Flawless Finish
These simple additions elevate both the appearance and the flavor.
Powdered Sugar: A light dusting adds a touch of elegance and subtle sweetness.
Whipped Cream: Provides a light, airy contrast to the rich cheesecake, enhancing the overall dessert experience.
Essential Tools for Cheesecake Bar Success
Basic Baking Equipment You’ll Need
You likely have most of these kitchen essentials already.
An 8×8-inch baking pan, preferably light-colored for even baking.
Parchment paper, for lining and easy removal.
Several mixing bowls of various sizes.
A sturdy whisk or fork for combining dry ingredients.
Specialized Helpers for Flawless Execution
These tools make the process smoother and ensure professional results.
An electric mixer (handheld or stand mixer) is highly recommended for achieving that smooth, lump-free cheesecake filling. It’s truly a game-changer for creamy desserts.
A pastry blender is ideal for cutting cold butter into the flour mixture for the crumb topping, creating perfectly varied crumb sizes. If you don’t have one, two knives or even your fingertips can work effectively.
Your Step-by-Step Guide to Perfect Classic Crumb Cheesecake Bars
-
Preparing Your Canvas: Pan and Oven Setup
Preheat your oven to 350°F (175°C) to ensure it’s at the correct temperature before baking. Line an 8×8-inch baking pan with parchment paper, allowing some overhang on the sides.
This parchment overhang acts as “handles” later, making it incredibly easy to lift the entire batch of bars out of the pan for clean cutting and serving.
-
Laying the Foundation: The Graham Cracker Crust
In a medium bowl, combine the graham cracker crumbs and granulated sugar. Pour in the melted butter and mix thoroughly until the crumbs are evenly moistened.
Press this mixture firmly and evenly into the bottom of your prepared pan. A slight pre-bake for 8-10 minutes creates a sturdy, lightly golden base that prevents sogginess and adds a depth of flavor.
Once baked, remove and cool slightly. Then, reduce your oven temperature to 325°F (160°C) for the cheesecake layer.
-
The Crumble Crown: Preparing Your Topping
In a separate medium bowl, whisk together the flour, brown sugar, granulated sugar, and cinnamon. Now, cut in the cold, cubed butter using a pastry blender, two knives, or your fingertips.
The goal is to achieve coarse crumbs with varying sizes – resist the urge to overmix, as you don’t want a uniform paste. Chilling this mixture in the refrigerator while you prepare the filling is a critical step; it keeps the butter cold, ensuring a perfectly crumbly texture during baking.
For more delightful crumb-topped treats, consider trying our Blueberry Crumble Bars or the Easy Creamy Berry Crumble Cheesecake Bars.
-
The Star of the Show: Crafting the Creamy Filling
This is where the magic happens for that “never dense” promise. In a large mixing bowl, using an electric mixer, beat the room temperature cream cheese on medium speed for 2-3 minutes until it is exceptionally smooth and creamy, with no lumps.
Scrape down the sides of the bowl often to ensure everything is incorporated. This initial beating is crucial for an airy, uniform texture.
-
Incorporating Eggs and Flavor (The “Never Dense” Secret)
Add the ¾ cup granulated sugar to the cream cheese, beating on medium-low speed just until combined. Next, add the room temperature eggs one at a time, beating on low speed only until each is just incorporated before adding the next.
This step is vital: overmixing after adding eggs introduces too much air, which can cause the cheesecake to rise too quickly and then crack or become dense upon cooling. Finally, gently stir in the vanilla extract and sour cream (or heavy cream) until just blended, ensuring the mixture remains smooth and lump-free.
-
Assembling Your Layers
Carefully pour the creamy cheesecake filling evenly over the partially baked graham cracker crust in the pan. Use an offset spatula to spread it smoothly to the edges.
Then, retrieve your chilled crumb topping from the refrigerator and sprinkle it evenly over the cheesecake filling, covering the surface completely.
-
Baking to Golden Perfection
Bake for 45-55 minutes at 325°F (160°C). The bars are ready when the edges are set and lightly golden, and the center wiggles only slightly when gently shaken.
Avoid overbaking, as this can lead to dryness or cracks. Remember, the cheesecake will continue to set as it cools.
-
The Cooling Secret: Ensuring That Dreamy Texture
Once baked, turn off the oven and leave the cheesecake bars inside with the oven door slightly ajar for 30 minutes. This gradual cooling process is a game-changer.
It prevents sudden temperature changes that can cause cracks or a dense, heavy texture, allowing the cheesecake to gently settle into its perfect creaminess.
-
The Grand Finale: Chilling and Serving
Remove the bars from the oven and let them cool completely on a wire rack at room temperature. This takes time, but it’s essential.
Once fully cooled, refrigerate them for at least 4 hours, or preferably overnight. Proper chilling allows the cheesecake to set completely, firm up, and achieve its signature creamy consistency.
When ready to serve, use the parchment paper overhang to lift the bars out of the pan. Cut into neat squares, and for the ultimate presentation, dust with powdered sugar and top with a dollop of whipped cream, if desired.
Unlocking Deeper Flavor: Expert Tips for Your Cheesecake Bars
Room Temperature Matters (A Lot!): Ensure your cream cheese and eggs are truly at room temperature. This is non-negotiable for a silky, lump-free filling, as cold ingredients don’t emulsify properly, leading to a lumpy or dense texture.
Mastering the Mix: Avoiding Over-Beating: While beating the cream cheese initially until smooth is crucial, be very gentle once the eggs are added. Overmixing introduces excess air, which can cause the cheesecake to puff up excessively and then crack or become dense as it cools.
The Art of the Chill: Why Patience Pays Off: Do not rush the chilling process after baking. The gradual cooling inside the oven and subsequent refrigeration are absolutely vital for the cheesecake to set properly and develop its signature creamy, “never dense” consistency. Plan ahead for this chilling time.
Perfect Cuts for Presentation: For beautifully clean slices, use a sharp, thin-bladed knife. Wipe the knife clean with a warm, damp cloth after each cut to prevent crumbs and filling from sticking, ensuring professional-looking squares every time.
Common Hurdles & How to Solve Them
My Cheesecake is Dense or Crumbly!
This common issue often stems from overmixing the batter, especially after the eggs have been added, or from not using truly room temperature ingredients. Cold cream cheese or eggs won’t blend smoothly, requiring more beating and incorporating too much air.
Solution: Always ensure your cream cheese and eggs are softened to room temperature. Beat cream cheese until smooth before adding other ingredients, and then mix on low speed, just until everything is combined, avoiding excessive beating.
There Are Cracks in My Cheesecake!
Cracks typically occur due to overbaking or a sudden, drastic temperature change during cooling. Overbaking dries out the cheesecake, causing it to pull away from the pan and crack, while rapid cooling shocks the delicate structure.
Solution: Adhere to the specified baking time, watching for the slight wiggle in the center. Crucially, utilize the gradual cooling method by leaving the bars in the turned-off oven with the door ajar for 30 minutes, allowing them to adjust slowly to room temperature.
My Crust is Soggy or Falls Apart!
A soggy crust usually means it wasn’t pre-baked long enough, or the crumbs weren’t pressed firmly enough into the pan. If it falls apart, there might not have been enough melted butter to bind the crumbs.
Solution: Ensure your graham cracker crust is baked until lightly golden and firm before adding the filling. Press the mixture very firmly and evenly into the pan, using the bottom of a glass or a flat measuring cup for best compaction.
Your Classic Crumb Cheesecake Bars Questions Answered
Can I make these Classic Crumb Cheesecake Bars dairy-free or gluten-free?
Yes, adaptations are possible! For dairy-free, substitute plant-based cream cheese, vegan butter, and a dairy-free sour cream or heavy cream alternative. For gluten-free, ensure you use certified gluten-free graham cracker crumbs and a reliable all-purpose gluten-free flour blend for the crumb topping.
How long do these cheesecake bars last, and how should I store them?
These
Classic Crumb Cheesecake Bars
maintain their freshness and delightful texture for up to 5 days when stored in an airtight container in the refrigerator. For the absolute best taste and creamy consistency, I recommend enjoying them within 3-4 days of baking.Can I freeze leftover Classic Crumb Cheesecake Bars?
Absolutely! Freezing is an excellent option for longer storage. To do so, wrap individual bars tightly in plastic wrap, then place them in a freezer-safe container or a heavy-duty freezer bag. They can be frozen for up to 2 months. Thaw them in the refrigerator overnight for the best texture before serving.
What if I don’t have sour cream or heavy cream?
The recipe thoughtfully provides heavy cream as a direct substitute for sour cream, offering a rich and creamy alternative. If neither is available, full-fat Greek yogurt can also work in a pinch, providing a similar tanginess, though the final texture might be subtly different.
Extending the Enjoyment: Storage and Serving Ideas
Ideal Storage for Freshness
To preserve the creamy texture and fresh flavor of your
Classic Crumb Cheesecake Bars
, always store them in an airtight container in the refrigerator. This protects them from absorbing odors and keeps the filling perfectly set.Creative Serving Suggestions
While delicious on their own, these bars can be beautifully enhanced with various garnishes. Beyond powdered sugar and whipped cream, consider a drizzle of homemade caramel sauce, a scattering of fresh berries, or even a sprinkle of mini chocolate chips for added indulgence.
For another delightful bar recipe that’s sure to please, try our Caramel Nut Squares.
Make-Ahead Magic: Prep for Success
These bars are fantastic for make-ahead convenience. The crumb topping can be prepared a day or two in advance and kept chilled. The finished bars benefit immensely from an overnight chill in the refrigerator, allowing the flavors to meld and the cheesecake to firm up to its ideal consistency.
Ready to Create Your Own Masterpiece?
Now that you’re equipped with all the expert tips and techniques, it’s time to bring these irresistible
Classic Crumb Cheesecake Bars
to life in your own kitchen. You’ll be amazed at how simple it is to achieve that coveted creamy, dreamy texture every single time.Go ahead, bake a batch, share the joy, and most importantly, savor every incredibly delicious bite. Happy baking!
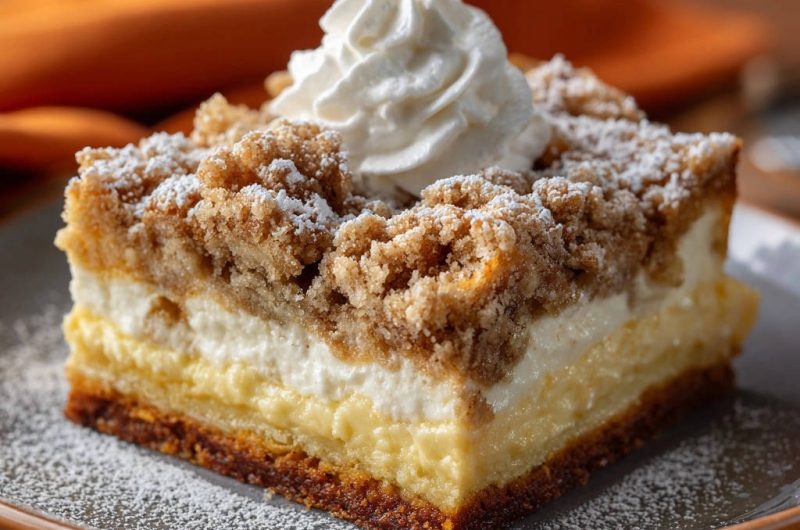
Crumb Cheesecake Bars
Course: DessertCuisine: AmericanDifficulty: medium12
servings20
minutes45
minutes450
kcal60
minutesDiscover the secret to perfectly smooth, rich, and melt-in-your-mouth cheesecake bars every time. This recipe features a buttery graham cracker crust, a creamy cheesecake layer, and a delightful crumb topping. A simple technique change ensures a dense-free, dreamy dessert.
Ingredients
For the Crust:
1 ½ cups graham cracker crumbs
¼ cup granulated sugar
½ cup unsalted butter, melted
For the Cheesecake Filling:
2 (8-ounce) blocks cream cheese, softened to room temperature
¾ cup granulated sugar
2 large eggs, at room temperature
1 teaspoon vanilla extract
¼ cup sour cream or heavy cream
For the Crumb Topping:
1 cup all-purpose flour
½ cup packed light brown sugar
¼ cup granulated sugar
½ teaspoon ground cinnamon
½ cup unsalted butter, cold and cubed
For Garnish:
Powdered sugar
Whipped cream
Directions
- Preheat your oven to 350°F (175°C). Line an 8×8-inch baking pan with parchment paper, leaving an overhang on the sides for easy removal.
- Make the Crust: In a medium bowl, combine the graham cracker crumbs and ¼ cup granulated sugar. Pour in the melted butter and mix until well combined and moist. Press the mixture firmly and evenly into the bottom of the prepared pan. Bake for 8-10 minutes until lightly golden. Remove from oven and set aside to cool slightly. Reduce oven temperature to 325°F (160°C).
- Prepare the Crumb Topping: In a separate medium bowl, combine the flour, brown sugar, granulated sugar, and cinnamon. Cut in the cold, cubed butter using a pastry blender, two knives, or your fingertips until coarse crumbs form. Don’t overmix; you want varying sizes of crumbs. Place this bowl in the refrigerator while you make the filling.
- Make the Cheesecake Filling (The Key to Creaminess!): In a large mixing bowl, using an electric mixer, beat the room temperature cream cheese on medium speed until smooth and creamy, about 2-3 minutes. Scrape down the sides of the bowl.
- Add the ¾ cup granulated sugar and continue to beat on medium-low speed until just combined.
- Add the room temperature eggs one at a time, beating on low speed just until incorporated after each addition. Do not overmix at this stage; overmixing after adding eggs can lead to a dense or cracked cheesecake. Stir in the vanilla extract and sour cream (or heavy cream) until just blended. The mixture should be smooth and lump-free.
- Pour the cheesecake filling evenly over the partially baked crust.
- Sprinkle the chilled crumb topping evenly over the cheesecake filling.
- Bake for 45-55 minutes, or until the edges are set and lightly golden, and the center wiggles only slightly when gently shaken.
- Cooling for Perfect Texture: Once baked, turn off the oven and leave the cheesecake bars in the oven with the door slightly ajar for 30 minutes. This gradual cooling prevents sudden temperature changes that can lead to density or cracking.
- Remove from the oven and let cool completely on a wire rack at room temperature.
- Once cooled, refrigerate for at least 4 hours, or preferably overnight, to allow the cheesecake to set completely and achieve its perfect creamy texture.
- When ready to serve, use the parchment paper overhang to lift the bars out of the pan. Cut into squares. Dust with powdered sugar and top with a dollop of whipped cream, if desired.
Notes
- Refrigerate for at least 4 hours or preferably overnight for the best texture.


