
For years, I struggled to achieve that perfect, plush texture in heavy layered desserts, often ending up with a crumb that was either disappointingly dry or strangely gummy. This recipe for Classic Harvest Spice Cake is the culmination of that journey, featuring a specialized technique that guarantees an incredibly tender, moist crumb every single time.
This is the definitive autumn centerpiece you’ve been searching for, relying on precision mixing and the revolutionary buttermilk folding technique to deliver rich flavor and flawless structure.
Why This Classic Harvest Spice Cake Recipe Is Your New Fall Favorite
Solving the Dry Cake Dilemma
The key to superior moisture in this spice cake lies in using two types of fat: vegetable oil and melted butter. Oil provides fundamental lubrication and prevents dryness, ensuring the cake stays tender for days.
Melted butter delivers that rich, deep, classic flavor that elevates the cake from good to exceptional without compromising the texture.
The Revolutionary Buttermilk Technique
The secret weapon here is adding room-temperature buttermilk as the very last liquid ingredient and folding it in gently by hand.
The acid in the buttermilk reacts perfectly with the baking soda, resulting in a super-soft crumb while the gentle folding prevents gluten strands from developing, eliminating that tough or gummy texture.
A Versatile Base: Pumpkin or Carrot Puree
Using 1 cup of either pumpkin or carrot puree adds essential body, moisture, and a subtle vegetal sweetness to the batter.
Both options provide necessary bulk and structure, enhancing the deep flavor of the spices and keeping the cake moist long after baking.
The Building Blocks of Flavor: Understanding Your Spice Cake Ingredients
The Essential Spice Blend: Depth, Warmth, and Balance
Cinnamon provides the warm foundation, while nutmeg offers creamy complexity and sweetness.
Ginger introduces a necessary, sharp bite, and cloves deliver a profound, resonant depth, making the cake smell and taste intensely autumnal.
For maximum impact, always use freshly ground spices, especially nutmeg and ginger, to unlock their volatile oils and powerful aroma.
The Dual Fat Approach: Oil and Melted Butter
Vegetable oil, being liquid at room temperature, coats the dry ingredients thoroughly, resulting in an exceptionally moist texture that resists staling.
Melted butter introduces complex flavor compounds and contributes to a richer mouthfeel than oil alone could provide.
Leavening Agents: Baking Soda vs. Baking Powder
Baking soda is required to neutralize the acid present in the buttermilk and the puree, providing the lift needed for a light cake structure.
Baking powder is included as a necessary backup leavener to ensure uniform rising and generous overall volume.
Essential Baking Equipment for Spice Cake Success
-
Accurate Kitchen Scale:
Weighing flour is non-negotiable for tender cakes, as volume measurements (cups) can vary wildly and lead to an overly dense product.
-
High-Quality Whisk and Mixer:
While the initial mixing requires a stand or hand mixer to ensure emulsification, the final folding of the buttermilk must be done by hand to prevent over-development of gluten.
-
Cake Pans: 9-inch vs. 8-inch Adjustments:
Using two 9-inch pans results in slightly thinner layers and a standard 30-35 minute bake time, while three 8-inch pans yield taller, more elegant layers and may require an extra 5 minutes of baking time.
-
Wire Cooling Rack:
Transferring the cakes to a wire rack after the initial 10-minute cooling period is vital to allow air circulation, preventing the bottom crust from steaming and collapsing.
Precision Baking: Your Step-by-Step Guide to Classic Harvest Spice Cake Perfection
-
Preparation Checklist (Step 1):
Preheat your oven to 350°F (175°C) and prepare your pans immediately. Properly greasing and lightly dusting the pans with flour ensures easy release and prevents frustrating sticking after baking.
-
Mixing Dry Ingredients for Uniformity (Step 1):
Combine the flour, spices, leavening agents, and salt in a large bowl and whisk thoroughly. This ensures every piece of cake receives a consistent distribution of flavor and lift, crucial for texture.
-
The Moisture Lock Method (Step 2):
Whisk together the melted butter, oil, and both sugars in a separate bowl until fully combined. This step begins the emulsification process and traps moisture effectively.
Add the room-temperature eggs one at a time, mixing well after each addition. Room temperature eggs blend seamlessly into the fats, creating a stable emulsion that leads to a higher, more delicate crumb.
-
Incorporating Dry Ingredients (Step 3):
Add the dry mixture to the wet mixture and beat only on low speed. Mix solely until the flour streaks disappear-no longer.
Overmixing at this stage is the primary cause of tough, chewy cake texture because it aggressively develops gluten strands.
-
The Buttermilk Folding Technique (Step 4):
Pour the room temperature buttermilk over the batter and immediately switch to a rubber spatula.
Gently fold the buttermilk into the batter until just smooth. This gentle motion, combined with the acid/baking soda reaction, guarantees a delicate, tender texture without developing any tough gluten.
-
Baking and Testing for Doneness (Step 5):
Divide the batter evenly between the prepared pans and bake for 30 to 35 minutes. Do not open the oven door for the first 25 minutes, as the temperature fluctuation can cause the cake to fall.
The cake is done when the edges pull slightly away from the pan and a toothpick inserted into the center comes out clean, potentially with a few moist crumbs clinging to it.
For a similar breakfast treat that’s always moist, check out this easy overnight French toast bake.
-
The Two-Stage Cooling Process (Step 5):
Allow the cakes to cool in their pans for 10 minutes. This essential rest period allows the structure to set fully, preventing breakage.
Invert the warm cakes onto a wire rack and allow them to cool completely before even thinking about frosting. Warm cakes will melt the cream cheese frosting instantly.
Crafting the Silky Finish: Rich Cream Cheese Frosting and Drizzle
Achieving Light and Fluffy Frosting Consistency
Cream cheese and butter must be perfectly softened-not melted-to create a light, stable frosting.
Beat the fats together vigorously for a full three minutes until they become visibly light, pale, and incredibly aerated. This whipping process is what gives the final frosting its silky texture.
Sifting Powdered Sugar: A Non-Negotiable Step
Powdered sugar compacts easily and often contains small, hard lumps formed by moisture.
Sifting ensures that the sugar dissolves smoothly into the fat mixture, guaranteeing a lump-free, velvety consistency that pipes and spreads beautifully.
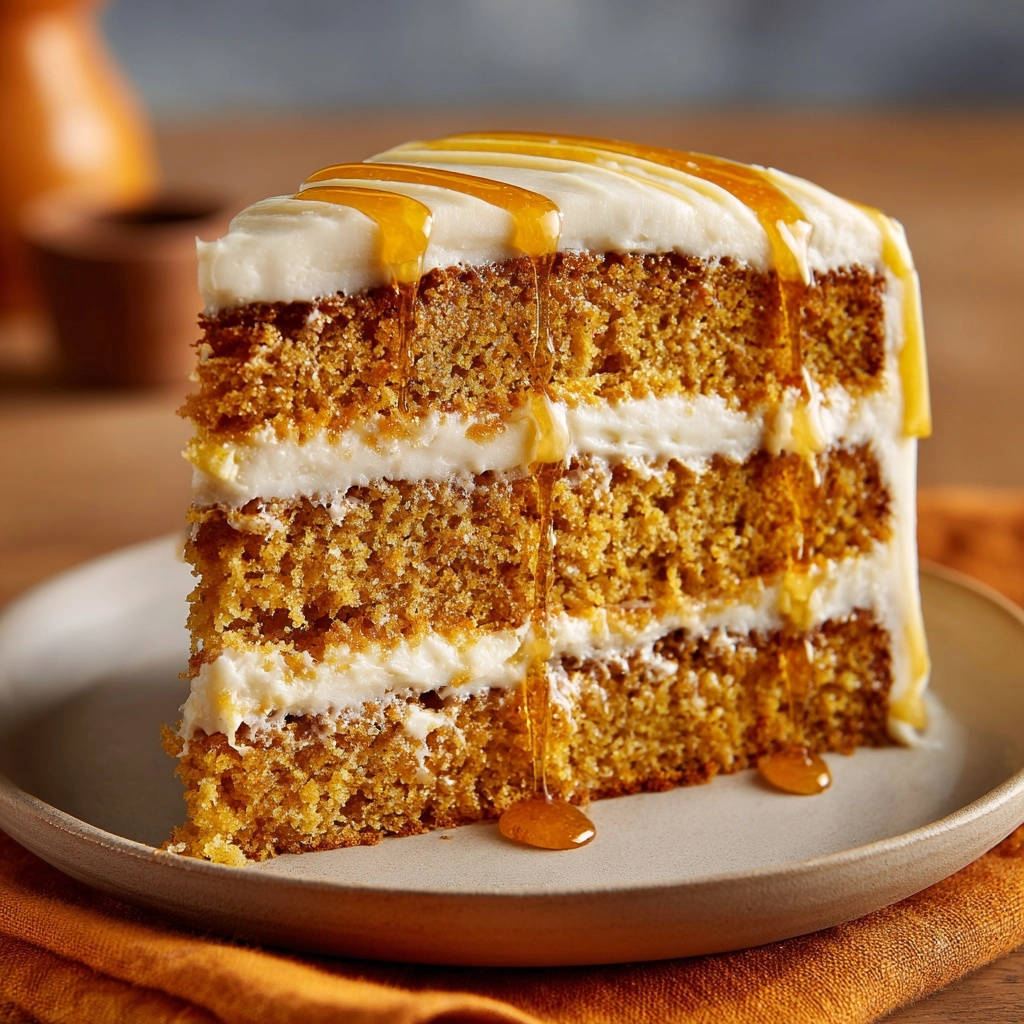
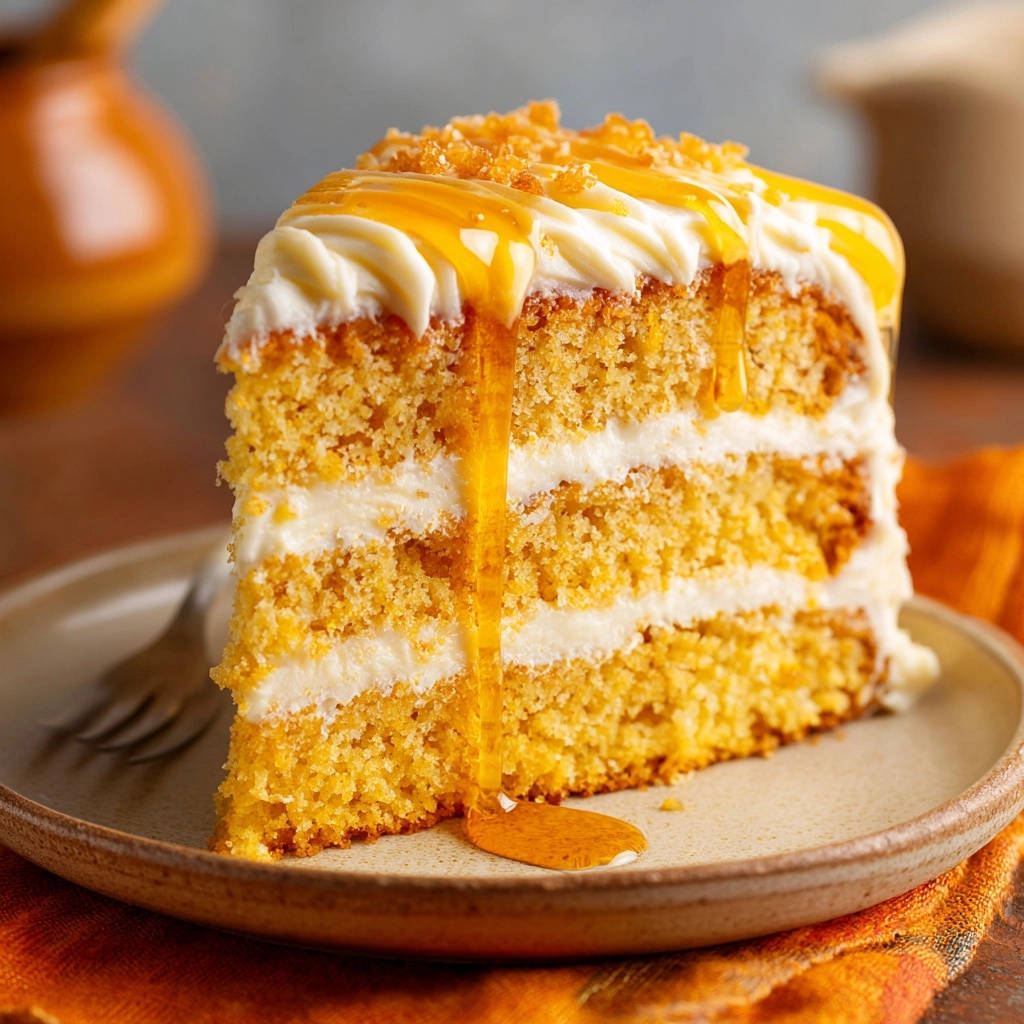
The Final Touch: Honey or Maple Syrup Drizzle
A generous drizzle of warm honey or pure maple syrup adds a complementary sweetness and a glossy, professional aesthetic.
Apply the drizzle just before serving to prevent it from fully soaking into the frosting and disappearing over time.
Chef’s Secrets: Troubleshooting and Elevating Your Harvest Cake
Temperature Control is King: Ensure all cold ingredients (eggs, buttermilk) are at exact room temperature for optimal emulsification and lift. Cold ingredients shock the batter, leading to lumps and a tougher texture.
Flavor Infusion for the Puree: Roast your pumpkin or carrot puree lightly before measuring to drive off excess water and deepen the naturally sweet, concentrated flavor.
Preventing Cake Domed Tops: Wrap your cake pans with specialized damp baking strips. These strips insulate the edges, forcing the cake to bake evenly from the edges to the center, resulting in flat layers for easier stacking.
Crumb Coating for Clean Frosting: Always apply a very thin, stabilizing first layer of frosting (the crumb coat) and chill the cake for 15 minutes.
This seals any loose crumbs, ensuring the final, thick layer of frosting remains perfectly pristine and smooth.
Maximizing Freshness: Storage and Make-Ahead Strategies
Can I make the cake layers ahead of time?
Yes, the cooled cake layers freeze beautifully and can be made up to three months in advance. Wrap each completely cooled layer tightly in plastic wrap, followed by a layer of aluminum foil.
Thaw the layers overnight in the refrigerator before unwrapping and frosting.
Optimal Storage for Frosted Classic Harvest Spice Cake
Since this recipe features a dairy-rich cream cheese frosting, the finished Classic Harvest Spice Cake must be refrigerated.
Store the cake in an airtight cake carrier to prevent it from absorbing refrigerator odors and to keep the cake layers from drying out.
Serving Suggestions and Flavor Pairings
Serve slices of this warming spice cake alongside strong, freshly brewed coffee or a comforting mug of hot spiced apple cider to enhance the autumn flavors.
Garnish the finished cake with a sprinkle of toasted pecans or crushed walnuts for a delightful textural contrast.
Frequently Asked Questions About Baking Spice Cake
Can I substitute milk for buttermilk in this Classic Harvest Spice Cake?
While you can use whole milk, the resulting cake will not be as tender or moist because the milk lacks the acidity needed to properly react with the baking soda and tenderize the gluten.
If you lack buttermilk, you can quickly make soured milk by adding 1 tablespoon of white vinegar or lemon juice to 1 cup of whole milk and letting it sit for 5 minutes until it thickens slightly.
How do I know if my baking soda and baking powder are still active?
Test baking soda by adding a teaspoon to a small bowl of vinegar; it should bubble vigorously immediately.
Test baking powder by adding a teaspoon to a small bowl of hot water; it should foam slightly and then vigorously.
Why does the recipe call for sifting the powdered sugar but not the flour?
Sifting powdered sugar is necessary because of its sticky nature and tendency to clump, which would ruin the smooth consistency of the cream cheese frosting.
The flour in the cake batter is whisked aggressively with the other dry ingredients, which is usually sufficient to aerate it without the risk of adding too much air, which can cause the cake to sink.
Mastering the Classic Harvest Spice Cake comes down to understanding the simple science behind the buttermilk folding technique-it guarantees a rich, moist, and perfectly tender result every time.
Take these expert tips and transform your autumn baking; you won’t believe the difference this precise method makes. Bake this recipe today and share your flawless, aromatic masterpiece!
Harvest Spice Cake
Course: DessertCuisine: AmericanDifficulty: medium12
servings30
minutes35
minutes550
kcal60
minutesThis incredibly tender spice cake is guaranteed to be perfectly moist every time, thanks to a crucial ingredient substitution and gentle mixing technique. Featuring rich fall spices and topped with luscious cream cheese frosting, this is the essential keeper recipe for the harvest season.
Ingredients
For the Cake:
2 cups all-purpose flour
2 teaspoons baking soda
1 teaspoon baking powder
1 teaspoon ground cinnamon
1/2 teaspoon ground nutmeg
1/4 teaspoon ground ginger
1/4 teaspoon ground cloves
1 teaspoon salt
1 cup granulated sugar
1 cup packed light brown sugar
1/2 cup vegetable oil
1/2 cup unsalted butter, melted
4 large eggs, room temperature
1 cup pumpkin puree (or carrot puree)
1/2 cup buttermilk, room temperature
1 tablespoon vanilla extract
For the Cream Cheese Frosting:
8 ounces cream cheese, softened
1/2 cup (1 stick) unsalted butter, softened
4 cups powdered sugar, sifted
2 teaspoons vanilla extract
1/4 cup honey or maple syrup, for drizzle
Directions
- Prepare the Batter: Preheat your oven to 350 degrees F. Grease and flour two 9-inch round cake pans or three 8-inch pans. In a large bowl, whisk together the flour, baking soda, baking powder, cinnamon, nutmeg, ginger, cloves, and salt. Set aside.
- Mix Wet Ingredients for Moisture Lock: This step is key to avoiding gumminess and dryness. In a separate large bowl, whisk together the melted butter, vegetable oil, granulated sugar, and brown sugar until thoroughly combined. Add the eggs one at a time, mixing well after each addition. Stir in the pumpkin puree and vanilla extract.
- Incorporate the Secret Ingredient: Add the dry ingredient mixture to the wet ingredients and mix on low speed until just combined. Stop mixing immediately once you no longer see flour streaks.
- The Buttermilk Technique (Ensuring Tender Crumb): Pour the 1/2 cup of room temperature buttermilk over the batter and gently fold it in by hand with a spatula until smooth. The acid in the buttermilk, combined with the baking soda and the gentle folding, guarantees a tender, moist crumb without developing tough gluten, solving the dry/gummy problem. Do not overmix after adding the buttermilk.
- Bake: Divide the batter evenly among the prepared pans. Bake for 30 to 35 minutes, or until a toothpick inserted into the center comes out clean. Let the cakes cool in the pans for 10 minutes, then invert them onto a wire rack to cool completely.
- Make the Frosting: Beat the softened cream cheese and butter together in a bowl until light and fluffy. Gradually add the sifted powdered sugar until smooth. Beat in the vanilla extract.
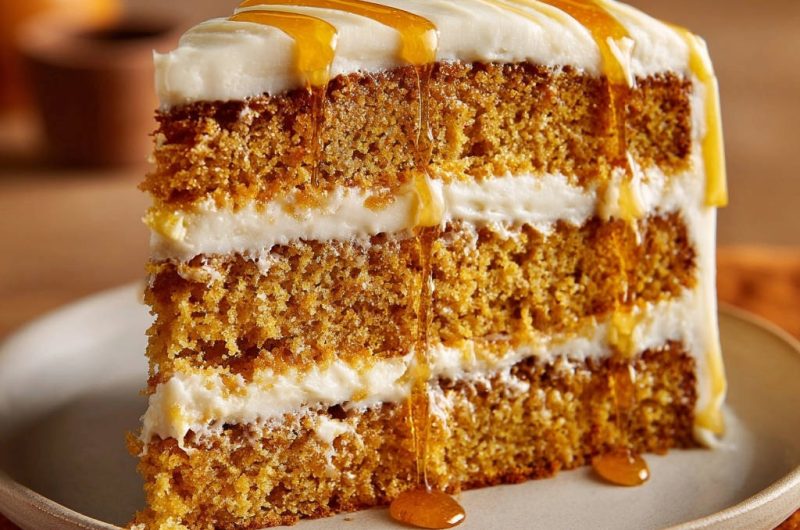
- Assemble and Finish: Once the cakes are completely cool, frost the layers and stack them. Drizzle the top generously with honey or maple syrup just before serving.
Notes
- The key to the tender crumb is the room temperature buttermilk, folded in gently by hand at the end of mixing.


