
For years, I perfected countless desserts, but Classic Honey Baklava often posed a challenge. Achieving that shatteringly crisp texture, without it dissolving into a sweet, soggy disappointment, felt like an elusive dream for many home bakers, including myself.
But through dedicated experimentation, I discovered a crucial technique that transforms this beloved treat. This recipe shares my foolproof method, ensuring every single bite of your Classic Honey Baklava delivers pure, golden crunch and unforgettable flavor.
Why This Classic Honey Baklava Will Be Your New Favorite
Say Goodbye to Soggy Baklava: Our Crispy Promise
The most common frustration with homemade baklava is a lack of crispness, often resulting from incorrect syrup application. Our recipe focuses on a specific temperature shock technique that actively prevents sogginess, guaranteeing truly golden, brittle layers every time.
For a delightful variation on crispy layers, explore this golden pistachio baklava.
Effortless Elegance: Impress with Minimal Stress
While baklava might appear intricate, this guide simplifies the process without compromising on quality or tradition. We break down each step, making it accessible for home bakers to create an incredibly impressive, sweet Mediterranean treat with confidence and ease.
Complementary Dishes to Try
If you enjoyed the flaky pastry and sweet nut filling of our honey baklava, explore these other delights featuring similar textures and flavors.
- For another way to enjoy crispy phyllo, consider these Crispy Feta Phyllo Rolls, which offer a savory contrast.
- If you liked the idea of a warm, cheesy center wrapped in a crisp exterior, these Crispy Fried Cheese Bites provide a similar satisfying crunch.
A Timeless Treat: The Irresistible Charm of Honey Baklava
Baklava’s universal appeal lies in its harmonious blend of sweet honey, aromatic nuts, and delicate, buttery phyllo. This recipe captures that timeless charm, promising a luxurious dessert perfect for special occasions or a delightful everyday indulgence.
For another sweet treat, explore sugared mini croissants that are just as delightful.
Gather Your Essentials: Ingredients for Golden Perfection
The Foundation: Delicate Phyllo Dough
One pound of frozen phyllo dough is your starting point. It’s crucial to thaw it overnight in the refrigerator; this slow thawing prevents cracking and makes the delicate sheets much easier to handle.
Once unrolled, always keep the phyllo covered with a damp kitchen towel. This simple step is vital to prevent the thin sheets from drying out and becoming brittle, which can lead to tearing during assembly.
Buttery Bliss: The Key to Crisp Layers
You’ll need 1 1/2 cups of unsalted butter, melted. Unsalted butter allows you to control the overall saltiness of your dish, providing a cleaner, richer flavor.
Generous application of butter between the phyllo layers is what creates that signature crispness and rich, golden hue. Don’t be shy; it’s essential for a truly decadent honey nut pastry.
The Heart of the Flavor: Choosing Your Nuts (Walnuts or Pistachios)
A full pound of walnuts or pistachios forms the delicious core of your baklava. Finely chopping them ensures an even distribution and prevents any large, clunky pieces that could disrupt the delicate layers.
One teaspoon of ground cinnamon enhances the nutty flavor with a warm, aromatic spice. It’s a classic pairing that provides depth and a comforting aroma to this traditional baklava.
Crafting the Liquid Gold: Our Signature Honey Syrup
For the syrup, you’ll combine 1 1/2 cups granulated sugar, 1 cup water, 1/2 cup honey, 1 tablespoon lemon juice, and 1/2 teaspoon vanilla extract. The sugar and water create the base, while honey adds its distinctive floral sweetness.
Lemon juice brightens the flavor, cutting through the richness and preventing the baklava from being overly sweet. Vanilla extract adds a final layer of comforting aroma and taste to the “liquid gold” that will drench your crispy phyllo dessert.
The absolute critical step for the syrup is to cool it completely to room temperature. This temperature difference between the hot baklava and the cool syrup is the secret to preventing sogginess and achieving maximum crispness.
Essential Tools for Your Baklava Baking Adventure
9×13 Inch Baking Pan: The perfect size for even baking and portioning.
Pastry Brush: Essential for evenly buttering those delicate phyllo layers.
Sharp Knife: For precise pre-baking cuts and easy serving.
Medium Saucepan: For simmering your perfectly balanced honey syrup.
Damp Kitchen Towel: Your phyllo’s best friend to prevent drying out.
Crafting Your Masterpiece: A Step-by-Step Guide to Classic Honey Baklava
Mastering the Syrup: The Foundation of Crispiness
In a medium saucepan, combine the granulated sugar, water, and lemon juice. Bring this mixture to a boil over medium heat, stirring continuously until all the sugar has completely dissolved.
Reduce the heat to low and allow it to simmer gently for 10 minutes without stirring. This simmering time is crucial for developing the syrup’s body and ensures the sugar is fully integrated.
Remove the saucepan from the heat, then stir in the honey and vanilla extract. The most important step here is to let the syrup cool completely to room temperature. This temperature difference between hot baklava and cool syrup is the “anti-soggy secret” for ultimate crispness, so do not rush this stage.
Prepping for Success: Oven, Nuts, and Phyllo
Preheat your oven to 325 degrees F (160 degrees C). A consistent oven temperature is vital for even baking and achieving that beautiful golden-brown crust.
In a medium bowl, combine your finely chopped walnuts or pistachios with the ground cinnamon. Stir well to ensure an even distribution of flavor throughout the layers of your honey nut pastry.
Carefully unroll the thawed phyllo dough. Trim the sheets to perfectly fit your 9×13 inch baking pan, ensuring clean edges for assembly. Immediately cover the trimmed phyllo with a damp kitchen towel to prevent it from drying out and becoming brittle, which makes it hard to work with.
Building the Layers: The Baklava Structure
Generously brush the bottom of your 9×13 inch baking pan with a good amount of the melted unsalted butter. This creates a non-stick base and contributes to the overall richness and browning of the bottom layers.
Lay a single sheet of phyllo dough in the pan and lightly brush its surface with melted butter. Repeat this layering and buttering process for 8 to 10 sheets, ensuring each layer is thin and evenly coated for optimal crispness.
Evenly sprinkle about one-third of your prepared nut mixture over these buttered phyllo layers. This creates the first flavorful nut layer, forming the heart of your Classic Honey Baklava.
Place two more sheets of phyllo on top of the nuts, buttering each sheet as you go. Add another third of the nut mixture evenly over these sheets, creating a second layer of aromatic nuts.
Repeat the previous step: two more buttered phyllo sheets, followed by the remaining nut mixture. This strategic layering technique ensures a balanced distribution of nuts and crisp phyllo throughout the entire dessert.
Top with the remaining phyllo sheets, buttering each layer thoroughly. For the very top layer, be extra generous with the butter – this will help it achieve that beautiful deep golden-brown crispness and appealing shine.
The Art of Cutting: Preparing for Perfection
Using a very sharp knife, carefully cut the baklava into your desired diamond or square shapes. Take your time to ensure clean, precise lines.
Make sure to cut all the way through the phyllo layers, but avoid cutting through to the very bottom of the pan at this stage. This pre-cutting helps the syrup penetrate evenly into every layer and makes serving much easier later on.
Baking to Golden Perfection
Place the baklava in your preheated oven and bake for 50 to 60 minutes. The baklava is ready when the top is a deep, inviting golden brown and visibly crispy and puffed.
Keep a close eye on it, especially towards the end of the baking time, to prevent over-browning. Oven temperatures can vary, so adjust accordingly.
The Grand Finale: Syrupping the Hot Baklava
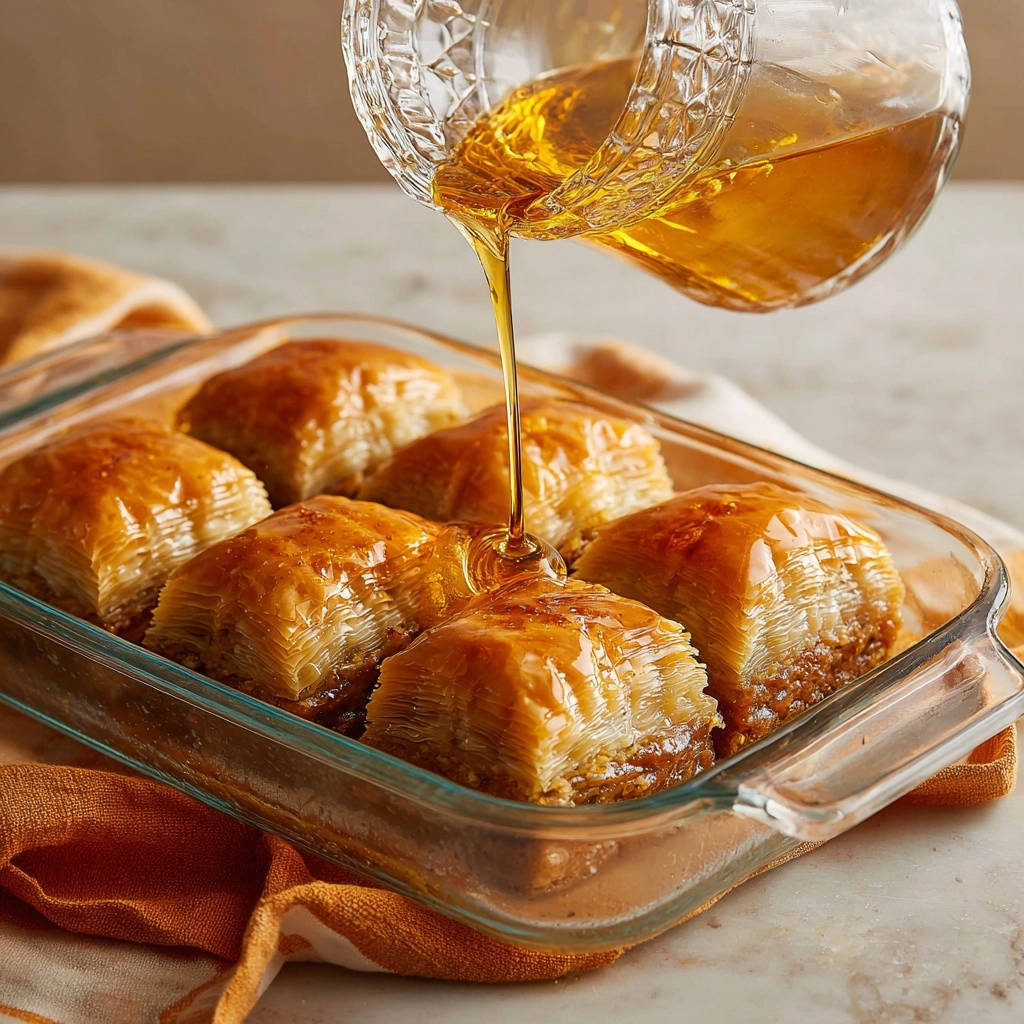
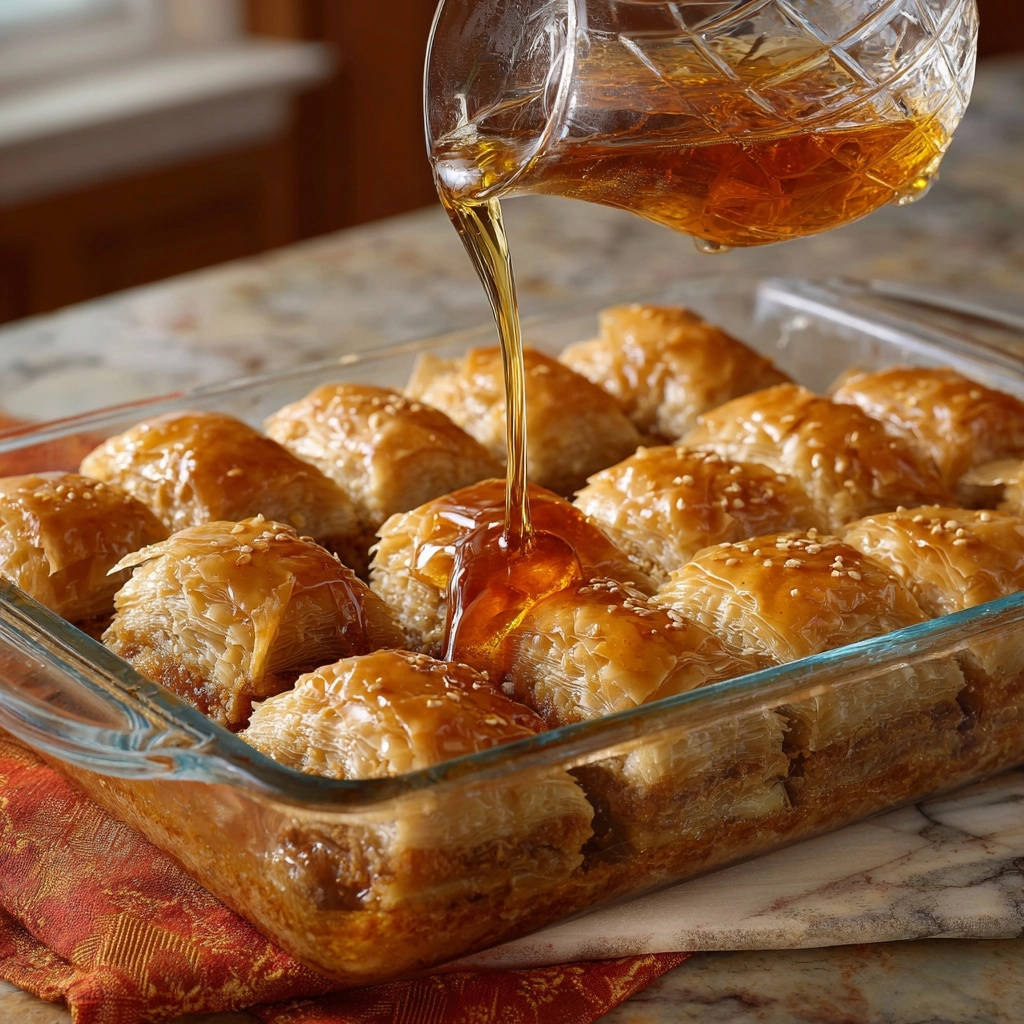
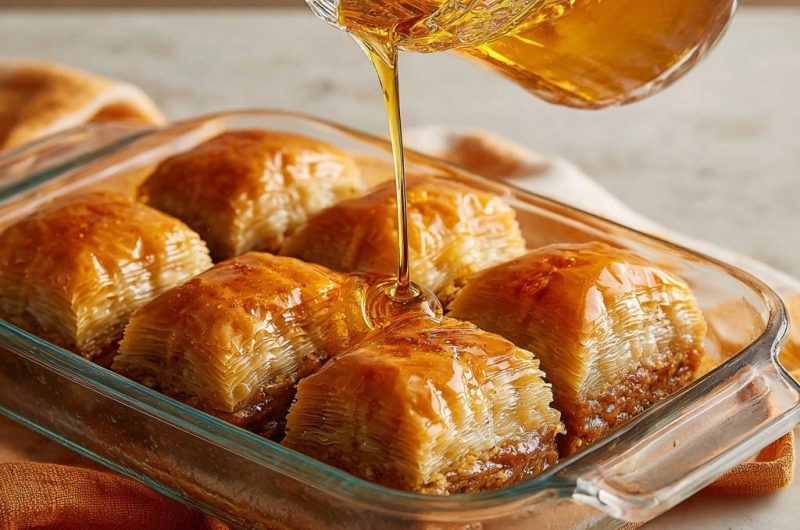
Immediately upon removing the hot baklava from the oven, slowly and evenly pour the completely cooled syrup over the entire surface. You will hear a satisfying sizzle as the cool syrup meets the hot pastry – this is the crucial temperature shock ensuring maximum crispiness and preventing sogginess.
Do not hesitate or skimp on this step; ensuring complete coverage allows the syrup to permeate every layer.
Patience is Key: Cooling for Optimal Crispness
Let the baklava cool completely at room temperature for at least 4 hours, or preferably overnight. This extended cooling period is essential.
It allows the syrup to fully absorb into the layers without making them soggy, solidifying that perfect, shatteringly crisp texture that makes this Classic Honey Baklava so exceptional.
Serve and Enjoy!
Once fully cooled and the syrup has absorbed, you can carefully re-cut the pieces if needed, ensuring clean edges for presentation. Serve your irresistible Classic Honey Baklava and savor the golden crunch!
Chef’s Secrets: Elevate Your Classic Honey Baklava Game
Mind the Phyllo: Always keep unused phyllo covered with a damp cloth to prevent it from drying out. Work quickly but carefully; dried phyllo tears easily and cannot be repaired.
Butter Generously, But Evenly: Don’t skimp on butter, especially on the top layers, but ensure an even application for uniform crispness and browning. Uneven buttering can lead to pale spots or scorched areas.
The Sharp Knife is Your Friend: A very sharp knife is critical for pre-cutting. A dull knife will drag and tear the delicate layers, making your baklava look messy and affecting syrup absorption.
Don’t Rush the Syrup Cooling: This is the absolute core of the “anti-soggy” secret. A hot syrup on hot baklava equals a soggy mess, no matter how perfectly you layered. Plan ahead to ensure your syrup is completely chilled.
Patience with Cooling: Resist the urge to cut and serve hot baklava. The extended cooling time allows the syrup to fully meld and the layers to set, achieving that shatteringly crisp texture you’re aiming for.
Flavor Variations: Experiment with a pinch of cloves, cardamom, or orange zest in your nut mixture for a different aromatic twist. These spices can add wonderful depth to your traditional baklava.
Common Baklava Conundrums & How to Solve Them
Why is My Baklava Soggy?
The primary culprit is usually warm syrup poured over hot baklava. Ensure your syrup is completely cooled to room temperature before pouring it over the freshly baked, hot pastry.
Additionally, sufficient cooling time after syrupping is crucial for complete absorption and setting of the layers, which prevents a soft texture.
My Phyllo Dough is Cracking/Drying Out!
This happens when phyllo is exposed to air for too long. Always keep your unused phyllo sheets covered with a damp kitchen towel or plastic wrap to maintain moisture.
Work efficiently, peeling off sheets one at a time as you need them, and re-covering the stack promptly.
Uneven Browning: What Went Wrong?
Uneven buttering of the phyllo layers can lead to patchy browning. Ensure each layer, especially the top ones, receives an even, generous coat of melted butter.
Also, check your oven for hot spots. If your oven bakes unevenly, rotate the pan halfway through baking to promote uniform browning across your crispy phyllo dessert.
My Baklava is Too Sweet!
While baklava is a famously sweet treat, if it’s overwhelmingly so, you might consider slightly reducing the granulated sugar in the syrup next time, not the honey. The lemon juice in this recipe already helps to balance the sweetness, so make sure to include it.
Serving, Storing, and Enjoying Your Delicious Baklava
Presentation Perfect: Plating Your Baklava
Once fully cooled, gently separate the pre-cut pieces, which should now be perfectly crisp. Garnish with a sprinkle of finely chopped pistachios or a delicate dusting of confectioners’ sugar for an elegant finish.
Serve your Classic Honey Baklava alongside strong coffee or robust black tea for a truly traditional and complementary experience.
How to Store Leftover Baklava for Freshness
Store baklava in an airtight container at room temperature for up to 1-2 weeks. The high sugar content of the syrup acts as a natural preservative, keeping it fresh.
Avoid refrigerating, as it can cause the phyllo to soften and lose its desired crispness, compromising the texture of your honey nut pastry.
Can I Make Baklava Ahead of Time?
Absolutely! Baklava is an excellent make-ahead dessert; its flavor and texture often improve after a day or two as the syrup fully penetrates the layers. This makes it perfect for entertaining.
Prepare it a day or two before serving, storing as directed above, for stress-free entertaining and maximum flavor development.
Freezing Baklava: A Convenient Option
For longer storage, freeze cooled, syruped baklava in an airtight container for up to 3 months. Layer parchment paper between pieces to prevent sticking.
Thaw at room temperature for several hours before serving. While it might lose a tiny bit of its original crispness, it will still be a delicious and convenient sweet Mediterranean treat.
Your Classic Honey Baklava Questions Answered
What’s the best type of honey to use for baklava?
For Classic Honey Baklava, a good quality, mild-flavored honey like clover, wildflower, or orange blossom honey works beautifully. These varieties offer sweetness without overpowering the delicate nut and butter flavors.
Avoid overly strong or dark honeys, such as buckwheat, as they can dominate the overall taste profile. Using a local honey can also add a unique regional touch and support local producers.
Can I use fresh phyllo dough instead of frozen?
Yes, if you have access to fresh phyllo dough, it can certainly be used! However, fresh phyllo often comes in different thicknesses, so you may need to adjust the number of layers slightly.
Ensure that fresh phyllo is very thin for the best, most delicate results, mimicking the traditional texture of crispy phyllo dessert.
Is there a gluten-free option for baklava?
While traditional baklava relies on wheat-based phyllo dough, some specialty stores now carry gluten-free phyllo dough, which can be a good substitute. Be aware that the texture may vary slightly from traditional baklava.
Alternatively, you could explore recipes that use rice paper or other gluten-free pastry sheets as a substitute, though this would result in a significantly different texture than classic baklava.
How long does baklava last?
When stored properly in an airtight container at room temperature, Classic Honey Baklava can last for up to two weeks. The high sugar content of the syrup acts as a natural preservative, keeping it fresh and delicious.
For optimal crispness and flavor, it’s best enjoyed within the first week, but it remains perfectly edible and delightful beyond that period.
Ready to Impress? Your Classic Honey Baklava Journey Awaits!
You now hold the secret to creating truly unforgettable Classic Honey Baklava – crisp, sweet, and utterly irresistible, with no soggy disappointment in sight. This recipe is more than just a dessert; it’s an experience, a tradition, and a guaranteed crowd-pleaser that will earn you accolades.
Don’t just dream of that perfect bite; make it a reality in your own kitchen. Gather your ingredients, embrace the layering process, and unleash your inner pastry chef. We can’t wait to see your golden-brown masterpieces!
Share your baklava creations with us and spread the joy of homemade goodness. Happy baking, and get ready to savor the unparalleled crispness of your perfect honey nut pastry!
Baklava
Course: DessertCuisine: MediterraneanDifficulty: medium12
to 16 servings45
minutes50
minutes450
kcal120
minutesThis recipe helps you achieve that perfect, shatteringly crisp Baklava texture, avoiding a sweet, soggy mess. A simple trick ensures every bite is pure, golden crunch. Layers of delicate crispiness and sweet, nutty goodness await!
Ingredients
1 pound frozen phyllo dough, thawed overnight in the refrigerator
1 1/2 cups unsalted butter, melted
1 pound walnuts or pistachios, finely chopped
1 teaspoon ground cinnamon
For the Syrup:
1 1/2 cups granulated sugar
1 cup water
1/2 cup honey
1 tablespoon lemon juice
1/2 teaspoon vanilla extract
Directions
- Prepare the Syrup First (This is key!): In a medium saucepan, combine the sugar, water, and lemon juice. Bring to a boil over medium heat, stirring until the sugar dissolves. Reduce heat to low and simmer for 10 minutes without stirring. Remove from heat, stir in the honey and vanilla extract. Allow the syrup to cool completely to room temperature. This step is crucial for preventing soggy baklava.
- Preheat your oven to 325 degrees F (160 degrees C).
- In a medium bowl, combine the chopped walnuts or pistachios with the ground cinnamon.
- Unroll the thawed phyllo dough and trim it to fit your 9×13 inch baking pan. Cover the phyllo with a damp kitchen towel to prevent it from drying out.
- Brush the bottom of the baking pan generously with melted butter.
- Lay one sheet of phyllo dough in the pan and brush lightly with melted butter. Repeat this process for 8 to 10 sheets, layering and buttering each sheet.
- Sprinkle about one-third of the nut mixture evenly over the phyllo layers.
- Place two more sheets of phyllo on top of the nuts, buttering each. Add another third of the nut mixture.
- Place two more sheets of phyllo, buttering each. Add the remaining nut mixture.
- Top with the remaining phyllo sheets, buttering each layer thoroughly. For the very top layer, be generous with the butter.
- Using a sharp knife, carefully cut the baklava into diamond or square shapes, cutting all the way through the layers. Do not cut through to the bottom of the pan just yet.
- Bake for 50 to 60 minutes, or until the top is golden brown and crispy.
- The Anti-Soggy Secret: Immediately upon removing the hot baklava from the oven, slowly and evenly pour the completely cooled syrup over the entire surface. You will hear a satisfying sizzle.
- Let the baklava cool completely at room temperature for at least 4 hours, or preferably overnight, allowing the syrup to fully absorb into the layers without making them soggy. This temperature shock ensures maximum crispiness.
- Once fully cooled and absorbed, you can carefully re-cut the pieces if needed. Serve and enjoy!
Notes
- Allow baklava to cool completely (4 hours or overnight) for best crispiness and to prevent sogginess.


