

For years, I struggled with the heartbreak of a beautiful peach pie undermined by a soggy bottom crust. It felt like a culinary Everest, until I finally cracked the code to truly crisp, golden perfection with this Classic Peach Lattice Pie recipe. This isn’t just another pie; it’s a triumph of texture and flavor, guaranteeing every slice is as flawless as it is delicious.
The “No More Soggy Bottom” Secret: Our Classic Peach Lattice Pie Promise
Nothing sours the joy of a homemade fruit pie faster than a limp, undercooked bottom crust. This recipe specifically tackles that common baking challenge head-on, ensuring your Classic Peach Lattice Pie boasts a foundation that is as flaky and golden as its stunning top.
For a similarly juicy outcome, explore these baked pineapple dumplings.
Our secret lies in a meticulously executed blind baking technique. This crucial step creates a protective barrier, preventing the juicy peach filling from ever compromising the crispness of your bottom crust. You’ll achieve a pie that’s consistently superb, from the first bite to the last.
Gather Your Gear: Essential Tools for Pie Perfection
Having the right tools ready makes the pie-making process smooth and enjoyable. These essentials will help you construct your Classic Peach Lattice Pie with confidence and precision.
What You’ll Need in Your Kitchen
9-inch Pie Plate: Essential for shaping and baking your pie. Glass or ceramic plates promote even browning.
Large Mixing Bowl: For combining ingredients with ease, especially your generous peach filling.
Rolling Pin: To expertly roll out your pie crusts to an even thickness.
Parchment Paper & Pie Weights (or dried beans/rice): Crucial for the blind baking process to prevent shrinking and achieve a crisp bottom.
Sharp Knife or Pastry Wheel: For slicing peaches precisely and creating neat lattice strips.
Wire Rack: For proper cooling and setting of the pie, allowing air circulation to prevent condensation.
Baking Sheet: To place under the pie during baking, catching any potential drips and keeping your oven clean.
The Building Blocks of Flavor: Inside Your Classic Peach Lattice Pie
Every exceptional pie starts with quality ingredients. Here’s what you’ll need for a truly unforgettable Classic Peach Lattice Pie.
For the Flawless Pie Crust
Prepared Pie Crusts (2): Chilled and ready – whether homemade for ultimate flavor and texture, or store-bought for convenience. Ensuring they are thoroughly chilled is critical for easy handling and preventing shrinkage.
Juicy Peach Filling Essentials
Fresh Peaches (6 cups): Peeled, pitted, and sliced. For the best Classic Peach Lattice Pie, opt for ripe, fragrant peaches that yield slightly to gentle pressure. Look for vibrant color and avoid any green areas, which indicate under-ripeness.
Granulated Sugar (3/4 cup): Sweetens the fruit, balancing the peaches’ natural tartness, and contributes to the syrupy consistency of the filling.
Cornstarch or All-Purpose Flour (1/4 cup): This is the crucial thickener for a perfectly set, non-runny filling. Cornstarch generally yields a clearer, glossy filling, while flour results in a slightly cloudier, more opaque, and rustic-looking filling with a subtle flavor.
Lemon Juice (1 tablespoon): A splash of fresh lemon juice brightens the peach flavor, prevents browning, and balances the sweetness of the pie, adding a necessary acidic counterpoint.
Vanilla Extract (1 teaspoon): Adds a warm, aromatic depth that beautifully complements the peaches and other spices.
Ground Cinnamon (1/2 teaspoon) & Nutmeg (1/4 teaspoon): These classic spices are perfect companions for peaches. They enhance the fruit’s natural sweetness and warmth without overpowering its delicate flavor.
Salt (1/4 teaspoon): A small but mighty ingredient, a pinch of salt is essential for enhancing and balancing all the other flavors in the filling, making the peaches taste even more peachy.
Unsalted Butter (2 tablespoons): Cut into small pieces and dotted over the filling, butter adds richness, a hint of creamy flavor, and helps create a beautifully bubbly, caramelized top layer under the lattice.
The Golden Finish: Egg Wash & Topping
Large Egg (1, beaten): For the egg wash, which is brushed over the top crust. This provides a stunning golden-brown sheen and helps the coarse sugar adhere for extra sparkle.
Coarse Sugar (1 tablespoon): Sprinkled generously over the egg wash, it adds a delightful sparkle, a beautiful texture, and a pleasant crunch to the finished Classic Peach Lattice Pie crust.
Your Path to Pie Perfection: Crafting the Classic Peach Lattice Pie
Follow these detailed steps to create a show-stopping Classic Peach Lattice Pie with a perfectly crisp crust and a luscious, set filling.
Prepare the First Crust & Oven: Preheat your oven to a robust 425°F (220°C). Carefully roll out one chilled pie crust and gently fit it into a standard 9-inch pie plate. Crimp the edges as desired, creating a decorative border. This initial setup ensures your crust is ready for its critical pre-bake.
The “No-Soggy-Bottom” Blind Bake: This is the most crucial step for a crisp crust. Prick the bottom and sides of the fitted crust all over with a fork to prevent bubbles. Line the crust with parchment paper, then fill it generously with pie weights, dried beans, or rice. Bake for 15 minutes. Carefully remove the parchment and weights, then continue baking for another 5-7 minutes, or until the crust is lightly golden and appears dry. This essential blind baking process creates an impermeable moisture barrier.
Craft the Luscious Peach Filling: While your bottom crust is blind baking, prepare the heart of your Classic Peach Lattice Pie. In a large bowl, combine the sliced peaches, granulated sugar, cornstarch (or all-purpose flour), lemon juice, vanilla extract, cinnamon, nutmeg, and salt. Toss gently but thoroughly to ensure every peach slice is evenly coated with the thickeners and spices. This step ensures uniform flavor and a perfectly set filling.
Fill the Baked Crust: Once your blind-baked crust is ready and slightly cooled, pour the prepared peach filling into it, spreading it evenly. Evenly dot the top of the filling with the small pieces of unsalted butter; these will melt and create pockets of richness.
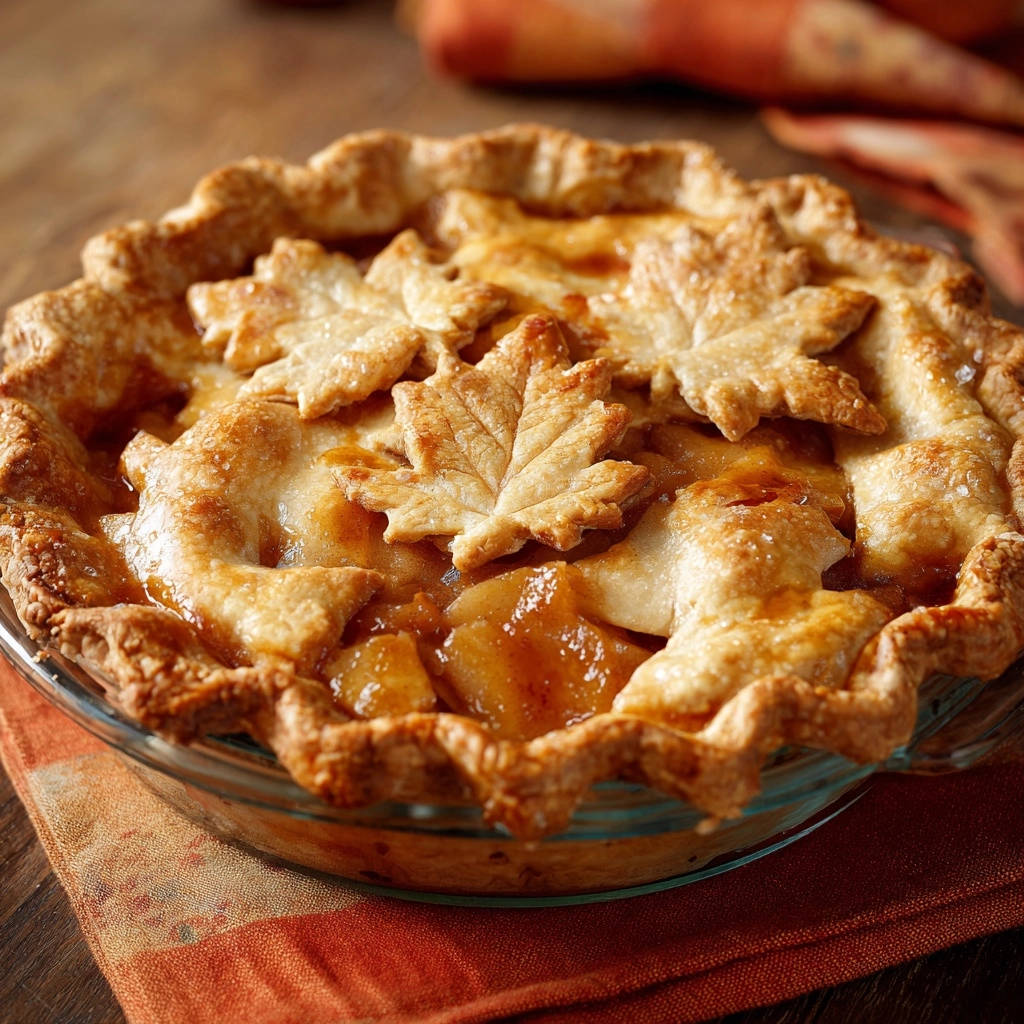
Design Your Lattice Top: Roll out the second chilled pie crust. For a classic aesthetic, cut it into even strips, approximately 3/4 inch wide. If you’re feeling adventurous, use cookie cutters to create decorative shapes like leaves or stars for a unique topping.
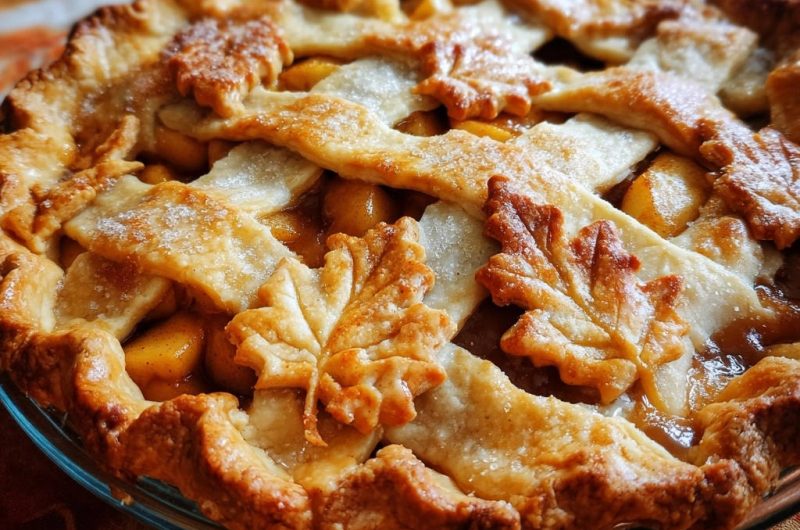
Weave Your Masterpiece: Arrange the lattice strips artfully over the peach filling. For a traditional look, weave them over and under, creating an intricate pattern. Alternatively, simply lay them crisscross for a simpler design. Trim any excess dough from the edges and securely crimp the lattice strips to the bottom crust’s edge, creating a beautiful, unified seal. This step is where your pie’s visual appeal truly shines, making it a feast for the eyes.
Apply the Golden Wash: In a small bowl, whisk the beaten egg until smooth. Gently brush the entire top of the Classic Peach Lattice Pie crust with this egg wash, ensuring full coverage. Then, generously sprinkle with coarse sugar. This creates a beautiful, shimmering, and delightfully crunchy golden finish that will brown perfectly.
Initial High-Heat Bake: Place the pie on a baking sheet (this will catch any potential drips and make transfer easier) and bake in the preheated 425°F (220°C) oven for an initial 15 minutes. The high heat helps the crust set quickly, develop a beautiful puff, and begin to brown.
Lower Heat & Finish Baking: Reduce the oven temperature to 375°F (190°C) and continue baking for another 45-50 minutes. The Classic Peach Lattice Pie is done when the crust is deeply golden brown and the filling is visibly bubbling thickly through the lattice openings. If the edges of the crust start to brown too quickly, you can loosely cover them with aluminum foil to prevent burning. Monitoring the color and robust bubbling is key to a perfectly cooked interior.
The Critical Cooling Phase: Remove the pie from the oven and transfer it to a wire rack. This allows air to circulate around the entire pie, preventing condensation. Let it cool COMPLETELY for at least 3-4 hours before slicing and serving. This extended cooling time is absolutely essential for the filling to fully set, ensuring clean, neat slices with that guaranteed non-soggy bottom. Patience truly is a virtue here!
Chef’s Secrets: Elevate Your Classic Peach Lattice Pie Game
Beyond the steps, these insights will help you achieve pie perfection every time, taking your Classic Peach Lattice Pie from great to extraordinary.
Choose Peak-Season Peaches: The flavor of your pie starts with your fruit. Select ripe, fragrant peaches that yield slightly to gentle pressure for the sweetest, most flavorful filling. Summer’s bounty offers the best results.
Don’t Skip the Blind Bake (Seriously!): This recipe’s core innovation is the blind baking. It creates an impermeable barrier that truly prevents soggy bottoms by pre-cooking and sealing the crust. Don’t rush or omit this step-it’s non-negotiable for success!
Chill Your Dough: Whether homemade or store-bought, always ensure your pie crusts are well-chilled before rolling and handling. Cold dough is less sticky, easier to work with, and holds its shape better, especially crucial for intricate lattice work.
Perfecting Your Lattice: For an easy lattice, lay half your strips parallel, then fold back alternating strips to weave others perpendicularly. Don’t worry if it’s not perfect; rustic charm is part of homemade pie. Practice makes perfect!
Prevent Over-Browning: If your Classic Peach Lattice Pie crust edges start to brown too quickly before the center is done, a foil ring is your best friend. Loosely tenting aluminum foil over the edges will protect them from scorching without hindering the overall bake.
The Patience of Cooling: As tempting as it is, resist cutting into your pie too early! The long cooling period allows the filling to fully set and gel, ensuring clean, beautiful slices and preventing a soupy, runny mess. This step guarantees the perfect texture.
Solving Your Pie Predicaments: Common Classic Peach Lattice Pie Issues
Even experienced bakers encounter challenges. Here are solutions to common Classic Peach Lattice Pie dilemmas.
My Pie Crust is Still Soggy!
Ensure you rigorously follow the blind baking steps, including pricking the crust and fully baking it until it appears dry and lightly golden. Insufficient blind baking is the primary culprit. Also, make sure your Classic Peach Lattice Pie cools completely for the full recommended time, allowing the filling ample time to set and solidify.
The Peach Filling is Too Runny!
This often happens if there wasn’t enough cornstarch or flour, or if the pie wasn’t cooled long enough. Double-check your measurements for the thickener. If your peaches are exceptionally juicy, you might need to add an extra tablespoon of cornstarch or flour. Always allow the pie to cool for the full 3-4 hours.
Crust Edges Are Burning Before the Pie Is Done!
This is a common issue in many ovens. Loosely tenting the edges of your Classic Peach Lattice Pie with aluminum foil (creating a foil ring) will protect them from over-browning while the rest of the pie continues to bake evenly. Apply this once you notice the edges are golden enough.
My Lattice Design Fell Apart/Is Hard to Weave!
Working with very cold dough is absolutely key for successful lattice work. If your dough warms up too much during handling, pop it back into the fridge for 10-15 minutes to firm up. A light dusting of flour on your work surface and rolling pin can also help prevent sticking. Don’t be afraid to gently patch any small tears with a little water.
Beyond the Bake: Serving, Storing, and Enjoying Your Pie
Once your masterpiece is cooled, here’s how to best enjoy and preserve your Classic Peach Lattice Pie.
Perfect Pairings: What to Serve with Classic Peach Lattice Pie
A slice of warm Classic Peach Lattice Pie is a delight on its own, its flavors shining brightly. However, it truly becomes an extraordinary dessert when paired with a scoop of creamy vanilla bean ice cream, allowing the cold to contrast with the warm fruit. A dollop of freshly whipped cream also adds a luxurious touch. For an extra flourish, consider a sprinkle of toasted slivered almonds or a delicate drizzle of caramel sauce to elevate the experience.
Storing Leftovers: Keeping Your Pie Fresh
To preserve the freshness of any leftover Classic Peach Lattice Pie, cover it loosely with plastic wrap or aluminum foil. It can be stored at cool room temperature for up to 2 days, or in the refrigerator for up to 4-5 days, especially in warmer climates. For the best texture and flavor, gently warm individual slices in the microwave or oven before serving.
Make-Ahead Magic: Prep Your Pie in Advance
Life gets busy, but your desire for delicious pie shouldn’t wait. You can prepare the peach filling a day in advance and store it, covered, in the refrigerator. The pie crusts can also be made ahead and kept chilled for several days. You can even assemble the entire Classic Peach Lattice Pie (unbaked), wrap it tightly in plastic wrap and then foil, and freeze for up to 1 month. Thaw it overnight in the refrigerator before baking as directed, adding about 10-15 minutes to the overall baking time.
Your Classic Peach Lattice Pie Questions Answered
Can I use frozen peaches for Classic Peach Lattice Pie?
Yes, you absolutely can use frozen peaches! If doing so, do not thaw them completely before mixing with the other filling ingredients; use them mostly frozen. This helps prevent the filling from becoming too watery. You may need to add an extra tablespoon of cornstarch or flour to account for any additional moisture released by frozen fruit.
What’s the best way to peel peaches?
The easiest and most efficient method is to blanch them. Score a small ‘X’ at the bottom of each peach, then immerse them in boiling water for 30-60 seconds, or until the skins just start to loosen. Immediately transfer them to an ice bath to stop the cooking. The skins should then slip off easily with your fingers or a paring knife.
Why is cornstarch or flour necessary in the filling?
These ingredients are essential thickeners, acting to absorb the copious juices released by the peaches during baking. Without them, your pie filling would be watery, runny, and fail to set, almost certainly leading to a soggy bottom crust. Cornstarch typically yields a clearer, glossier filling, while flour gives a slightly cloudier, more rustic appearance and a marginally different texture.
How do I know when my Classic Peach Lattice Pie is done?
Look for several key indicators: the crust should be deeply golden brown, not just light golden. The filling, visible through the lattice openings, should be visibly bubbling thickly and slowly. If you gently jiggle the pie, the center should be mostly set with only a slight, almost imperceptible wobble, indicating the filling has gelled. If using a thermometer, the internal temperature of the filling should reach at least 200-210°F (93-99°C).
Ready to Impress? Share Your Classic Peach Lattice Pie Masterpiece!
Now that you possess the ultimate secrets to a perfectly crisp crust and a luscious peach filling, it’s truly time to bake your own show-stopping Classic Peach Lattice Pie. We encourage you to embrace the joy of baking, savor the incredible aromas filling your kitchen, and share your beautiful creation with family and friends.
Don’t forget to share your baking journey and photos with us! We absolutely love seeing your culinary triumphs and the smiles your homemade Classic Peach Lattice Pie brings. Happy baking!
Peach Pie
Course: DessertCuisine: AmericanDifficulty: medium8
servings45
minutes1
hour350
kcal60
minutesDiscover the simple trick to prevent a soggy bottom crust, ensuring your homemade fruit pie is perfectly crisp from top to bottom every single time. Get ready to bake your best pie yet!
Ingredients
2 prepared pie crusts, chilled (homemade or store-bought)
6 cups fresh peaches, peeled, pitted, and sliced (about 6-8 medium peaches)
3/4 cup granulated sugar
1/4 cup cornstarch or all purpose flour
1 tablespoon lemon juice
1 teaspoon vanilla extract
1/2 teaspoon ground cinnamon
1/4 teaspoon ground nutmeg
1/4 teaspoon salt
2 tablespoons unsalted butter, cut into small pieces
1 large egg, beaten (for egg wash)
1 tablespoon coarse sugar (for topping)
Directions
- Preheat your oven to 425F (220C). Roll out one pie crust and fit it into a standard 9 inch pie plate. Crimp the edges as desired. This is the crucial step for preventing a soggy bottom: Prick the bottom and sides of the crust all over with a fork. Line the crust with parchment paper and fill it with pie weights, dried beans, or rice.
- To ensure a crisp bottom crust: Bake the crust for 15 minutes, then carefully remove the parchment paper and pie weights. Continue baking for another 5-7 minutes, or until the crust is lightly golden and appears dry. This process is called blind baking, and it sets the crust, creating a barrier against moisture from the filling.
- While the crust is blind baking, prepare the peach filling. In a large bowl, combine the sliced peaches, granulated sugar, cornstarch or all purpose flour, lemon juice, vanilla extract, cinnamon, nutmeg, and salt. Toss gently to coat the peaches evenly.
- Once the blind baked crust is ready, pour the peach filling into it. Dot the top of the filling with the small pieces of unsalted butter.
- Roll out the second pie crust. Cut it into even strips, about 3/4 inch wide, to create a lattice top for your pie. Alternatively, use cookie cutters to make decorative shapes like the leaves shown, placing them artfully on top.
- Arrange the lattice strips over the peach filling, weaving them if you desire, or simply lay them crisscross. Trim any excess dough from the edges and crimp the lattice strips to the bottom crust.
- In a small bowl, whisk the beaten egg. Brush the top of the pie crust with the egg wash and sprinkle generously with coarse sugar. This creates a beautiful golden finish.
- Place the pie on a baking sheet (to catch any potential drips) and bake in the preheated 425F (220C) oven for 15 minutes.
- Reduce the oven temperature to 375F (190C) and continue baking for another 45-50 minutes, or until the crust is deeply golden brown and the filling is bubbling thickly. If the edges of the crust start to brown too quickly, you can cover them loosely with aluminum foil.
- Remove the pie from the oven and let it cool completely on a wire rack for at least 3-4 hours before slicing and serving. This cooling time is essential for the filling to set properly, giving you perfect, neat slices with a truly non-soggy bottom.
Notes
- Allow at least 3-4 hours of cooling time for the filling to set properly, giving you perfect, neat slices.


