
Making Classic Peanut Butter Chocolate Truffles can be incredibly rewarding, but achieving that perfectly smooth, glossy chocolate coating used to be my biggest kitchen challenge. I often ended up with a lumpy mess or a coating that just wouldn’t cooperate, which was so frustrating. This recipe, however, is the culmination of years of testing and delivers a foolproof method for a stunningly smooth chocolate shell, elevating your homemade truffles to bakery-quality treats every single time.
Beyond Basic: What Makes Our Classic Peanut Butter Chocolate Truffles Shine?
The “No-Fail” Smooth Chocolate Coating Method
Our unique approach, combining a precise double boiler technique with a touch of coconut oil, guarantees a beautifully glossy and perfectly smooth chocolate shell. This method eliminates common dipping frustrations, giving you professional-looking results without the guesswork.
Effortless Elegance: Impress Guests with Minimal Fuss
Despite their sophisticated appearance, these homemade truffles are surprisingly simple to prepare. They offer an elegant dessert solution that requires minimal active cooking time, allowing you to impress friends and family with ease.
A Nostalgic Treat with Modern Ease
These Classic Peanut Butter Chocolate Truffles capture the beloved flavor combination of peanut butter and chocolate, evoking cherished memories. Our streamlined process makes recreating this nostalgic favorite straightforward and enjoyable for any home baker.
Essential Ingredients for Irresistible Peanut Butter Chocolate Truffles
Creamy Peanut Butter: The Heart of the Truffle
Opt for creamy, processed peanut butter (like Jif or Skippy) over natural varieties. Its consistent texture and lower oil separation are crucial for creating a smooth, stable truffle filling that holds its shape beautifully.
Unsalted Butter & Powdered Sugar: Mastering the Filling’s Texture
Softened unsalted butter provides richness and helps bind the mixture, while powdered sugar contributes essential sweetness and structure. Together, they create a wonderfully smooth, pliable base that’s easy to roll.
Vanilla Extract & Crispy Rice Cereal: Flavor & Subtle Crunch
A touch of vanilla extract deepens the flavor profile, adding warmth and complexity to the peanut butter. Finely crushed crispy rice cereal, while optional, introduces a delightful, subtle crunch that elevates the texture experience of these sweet treats.
Chocolate Choices: Semi-Sweet Perfection
High-quality semi-sweet chocolate chips or chopped baking chocolate are ideal for coating. Their balanced sweetness complements the rich peanut butter filling without being overly sugary, ensuring a harmonious flavor.
The Coconut Oil Advantage: Your Dipping Game Changer
A small amount of coconut oil (or vegetable shortening) is the secret to a perfectly fluid, glossy chocolate coating. It lowers the chocolate’s viscosity, making it easy to dip and resulting in a thin, crisp shell that sets beautifully.
Tools for Truffle Success: Your Kitchen Arsenal
Mixing Essentials for the Truffle Base
You’ll need a large mixing bowl for combining ingredients, and an electric mixer (handheld or stand mixer) simplifies the process of achieving a smooth, uniform peanut butter mixture. A sturdy rubber spatula is also helpful for scraping down the sides.
Precision for Rolling: Sizing Up Your Truffles
A small cookie scoop ensures uniformly sized truffles, leading to consistent cooking and a more professional appearance. Parchment paper and a baking sheet are essential for preventing sticking and easy freezing.
The Double Boiler Setup: Melting Mastery
This technique requires a heatproof bowl that fits snugly over a saucepan containing simmering water, without touching the water itself. This gentle, indirect heat is crucial for melting chocolate slowly and evenly, preventing scorching.
Dipping Tools: For a Flawless Finish
A regular dinner fork works well for dipping, allowing excess chocolate to drip off easily. Specialized chocolate dipping tools are also available and can make the process even smoother, ensuring an even coating on your homemade truffles.
Crafting Your Classic Peanut Butter Chocolate Truffles: A Step-by-Step Guide
Preparing the Velvety Peanut Butter Base
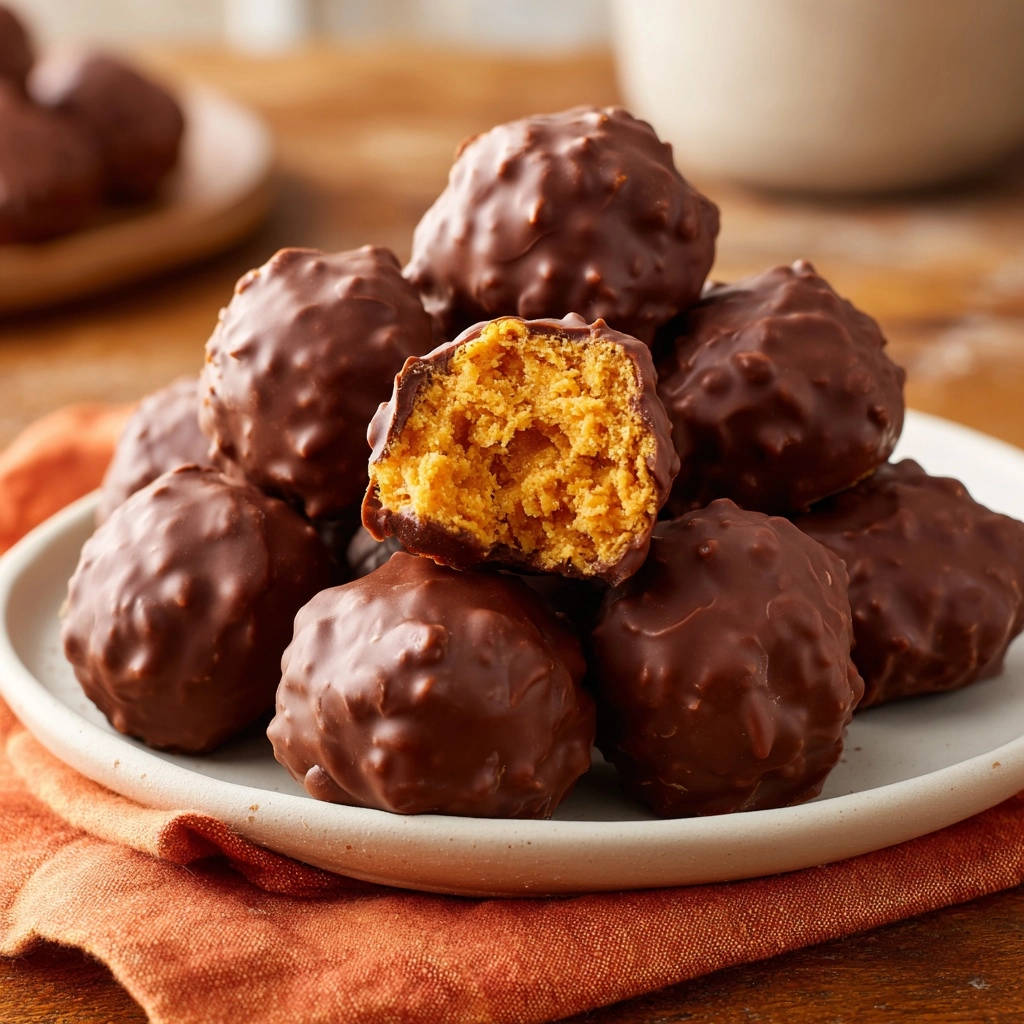
In a large mixing bowl, combine the peanut butter, softened butter, powdered sugar, vanilla extract, and crushed crispy rice cereal (if using). Mix until well combined and smooth.
Expert Tip: If the mixture is too soft to handle, add a little more powdered sugar, one tablespoon at a time, until it reaches a rollable consistency. This ensures your truffles hold their shape.
Perfecting the Truffle Shape & Pre-Chilling
Roll the peanut butter mixture into uniform 1-inch balls. Place them on a parchment paper lined baking sheet, ensuring they are not touching, as they’ll expand slightly when dipped.
Crucial Step: Freeze the peanut butter balls for at least 30 minutes. This firming-up process is vital to prevent them from falling apart or melting during the dipping stage.
The Art of the Double Boiler: Melting Chocolate to Perfection
Prepare your chocolate coating by placing the chocolate chips or chopped baking chocolate in a heatproof bowl. Add the coconut oil.
The Magic Method: Create a double boiler by placing the heatproof bowl over a saucepan with about 1 inch of simmering water. Ensure the bottom of the bowl does not touch the water.
Heat the chocolate slowly, stirring frequently with a dry rubber spatula, until it is completely melted and smooth. The coconut oil is key here, helping to achieve that glossy, fluid consistency perfect for dipping. Do not let any water or steam get into the chocolate, as this will cause it to seize and become lumpy. Keep the heat on low to maintain the chocolate’s fluidity while you dip.
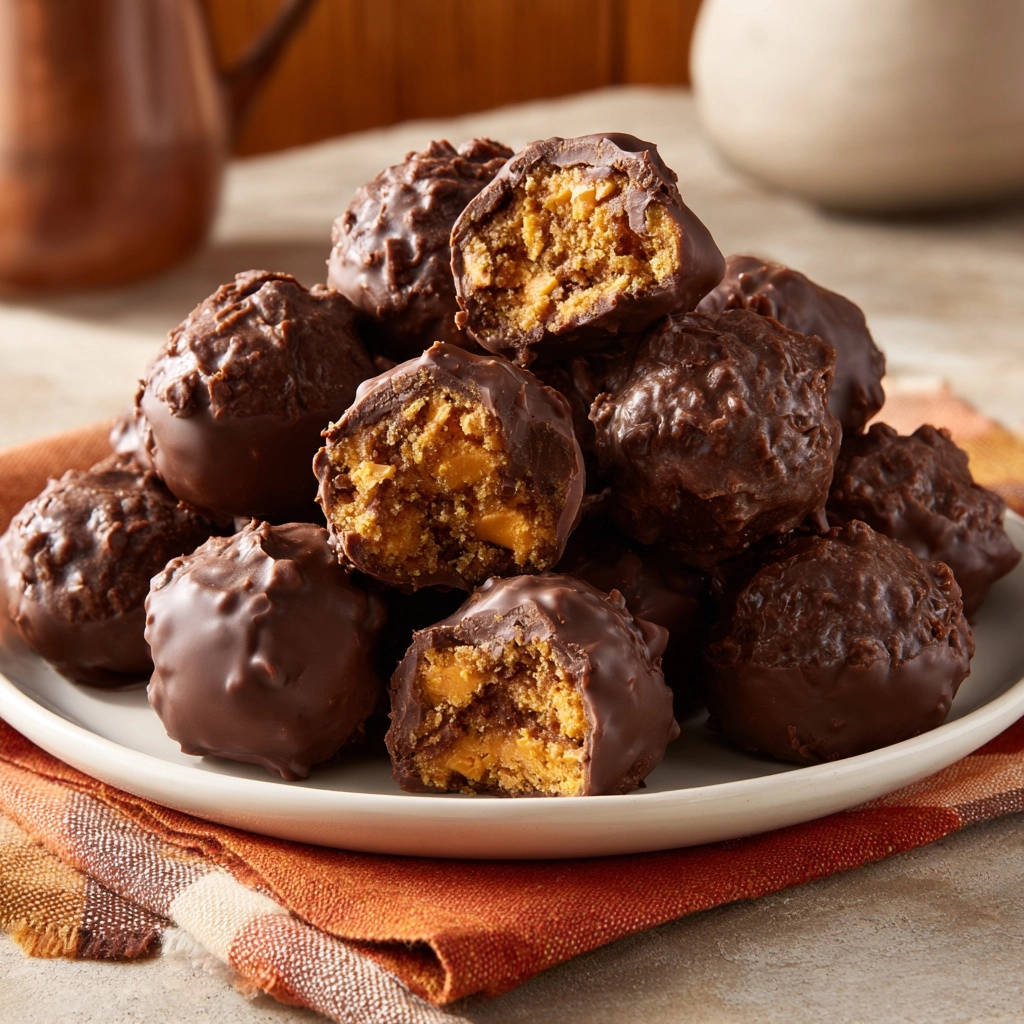
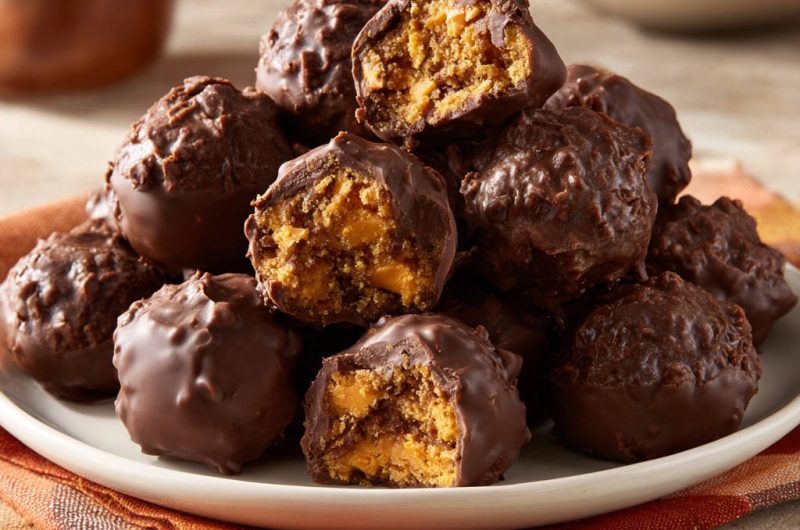
Dipping & Decorating for a Professional Finish
Remove the chilled peanut butter balls from the freezer. Using a fork or a specialized dipping tool, dip each ball into the melted chocolate, ensuring it’s fully coated.
Lift the ball, tapping the fork gently against the side of the bowl to let excess chocolate drip off. This creates a clean, even coating for your Classic Peanut Butter Chocolate Truffles.
Place the coated truffles back onto the parchment paper lined baking sheet. If desired, sprinkle with additional crushed crispy rice cereal or a pinch of sea salt immediately after dipping, before the chocolate sets.
Setting & Storing Your Delicious Creations
Let the chocolate set at room temperature or in the refrigerator for about 15 to 20 minutes until firm. Once set, your Classic Peanut Butter Chocolate Truffles are ready to enjoy!
Chef’s Secrets: Elevating Your Truffle-Making Game
Temperature Control is Key: Don’t rush the chilling step for the peanut butter balls, and maintain a consistent, low heat for your chocolate during dipping. These temperature considerations prevent messy melting and ensure a smooth coating.
The Role of Coconut Oil: Understand that coconut oil (or vegetable shortening) isn’t just for melting; it contributes to the fluid consistency and glossy finish, making it easier to dip and creating that professional look.
Avoiding Chocolate Seizure: Even a tiny drop of water or steam can ruin your chocolate. Use perfectly dry tools and bowls, and ensure no steam escapes from the simmering water into your chocolate. This is critical for a smooth coating.
Mastering the Dip: Practice makes perfect. Don’t swirl the truffle in the chocolate; a quick, decisive dip and then a gentle tap to remove excess is all you need for an even, thin coating.
Creative Toppings & Flavor Variations: While delicious as is, consider a drizzle of white chocolate, finely chopped nuts, or even a sprinkle of edible glitter for special occasions. Experiment with different chocolate types (dark, milk) for varied flavor profiles.
For a different kind of sweet and spicy treat, consider making these red chili white chocolate truffles.
Troubleshooting Common Truffle Mishaps
“My Peanut Butter Mixture is Too Soft/Crumbly!”
If too soft, gradually add more powdered sugar, one tablespoon at a time, until it reaches a firm, rollable consistency. If too crumbly, ensure your butter was truly softened, and knead the mixture briefly to incorporate ingredients more thoroughly. A tiny bit more peanut butter can also help bind it.
“The Chocolate Coating is Lumpy or Seized!”
This is almost always due to water contamination. Ensure all your bowls and tools are completely dry, and that no steam or water from the double boiler touches the chocolate. If it seizes, you can try to rescue it by stirring in a teaspoon of vegetable oil or melted shortening, but results may vary.
“My Truffles Are Falling Apart While Dipping!”
The most common cause is insufficient freezing time. Ensure your peanut butter balls are rock-solid from the freezer before dipping. Also, work quickly and gently, dipping one at a time to prevent them from warming up too much.
“The Chocolate Won’t Set Properly!”
This can happen if the room temperature is too warm or if the chocolate coating is too thick. Place the coated truffles in the refrigerator for 15-20 minutes to help them firm up. Using quality chocolate and a thin coating also helps ensure a proper set.
Perfect Pairings & Presentation Ideas
Beyond the Plate: Creative Serving Suggestions
These peanut butter desserts are fantastic alongside a hot cup of coffee or a cold glass of milk. They also make an impressive addition to any dessert platter or can be served individually as a sophisticated after-dinner treat.
Gift-Giving Gold: Packaging Your Homemade Truffles
Classic Peanut Butter Chocolate Truffles are ideal for gifting. Arrange them in small decorative boxes lined with parchment paper or place them in cellophane bags tied with a ribbon for a thoughtful, handmade present that truly delights.
Planning Ahead: Storage & Make-Ahead Tips
How Long Do Classic Peanut Butter Chocolate Truffles Last?
Store your truffles in an airtight container at room temperature for up to one week. For extended freshness, they can be kept in the refrigerator for up to two weeks. Always let them come to room temperature briefly for the best texture and flavor.
Freezing Truffles for Future Indulgence
You can freeze finished, set truffles for up to 2-3 months. Place them in a single layer on a baking sheet to freeze, then transfer to an airtight freezer-safe container or bag, separating layers with parchment paper. Thaw in the refrigerator or at room temperature before serving.
Best Practices for Freshness
To maintain their pristine condition, store truffles away from strong odors, as chocolate can absorb surrounding smells. An airtight container is paramount to prevent them from drying out or absorbing moisture, preserving their delicious quality.
Your Burning Questions About Classic Peanut Butter Chocolate Truffles, Answered!
Can I use natural peanut butter for these truffles?
While possible, natural peanut butter’s inconsistent oil content can make the truffle base softer and harder to work with. If using it, you may need to add more powdered sugar or chill the mixture longer to achieve a rollable consistency.
What if I don’t have coconut oil for the chocolate?
Vegetable shortening is an excellent substitute for coconut oil. It serves the same purpose of thinning the chocolate and creating a smooth, glossy finish without altering the flavor of your Classic Peanut Butter Chocolate Truffles.
How can I make these truffles gluten-free?
Most ingredients in this recipe are naturally gluten-free. If you’re including the crispy rice cereal, ensure you purchase a certified gluten-free brand. Always double-check labels on all packaged ingredients for hidden gluten.
Can I use different types of chocolate?
Absolutely! Dark chocolate offers a richer, less sweet truffle, while milk chocolate provides a creamier, sweeter coating. White chocolate can also be used, though it melts at a lower temperature and may require more careful handling to avoid scorching.
Are these truffles suitable for gifting?
These gourmet confectionery treats are perfect for gifting! Their homemade charm and irresistible flavor make them a thoughtful present for holidays, birthdays, or as a hostess gift. Simply package them in a lovely box or bag for a delightful presentation.
Ready to Delight? Share Your Truffle Masterpiece!
You now possess the secrets to creating truly exceptional Classic Peanut Butter Chocolate Truffles with a perfectly smooth, professional finish. This recipe is designed to build your confidence and deliver an utterly delicious result every time. Don’t hesitate to embark on this sweet adventure!
Whip up a batch for yourself, share them with loved ones, or bring them to your next gathering. I can’t wait for you to experience the joy of making (and eating!) these exquisite homemade truffles.
Peanut Butter Chocolate Truffles
Course: DessertCuisine: AmericanDifficulty: easy24
truffles30
minutes5
minutes240
kcal60
minutesTransform your chocolate dipping game with these homemade Classic Peanut Butter Chocolate Truffles. Learn the secret to a smooth, glossy coating for these irresistible treats. Perfect for any occasion!
Ingredients
1 cup creamy peanut butter
1/2 cup unsalted butter, softened
2 cups powdered sugar
1/2 teaspoon vanilla extract
1/4 cup finely crushed crispy rice cereal (optional)
12 ounces semi-sweet chocolate chips or chopped baking chocolate
1 tablespoon coconut oil (or vegetable shortening)
Directions
- In a large mixing bowl, combine the peanut butter, softened butter, powdered sugar, vanilla extract, and crushed crispy rice cereal (if using). Mix until well combined and smooth. If the mixture is too soft to handle, add a little more powdered sugar until it reaches a rollable consistency.
- Roll the peanut butter mixture into 1-inch balls. Place them on a parchment paper lined baking sheet, ensuring they are not touching.
- Freeze the peanut butter balls for at least 30 minutes. This crucial step helps them firm up and prevents them from falling apart during dipping.
- Prepare your chocolate coating. Place the chocolate chips or chopped baking chocolate in a heatproof bowl. Add the coconut oil.
- This is where the magic happens for a perfectly smooth coating: Create a double boiler by placing the heatproof bowl over a saucepan with about 1 inch of simmering water. Ensure the bottom of the bowl does not touch the water.
- Heat the chocolate slowly, stirring frequently with a dry rubber spatula, until it is completely melted and smooth. The coconut oil helps achieve that glossy, fluid consistency perfect for dipping. Do not let any water or steam get into the chocolate, as this will cause it to seize and become lumpy. Keep the heat on low to maintain the chocolate’s fluidity while you dip.
- Remove the chilled peanut butter balls from the freezer. Using a fork or a dipping tool, dip each ball into the melted chocolate, ensuring it’s fully coated. Lift the ball, tapping the fork gently against the side of the bowl to let excess chocolate drip off.
- Place the coated truffles back onto the parchment paper lined baking sheet.
- If desired, you can sprinkle with additional crushed crispy rice cereal or a pinch of sea salt immediately after dipping, before the chocolate sets.
- Let the chocolate set at room temperature or in the refrigerator for about 15 to 20 minutes until firm. Store in an airtight container at room temperature for up to a week, or in the refrigerator for longer.
Notes
- Freeze peanut butter balls before dipping for best results. Store in an airtight container.


