
Few things in the baking world are as disappointing as a cookie that looks like a masterpiece on top but reveals a soft, gummy underside. We’ve all been there, biting into a beautiful pistachio treat only to find the texture more like wet cardboard than buttery shortbread. This happens because traditional shortbread recipes often struggle with moisture retention and poor heat distribution, leading to that dreaded “soggy bottom.”
These Crinkle Pistachio Shortbread Cookies solve that frustration by utilizing thermal mass and a specific double-chill method. By marrying the earthy, roasted flavor of pistachios with a sophisticated “crinkle” technique, you get a cookie that is visually stunning and structurally sound. The secret lies in how we manage the temperature of both the dough and the baking surface to ensure a professional snap.
For a similarly delightful bite, check out this recipe for Orange Snowball Cookies.
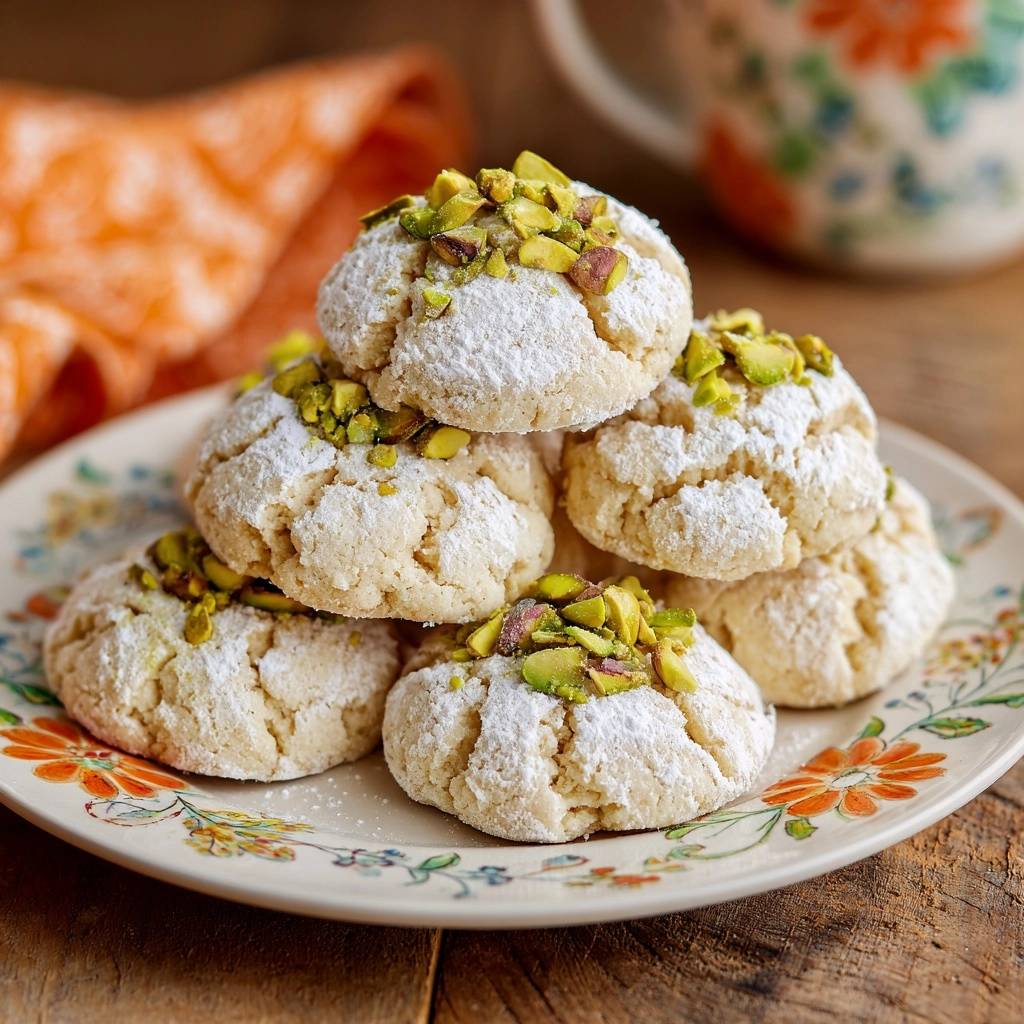
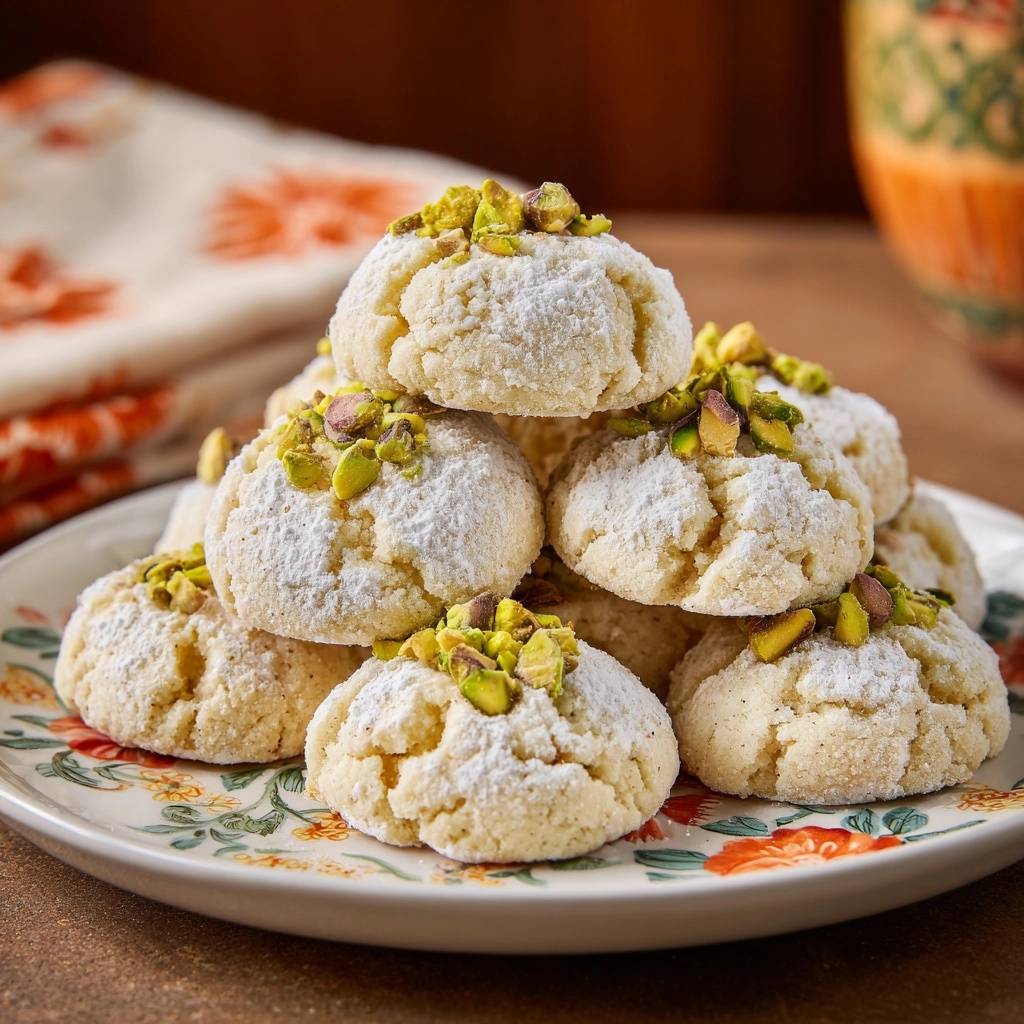
The magic happens when the cold, fat-heavy dough hits a preheated heavy-duty surface. This creates an immediate sear on the base of the cookie, locking in the shape and preventing the butter from leaking out into a greasy puddle. You’ll notice a beautiful sensory contrast between the snowy, powdered sugar exterior and the vibrant green, nutty crunch of the interior.
The Science of the Anti-Soggy Bottom
Baking is essentially a series of chemical reactions governed by physics, and the “Anti-Soggy Bottom” method relies on thermal shock. When you place room-temperature dough on a cold, thin cookie sheet, the butter melts slowly as the oven air heats the pan. This slow melt causes the dough to spread excessively and prevents the bottom from ever reaching the temperature needed to caramelize and crisp up.
By preheating a heavy-duty baking sheet or a baking stone, you are creating a reservoir of heat. When the chilled dough balls land on that hot surface, the bottom of the cookie “sears” instantly. This thermal shock sets the crust immediately, which supports the rest of the cookie as it expands. It’s the same principle as searing a steak; you want that immediate high-heat contact to create a structural barrier.
Furthermore, this method prevents the butter from separating and pooling at the bottom. Instead of a greasy mess, the fats stay suspended within the flour structure. This ensures that every bite of your Crinkle Pistachio Shortbread Cookies has that signature “short” texture—crumbly, light, and perfectly dry to the touch.
Why Almond Flour Changes the Crumb
While all-purpose flour provides the protein needed for the cookie to hold its shape, almond flour is the secret to that “sandy” melt-in-your-mouth feel. Almond flour lacks gluten, so it effectively breaks up the long gluten strands formed by the wheat flour. This prevents the cookie from becoming tough or bread-like, even if you accidentally mix the dough a little too long.
Additionally, the natural oils in almond flour add a layer of richness that complements the pistachios. The combination of the two flours creates a balanced crumb that is sturdy enough to handle but delicate enough to dissolve on the tongue. It’s this specific ratio that allows the “crinkle” to form on top while the interior remains tender.
Essential Components for Pistachio Shortbread Success
Quality ingredients are the backbone of any shortbread, as there are no leavening agents like baking soda to hide behind. I highly recommend using a high-fat European-style butter if you can find it. These butters have a lower water content than standard grocery store brands, which means less steam is released during baking and your cookies will be even crispier.
We also use a dual-sugar approach within the dough itself. Granulated sugar provides the essential structure and helps create those crisp edges we love. Meanwhile, the small amount of powdered sugar in the dough adds a level of tenderness and helps the dough bind together without needing eggs. This combination is what gives the cookie its unique “crinkle” potential.
Don’t skip the salt! Even a quarter teaspoon makes a massive difference. Salt acts as a flavor enhancer that cuts through the richness of the butter and makes the nutty pistachio notes sing. Without it, the cookies can taste one-dimensional and overly sweet.
Selecting and Preparing Your Pistachios
For the best flavor, look for raw, unsalted pistachios. You can toast them lightly yourself to control the depth of flavor, but raw pistachios provide that bright green color that looks so striking against the white powdered sugar. If you use pre-roasted salted nuts, make sure to rub off the excess salt and omit the salt called for in the recipe.
The “Two-Texture” method is non-negotiable for these cookies. You’ll grind half of the nuts into a fine meal—almost like a flour—to infuse the entire dough with pistachio flavor. The other half should be roughly chopped by hand. These larger pieces provide a satisfying crunch and a beautiful visual pop when pressed into the center of the crinkle.
The Role of Pure Extracts
Vanilla extract is a staple, but almond extract is the real “secret weapon” here. While it might seem counterintuitive to use almond extract in a pistachio cookie, it actually amplifies the natural nuttiness of the pistachios. It provides a floral, cherry-like backnote that makes the cookies taste like they came from a high-end French patisserie.
Be careful with the almond extract, though; it is very potent. Stick to the half-teaspoon measurement. It should support the butter and pistachio flavors, not overpower them. When combined with the vanilla, it creates a complex aroma that will fill your entire kitchen as the cookies bake.
Step-by-Step: Engineering the Perfect Crinkle
Creating the perfect crinkle isn’t about luck; it’s about engineering. The process involves three distinct phases that must be followed to ensure the dough reacts correctly to the heat of the oven. If you rush these steps, you might end up with a flat cookie or a smooth top instead of those beautiful fissures.
Phase 1: Achieving the Aerated Butter Base
Start by creaming your softened butter with the sugars. You aren’t just mixing them; you are aerating them. Use a hand mixer or stand mixer until the mixture looks pale, fluffy, and resembles a light buttercream frosting. This trapped air is what will expand in the oven to create the “lift” for the crinkle.
When you add the dry ingredients, switch to a spatula or a low setting on your mixer. You want to fold the flour and pistachio meal in until just combined. If you overwork the dough at this stage, you’ll develop too much gluten, and the cookies will be tough rather than crumbly. Stop as soon as no streaks of white flour remain.
Phase 2: The Double-Chill Technique
Chilling the dough is the most important step for texture. At least 30 minutes in the fridge allows the butter to firm back up and the flour to fully hydrate. This prevents the cookies from spreading too fast when they hit the oven. If the butter is too soft, the cookies will melt into puddles before the edges have a chance to set.
While the dough is chilling, place your heavy baking sheet in the oven to preheat. This is the “double” part of the technique: cold dough meeting a hot surface. This temperature differential is exactly what causes the surface of the cookie to crack and crinkle as the interior expands against the quickly-setting exterior.
Phase 3: Coating and Indenting for Texture
Once the dough is cold, roll it into one-inch balls. For the best visual contrast, roll the balls in granulated sugar first, then very generously in powdered sugar. The granulated sugar creates a “grip” for the powdered sugar to hold onto, ensuring a thick, white coating that won’t just melt away in the oven.
After placing the balls on the hot parchment-lined sheet, use your thumb to make a slight indentation in the center. This isn’t just for the chopped pistachio topping; it actually encourages the cookie to spread outward rather than upward. This outward pressure is what forces the powdered sugar coating to split, creating those iconic crinkle cracks.
Thermal Management: Using Baking Stones and Heavy Sheets
The equipment you use is just as important as the ingredients. Thin, flimsy aluminum sheets are prone to warping and hot spots, which lead to uneven browning. For these cookies, I recommend using aluminized steel or a heavy ceramic baking stone. These materials hold onto heat much better, providing the consistent energy needed for a crisp base.
Always use parchment paper rather than greasing the pan. Greasing the pan adds extra fat to the bottom of the cookie, which can lead to spreading and sogginess. Parchment paper provides a clean release while still allowing the heat from the preheated pan to transfer directly into the dough.
Troubleshooting Common Shortbread Failures
If your cookies didn’t crinkle, the most likely culprit is the temperature. Either the dough wasn’t cold enough, or your oven (and baking sheet) wasn’t hot enough. Without that immediate burst of heat, the surface won’t set fast enough to crack. Make sure you aren’t leaving the oven door open too long when loading the tray.
If the pistachio flavor feels muted, try adding a tiny pinch more salt to the dough next time. Fat needs salt to carry flavor to your taste buds. Also, ensure your pistachios are fresh; old nuts can lose their vibrant oils and taste dusty. A quick 5-minute toast in a dry pan before grinding can also wake up those dormant flavors.
Lastly, if your powdered sugar seems to disappear or “melt” into the cookie, it’s usually due to high humidity in the kitchen. To combat this, roll the dough balls in the sugar twice. Let them sit for a minute after the first roll, then give them a second heavy coating right before they go into the oven.
Storage and Texture Preservation
Shortbread is famous for its long shelf life, provided you keep it away from its number one enemy: humidity. Store your cooled cookies in an airtight container at room temperature. They will stay perfectly crisp for up to two weeks. In fact, the flavor often improves after the first 24 hours as the pistachio and almond extracts meld.
If you want to prep ahead, you can freeze the raw, sugar-coated dough balls. When you’re ready to bake, just pop them onto the preheated tray straight from the freezer. You may need to add 2 minutes to the baking time. I don’t recommend freezing the baked cookies, as the powdered sugar can become tacky and lose its beautiful crinkle appearance upon thawing.
Expert Baking Troubleshooting
Can I use salted butter if I omit the added salt?
Yes, you can certainly use salted butter. However, the amount of salt in butter brands varies wildly. If you go this route, omit the 1/4 teaspoon of salt called for in the recipe. For the most consistent results, professional bakers prefer unsalted butter so they can control the seasoning precisely.
How do I prevent the chopped pistachios from burning on top?
Since these cookies only bake for about 10-12 minutes, the nuts shouldn’t burn. However, if your oven runs hot, you can lightly press the chopped pistachios deeper into the thumbprint indentation. This shields them slightly from the direct heating elements. Using raw pistachios rather than pre-roasted ones also gives you a larger safety margin.
What is the best way to grind pistachios without turning them into nut butter?
The trick is to use the “pulse” function on your food processor. Do not just turn it on and walk away. Pulse in short, one-second bursts. It also helps to grind the pistachios along with a tablespoon of the flour from the recipe; the flour absorbs the oils as they are released, keeping the mixture powdery rather than pasty.
Can this dough be made 24 hours in advance?
Absolutely. This dough actually benefits from a long rest in the refrigerator. Wrap the dough disc tightly in plastic wrap to prevent it from picking up any fridge odors. When you are ready to bake, let it sit on the counter for about 10 minutes just so it’s pliable enough to roll into balls, then proceed with the sugar coating.
Why is my powdered sugar disappearing into the dough during the bake?
This usually happens if the dough is too warm or the kitchen is very humid. The sugar absorbs the moisture and dissolves. To prevent this, ensure your dough is thoroughly chilled. You can also try the “pro trick” of rolling the balls in granulated sugar first; this creates a dry barrier that helps the powdered sugar stay white and distinct.
Optimal Pairings for Nutty Shortbread
The rich, buttery profile of these Crinkle Pistachio Shortbread Cookies calls for a beverage that can cleanse the palate. A sharp, hot espresso is a classic choice, as the bitterness of the coffee balances the sweet powdered sugar. If you prefer tea, a floral Earl Grey is spectacular; the bergamot notes dance beautifully with the almond extract.
For a comforting afternoon snack, try a cold glass of creamy oat milk. The natural grain sweetness of the oat milk complements the earthy pistachio flavor without being as heavy as dairy milk. If you’re serving these at a gathering, a sparkling apple cider provides a crisp, acidic contrast that cuts through the butter beautifully.
Pistachio Shortbread Cookies
Course: DessertCuisine: AmericanDifficulty: medium24
cookies20
minutes12
minutes155
kcal32
MinutesThese cookies feature a signature sandy texture from almond flour and ground pistachios. By using a preheated baking sheet and a specific chilling process, these shortbreads achieve a perfect crinkle top without the risk of a soggy bottom.
Ingredients
2 cups all-purpose flour
1/2 cup almond flour (for the signature sandy texture)
1 cup unsalted butter, softened
1/2 cup granulated sugar
1/4 cup powdered sugar (for the dough)
1/2 cup powdered sugar (in a separate bowl for coating)
1/2 cup finely ground pistachios (processed until almost a flour)
1 teaspoon vanilla extract
1/2 teaspoon almond extract
1/4 teaspoon salt
1/2 cup roughly chopped pistachios for topping
Directions
- In a large bowl, cream the softened butter, granulated sugar, and 1/4 cup powdered sugar until light and pale. Stir in the vanilla and almond extracts.
- In a separate bowl, whisk together the all-purpose flour, almond flour, salt, and finely ground pistachios.
- Gradually fold the dry ingredients into the butter mixture. Mix until a thick, cohesive dough forms. Do not overmix.
- To prevent a soggy bottom and ensure the “crinkle” effect, chill the dough for at least 30 minutes. While the dough chills, place a heavy-duty baking sheet or baking stone inside the oven and preheat to 350°F (175°C).
- Roll the chilled dough into 1-inch balls. Roll each ball first in granulated sugar (optional, for extra crunch) and then generously in the bowl of powdered sugar until heavily coated.
- Working quickly to maintain heat, remove the hot baking sheet from the oven and line it with parchment paper. Place the dough balls on the sheet. Use your thumb or a small spoon to create a slight indentation in the center of each ball; this encourages the crinkle spread.
- Press a generous pinch of the roughly chopped pistachios into the center indentation of each cookie.
- Bake for 10 to 12 minutes. The cookies should look set and cracked on top but remain pale.
- Let the cookies cool on the hot pan for 5-10 minutes before moving to a wire rack. This final rest on the hot surface “sears” the base, locking in the crisp bottom texture shown in the image.
Notes
- The final rest on the hot surface is crucial to sear the base and prevent a gummy texture. You can roll the balls in granulated sugar before the powdered sugar for extra crunch.


