

The most common hurdle when making homemade chicken parm is the inevitable soggy bottom-that moment when your beautifully crisp crust turns to mush under the sauce and cheese. I struggled with this frustration for years until I finalized this precise method.
This recipe for Crispy Baked Chicken Parmesan is the definitive solution, employing a three-part cooking method and an essential “Anti-Soggy” secret weapon that guarantees a shatteringly crisp texture every single time.
Finally! The Crispy Baked Chicken Parmesan Recipe That Never Gets Soggy
The Anti-Soggy Bottom Guarantee: How We Cracked the Code
The secret lies in a strategic timing sequence: we separate the baking phase from the saucing phase using very short, high-heat applications. This ensures that the breading is bone-dry before the marinara even touches it.
The crucial elements include the 5-minute initial drying bake and, most importantly, the quick, high-heat finish under the broiler. We melt the cheese in under 90 seconds, denying the moisture in the sauce any time to penetrate the crust.
Why Baking is Better Than Pure Frying (A Hybrid Approach)
While deep frying provides unparalleled richness, it leaves the chicken cutlets too oily and moist immediately underneath the crust, which leads to quicker saturation when sauce is applied. This hybrid method minimizes oil absorption.
We use a quick, high-temperature pan-fry solely for color and flavor, achieving a deep golden crust quickly. The short subsequent bake removes residual moisture and perfectly sets the internal temperature, resulting in a cleaner, lighter, and safer cooked final product.
Prep Station Essentials: Tools for Success (Including the Wire Rack)
The equipment you use is just as vital as the ingredients, especially when striving for maximum crispness. Having the right setup ensures consistent heat and optimal air circulation.
Must-Have Equipment for Perfect Texture
The Crucial Wire Rack and Baking Sheet: This is non-negotiable for air circulation. Placing the cutlets on a rack elevates them, allowing steam to escape from the bottom surface instead of pooling, which directly prevents sogginess.
Three Shallow Dishes: Necessary for an efficient dredging station. Use wide, shallow containers that allow the full surface of the cutlet to be pressed down firmly.
Heavy-Bottomed Skillet: Ensures stable, consistent oil temperature for frying. Cast iron or stainless steel is ideal to prevent the temperature from plummeting when cold chicken is added.
The Essential Components: Building a Restaurant-Quality Meal
Selecting and Prepping the Chicken Cutlets
Use boneless, skinless chicken breasts and slice them horizontally into thin cutlets of uniform thickness (about ¼ to ⅓ inch). Consistency in size is paramount to guarantee that all pieces cook through at the same rate during the short frying time.
If your cutlets are uneven, lightly pound the thicker parts between two sheets of plastic wrap until they are uniform. This creates a surface area that is ideal for maximizing the crispy Panko coating.
Achieving the Ideal Crispy Breading Mixture
We rely on Panko breadcrumbs exclusively, as their jagged, large flake structure absorbs less oil and stays much crispier than finely ground standard breadcrumbs. They create the structural integrity necessary for this technique.
Grated Parmesan cheese adds salty depth, while Italian seasoning infuses essential herbal notes. Ensure the mixture is generously seasoned with salt and pepper, as this is where the primary flavor of the crust comes from.
Marinara and Mozzarella: The Finishing Touches
Always use a high-quality marinara sauce that is thick enough to cling to the chicken but not watery. Crucially, the sauce must be warmed slightly before application.
Warming the sauce prevents a sudden drop in temperature on the hot crust, helping to minimize the moisture shock. Use fresh, thinly sliced mozzarella (preferably low-moisture), as pre-shredded cheese contains starches that melt poorly and can interfere with the crispy texture.
Mastering the Dredging Station: The Path to Uniform Coating
-
Setting Up the Production Line:
Preheat your oven to 400°F (200°C) and prepare your baking sheet with the wire rack immediately. Arrange the flour, egg, and Panko mixture in an assembly line fashion for maximum efficiency.
-
The Triple Dip Technique:
First, dip the cutlet into the flour, shaking off excess so the coating is thin and dry. Next, coat in the egg mixture, allowing all excess to drip off-the egg acts as the vital glue.
Finally, press the cutlet firmly and thoroughly into the Panko mixture on both sides. This pressing action ensures a robust, thick, and complete coating that will adhere successfully during frying.
The Critical 10-Minute Rest: Activating the Anti-Shedding Secret
Once breaded, the chicken must rest for at least 10 minutes on a clean plate or tray before frying. This rest time is absolutely mandatory for crust adhesion.
Resting allows the moisture in the flour and egg to hydrate the Panko, gluing it firmly to the chicken surface. Skipping this step often results in the breading sloughing off the moment it hits the hot oil.
The Three-Part Cooking Method: Fry, Dry, and Finish
-
Frying to Deep Golden Perfection: Temperature Control is Key
Heat about ½ inch of oil in your heavy-bottomed skillet over medium-high heat until it shimmers, ideally reaching 350°F (175°C). The oil must be hot enough to sizzle immediately upon contact.
Fry the chicken cutlets in small batches, turning once, until they are deep golden brown, approximately 3 to 4 minutes per side. Do not overcrowd the pan; this drops the oil temperature and leads to a soggy crust immediately.
-
Implementing the Anti-Soggy Bottom Technique (Wire Rack & Initial Bake)
Immediately transfer the hot, crispy cutlets to the prepared wire rack on the baking sheet. This ensures the bottom remains exposed to air, preventing condensation.
Bake at the preheated 400°F for exactly five minutes. This step draws out any residual oil and moisture from the crust, guaranteeing dryness before the sauce is applied for the final melt.
-
Sauce and Cheese Application (The Quickest Step)
Pull the baking sheet out of the oven. Apply the warmed marinara sauce (2 to 3 tablespoons max) only over the center of each cutlet, carefully leaving a crispy 1/4-inch perimeter exposed.
Place two thin slices of fresh mozzarella directly on top of the sauce. Working quickly is essential here to retain the heat of the chicken.
For another easy chicken dinner with layers of flavor, check out this cheesy pesto chicken bake.
-
The Rapid Cheese Melt: Broiling for Maximum Crunch Retention
Return the cutlets to the oven and immediately switch to the broiler on high heat. Position the rack about 6 to 8 inches from the heat source.
Broil for a very short duration, typically 60 to 90 seconds, just until the cheese is beautifully melted and the edges of the sauce begin to bubble. This extremely short, high heat application melts the cheese without giving the sauce time to saturate the bottom crust.
-
Garnish and Serve Immediately:
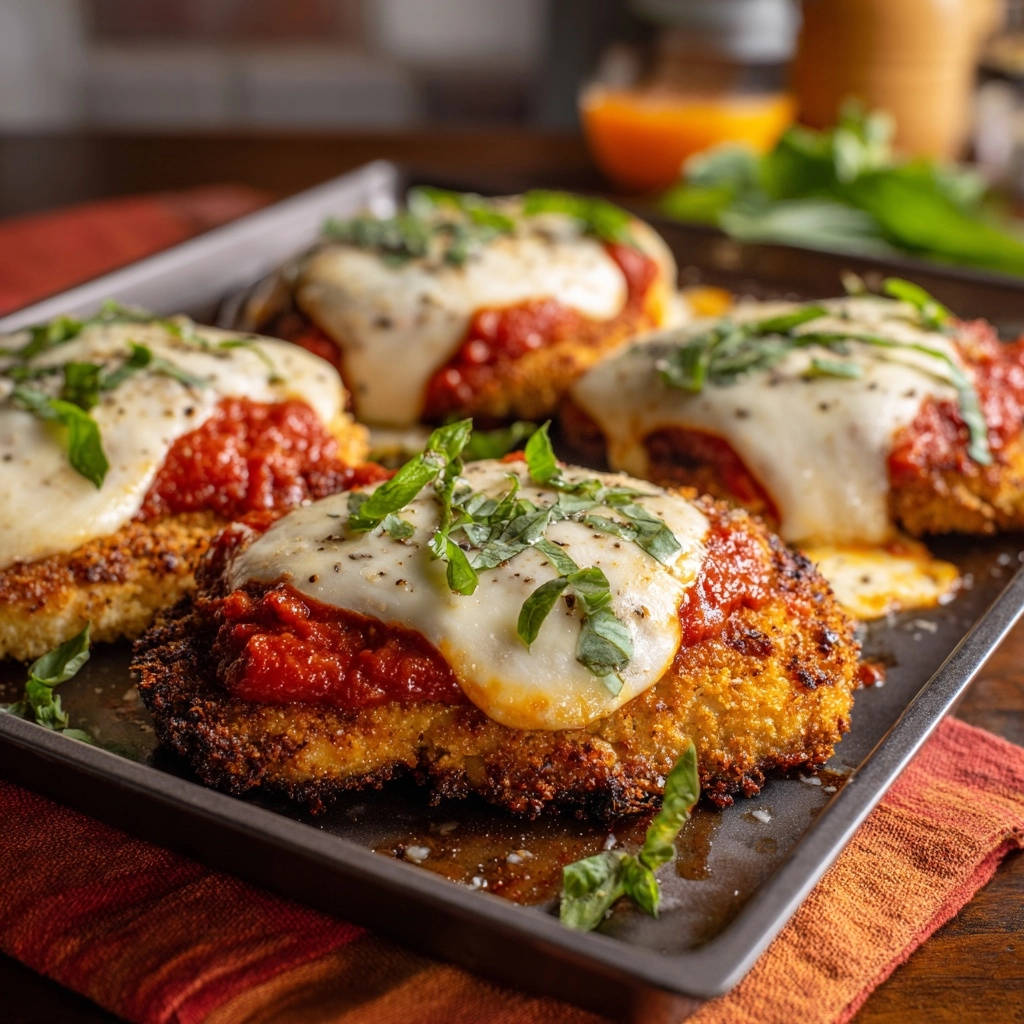
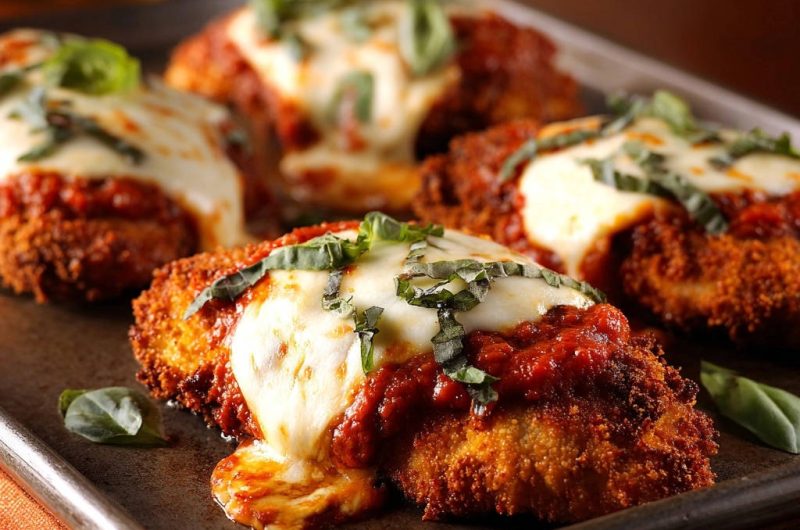
Remove the finished Crispy Baked Chicken Parmesan cutlets from the oven and garnish immediately with a generous chiffonade of fresh basil.
Troubleshooting and Chef’s Secrets for Flawless Chicken Parmesan
Why Did My Breading Still Fall Off?
Breading failure is nearly always attributed to inadequate prep work at two critical stages: skipping the 10-minute rest or failing to properly drain excess egg.
Ensure you press the cutlet firmly into the Panko mixture to create mechanical adhesion. Additionally, always make sure the chicken is patted completely dry before starting the dredging process.
Can I Make Crispy Chicken Parmesan Ahead of Time?
Yes, but only up to the frying stage. You can bread and rest the cutlets, then fry them completely, cool them on the wire rack, and refrigerate them for up to 24 hours.
Do not apply sauce or cheese until you are ready to serve. To reheat, place the fried cutlets on the wire rack in a 400°F oven for 5 minutes, then proceed with steps 6 through 8.
Ensuring Perfectly Melted, Golden Brown Mozzarella
While you can bake the chicken with cheese for 5-7 minutes, broiling is the superior method for this dish. Baking takes too long, allowing the sauce to release moisture and steam the crust.
Broiling utilizes direct, intense heat, giving you that beautiful bubbly, golden cheese crust without increasing the internal cook time of the chicken or compromising the crispy Panko crust.
Creating a Complete Meal: Serving Suggestions That Complement the Crunch
The Classic Pairing: Pasta and Marinara
If serving with pasta, opt for a simple spaghetti or linguine tossed lightly with the remaining warm marinara sauce. Since the chicken itself is rich and sauced, you want the pasta to serve as a subtle background.
Keep the pasta dressing simple to avoid competing with the robust flavor profile of the chicken cutlets.
Bright, Fresh Salad Companions
A crisp salad provides an acidic counterpoint that cuts through the richness of the cheese and breading. A simple arugula salad tossed in a sharp lemon vinaigrette is an ideal choice.
The peppery bite of the arugula and the bright citrus contrast beautifully with the savory, melting mozzarella.
Vegetable Sides That Shine
Choose green vegetables that can be prepared quickly and served alongside the main dish. Roasted asparagus or sautéed broccoli rabe with garlic and a touch of red pepper flakes work wonderfully.
These vegetables offer a slight bitterness that cleanses the palate after the richness of the homemade chicken parm.
FAQs: Deep Dive into Crispy Chicken Parmesan Substitutions and Storage
Is Panko Necessary, or Can I Use Regular Breadcrumbs?
Panko breadcrumbs are essential for achieving the maximum crispness required for this anti-soggy technique. Regular breadcrumbs, being finer, absorb oil and moisture much faster, making them prone to collapse under the sauce.
If you must use standard breadcrumbs, toast them lightly before mixing with Parmesan to dry them out as much as possible, though the results will not be as guaranteed crispy as Panko.
Can I Use Chicken Thighs Instead of Breasts?
You can substitute boneless, skinless chicken thighs, but you will need to adjust the preparation and cooking time significantly. Thighs are naturally fattier and require a longer cook time to reach safety.
Ensure the thighs are butterflied thin and increase the initial 400°F bake time from 5 minutes to 8-10 minutes before applying the sauce and cheese.
How Do I Reheat Leftover Chicken Parmesan While Keeping It Crispy?
Never reheat in a microwave, which turns the crust instantly rubbery. The best method is using an air fryer or a conventional oven.
Place leftovers on a wire rack inside a 375°F (190°C) oven or air fryer for 10 to 15 minutes, or until the cheese is melted and the crust is revitalized.
What is the Best Oil for Frying the Cutlets?
You need an oil with a high smoke point and a neutral flavor to ensure the chicken doesn’t taste oily or bitter. Vegetable, canola, or grapeseed oil are excellent choices.
While you can use light olive oil, avoid extra virgin olive oil, as its low smoke point will burn quickly at the required frying temperature.
Serve Your Crispy Baked Chicken Parmesan Masterpiece and Enjoy the Rave Reviews!
You now possess the complete, foolproof method for flawless Crispy Baked Chicken Parmesan-no more compromising texture for flavor. Embrace the anti-soggy technique and enjoy the audible crunch.
This hybrid approach ensures professional, restaurant-quality results in your kitchen every time. Try this recipe tonight, and let us know how wonderfully crisp your final results were!
Chicken Parmesan
Course: Main CourseCuisine: Italian-AmericanDifficulty: easy4
servings15
minutes20
minutes750
kcal35
minutesSay goodbye to soggy bottoms! This recipe uses a secret timing trick—including a breading rest and a quick broil finish—to ensure your chicken cutlets stay perfectly crisp under melted mozzarella.
Ingredients
4 boneless skinless chicken breasts, sliced horizontally into 8 thin cutlets
1 cup all-purpose flour
2 large eggs, lightly beaten
2 cups Panko breadcrumbs
1/2 cup grated Parmesan cheese
1 teaspoon dried Italian seasoning
1/2 teaspoon kosher salt, plus more for seasoning
1/4 teaspoon black pepper, plus more for seasoning
2 cups marinara sauce, warmed
8 ounces fresh mozzarella cheese, sliced thinly
2 tablespoons fresh basil, chiffonade (cut into thin strips)
1/2 cup vegetable or olive oil, for frying
Directions
- Prepare the Chicken and Breading: Preheat your oven to 400 degrees F. Place a wire rack on a baking sheet and set aside (this helps air circulate and is crucial for the Anti-Soggy Bottom technique). Season the thin chicken cutlets generously on both sides with salt and pepper.
- Set Up the Dredging Station: Arrange three shallow dishes. Place flour in the first dish. Whisk the eggs in the second dish. In the third dish, combine the Panko breadcrumbs, Parmesan cheese, Italian seasoning, 1/2 teaspoon salt, and 1/4 teaspoon pepper.
- Dredge and Rest: Dip each chicken cutlet first in the flour (shaking off excess), then in the egg mixture (allowing excess to drip off), and finally press firmly into the Panko mixture to coat thoroughly. The Secret Start: Place the breaded cutlets on a plate or tray and let them rest for at least 10 minutes before frying. This rest time allows the breading to adhere firmly, preventing it from shedding or getting instantly soggy when it hits the oil and sauce.
- Fry the Cutlets: Heat the oil in a large skillet over medium-high heat until shimmering (about 350 degrees F). Fry the cutlets in batches, turning once, until deeply golden brown and cooked through, about 3 to 4 minutes per side. They should look crisp and rich brown.
- Apply the Anti-Soggy Bottom Technique: Immediately transfer the hot, crispy cutlets to the prepared baking sheet with the wire rack. Place the baking sheet in the preheated 400 degree F oven for 5 minutes just to ensure the internal temperature is perfect and the crust dries slightly.
- Finish with Sauce and Cheese: Pull the baking sheet out. Spoon about 2 to 3 tablespoons of warmed marinara sauce over the center of each cutlet, being careful not to overwhelm the crust edges. Top each with 2 thin slices of fresh mozzarella.
- Melt and Serve: Return the cutlets to the oven for 2 to 3 minutes, or better yet, slide them under the broiler on High heat for 60 to 90 seconds, just until the cheese is beautifully melted and bubbly. The extremely short, high heat application melts the cheese without giving the sauce time to saturate the bottom crust.
- Garnish immediately with fresh basil and serve hot.
Notes
- For the crispiest result, ensure the cutlets rest 10 minutes after breading, and use a wire rack when baking for maximum air circulation.


