
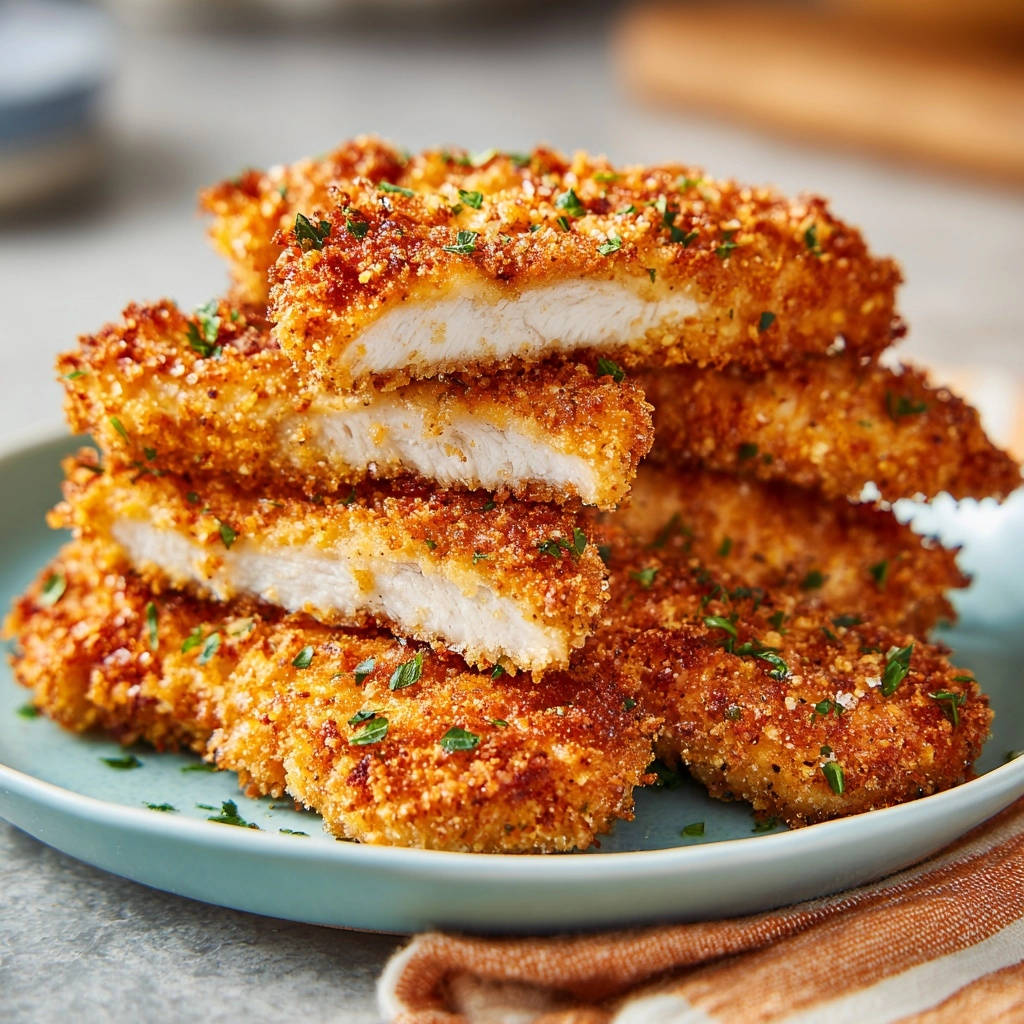
There is nothing more frustrating than biting into tough, dry chicken after you’ve worked hard on a perfect golden crust. I’ve cracked the code to delivering guaranteed tenderness and extreme crunch every time you prepare Crispy Coated Chicken Cutlets.
The secret lies in a crucial preparation step-pounding the meat-that not only locks in moisture but ensures the cutlets cook so quickly they can’t possibly dry out, resulting in juicy perfection beneath a savory Panko crust.
Beyond Basic: Why This Crispy Coated Chicken Cutlets Recipe Solves the “Dry Chicken” Problem
Standard chicken breast recipes often rely on long cook times, which evaporate moisture and lead to tough, stringy results, especially with frying methods.
Our methodology transforms the chicken breast into a highly efficient cooking canvas, prioritizing uniform thickness and a superior, flavor-packed crust that adheres flawlessly.
The Crucial Prep Step: Pounding for Uniform Tenderness
The core innovation here is pounding the chicken down to a uniform half-inch thickness. This dramatically reduces the cooking time from 10-15 minutes down to 6-8 minutes total.
Rapid cooking prevents the evaporation of internal juices, guaranteeing a moist, tender interior the moment the crust reaches that beautiful golden brown finish.
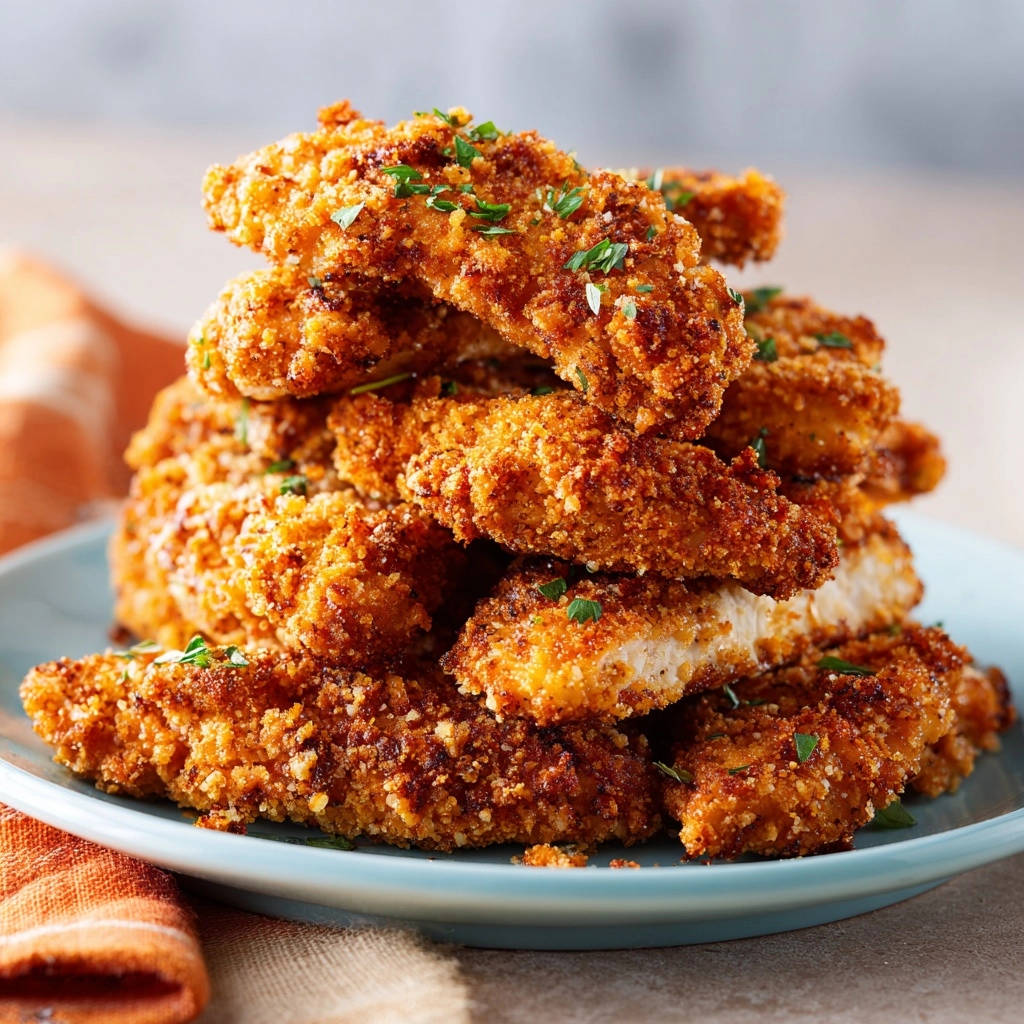
Superior Crunch: The Panko and Parmesan Difference
We skip traditional breadcrumbs in favor of Japanese Panko, which has a coarser, flakier texture that excels at creating air pockets for maximum shattering crunch.
The addition of grated Parmesan cheese melds with the Panko to create a savory, complex crust that is miles ahead of basic seasoned breading.
Essential Building Blocks: Ingredients for Your Crispy Coating
Chicken and Preparation Must-Haves
Start with high-quality boneless, skinless chicken breasts, ideally around 6 ounces each, for the best yield and handling.
Remember that each breast will be horizontally sliced to create two separate, thinner cutlets, doubling your servings and facilitating the necessary pounding step.
Creating the Ultimate Breading Mix
Panko is the star, delivering texture that plain breadcrumbs cannot match; it is essential not to substitute it if you want the optimal crispness.
The spice blend-salt, pepper, garlic powder, and a touch of smoked paprika-is critical, as paprika adds a subtle, earthy depth that elevates the entire flavor profile beyond just standard saltiness.
The Perfect Binder: Egg Wash Ratios
The egg wash is the crucial adhesive, but if it is too thick, it can become heavy and cause the crust to separate.
Adding just a tablespoon of milk or water slightly thins the eggs, allowing the wash to coat the flour evenly and thinly, ensuring flawless adhesion of the Panko layer.
Essential Equipment for Seamless Frying
The Right Tool for Pounding
A flat-sided meat mallet or even a sturdy rolling pin is preferred over a heavily textured meat tenderizer. This ensures you achieve a smooth, even half-inch thickness without tearing the delicate chicken muscle fibers.
The High-Heat Skillet
Use a heavy-bottomed skillet, such as a stainless steel or cast iron pan, to maintain a consistent temperature across the entire cooking surface. Even heat is key to preventing hot spots that cause uneven browning.
The Post-Fry Wire Rack
This tool is non-negotiable for superior texture. Placing the finished cutlets on a wire rack over a baking sheet allows air to circulate, draining excess oil and ensuring the bottom crust stays just as crispy as the top.
Your Path to Crispy Coated Chicken Cutlets Perfection: A Detailed Guide
Mastering the Cutlet Prep (The Tenderness Fix)
Begin by slicing each 6-ounce chicken breast horizontally to create two uniform cutlets. Place these pieces between plastic wrap to prevent sticking and mess.
Gently and evenly pound the chicken until it measures a consistent 1/2 inch thickness across the entire surface. This guarantees rapid, even cooking.
Setting Up the Three-Stage Breading Station
Prepare three wide, shallow dishes, setting them up in an assembly line: flour, then the egg wash, and finally the seasoned Panko mixture.
Ensure the Panko, Parmesan, salt, and spices are vigorously mixed together so every cutlet receives a balanced flavor profile.
Achieving Flawless Adhesion (The Dredge)
Dredge the cutlet first in flour, making sure to shake off all excess powder-too much flour equals a gooey crust.
Dip in the egg wash next, letting any excess wash drip away for 3-5 seconds. Finally, press the cutlet very firmly into the Panko mixture on all sides, gently compressing the coating to maximize adherence before frying.
Optimal Frying Temperature and Technique
Heat your chosen oil (vegetable or canola) to 350°F (175°C) in the skillet. If you lack a thermometer, test the oil by dropping a small breadcrumb; it should immediately sizzle vigorously.
Carefully place the cutlets in the hot oil, ensuring the pan is never overcrowded. Overcrowding drops the oil temperature too quickly, leading to greasy, soggy breading, so work in batches.
Finish, Drain, and Serve
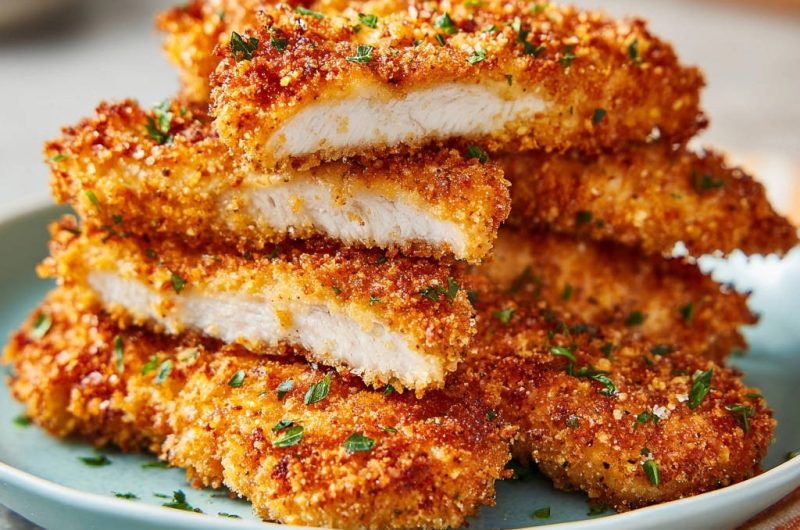
Fry the thin cutlets for 3 to 4 minutes per side, turning only once, until the crust is a deep, rich golden brown and the internal temperature reaches 165°F (74°C).
Immediately transfer the finished cutlets to a wire rack to drain excess oil. Sprinkle lightly with an extra pinch of finishing salt and garnish heavily with fresh chopped parsley before serving hot.
Chef’s Secrets for Maximum Crunch and Flavor
The Double-Dip Secret (For Extreme Thickness)
If you desire an exceptionally thick and robust crust, you can perform a modified double dredge. After the first Panko coating, dip the cutlet back into the egg wash quickly, and then press it into the Panko again.
Why Resting the Battered Cutlets Matters
After breading, place the cutlets on a baking sheet and refrigerate them for 15 to 30 minutes. This essential step dries the exterior slightly, helping the crust “set” and preventing it from detaching when it hits the hot oil.
Managing the Oil Temperature for Consistency
The oil temperature is volatile and will drop every time you add cold chicken. After removing a finished batch, wait 1-2 minutes for the oil to reheat back up to the 350°F target before starting the next batch.
Solving Common Crispy Cutlet Challenges
Why is My Coating Falling Off in the Pan?
The coating often falls off because there was too much moisture or dry flour between layers. Ensure you shake off excess flour and allow excess egg wash to drip away before moving to the Panko.
Crucially, you must firmly compress the Panko onto the meat; reference the chilling tip, as resting the cutlets helps solidify the bond.
The Chicken is Cooked, But the Crust is Soggy or Burned
Sogginess is a sure sign the oil temperature was too low, causing the crust to absorb oil instead of crisping up immediately.
If the crust burns before the internal temperature reaches 165°F, your oil is too hot; ensure you maintain a steady temperature between 325°F and 350°F for perfect results.
Keeping Large Batches Warm and Crispy
To keep the first cutlets warm while you finish the batch, place the wire rack (with the drained cutlets) inside an oven set to the lowest temperature, around 200°F (95°C).
Using the wire rack prevents steam from accumulating underneath the cutlets, which is the fastest way to ruin a beautiful crispy crust.
Pairing Perfection: What to Serve with Crispy Coated Chicken Cutlets
Quick and Refreshing Side Dishes
Since the cutlets are rich, complement them with something bright and acidic. A simple Arugula Salad tossed in a lemon vinaigrette provides a wonderful textural and flavor contrast.
For another crunchy snack idea, try crispy parmesan broccoli bites.
Quickly roasted or blanched green vegetables, like asparagus or green beans finished with sea salt and garlic, offer a fresh, healthy counterpoint to the fried coating.
Sauces That Complement the Crunch
For a classic Italian-American feel, serve these Crispy Coated Chicken Cutlets with a bright, homemade marinara sauce or a simple lemon-butter caper sauce.
Alternatively, a quick creamy dipping sauce made from mayo, Dijon mustard, and a hint of cayenne is fantastic for a faster, weeknight meal.
Make-Ahead, Storage, and Reheating Answers
Can I Freeze Uncooked Crispy Coated Chicken Cutlets?
Yes, freezing is an excellent way to meal prep. After breading, flash freeze the individual cutlets on a baking sheet until solid (about 2 hours).
Transfer the frozen cutlets to a freezer bag or airtight container, layering them with parchment paper to prevent sticking. They will keep well for up to two months and can often be cooked directly from frozen, adding a few minutes to the cook time.
The Best Way to Reheat Leftovers
Never microwave leftover breaded chicken, as this destroys the crispy texture and makes the coating rubbery.
The best method is reheating in an air fryer at 350°F for 4-6 minutes or in a conventional oven at 375°F for 10-12 minutes, until piping hot and re-crisped.
Are There Gluten-Free Alternatives for the Coating?
Absolutely. You can easily substitute the all-purpose flour with a standard cup-for-cup gluten-free flour blend.
For the breadcrumbs, use certified gluten-free Panko (now widely available) or, for a very low-carb option, finely crushed crispy pork rinds mixed with the Parmesan and spices.
Ready to Impress? Share Your Crispy Coated Chicken Cutlets Masterpiece!
This method transforms basic chicken breasts into tender, savory delights, guaranteeing you success against the scourge of dry, tough poultry forever.
These expertly prepared Crispy Coated Chicken Cutlets are a guaranteed crowd-pleaser for any occasion, proving that the secret to perfect frying is always in the prep.
Try out the crucial pounding technique tonight, and let us know how juicy and crispy your results turn out!
Chicken Cutlets
Course: Main CourseCuisine: InternationalDifficulty: easy4
servings15
minutes10
minutes750
kcal25
minutesTired of dry chicken? This recipe reveals the simple prep secret (pounding the meat thin) needed to achieve perfectly crispy, flavorful cutlets that remain incredibly juicy inside every time. They cook quickly and are seasoned perfectly with Parmesan and smoked paprika.
Ingredients
4 Boneless, skinless chicken breasts (about 6 ounces each)
1 cup All-purpose flour
2 large Eggs
1 tablespoon Milk or water
1 1/2 cups Panko breadcrumbs
1/4 cup Grated Parmesan cheese
1 teaspoon Salt, plus more for seasoning
1/2 teaspoon Black pepper
1/2 teaspoon Garlic powder
1/4 teaspoon Smoked paprika
1/2 cup Vegetable oil or canola oil, for frying
2 tablespoons Fresh parsley, chopped (for garnish)
Directions
- Preparation for Tenderness (The Fix): Slice each chicken breast horizontally to create two thinner cutlets, resulting in 8 pieces total. Place the cutlets between two sheets of plastic wrap. Using a rolling pin or the flat side of a meat mallet, gently pound the cutlets until they are uniform thickness, about 1/2 inch thick across the entire surface. This crucial step ensures rapid and even cooking, locking in moisture and preventing dryness. Season both sides of the pounded chicken cutlets generously with salt and pepper.
- Set Up the Breading Station: Prepare three shallow dishes. In the first dish, place the flour. In the second dish, whisk the eggs and milk/water until fully combined. In the third dish, combine the Panko breadcrumbs, Parmesan cheese, 1 teaspoon salt, black pepper, garlic powder, and smoked paprika. Mix well.
- Coat the Chicken: Dredge each chicken cutlet first in the flour (shaking off excess), then dip into the egg wash (allowing excess to drip off), and finally press firmly into the Panko mixture to ensure a thick, even crust covers all sides. Gently compress the coating onto the meat with your hands to help it adhere.
- The Cooking Method: Heat the vegetable oil in a large skillet over medium-high heat until shimmering (about 350 degrees F). The oil should be hot enough to immediately bubble when a test breadcrumb is dropped in. Carefully place the chicken cutlets in the hot oil, ensuring you do not overcrowd the pan; work in batches if necessary.
- Fry Until Golden: Fry the cutlets for 3 to 4 minutes per side, or until the crust is a deep golden brown and the internal temperature of the chicken reaches 165 degrees F. Because the chicken is pounded thin, it will cook through quickly once the crust is achieved.
- Finish and Serve: Remove the cutlets from the oil and place them on a wire rack or a plate lined with paper towels to drain excess oil. Sprinkle immediately with a pinch of extra salt, if desired. Garnish generously with fresh chopped parsley before serving hot.
Notes
- The key to juiciness is pounding the cutlets to a uniform 1/2 inch thickness across the entire surface before breading.


