
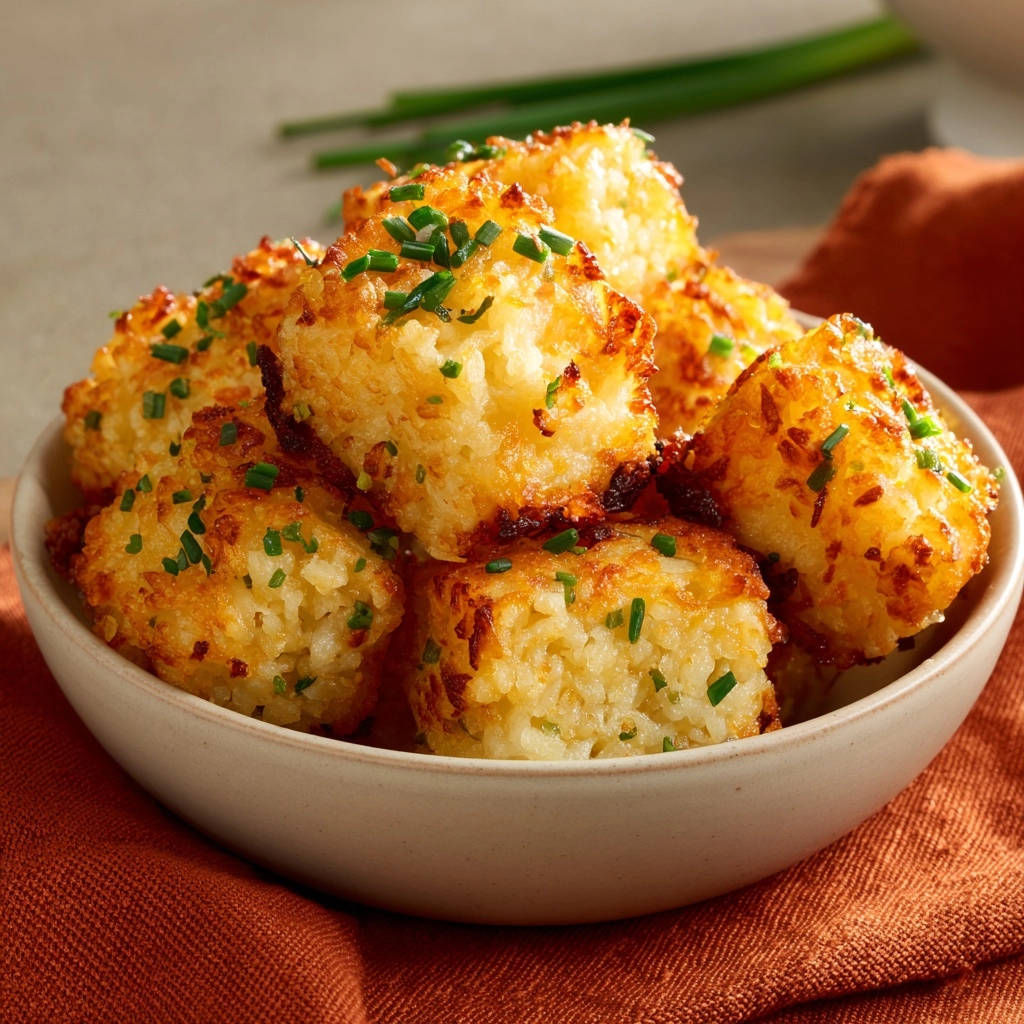
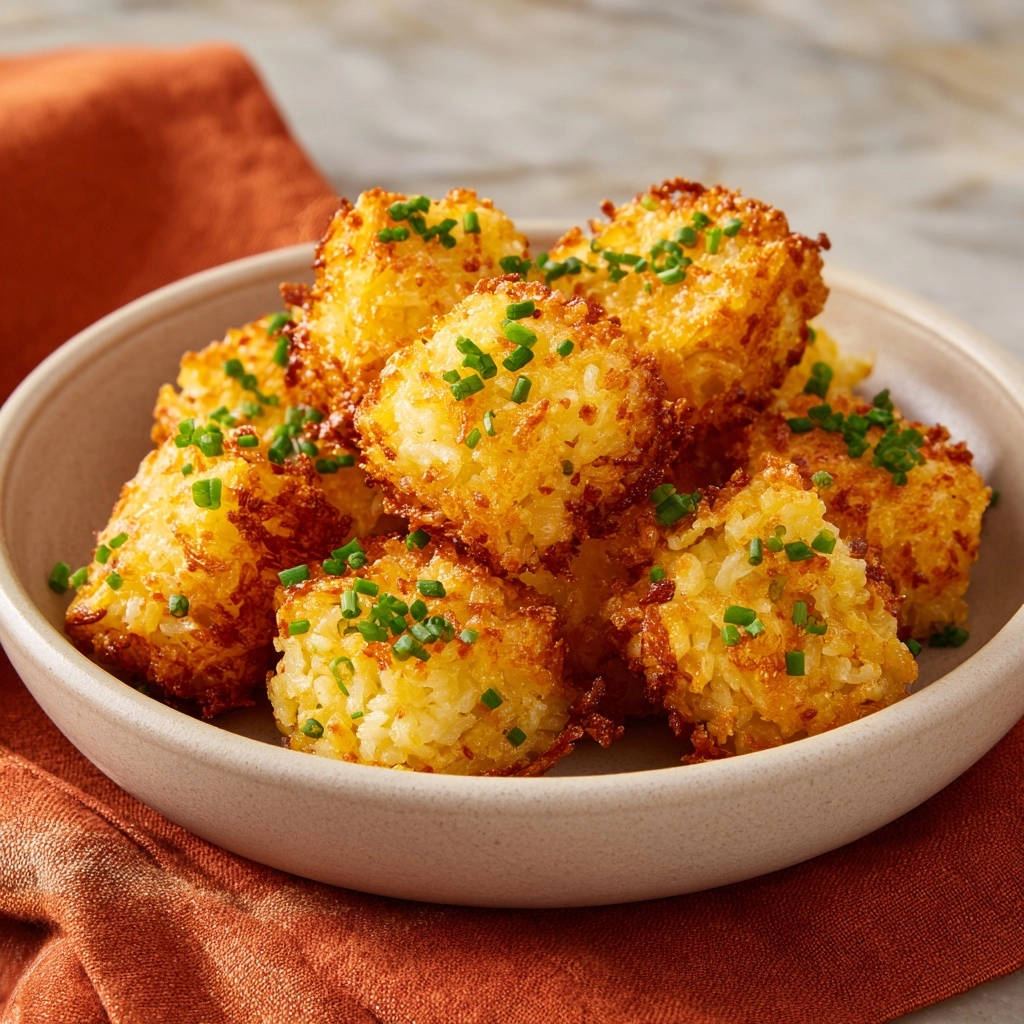
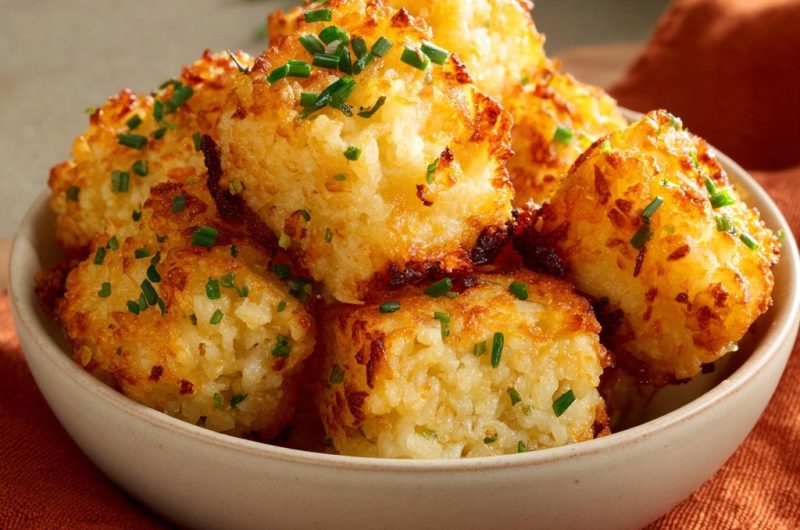
I know the struggle firsthand: trying to create a perfectly crispy rice patty only to have it fall apart, turn out gummy, or just lack that irresistible crunch. For years, I experimented until I finally cracked the code, transforming a common kitchen challenge into a guaranteed success. This recipe for Crispy Golden Rice Squares delivers that coveted exterior crunch with a wonderfully tender, flavorful interior every single time.
You’ll discover the simple yet critical technique that ensures these savory bites hold their shape and become the star of any meal or gathering.
Beyond Basic: Why These Crispy Golden Rice Squares Will Be Your New Favorite
The “Never Fall Apart” Secret: Achieving Perfect Texture
The magic of these Crispy Golden Rice Squares lies in a crucial chilling step. This simple technique transforms a loose rice mixture into a firm, cohesive block, ready to be cut and fried without any crumbling.
The result is a beautifully crisp, golden crust that gives way to a soft, flavorful interior, offering a delightful textural contrast that truly elevates humble rice.
A Symphony of Savory Flavors: More Than Just Rice
These aren’t just plain rice patties; they’re a carefully crafted blend of savory delights. Shredded cheddar cheese melts into gooey pockets, while fresh chives and a thoughtful selection of spices infuse every bite with vibrant, aromatic notes.
The garlic and onion powder provide a foundational umami, ensuring a deeply satisfying flavor profile that keeps you coming back for more.
From Appetizer to Side Dish: Versatility on a Plate
Whether you’re looking for an impressive appetizer for guests, a delightful side dish to complement your main course, or even a quick, satisfying snack, these Crispy Golden Rice Squares fit the bill. Their robust flavor and satisfying texture make them incredibly adaptable.
They pair wonderfully with a range of meals, from simple weeknight dinners to elegant weekend brunches, always adding a touch of golden deliciousness.
The Essential Elements: Building Your Crispy Golden Rice Squares
The Rice Foundation: Why Day-Old Matters
Using cooled, preferably day-old white rice is not just a suggestion; it’s a game-changer for these squares. Day-old rice is drier, which prevents a gummy texture and allows the binding agents to work more effectively.
This dryness is key to achieving that desirable crisp exterior when frying, as excess moisture would steam rather than fry.
The Flavor & Binding Agents: Cheese, Eggs, and Flour
Shredded cheddar cheese offers a rich, tangy flavor and contributes to the squares’ tender interior. Feel free to use a blend like Monterey Jack for a milder profile or a touch of Parmesan for a sharper note.
Large eggs act as the primary binder, holding the rice and cheese together. All-purpose flour further enhances cohesion, ensuring the mixture sets firmly during chilling and fries beautifully.
Aromatic Boosters & Freshness: Spices and Chives
Garlic powder and onion powder are indispensable for building a savory base. They infuse the entire mixture with a warm, inviting aroma that complements the cheese.
Fresh chives provide a bright, delicate oniony flavor and a pop of color, adding a layer of freshness that balances the richness of the cheese and spices. Don’t skip these for optimal flavor.
Choosing the Right Oil for Frying
Vegetable oil is an excellent choice for frying these squares due to its neutral flavor and high smoke point. Canola, sunflower, or grapeseed oil also work well.
Using the right oil ensures even browning without imparting unwanted flavors, letting the savory notes of the rice squares truly shine.
Gathering Your Gear: Essential Tools for Rice Square Success
Standard Kitchen Essentials
You’ll need basic kitchen tools such as a large mixing bowl for combining ingredients, along with measuring cups and spoons for accurate ingredient portions. A whisk or fork will help lightly beat the eggs if done separately, though hands are often best for mixing this particular recipe.
Specialized Tools for Shaping and Frying
A small baking dish or shallow container is crucial for firmly pressing and chilling the rice mixture, allowing it to set into a cohesive block. A sharp knife and cutting board are necessary for neatly shaping your squares.
For frying, a large, heavy-bottomed skillet or frying pan is ideal for even heat distribution. Lastly, paper towels are essential for draining excess oil, ensuring your Crispy Golden Rice Squares are perfectly crisp, not greasy.
Your Path to Perfect Crispy Golden Rice Squares: A Detailed Guide
- Step 1: Combining Your Ingredients with Care
In a large bowl, bring together the cooled cooked rice, shredded cheese, eggs, flour, garlic powder, onion powder, salt, pepper, and fresh chives.
Mix everything thoroughly with your hands until the mixture is cohesive. The goal is an even coating and a sticky texture that holds its shape, which is crucial for the next step.
- Step 2: The Critical Chilling for Structure
Firmly press the rice mixture into a small baking dish or shallow container, aiming for about 1-inch thickness. Ensure it’s packed tightly.
Cover the dish tightly with plastic wrap and refrigerate for at least 30 minutes. This chilling step is absolutely critical; it allows the squares to set, preventing them from crumbling during cooking and ensuring they achieve that beautiful crisp exterior.
- Step 3: Precisely Shaping Your Squares
Once chilled, carefully invert the firm rice mixture onto a clean cutting board.
Using a sharp knife, cut the mixture into approximately 1.5-inch squares or your desired uniform shapes. Uniformity helps with even cooking.
- Step 4: Achieving Golden Perfection in the Pan
Heat about 1/4 inch of vegetable oil in a large skillet or frying pan over medium-high heat. The oil is ready when a drop of water sizzles immediately upon contact.
Carefully place the rice squares into the hot oil, ensuring there’s enough space between each square to avoid overcrowding the pan. Cook in batches if necessary to maintain oil temperature and even browning.
Fry for 4 to 6 minutes per side, or until each side develops a deep golden-brown color and a visibly crispy crust. Adjust the heat as needed to prevent burning while ensuring a thorough cook.
- Step 5: Draining and Immediate Serving
Once perfectly golden and crispy, carefully remove the Crispy Golden Rice Squares from the pan using a slotted spoon or tongs.
Place them on a plate lined with paper towels to drain any excess oil. Serve immediately, perhaps with an additional sprinkle of fresh chives for garnish and extra flavor.
Chef’s Wisdom: Elevating Your Crispy Golden Rice Squares Game
Secrets to a Consistently Crispy Exterior
To achieve maximum crispness, always ensure your frying oil is at the correct temperature-hot enough to sizzle, but not smoking. Test with a tiny bit of the rice mixture before adding the squares.
Never overcrowd the pan. Cooking in smaller batches allows the oil temperature to remain high and ensures each square has enough space to crisp up evenly, rather than steam.
Preventing Sticking and Ensuring Even Cooking
A well-seasoned cast iron skillet or a good quality non-stick pan will minimize sticking. Ensure the oil has fully preheated before adding the squares, as this creates an immediate barrier against sticking.
For even cooking, resist the urge to move the squares too soon. Let them form a golden crust before carefully flipping, and adjust heat to a medium setting if browning too quickly.
Flavor Twist: Creative Additions and Substitutions
Experiment with different cheeses like Pepper Jack for a spicy kick or smoked Gouda for a deeper flavor. For an aromatic variation, try adding finely minced fresh parsley or a hint of dried Italian seasoning to the mixture.
Consider incorporating finely diced bell peppers, grated zucchini (well-squeezed to remove moisture), or even a touch of cooked, crumbled crispy bacon for a savory boost. For another delicious rice-based creation, consider our Sticky Glazed Chicken and Rice for a complete meal idea.
Troubleshooting Common Crispy Golden Rice Squares Challenges
My Squares Are Falling Apart!
If your Crispy Golden Rice Squares are crumbling, the most common culprit is insufficient chilling time. Ensure the mixture is pressed firmly and chilled for at least 30 minutes, or even longer.
Additionally, make sure your initial rice mixture was sticky and cohesive enough before chilling. Adjust with a tiny bit more flour or another egg if necessary to improve binding.
Why Aren’t My Squares Crispy?
Lack of crispness usually points to oil that isn’t hot enough or overcrowding the pan. Ensure your oil reaches the correct temperature before adding the squares (test with a sizzle).
Cook in batches if needed to maintain high oil temperature, and don’t rush the frying time. Let them develop that deep golden crust. For another fantastic crispy bite, you might enjoy my Crispy Zucchini Fritters, which also share secrets to achieving that perfect crunch.
Dealing with Uneven Browning
Uneven browning can often be remedied by consistent heat regulation and careful turning. Adjust your stove’s flame as needed throughout the frying process to maintain a steady, medium-high heat.
Make sure to turn each square precisely after the first side is golden, ensuring both sides get equal exposure to the hot oil for a uniform finish.
Serving Suggestions: What to Pair with Your Golden Bites
Dipping Delights: Sauces That Complement
These Crispy Golden Rice Squares are fantastic on their own, but they truly shine with a great dipping sauce. Try a spicy sriracha mayo, a classic marinara, or a vibrant sweet chili sauce for an Asian-inspired twist.
For a fresh and herby option, consider a cool yogurt-dill dip, or serve them with a dollop of my Creamy Homemade Hummus for a Mediterranean flair.
Garnish & Presentation Ideas
Beyond a sprinkle of fresh chives, elevate your presentation with a dusting of smoked paprika or a drizzle of your favorite hot sauce. A dollop of sour cream or a sprinkle of finely grated Parmesan cheese can also add visual appeal and flavor.
Arrange them artfully on a platter with a small bowl of dip in the center for an inviting appetizer display.
Elevating Your Side Dish Game
These savory rice squares are a fantastic alternative to traditional potato or bread sides. They complement roasted chicken, grilled fish, or even a hearty vegetarian main course beautifully.
Serve them alongside a fresh green salad for a balanced meal, adding both texture and comforting flavor to your plate.
Storage & Make-Ahead Magic: Keeping Them Fresh and Crispy
Best Practices for Storing Leftovers
To keep leftover Crispy Golden Rice Squares at their best, store them in an airtight container in the refrigerator for up to 3 days. Ensure they are completely cooled before storing to prevent sogginess.
Separating layers with parchment paper can also help prevent them from sticking together and maintain their shape.
Reheating for Retained Crispness
To revive their delicious crispness, avoid the microwave, which will make them soft. Reheat the squares in a preheated oven at 375°F (190°C) for about 10-15 minutes, or until heated through and crispy.
An air fryer is also an excellent option: cook at 350°F (175°C) for 5-8 minutes, checking halfway, for perfectly restored crunch.
Can You Prep These Ahead of Time?
Absolutely! The chilling step is your secret weapon for make-ahead success. You can prepare the rice mixture and press it into the baking dish up to 24 hours in advance.
Simply cover it tightly and keep it in the refrigerator until you’re ready to cut and fry. This makes these Crispy Golden Rice Squares perfect for entertaining or busy weeknights.
Your Crispy Golden Rice Squares Questions Answered
Can I Use Different Cheeses or Spices?
Yes, absolutely! Feel free to experiment with your favorite cheeses like Parmesan, Gruyere, or a spicy pepper jack for an extra kick. For spices, consider a pinch of smoked paprika, cumin, or even a touch of red pepper flakes to customize the flavor profile to your liking.
What About a Gluten-Free Version?
To make these Crispy Golden Rice Squares gluten-free, simply substitute the all-purpose flour with a good quality gluten-free all-purpose flour blend. Ensure your chosen blend contains xanthan gum for optimal binding, or add a small pinch separately if it doesn’t.
Is There an Air Fryer or Baked Option?
While frying yields the ultimate crispness, you can try an air fryer or oven. For air frying, preheat to 375°F (190°C), lightly spray the squares with oil, and cook for 10-15 minutes, flipping halfway, until golden. For baking, preheat your oven to 400°F (200°C), lightly oil a baking sheet, and bake for 20-25 minutes, flipping once, until golden and crisp. Note that the texture may be slightly different than pan-frying, often a bit less intensely crisp.
Can I Freeze These?
Yes, you can freeze both cooked and uncooked squares! For uncooked, cut the chilled squares and flash freeze them on a parchment-lined baking sheet until solid, then transfer to a freezer-safe bag. Fry from frozen, adding a few extra minutes to the cook time.
Cooked squares can also be frozen and then reheated in an oven or air fryer for best results, ensuring they regain their crispy texture.
Ready to Create Your Own Crispy Golden Rice Squares Masterpiece?
You now have all the insights and expert tips to master these irresistible Crispy Golden Rice Squares. Say goodbye to flimsy rice patties and hello to perfectly crisp, tender, and flavorful bites that will impress everyone at your table.
Don’t hesitate to dive into your kitchen and give this recipe a try. We’re confident it will become a cherished staple in your culinary repertoire. We can’t wait to see your creations!
Rice Squares
Course: SnacksCuisine: AmericanDifficulty: easy4
servings20
minutes15
minutes380
kcal60
minutesTransform day-old rice into perfectly crispy, savory squares with this foolproof recipe. Say goodbye to soft or crumbly patties and hello to a golden, tender delight. The secret is in the chilling step, ensuring every bite is wonderfully crisp.
Ingredients
2 cups cooked white rice, cooled (preferably day-old)
1 cup shredded cheddar cheese, or a blend like Monterey Jack
2 large eggs
2 tablespoons all-purpose flour
1 teaspoon garlic powder
1/2 teaspoon onion powder
Salt to taste
Black pepper to taste
1/4 cup chopped fresh chives, plus more for garnish
1/4 cup vegetable oil, plus more for frying
Directions
- In a large bowl, combine the cooled cooked rice, shredded cheese, eggs, flour, garlic powder, onion powder, salt, and pepper. Add the 1/4 cup of chopped fresh chives.
- Mix everything together thoroughly with your hands until well combined and the mixture feels cohesive. The rice should be evenly coated and sticky enough to hold a shape.
- This is the key to perfect texture: Firmly press the rice mixture into a small baking dish or a shallow container, about 1-inch thick. Cover tightly with plastic wrap and refrigerate for at least 30 minutes. This chilling step is critical; it helps the squares set and prevents them from falling apart, ensuring they crisp beautifully when cooked.
- Once chilled, remove the rice mixture from the refrigerator. Carefully invert it onto a cutting board and cut it into approximately 1.5-inch squares or desired shapes.
- Heat 1/4 inch of vegetable oil in a large skillet or frying pan over medium-high heat. The oil should be hot enough that a drop of water sizzles immediately.
- Carefully place the rice squares into the hot oil, ensuring not to overcrowd the pan. Cook in batches if necessary.
- Fry for 4 to 6 minutes per side, or until each side is deep golden brown and beautifully crispy. Adjust the heat as needed to prevent burning while ensuring even browning.
- Once golden and crispy, remove the rice squares from the pan and place them on a plate lined with paper towels to drain any excess oil.
- Serve immediately, garnished with additional fresh chives.
Notes
- Includes a critical 30-minute chilling period for optimal texture and shape.


