
I spent years perfecting beef rolls that didn’t immediately turn into a greasy, soggy disappointment-a frustratingly common issue when breading meat.
The breakthrough for these Crispy Steak Roll Skewers was recognizing that the breading needs to be pre-treated and the cooking must be a controlled two-stage process.
For a similarly satisfying beef dish, check out spiced beef and pasta.
This method ensures a light, shatteringly crisp crust that holds up long after serving, making this recipe the ultimate crowd-pleaser for effortless entertaining.
Beyond Basic: Why These Crispy Steak Roll Skewers Win Every Time
The “Shatteringly Crispy” Texture Lock
Achieving a truly crisp exterior often relies on deep frying, which easily leads to a heavy, fat-logged coating.
Our method delivers a crust that is golden, light, and airy, resisting sogginess even as the meat rests.
Why We Pre-Oil the Panko Coating
Mixing olive oil directly into the panko mixture is the single biggest key to texture success.
Pre-oiling saturates the breadcrumbs, preventing them from soaking up excess fat during the initial sear, which is the main cause of greasy crusts.
This crucial step also helps the panko brown much faster in the pan, locking in color and crunch before the meat overcooks.
The Efficiency Factor: Prep and Plate in Under 35 Minutes
Despite the complex technique, the total time commitment is surprisingly low-about 20 minutes of active prep and 15 minutes of cook time.
The speed and impressive presentation of these Crispy Steak Roll Skewers make them perfect for busy weeknights or unexpected guests.
Sourcing Quality Cuts: The Foundation of Flavor
Choosing the Perfect Steak Cut (Flank vs. Sirloin)
Flank steak or sirloin are ideal because they are lean and can be easily sliced thinly against the grain.
The key is a uniform thickness of about 1/4 inch, which allows the steak to cook quickly and evenly once rolled.
If those cuts are unavailable, top round or even a thin-cut cube steak can work, but ensure all connective tissue is removed before slicing.
Maximizing the Crunch Factor: Panko vs. Standard Breadcrumbs
Panko breadcrumbs, imported from Japanese cuisine, are essential here due to their light, flaky structure.
Unlike standard ground breadcrumbs, panko flakes maintain air pockets, resulting in a noticeably lighter and crunchier final texture.
For dietary needs, certified gluten-free panko options are widely available and perform almost identically to traditional panko.
The Essential Seasoning Blend: Herbs, Garlic, and Parmesan
The combination of finely grated Parmesan, minced garlic, fresh parsley, and dried oregano infuses the coating with deep savory flavor.
The salt and pepper on the meat itself ensure the beef is seasoned from the inside out, while the Parmesan contributes umami and helps create a tight bind when pressed onto the steak.
Precision Prep: Rolling and Securing Your Steak Bundles
Achieving Uniform Slices (Thickness Matters)
Slice the steak into strips that are consistently 1 inch wide and 4 inches long, maintaining the 1/4-inch thickness.
Uniformity is non-negotiable; if some rolls are thicker, they will require longer oven time, leading to overcooked thinner rolls.
Tightly Rolling vs. Tieing: Securing the Cylinder
For a clean presentation, aim to roll each seasoned strip into a tight cylinder starting from one end, applying firm pressure.
If your cuts are slightly irregular or you feel the roll might unravel, securing it temporarily with a small piece of kitchen twine (removed before serving) is advisable.
Best Practices for Threading Wooden Skewers
Always soak wooden skewers in water for at least 30 minutes prior to use to prevent them from burning in the oven.
Thread two to three tightly rolled bundles onto each skewer, ensuring the skewer passes through the roll horizontally and firmly holds all layers together.
The skewer acts as the roll’s structural support, so placement is key; thread near the center for maximum stability.
The Anti-Soggy Solution: Mastering the Two-Part Cooking Method
-
Creating and Applying the Optimized Panko Crust:
In a shallow bowl, combine the panko, Parmesan, herbs, and the 1/4 cup of olive oil, mixing until every crumb is evenly coated and the mixture feels sandy and moist.
Roll the steak skewers through the mixture, then use the heel of your palm to firmly press the coating onto all sides of the beef roll.
Do not just gently dust the rolls; the tight adherence achieved through firm pressure is essential for the crust to set properly and not shed during searing.
-
Setting Up the Two-Step Cook:
Preheat your oven to 400°F (200°C) with a rack in the middle position for efficient heat transfer.
Heat a large, oven-safe skillet (cast iron or stainless steel works best) over medium-high heat with the remaining 2 tablespoons of olive oil and the melted butter.
-
Searing for Color (Why Only Two Minutes Per Side?):
Place the skewers in the shimmering hot fat, ensuring there is ample space between them to prevent steaming.
Sear quickly, for just 2 minutes per side, focusing entirely on developing a deep, golden-brown color on only two opposing sides of the roll.
This high-heat sear instantly sets the pre-oiled crust; any longer, and the internal meat will begin to cook too quickly, compromising the final temperature.
-
Finishing in the Oven: High Heat for the Ultimate Crisp:
Immediately transfer the entire skillet directly into the preheated 400°F oven.
Bake for 6 to 8 minutes; the oven’s high, surrounding heat quickly finishes the internal cook while simultaneously crisping up the remaining unsmoothed layers of panko.
This indirect heat approach prevents the crust from burning while ensuring the inner layer of the coating completely dries out, eliminating greasiness.
-
Temperature Check and Resting:
Remove the skillet when the internal temperature of the beef reaches 135°F (57°C) for perfect medium-rare, or 140°F (60°C) for medium.
Allow the Crispy Steak Roll Skewers to rest for 5 minutes off-heat before garnishing and serving.
Crispy Steak Roll Skewers Troubleshooting and Chef’s Secrets
“My Coating Is Falling Off During Searing!”
If the crust is shedding, it usually means the panko was not pressed firmly enough onto the raw meat rolls in Step 3.
Next time, ensure you use the palm of your hand to create a dense, tightly adhered coating that can withstand the high-heat sear.
It can also indicate the searing fat was not hot enough initially, causing the crust to sit and absorb oil instead of setting immediately.
Why Is My Steak Tough or Overcooked?
Overcooked steak occurs when the initial sear is too long or the oven time is excessive.
Use an instant-read meat thermometer inserted into the center of a roll to verify doneness and pull them immediately at 135°F for medium-rare.
The rapid 2-minute sear per side is strict; any more risks drying out the lean flank steak.
The Skewers Are Crispy, But the Meat Is Still Raw in the Center!
This is a common issue resulting from inconsistent slicing; thicker rolls require significantly more oven time.
If you find this is the case, your best immediate fix is to return the skillet to the oven for 2-3 minute intervals until the target temperature is reached.
For future batches, ensure the steak is uniformly sliced to 1/4 inch thickness for even, rapid cooking.
The Essential Technique of Resting Meat
Resting the skewers for five minutes is mandatory, even for small cuts.
During the cooking process, the heat forces the meat’s moisture and juices outward; resting allows these critical fluids to redistribute evenly throughout the muscle fibers.
Slicing or eating immediately after removing the steak from the oven will result in a loss of moisture and a drier, less tender texture.
Scaling the Recipe for a Crowd
This recipe scales beautifully, but you must avoid overcrowding the searing pan.
If making a large batch, sear the skewers in two or three smaller batches, transferring each completed batch to a separate lined baking sheet before finishing them all simultaneously in the 400°F oven.
Pairing, Serving, and Reheating Your Skewered Delights
Suggested Dipping Sauces and Side Dishes
The rich, herbed steak rolls pair wonderfully with bright, acidic, and creamy components.
Dipping Sauce Ideas: Try a bright, garlicky Chimichurri, a tangy Balsamic Reduction, or a creamy, slightly spicy Horseradish Sauce for contrast.
Suggested Vegetable and Starch Sides: Serve alongside creamy Garlic Mashed Potatoes, a simple Lemon-dressed Arugula Salad, or sautéed Asparagus with Parmesan.
Making Ahead: Prep vs. Cook
You can complete the initial prep work 24 hours in advance to save time.
Slice the steak, roll the cylinders, and thread them onto the soaked skewers, storing them tightly wrapped in the refrigerator.
Crucially, do not apply the panko coating until immediately before searing, as moisture from the raw meat will rapidly soften the crumbs, ruining the crisp factor.
Storage and Reheating Instructions for Maximum Crispness
Store any leftover Crispy Steak Roll Skewers in an airtight container for up to three days.
To revive the shatteringly crisp coating, avoid the microwave entirely.
Reheat leftovers in a 350°F (175°C) oven or an air fryer for 5-7 minutes until heated through and the crust is revitalized.
Frequently Asked Questions About Crispy Steak Roll Skewers
Can I use chicken or pork instead of beef for this method?
Yes, this two-part cooking method is highly effective for any thinly sliced protein.
If using chicken breast or tenderloin, ensure it is cut equally thin and increase the internal temperature target to 165°F (74°C).
What is the best way to slice the steak thinly at home?
For perfect 1/4-inch slices, place the flank steak in the freezer for 20 to 30 minutes until it is stiff but not frozen solid.
This semi-frozen state provides the necessary firmness to slice very thin, uniform strips against the grain using a sharp chef’s knife.
Are wooden skewers necessary, or can I use metal?
Metal skewers are perfectly acceptable and do not require soaking; however, be mindful that they conduct heat much faster.
If using metal, slightly reduce your oven time by 1-2 minutes, as the center of the meat will cook more rapidly due to the heat transfer.
What if I don’t have an oven-safe skillet?
You can still use this method by searing the skewers in a regular skillet on the stovetop as directed.
After searing, immediately transfer the skewers to a baking sheet lined with parchment paper and finish the cooking in the preheated oven.
Ready to Impress? Share Your Crispy Steak Roll Skewers Masterpiece!
The challenge of the soggy crust is officially a thing of the past with this specialized technique for perfectly crisp steak.
Mastering the pre-oiled panko and the brief two-step cooking process guarantees tender, juicy beef wrapped in a savory, golden crunch every single time.
If you followed this guide, please let me know your favorite sauce pairing in the comments below, or share a photo of your success!
Steak Roll Skewers
Course: Main CourseCuisine: InternationalDifficulty: easy4
servings (5 skewers)20
minutes15
minutes550
kcal35
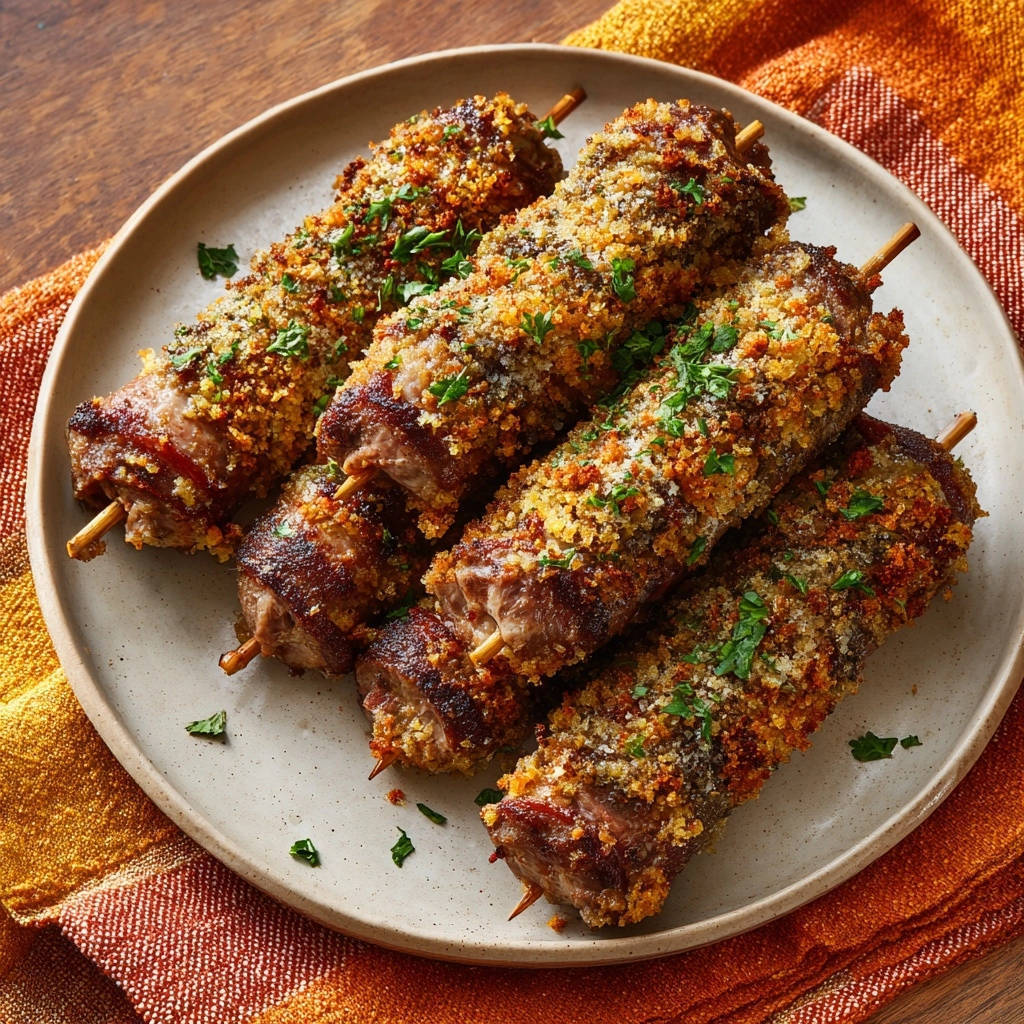
minutesSay goodbye to soggy breading! This recipe uses a secret two-part cooking method (sear then bake) to lock in a golden, shatteringly crispy crust while ensuring the steak remains tender. Perfect texture every time.
Ingredients
1.5 pounds flank or sirloin steak, thinly sliced (1/4 inch thick)
1 teaspoon kosher salt, divided
1/2 teaspoon black pepper, divided
1 cup panko breadcrumbs
1/2 cup finely grated Parmesan cheese
1/4 cup olive oil, plus 2 tablespoons for searing
2 cloves garlic, minced
1 tablespoon fresh parsley, finely chopped, plus extra for garnish
1/2 teaspoon dried oregano
2 tablespoons butter, melted
Wooden skewers
Directions
- Prepare the Steak Rolls: Slice the steak into uniform strips, about 1 inch wide and 4 inches long. Lay the strips flat and season both sides lightly with 1/2 teaspoon salt and 1/4 teaspoon pepper. Starting at one end, tightly roll each strip into a cylinder. If needed, secure the roll with a piece of kitchen twine, though pressing firmly usually works. Thread two to three rolls onto each wooden skewer, ensuring the skewer goes through both sides of the meat to hold the roll together firmly.
- Mix the Crispy Coating (The Crunch Factor): In a shallow bowl, combine the panko breadcrumbs, Parmesan cheese, minced garlic, 1 tablespoon chopped parsley, oregano, the remaining salt and pepper, and the 1/4 cup of olive oil. Mix this thoroughly until the panko is evenly coated and looks sandy. The olive oil is key here; pre-oiling the crumbs helps them brown quickly without absorbing excess fat during cooking.
- Apply the Coating: Roll the meat skewers through the panko mixture. This is the crucial step: use the palm of your hand to firmly press the breading onto the surface of the meat rolls, ensuring the coating adheres tightly to all sides. Do not be gentle; you want a thick, uniform layer.
- The Two-Step Cook (The Anti-Soggy Solution): Preheat your oven to 400 degrees F. Set the oven rack in the middle position. Heat a large oven-safe skillet over medium-high heat and add the remaining 2 tablespoons of olive oil and the melted butter.
- Sear for Color: Once the fat is shimmering hot, place the skewers in the pan, leaving space between them. Sear the rolls for just 2 minutes per side, focusing on developing a deep brown color on two sides only. The goal here is to set the outside crust immediately and start the internal cook, but not to cook the meat through.
- Finish in the Oven: Transfer the skillet immediately to the preheated 400 degree F oven. Bake for 6 to 8 minutes, or until the internal temperature of the beef reaches your desired doneness (around 135 to 140 degrees F for medium-rare to medium). The high heat finish ensures the inner layers of the coating crisp up beautifully without becoming greasy.
- Serve: Remove the skewers from the oven and let them rest for 5 minutes. Garnish generously with fresh parsley before serving hot.
Notes
- The key to the crisp crust is pre-oiling the panko and using the two-step sear-then-bake cooking method.


