
Most skillet chicken recipes promise a crispy finish but deliver a rubbery, steamed disappointment the moment the sauce hits the pan. You’ve likely experienced it before: that beautiful golden skin you worked so hard on turns into a soggy mess once it sits in a bubbling glaze. This recipe changes that dynamic by focusing on a specific cooking architecture that protects the crunch while surrounding the meat with a vibrant, spicy-sweet reduction.
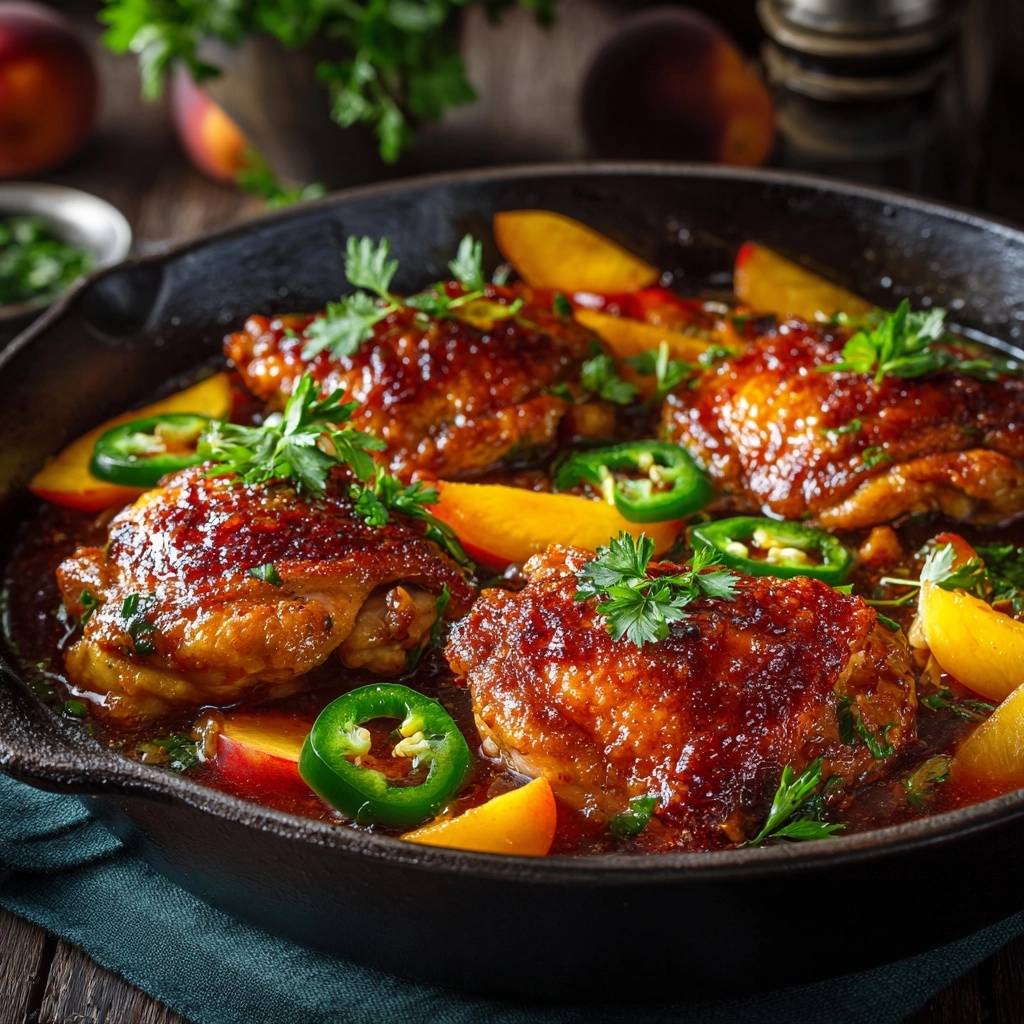
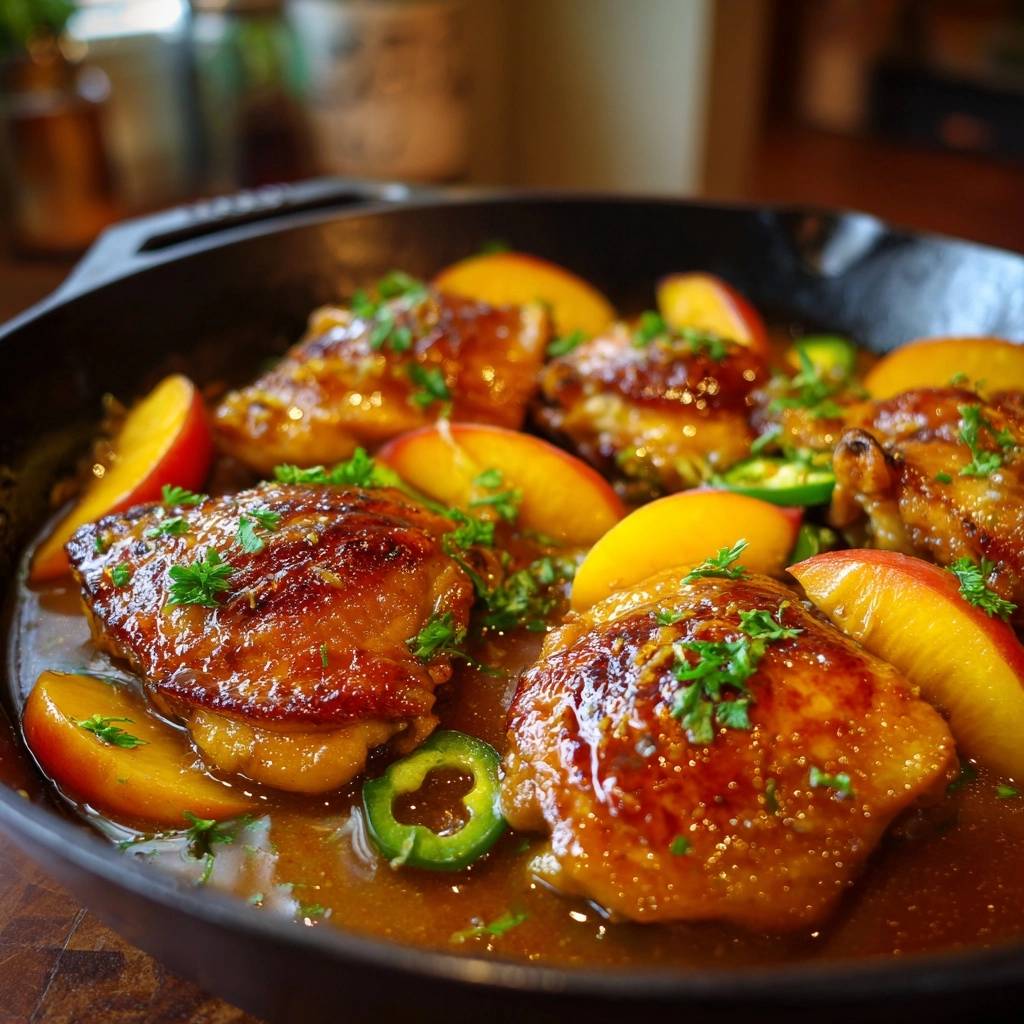
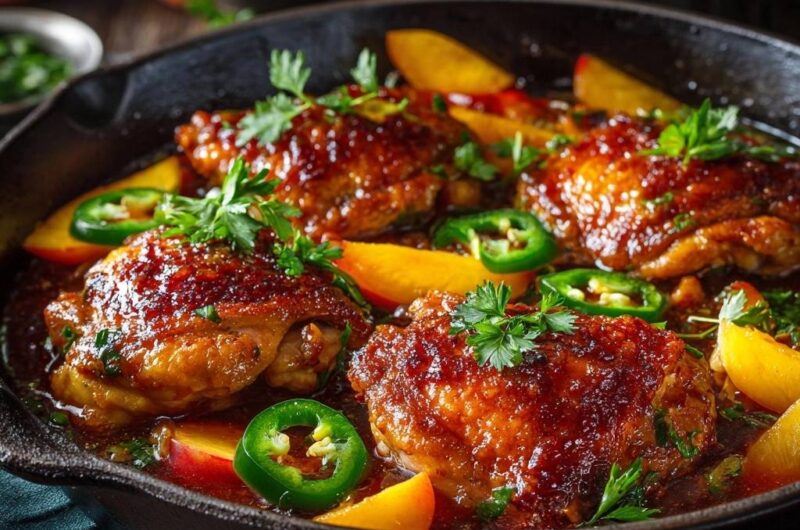
The magic lies in the sensory contrast between the sharp, stinging heat of fresh jalapenos and the mellow, floral sweetness of ripe peaches. By using bone-in, skin-on thighs, we ensure the meat stays incredibly juicy during the reduction process. The bone acts as an insulator, while the skin provides the structural integrity needed to hold up against the bold flavors of the peach glaze.
The secret to this dish is the cold-pan start. While it feels counterintuitive to put meat into a room-temperature skillet, this technique is the only way to achieve a professional-grade render. It allows the fat to liquefy slowly, creating a texture that is shatteringly crisp rather than chewy or tough. You’ll never go back to preheating your pan for chicken thighs again.
The Cold-Pan Method for Rendering Chicken Fat
When you drop a cold chicken thigh into a screaming hot pan, the protein fibers in the skin seize up instantly. This trap prevents the subcutaneous fat from escaping, leaving you with a layer of flabby grease underneath a singed exterior. Therefore, starting with a cold cast-iron skillet is the most effective way to achieve a paper-thin, crunchy skin.
As the pan gradually heats up, the fat begins to melt and pool around the chicken. This process, known as rendering, essentially fries the skin in its own natural oils. Because the temperature rises slowly, the moisture has time to evaporate completely before the browning begins. You’ll notice the skin becomes translucent and then slowly transforms into a deep, golden crust.
This method avoids the “rubber” effect entirely. Instead of a thick, chewy layer of skin, you end up with a delicate, crackling texture. It requires patience, but the result is a superior mouthfeel that stands up to the heavy peach glaze we’ll add later in the process.
For more ways to achieve that satisfying crunch, explore this recipe for black pepper glazed chicken.
Essential Components for the Peach-Jalapeno Glaze
A great glaze needs a balance of four pillars: sweetness, acidity, heat, and umami. We use peach preserves as the base because the natural pectin provides a thick, syrupy body that clings to the chicken. However, preserves alone can be cloying, so we introduce apple cider vinegar to cut through the richness of the rendered chicken fat.
Soy sauce adds a necessary savory depth, providing an umami backbone that bridges the gap between the fruit and the poultry. Freshly grated ginger offers an aromatic warmth that lingers on the palate, while the fresh peaches provide a soft, jammy texture that contrasts with the crispy chicken. Each ingredient plays a specific role in ensuring the sauce is complex rather than just sugary.
Selecting the Best Fresh Peaches
Choosing the right fruit is vital for the final texture of the dish. You want peaches that are firm-ripe; they should give slightly when pressed but still feel sturdy. If the peaches are too soft or overripe, they will disintegrate into a mushy paste during the ten-minute simmer, losing their beautiful wedge shape.
Look for Freestone varieties if they are in season. These are much easier to slice because the pit pulls away cleanly from the flesh. If you can only find clingstone peaches, just work carefully around the pit to keep your wedges thick and uniform so they hold up in the hot skillet.
Balancing Heat: Managing the Jalapeno Scoville Scale
Jalapenos can be unpredictable, ranging from mild to surprisingly spicy. Most of the capsaicin, which provides the heat, is concentrated in the white ribs and the seeds. If you love a bold kick that makes your ears tingle, slice the rounds and toss them in exactly as they are.
If you prefer a milder simmer, take a moment to scrape out the seeds before slicing. Interestingly, the high sugar content in the peach preserves chemically tempers the perception of heat on your tongue. This means you can often handle a bit more spice in this recipe than you might in a savory stir-fry.
Step-by-Step: Achieving Shatteringly Crispy Glazed Chicken
Achieving the perfect texture requires a disciplined approach to moisture management and heat control. If you follow these phases carefully, you’ll produce a dish that looks like it came out of a high-end bistro kitchen.
Phase 1: Moisture Removal and Seasoning
Moisture is the absolute enemy of the Maillard reaction. If your chicken skin is damp, it will steam in the pan rather than fry. Take a stack of paper towels and pat the skin side of the thighs multiple times until the surface feels tacky and dry. Don’t skip this step; it’s the foundation of the entire recipe.
When seasoning, only apply salt to the skin side. Salt draws out deep-seated moisture, helping the skin crisp up even further. Save the smoked paprika and black pepper for the meat side only. Spices like paprika burn easily at high temperatures, and putting them on the skin side would result in a bitter, blackened crust rather than a golden one.
Phase 2: The 15-Minute Undisturbed Render
Place the thighs skin-side down in your cold cast iron and turn the burner to medium. Now, the hardest part: leave them alone. You’ll hear a gentle sizzle that gradually builds into a vigorous pop. This is the sound of the fat rendering out and the skin becoming crisp.
If you’re aiming for moist chicken, consider how sweet potato chicken skillet recipes achieve that tender result.
Use a heavy spatula or a grill press to occasionally push the thighs down. This ensures every millimeter of the skin makes contact with the hot metal. You are looking for a deep mahogany color. If you try to flip the chicken and it sticks, it isn’t ready yet. When the skin is perfectly rendered, it will release from the pan effortlessly.
Phase 3: Deglazing and Fruit Integration
Once you flip the chicken, you’ll see a pool of liquid gold in the pan. This is rendered schmaltz, and it’s packed with flavor. Immediately scatter your peach wedges and jalapeno rounds into the empty spaces around the chicken. Let them sear in that fat for a minute or two until the peaches start to caramelize at the edges.
This brief sear softens the jalapenos and intensifies the natural sugars in the fruit. The aroma at this stage is incredible, as the spicy peppers hit the hot fat and the peaches begin to release their juices. You’re building layers of flavor before the liquid glaze even enters the picture.
Phase 4: The “Dry-Skin” Glazing Technique
This is the most critical technical instruction for maintaining crunch. When you pour the whisked peach glaze into the skillet, do not pour it over the top of the chicken. Instead, pour it into the gaps between the thighs. Use a spoon to gently swirl the sauce so it combines with the chicken fat and touches the bottom of the meat.
By keeping the top skin exposed to the air, it stays dry and crispy while the bottom of the thigh braises in the spicy-sweet liquid. Increase the heat to medium-high and let the sauce bubble. As the water evaporates, the sauce will transform into a thick, syrupy glaze that coats the peaches and the underside of the chicken perfectly.
Troubleshooting Common Skillet Chicken Obstacles
If your chicken skin sticks to the pan, you likely tried to flip it too early. The skin will naturally “self-release” once the proteins have browned and the fat has rendered. If it’s sticking, give it another two minutes and try again. Patience is your best friend when working with cast iron.
If you find your glaze is burning or becoming too dark before the chicken is cooked, your heat is too high. The sugar in the preserves can go from caramelized to scorched very quickly. Simply add a splash of water or more vinegar to loosen the sauce and turn the heat down to medium-low to finish the cooking process.
Finally, always use a meat thermometer to check the internal temperature. Because we are using bone-in thighs, the meat near the bone can stay raw even when the outside looks done. Ensure the thickest part of the thigh reaches 165°F. This guarantees the meat is safe to eat while remaining incredibly succulent.
Optimal Side Dishes for Spicy Fruit Glazes
You want a side dish that can act as a sponge for that extra peach-jalapeno reduction. A fluffy bed of jasmine rice or quinoa is perfect for soaking up the syrupy sauce. If you want something more rustic, a thick slice of toasted sourdough is excellent for mopping up the skillet juices.
Completing Your Meal
To complement your Glazed Peach and Jalapeno Chicken Thighs, consider these flavorful additions.
- For a sweet and spicy bread that pairs well with the chicken’s flavors, try this Jalapeño Honey Cornbread.
- Add a refreshing element to your plate with this Summer Kale Salad with Blueberries & Peaches, featuring some of the same fruit notes.
To balance the richness and sweetness, serve a bitter green salad on the side. Arugula or shredded kale tossed in a sharp lemon vinaigrette provides a necessary acidic counterpoint. The brightness of the greens cleanses your palate between bites of the decadent, glazed chicken.
Flavor Variations and Ingredient Swaps
This technique works beautifully with other stone fruits if peaches aren’t in season. Nectarines are a seamless substitute, or you can use apricots for a slightly more tart profile. If you want to ramp up the heat significantly, swap the jalapeno for a thinly sliced habanero, which shares a fruity undertone that pairs perfectly with peach.
For a smokier version of this dish, use poblano peppers instead of jalapenos. They offer a much milder heat but a deeper, earthier flavor. If you run out of peach preserves, you can use honey or maple syrup in a pinch, though you may need to simmer the sauce a bit longer to reach that thick, jammy consistency.
Storage and Reheating for Maximum Texture Retention
While the flavor of this chicken improves the next day, the skin will naturally soften in the refrigerator as it absorbs moisture from the sauce. To revive that signature crunch, avoid the microwave at all costs. The microwave will turn the skin rubbery and the peaches into mush.
Instead, place the leftovers in an air fryer or a 400°F oven for about 8 to 10 minutes. This high, dry heat will recrisp the skin and warm the glaze without overcooking the meat. If the sauce has thickened too much in the fridge, a tiny splash of water in the pan during reheating will bring it back to its original syrupy glory.
Expert Tips for Professional Results
For the best heat retention and even browning, always use a heavy cast-iron skillet. The thick metal holds onto heat much better than stainless steel, which prevents the pan temperature from dropping when you add the cold fruit. It’s the best tool for achieving that mahogany crust.
When prepping your aromatics, grate the ginger as finely as possible using a microplane. This allows the ginger to melt into the sauce, distributing its warmth evenly rather than leaving you with woody bits to chew on. It makes the glaze feel much more refined and professional.
Always let the chicken rest for at least five minutes before serving. This allows the juices to redistribute through the meat, ensuring every bite is moist. If you cut into it immediately, the juices will run out onto the plate, and you’ll lose that succulent texture you worked so hard to achieve.
Finally, use a splatter screen if you have one. The rendering process can be a bit messy as the fat pops in the pan. A screen allows steam to escape so the skin stays crispy, but it keeps your stovetop clean. It’s a small tool that makes a huge difference in the kitchen experience.
How do I store leftovers?
Store the chicken and peaches in an airtight container in the refrigerator for up to three days. Keep as much of the glaze as possible with the chicken to keep it moist. I do not recommend freezing this dish, as the peaches will become very grainy and the skin will lose its structural integrity once thawed.
Why is my chicken skin still soft?
This usually happens for two reasons: either the chicken wasn’t dried thoroughly before cooking, or the pan was too crowded. If the thighs are touching each other too closely, they trap steam between them, which prevents the skin from crisping. Use a large enough skillet so there is at least an inch of space between each piece of meat.
Can I use chicken breasts instead of thighs?
You can, but you must be very careful not to overcook them. Breasts are much leaner and dry out quickly. If using breasts, I recommend keeping the skin on and using the same cold-pan method, but reduce the simmering time in the glaze to ensure the internal temperature doesn’t go past 165°F. Thighs are much more forgiving for this specific braising technique.
What if I don’t have apple cider vinegar?
Rice vinegar or white wine vinegar are the best substitutes. They both provide the necessary acidity to balance the sugar in the preserves. Avoid using balsamic vinegar, as the flavor is too dominant and will muddy the bright, floral notes of the peach.
Is this dish very spicy?
It has a moderate kick, but it is easily adjustable. The sugar in the peach preserves does a great job of neutralizing the “burn” of the jalapeno. If you are sensitive to heat, remove all the seeds and ribs from the pepper before slicing, or use half a bell pepper for flavor without any spice at all.
Glazed Chicken Thighs
Course: Main CourseCuisine: AmericanDifficulty: medium4
servings15
minutes30
minutes440
kcal45
MinutesA skillet chicken dish that solves the problem of rubbery skin. By starting in a cold pan and finishing with a high-heat peach and jalapeno reduction, you get shatteringly crisp skin paired with a syrupy, spicy-sweet sauce.
Ingredients
4 bone-in, skin-on chicken thighs
2 large fresh peaches, sliced into thick wedges
1 large jalapeno, sliced into rounds (seeds left in for heat)
1/2 cup peach preserves
2 tablespoons apple cider vinegar
1 tablespoon soy sauce
1 teaspoon grated fresh ginger
1/2 teaspoon smoked paprika
1 tablespoon neutral oil (like avocado or vegetable oil)
Kosher salt and cracked black pepper to taste
Fresh cilantro or parsley for garnish
Directions
- Pat the chicken thighs extremely dry with paper towels. This is the most important step for crispiness. Season the meat side with salt, pepper, and smoked paprika. Season the skin side only with salt.
- Place the chicken skin-side down in a COLD cast-iron skillet. Only then, turn the heat to medium. Starting in a cold pan allows the fat to render out slowly without the skin seizing or burning.
- Cook undisturbed for 12-15 minutes. Use a heavy spatula to press the thighs down occasionally to ensure even contact. Do not flip until the skin is deep mahogany brown and releases easily from the pan.
- While the chicken renders, whisk together the peach preserves, apple cider vinegar, soy sauce, and grated ginger in a small bowl.
- Once the skin is crispy, flip the chicken. Immediately scatter the fresh peach wedges and jalapeno rounds into the rendered chicken fat in the empty spaces of the skillet.
- Carefully pour the peach glaze into the pan around the chicken. Crucial Step: Do not pour the sauce over the skin. Use a spoon to ensure the sauce touches the bottom of the chicken and the peaches, but keep the top skin dry to preserve the crunch.
- Increase heat slightly to medium-high. Simmer for 8-10 minutes. The sauce will reduce into a thick, syrupy glaze (as seen in the image) while the chicken finishes cooking to an internal temperature of 165°F.
- Remove from heat. Garnish with fresh herbs and serve immediately, spooning the thickened spicy-sweet glaze and softened peaches onto plates first, then nesting the crispy chicken on top.
Notes
- The most important step for crispiness is patting the chicken extremely dry and starting in a cold pan. When adding the glaze, ensure you do not pour it over the skin to preserve the crunch.


