
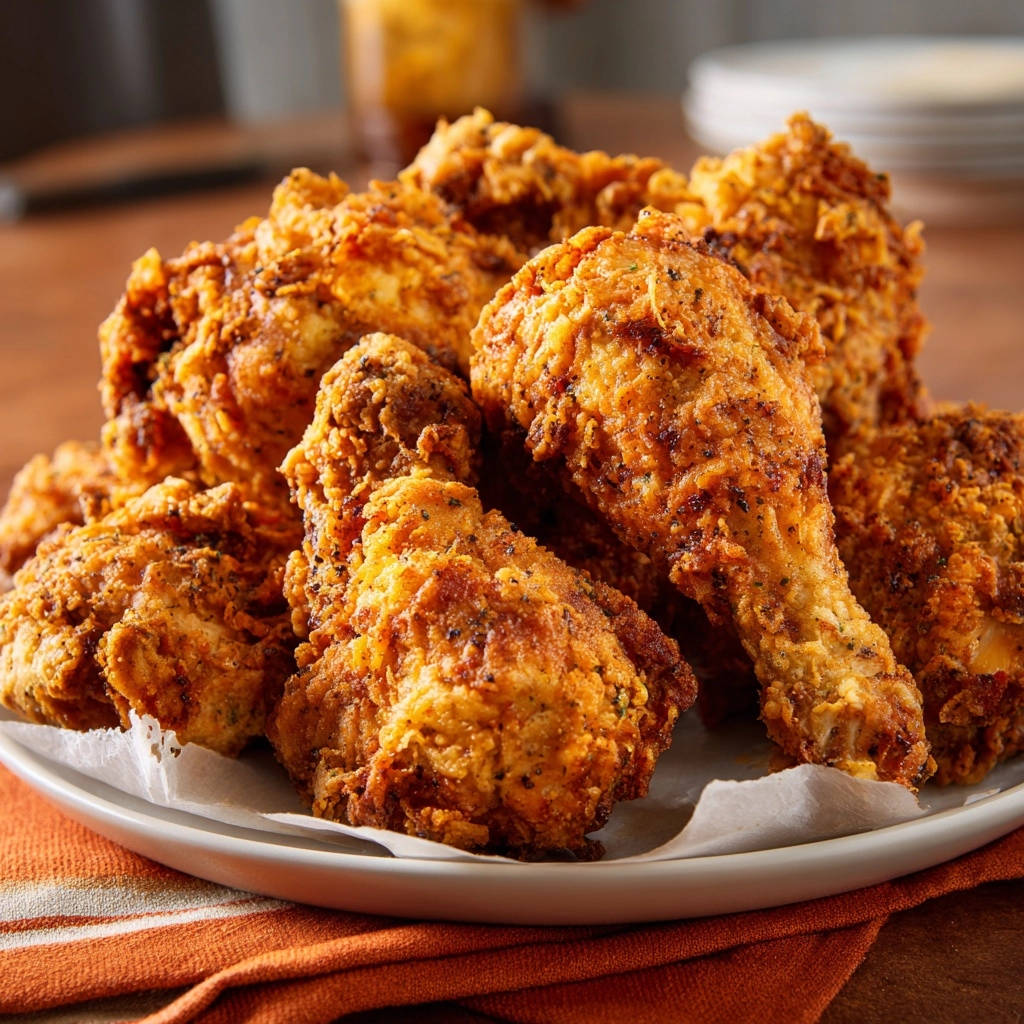
I used to think achieving truly Golden Crispy Fried Chicken at home was an elusive restaurant secret, always ending up with dry meat or a lackluster crust. But after countless experiments, I finally cracked the code to that perfect balance.
This recipe isn’t just another fried chicken guide; it’s a meticulously developed method that guarantees incredibly juicy, tender chicken with an unbelievably crisp, golden-brown coating every single time. Get ready to impress yourself and your loved ones with your new go-to Golden Crispy Fried Chicken masterpiece!
Why This Golden Crispy Fried Chicken Recipe is a Game-Changer
The Buttermilk Brine Advantage: Unlocking Ultimate Tenderness
Our buttermilk brine is the absolute secret weapon for profoundly juicy chicken.
The lactic acid in the buttermilk gently breaks down muscle fibers, ensuring tender meat that practically melts in your mouth. It also infuses deep flavor, preventing any dryness.
That Unforgettable Crispy, Golden Crust (It’s Easier Than You Think!)
Achieving that iconic, shatteringly crisp exterior is simpler than you’d imagine with this recipe.
The combination of all-purpose flour and cornstarch in the dredge, along with a firm pressing technique, creates that desired “thick, craggy coating” that fries up beautifully golden.
Simple Steps, Spectacular Results: Your New Go-To Recipe
Don’t let the thought of frying intimidate you; this recipe breaks down the process into clear, manageable steps.
From brining to the final glorious bite, you’ll find it an approachable path to restaurant-quality Golden Crispy Fried Chicken right in your own kitchen.
And for another great way to enjoy this style, check out these crispy fried chicken and waffles.
Assembling Your Arsenal: Ingredients for Perfect Fried Chicken
Choosing Your Chicken Pieces Wisely
We recommend 3 pounds of mixed bone-in, skin-on chicken pieces, such as drumsticks and thighs.
Bone-in chicken cooks more evenly and stays juicier, while the skin crisps up beautifully and protects the meat from drying out.
The Heart of Flavor: Buttermilk and Dry Seasonings
Four cups of tangy buttermilk form the tenderizing and flavorful base of our brine.
A blend of salt, black pepper, garlic powder, onion powder, paprika, and optional cayenne pepper creates a complex, savory profile that penetrates every bite.
The Secret to the Crunch: Flour & Cornstarch Blend
Two cups of all-purpose flour provide the bulk of our seasoned coating.
Adding 1/4 cup of cornstarch is the brilliant trick to ensuring an extra-crispy, almost delicate crunch that holds up beautifully.
Selecting the Right Frying Oil
You’ll need about 4 cups of vegetable oil for frying.
Vegetable oil has a high smoke point and neutral flavor, making it ideal for achieving that perfect golden hue without imparting unwanted tastes.
Beyond the Basics: Essential Tools for Frying Success
- Large Mixing Bowls: You’ll need at least two – one for the buttermilk brine and another for the seasoned flour dredge.
- Wire Rack & Baking Sheet: Crucial for resting brined chicken, draining coated chicken, and allowing fried chicken to cool while maintaining crispiness.
- Heavy-Bottomed Pot or Dutch Oven: Essential for even heat distribution and maintaining oil temperature, which is key for consistent frying.
- Deep-Fry Thermometer: Absolutely critical for monitoring and maintaining the precise oil temperature; don’t skip this for truly Golden Crispy Fried Chicken.
- Tongs: For safely handling hot chicken and placing/removing pieces from the hot oil.
From Brine to Bite: Crafting Your Golden Crispy Fried Chicken
The Crucial Brining Process: Infusing Flavor and Moisture
- Prepare the Buttermilk Brine: In a spacious bowl, thoroughly whisk together 4 cups of buttermilk, 1 tablespoon of salt, 1/2 tablespoon of black pepper, 1/2 tablespoon of garlic powder, and 1/2 tablespoon of onion powder.
- Brine the Chicken: Submerge your chicken pieces fully in the buttermilk mixture. Cover the bowl tightly and refrigerate for a minimum of 4 hours, or ideally, overnight. This extended soak is the secret to incredibly tender, flavorful meat, as the acidity works its magic on the proteins.
Prepping for the Perfect Coat
- Bring to Room Temperature: Before cooking, take the brined chicken out of the refrigerator and let it rest on the counter for about 30 minutes. This allows for more even cooking, preventing cold spots.
- Craft the Dry Dredge: In a separate shallow dish or a large resealable bag, combine 2 cups of all-purpose flour, 1/4 cup of cornstarch, the remaining 1 tablespoon of salt, 1/2 tablespoon of black pepper, 1/2 tablespoon of garlic powder, 1/2 tablespoon of onion powder, paprika, and cayenne pepper (if you like a little heat). Whisk or shake until all the spices are thoroughly integrated.
Mastering the Dredge: Achieving that “Craggy” Texture
- Coat Each Piece: Working with one chicken piece at a time, remove it from the buttermilk, allowing any excess liquid to drip off – do not rinse. Liberally dredge the chicken in the seasoned flour mixture, pressing firmly on all sides to ensure a thick coating adheres. You’re aiming for that signature “craggy” texture, which translates to extra crispiness. Place the coated chicken on a clean wire rack while you repeat with the rest.
Heating Your Oil: Precision is Key
- Heat the Frying Oil: Pour about 4 inches of vegetable oil into a large, heavy-bottomed pot or Dutch oven. Heat the oil over medium-high heat until your deep-fry thermometer registers 350°F (175°C). Maintaining this precise temperature is paramount for a crispy crust and thoroughly cooked interior.
The Fry: Timing and Temperature Control
- Fry in Batches: Carefully lower 3-4 chicken pieces into the hot oil, making sure not to overcrowd the pot. Overcrowding drops the oil temperature too quickly, leading to greasy chicken. Continue to monitor and adjust your heat to maintain the oil temperature between 325-350°F (160-175°C).
- Cook to Golden Perfection: Fry the chicken for 6-8 minutes per side, turning occasionally, until each piece achieves a deep, appetizing golden-brown color and is cooked through. Drumsticks and thighs generally require 15-20 minutes total. For ultimate safety and doneness, an internal temperature of 165°F (74°C) should be reached at the thickest part of the meat, avoiding the bone.
Resting and Serving Your Masterpiece
- Drain and Rest: Once cooked, use tongs to carefully remove the chicken from the oil. Place it on a clean wire rack set over a baking sheet to allow any excess oil to drain. This crucial step also helps to preserve the exquisite crispiness of the crust. Repeat this process with any remaining chicken pieces, always allowing the oil to return to the proper temperature between batches.
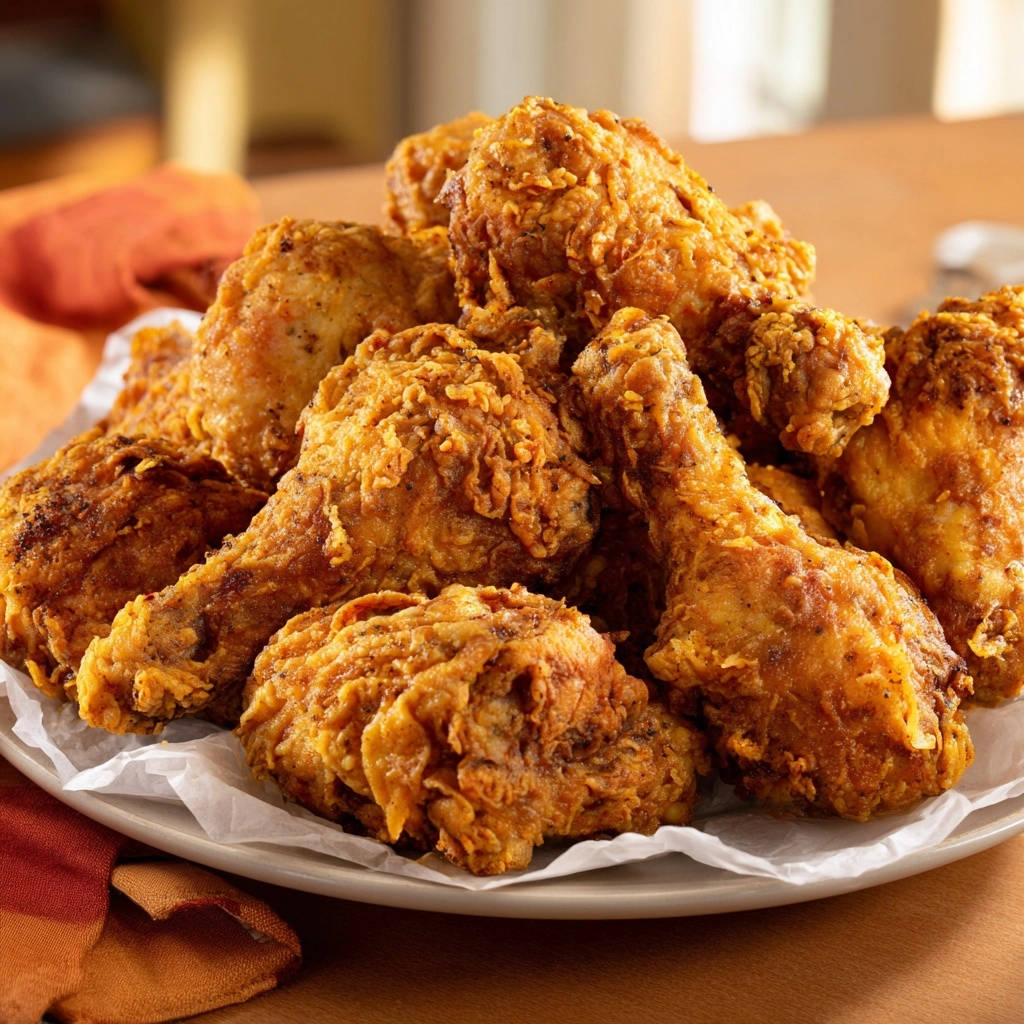
- Serve and Enjoy: Serve your Golden Crispy Fried Chicken hot and revel in the juicy, flavorful meat encased in that perfect, irresistible crispy coating!
Elevate Your Fry Game: Expert Tips & Tricks for Golden Crispy Fried Chicken
Why Brine Duration Matters
An overnight brine (12-24 hours) yields the most tender and flavorful results, allowing the buttermilk to deeply penetrate the chicken. Too short a brine, and you miss out on tenderness; too long (over 24 hours), and the chicken can become mushy.
The Science of Oil Temperature
Maintaining the oil between 325-350°F is critical. If the oil is too cool, the chicken absorbs too much oil and becomes greasy; if it’s too hot, the exterior burns before the inside cooks through. A thermometer is your best friend here.
Room Temperature Chicken: A Small Step, Big Impact
Bringing your chicken to room temperature for 30 minutes before frying ensures that the heat penetrates the meat more evenly. This prevents a raw center or an overcooked exterior.
Ensuring Coating Adherence
The key to a spectacular crust is a firm dredge. Don’t rinse the chicken after brining; the buttermilk helps the flour stick. Press the flour mixture onto every surface, ensuring a thick, “craggy” layer that will fry up beautifully.
The Importance of a Resting Rack
Always drain your fried chicken on a wire rack set over a baking sheet, rather than directly on paper towels. This allows air to circulate around all sides, preventing condensation and keeping the crust exquisitely crispy.
Solving Common Fried Chicken Conundrums
“Why is My Fried Chicken Greasy?”
Greasy fried chicken is almost always a sign that your oil temperature was too low. Ensure your oil stays between 325-350°F (160-175°C) and avoid overcrowding the pot, which instantly cools the oil.
Also, make sure to drain the chicken on a wire rack post-frying to allow excess oil to drip away.
“My Coating Isn’t Crispy Enough!”
For a truly crispy coating, ensure your dry dredge includes cornstarch and that you’ve pressed it firmly onto the chicken. Additionally, make sure your oil is at the correct temperature; oil that’s too cool won’t give you that golden, crisp finish.
“Is My Chicken Cooked Through?”
The most reliable way to check for doneness is with a meat thermometer. Insert it into the thickest part of the chicken, avoiding the bone, until it reads 165°F (74°C).
The juices should also run clear when pierced, but temperature is the definitive indicator.
“The Crust is Falling Off!”
This often happens if the chicken wasn’t properly dredged or if it was handled too much after coating. Ensure you press the flour mixture firmly onto all surfaces of the chicken. Also, try to handle the chicken minimally once it’s coated and again when it’s frying.
What to Serve with Your Golden Crispy Fried Chicken
Classic sides like creamy coleslaw or a fresh green salad offer a refreshing contrast to the richness of the chicken.
For a comforting and hearty accompaniment, a generous serving of fluffy mashed potatoes is always a crowd-pleaser.
Sweet cornbread or tender collard greens also make fantastic pairings, completing a truly satisfying meal.
For a truly satisfying meal, consider pairing this with our crispy chicken and waffles.
Make-Ahead, Storage, and Reheating Best Practices
Prepping Ahead: Brine and Beyond
The buttermilk brine is perfect for making ahead; you can brine the chicken for up to 24 hours. The seasoned flour dredge can also be prepared in advance and stored in an airtight container at room temperature.
Complementary Flavors
To round out your fried chicken meal, consider these complementary bread recipes.
- For a moist and flavorful bread experience, try this golden skillet cornbread, which uses a special method to avoid dryness.
- Enjoy a touch of sweet heat with jalapeño honey cornbread, featuring a technique that locks in moisture for a tender crumb.
Keeping Leftovers Delicious
Store any leftover Golden Crispy Fried Chicken in an airtight container in the refrigerator for up to 3-4 days. While it won’t be quite as crisp straight from the fridge, it will still be delicious.
Reviving that Crispiness: Reheating Tips
To bring back some of that amazing crispiness, reheat fried chicken in a preheated oven or air fryer. Place pieces on a wire rack and bake at 350°F (175°C) for 15-20 minutes, or air fry at 350°F for 8-10 minutes, until heated through and crisp.
Your Golden Crispy Fried Chicken Questions Answered
Can I Use Different Cuts of Chicken?
Absolutely! While drumsticks and thighs are recommended for their juiciness and flavor, you can use other bone-in, skin-on cuts. Just be mindful that cooking times may vary, especially for larger pieces or chicken breasts, which can dry out more easily.
What If I Don’t Have Buttermilk?
No buttermilk? No problem! You can easily make your own by adding 1 tablespoon of white vinegar or lemon juice to a measuring cup, then filling the rest with regular milk until it reaches 1 cup. Let it sit for 5-10 minutes until it slightly curdles, then use it as directed.
Is There a Healthier Frying Method?
While deep-frying yields the most authentic experience, you can achieve a similar result with less oil by pan-frying in about 1 inch of oil or using an air fryer. Adjust cooking times and check internal temperatures carefully to ensure doneness, though the texture won’t be identical to deep-frying.
How Do I Know When the Oil is Hot Enough Without a Thermometer?
While a thermometer is highly recommended, you can test the oil by dropping a pinch of flour into it. If it sizzles vigorously and immediately, the oil is ready. If it barely sizzles, it’s too cool; if it browns instantly, it’s too hot.
For optimal results and safety, consider investing in a reliable deep-fry thermometer for all your frying endeavors, like when making crispy fried fish.
Ready to Fry? Share Your Golden Crispy Fried Chicken Success!
There’s nothing quite like the satisfaction of biting into perfectly made Golden Crispy Fried Chicken, knowing you created that magic yourself. This recipe is more than just instructions; it’s an invitation to elevate your home cooking and create memorable meals.
So roll up your sleeves, grab your ingredients, and get ready to experience the joy of truly amazing homemade fried chicken. Don’t forget to share your triumphs and photos with us!
Fried Chicken
Course: Main CourseCuisine: AmericanDifficulty: hard4
servings25
hours20
minutes1200
kcal45
minutesStruggled with dry fried chicken? This recipe cracks the code, guaranteeing perfectly juicy meat with an unbelievably crispy, golden crust. The secret is a crucial buttermilk brine that locks in moisture and tenderizes the chicken, making every bite a delight.
Ingredients
3 pounds mixed bone-in, skin-on chicken pieces (drumsticks, thighs)
4 cups buttermilk
2 tablespoons salt, divided
1 tablespoon black pepper, divided
1 tablespoon garlic powder, divided
1 tablespoon onion powder, divided
1 teaspoon paprika
1/2 teaspoon cayenne pepper (optional, for a little kick)
2 cups all-purpose flour
1/4 cup cornstarch
4 cups vegetable oil, for frying
Directions
- In a large bowl, whisk together the buttermilk, 1 tablespoon of salt, 1/2 tablespoon of black pepper, 1/2 tablespoon of garlic powder, and 1/2 tablespoon of onion powder.
- Add the chicken pieces to the buttermilk mixture, ensuring they are fully submerged. Cover the bowl and refrigerate for at least 4 hours, or preferably overnight. This crucial step is the secret to locking in moisture and ensuring tender, flavorful meat. The acidity of the buttermilk also helps to break down the proteins, making the chicken incredibly tender.
- When ready to cook, remove the chicken from the refrigerator and let it sit at room temperature for about 30 minutes. This helps the chicken cook more evenly.
- In a separate shallow dish or large resealable bag, combine the flour, cornstarch, remaining 1 tablespoon of salt, 1/2 tablespoon of black pepper, 1/2 tablespoon of garlic powder, 1/2 tablespoon of onion powder, paprika, and cayenne pepper (if using). Whisk or shake to combine thoroughly.
- Working with one piece at a time, remove the chicken from the buttermilk, allowing excess liquid to drip off. Do not rinse. Dredge the chicken liberally in the seasoned flour mixture, pressing firmly to ensure the flour adheres to all surfaces. You want a thick, craggy coating. Place the coated chicken on a wire rack while you prepare the remaining pieces.
- Pour the vegetable oil into a large, heavy-bottomed pot or Dutch oven until it is about 3 inches deep. Heat the oil over medium-high heat until it reaches 350 degrees Fahrenheit. A thermometer is highly recommended for accurate temperature control, which is key for a crispy crust and perfectly cooked interior.
- Carefully lower 3-4 pieces of chicken into the hot oil, ensuring not to overcrowd the pot. Overcrowding will lower the oil temperature too much, resulting in greasy chicken. Maintain the oil temperature between 325-350 degrees Fahrenheit throughout the frying process.
- Fry the chicken for 6-8 minutes per side, turning occasionally, until it is a deep golden brown and cooked through. Drumsticks and thighs typically take 15-20 minutes total, or until an internal temperature of 165 degrees Fahrenheit is reached at the thickest part of the meat (avoiding the bone).
- Once cooked, use tongs to remove the chicken from the oil and place it on a clean wire rack set over a baking sheet to drain any excess oil. This also helps keep the crust crispy. Repeat with the remaining chicken pieces, allowing the oil to come back up to temperature between batches.
- Serve hot and enjoy that incredibly juicy, flavorful meat with a perfect crispy coating!
Notes
- Buttermilk brining is the crucial step for incredibly tender, juicy chicken and helps achieve that signature crispy crust.


