
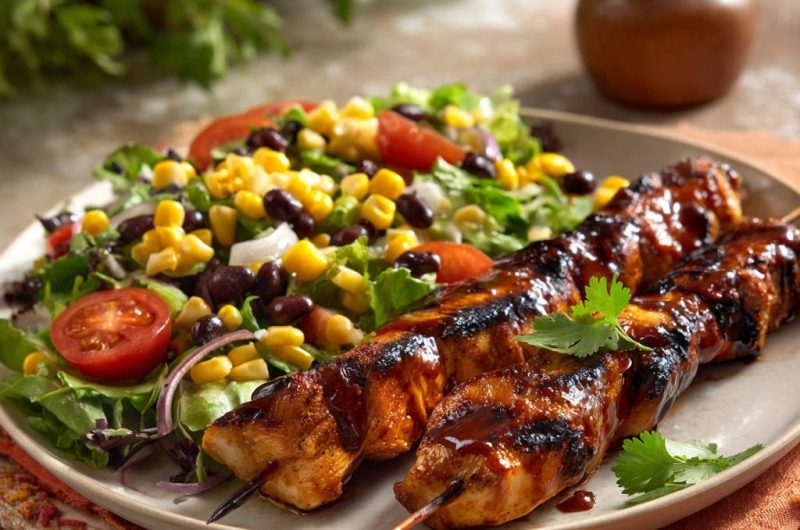
Biting into a dry, flavorless chicken skewer can truly deflate your grilling dreams. I’ve experimented tirelessly to perfect the art of making Grilled Chicken Skewers that are consistently tender, infused with flavor, and boast that irresistible caramelized BBQ glaze.
This recipe isn’t just about cooking chicken; it’s about mastering a technique that guarantees juicy results every time, turning a simple meal into a delightful experience. Get ready to elevate your grilling game with skewers that are perfect for any occasion.
Why This Grilled Chicken Skewers Recipe Will Be Your New Go-To
The Secret to Consistently Juicy Chicken
The key to avoiding dry chicken lies in a few simple, yet crucial, steps within this recipe. We focus on uniform cutting and the essential resting period.
These techniques ensure every bite of your Grilled Chicken Skewers remains succulent and moist, never disappointing your palate.
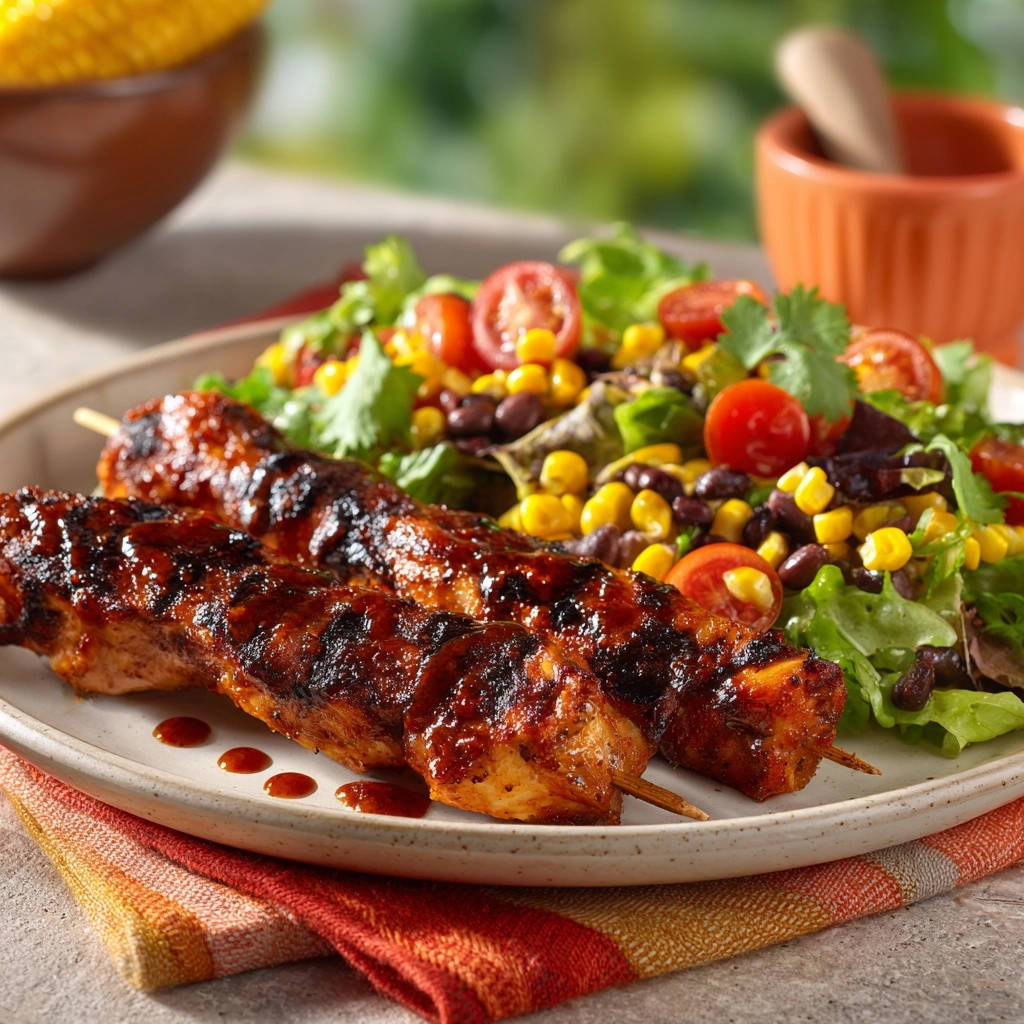
That Irresistible Caramelized BBQ Glaze
Timing is everything when it comes to a sticky, sweet, and perfectly caramelized BBQ glaze. We apply the sauce strategically, allowing it to develop rich flavors without burning.
This method creates a beautiful, deeply flavored crust that locks in moisture and adds an incredible dimension to your chicken.
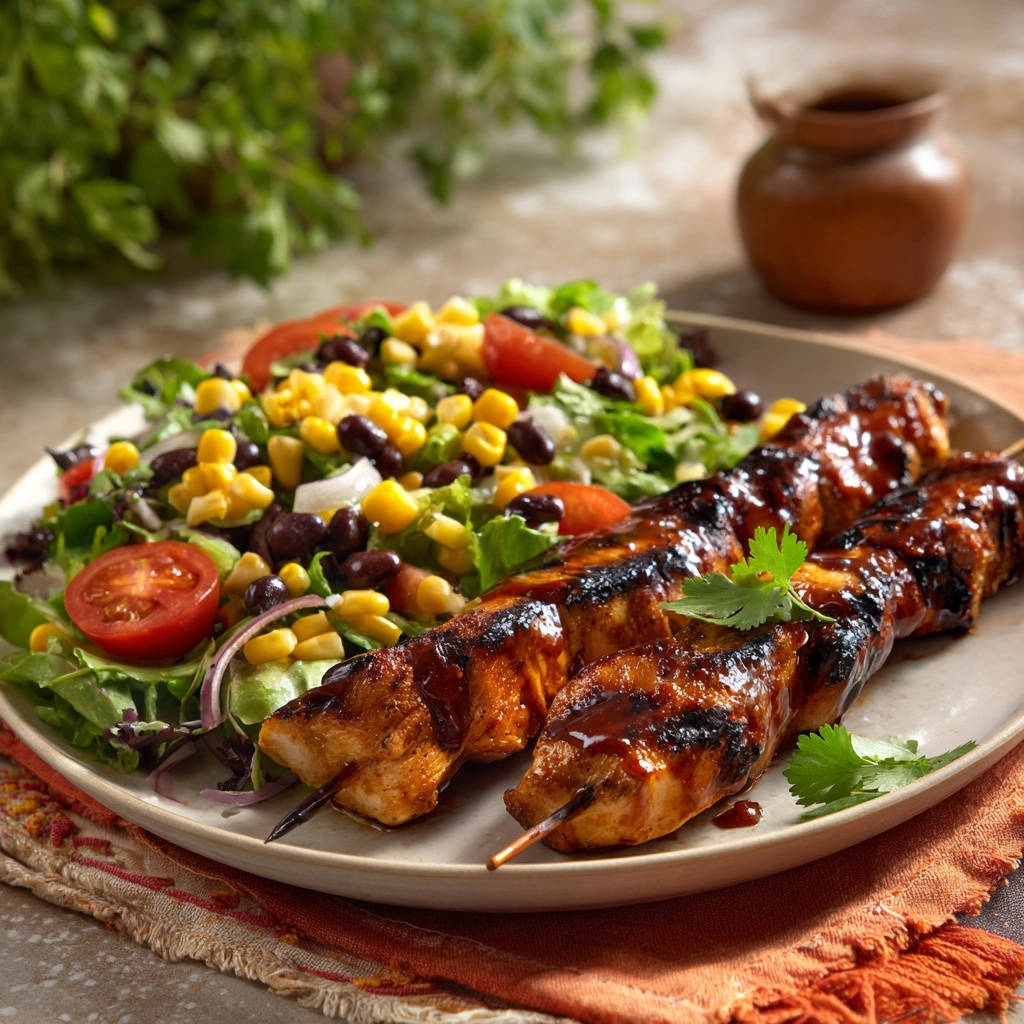
A Complete Meal: Skewers with a Fresh, Zesty Salad
This isn’t just a recipe for chicken; it’s a blueprint for a balanced and vibrant meal. The accompanying fresh, zesty salad perfectly complements the savory skewers.
It adds a bright contrast and nutritional value, making these Grilled Chicken Skewers a satisfying dish on their own.
Essential Tools for Your Grilled Chicken Skewers Adventure
Having the right equipment makes all the difference for a smooth and successful grilling experience. These tools are worth the investment for any home cook.
Your Trusty Grill & Clean Grates
A properly preheated grill ensures even cooking and beautiful grill marks. Always start with clean grates to prevent sticking and transfer unwanted flavors to your food.
Lightly oiling the grates further aids in preventing the chicken from adhering, guaranteeing easy turning and removal.
Skewer Choices: Wood vs. Metal
Metal skewers are reusable and conduct heat, which can help cook the chicken from the inside. They are durable and often come with convenient handles.
Wooden skewers are disposable and cost-effective, but require soaking in water for at least 30 minutes before use. This prevents them from charring or catching fire on the hot grill.
The Instant-Read Thermometer: Your Juiciness Guardian
This tool is non-negotiable for perfectly cooked chicken. An instant-read thermometer takes the guesswork out of grilling, ensuring your chicken reaches the safe internal temperature of 165°F (74°C).
It’s the only reliable way to confirm doneness without overcooking, keeping your Grilled Chicken Skewers wonderfully juicy every time.
Basic Kitchen Prep Gear
You’ll need a sturdy cutting board and a sharp chef’s knife for safely and uniformly cubing the chicken. Large mixing bowls are essential for seasoning the chicken and preparing the salad.
Long-handled tongs are crucial for safely turning skewers on a hot grill, allowing you to maintain control and prevent burns.
Building Blocks of Flavor: Your Ingredient List for Success
Each ingredient in this recipe plays a vital role in creating the tender, flavorful Grilled Chicken Skewers you’re aiming for. Quality matters here.
The Star Protein: Boneless, Skinless Chicken Breasts
Opt for high-quality, boneless, skinless chicken breasts. These cook relatively quickly and absorb marinades well.
Patting the chicken dry with paper towels before seasoning is crucial; it helps spices adhere better and promotes better browning on the grill.
The Flavor Powerhouse: Your Favorite BBQ Sauce
Choose a BBQ sauce you genuinely love, as it will be the dominant flavor of the glaze. Whether smoky, sweet, or spicy, ensure it’s a good quality brand.
This allows for personal customization, letting you tailor the taste of these delicious BBQ chicken skewers to your preference.
Freshness on the Side: Salad Essentials
Mixed greens provide a crisp, refreshing base to balance the richness of the chicken. Cooked corn kernels add a touch of sweetness and texture.
Black beans contribute earthy notes and protein, while thinly sliced red onion offers a sharp, vibrant crunch. Halved cherry tomatoes burst with juicy freshness, completing the colorful medley.
Zesty Finish: The Lime Dressing Components
Good quality olive oil forms the smooth base of our light dressing. Fresh lime juice provides essential acidity, cutting through richness and brightening the entire dish.
A touch of salt and black pepper enhances all the natural flavors, creating a simple yet effective complement to the salad.
Pantry Staples & Seasonings
Olive oil is used to coat the chicken, helping the seasonings stick and promoting browning. Salt and black pepper are fundamental for seasoning the chicken from within.
Fresh cilantro, used as a garnish, adds a burst of herbal freshness and a beautiful pop of color to the finished plate.
Mastering the Grill: Your Step-by-Step Skewer Guide
Preparing the Chicken & Skewers
Start by patting your chicken breasts completely dry with paper towels. Then, cut the chicken into uniform 1-inch cubes to ensure even cooking throughout.
Toss the chicken cubes in a bowl with 1 tablespoon of olive oil, 1/2 teaspoon of salt, and 1/4 teaspoon of black pepper until evenly coated. Thread the seasoned chicken onto your prepared skewers, leaving a small space between each piece to allow heat to circulate for optimal cooking.
Grill Setup: Heat & Prep
Preheat your grill to medium-high heat, aiming for a temperature of about 400°F (200°C). This consistent heat is vital for achieving good grill marks and cooking the chicken efficiently.
Once hot, lightly oil the grill grates using a paper towel dipped in a little oil, carefully wiping it over the grates with tongs. This crucial step prevents the chicken from sticking.
The Initial Grill: Achieving Perfect Marks
Place the Grilled Chicken Skewers directly onto the preheated and oiled grates. Cook them for 6 to 8 minutes initially, turning them occasionally to get even browning on all sides.
This first stage creates those desirable char marks and begins to cook the chicken through, building flavor before the sauce is added.
Glazing & Finishing: The Flavor Layer
During the final 5 minutes of grilling, brush your favorite BBQ sauce generously over all sides of the skewers. Continue to grill, turning frequently, to allow the sauce to caramelize without burning.
Keep a close eye on the internal temperature; the chicken should reach 165°F (74°C) as measured with an instant-read thermometer. Applying the sauce late in the process prevents it from burning and ensures it forms a glossy, flavorful glaze, sealing in moisture.
The Golden Rule: Resting for Juiciness
Once the chicken is cooked through, carefully remove the skewers from the grill and place them on a clean plate. Tent them loosely with foil and let them rest for at least 5 minutes before serving.
This resting period is paramount; it allows the muscle fibers to relax and the internal juices to redistribute, guaranteeing exceptionally tender and juicy Grilled Chicken Skewers.
Crafting the Fresh Side Salad
While the chicken is resting, prepare the vibrant accompanying salad. In a large bowl, combine the mixed greens, cooked corn kernels, rinsed and drained black beans, thinly sliced red onion, and halved cherry tomatoes.
Gently toss these ingredients together, creating a colorful and fresh foundation for your meal.
Whisking Up the Zesty Dressing
In a small bowl, whisk together 2 tablespoons of olive oil, 1 tablespoon of fresh lime juice, 1/4 teaspoon of salt, and a pinch of black pepper until well combined. The lime dressing adds a bright, tangy counterpoint to the rich chicken.
Pour this zesty dressing over the prepared salad and toss gently to ensure all the components are lightly coated and flavored.
Bringing It All Together: Serve with Style
Arrange the perfectly grilled chicken skewers alongside the fresh, vibrant salad on individual plates or a large platter. This presentation highlights both the delicious chicken and its colorful accompaniment.
Garnish generously with fresh cilantro, which adds a final touch of herbal brightness and visual appeal to your impressive meal.
For a sweet complement to your chicken, try these easy grilled pineapple rings.
Expert Tips & Tricks for Ultimate Grilled Chicken Skewers
Uniform Cutting: The Key to Even Cooking
Cutting chicken into uniform 1-inch cubes is essential for consistent results. Irregularly sized pieces will cook at different rates, leading to some dry, overcooked spots and others potentially undercooked.
Precision in cutting ensures every piece on your Grilled Chicken Skewer cooks evenly and reaches perfect tenderness simultaneously.
Don’t Overcrowd Your Skewers (or the Grill!)
Leaving a small space between chicken pieces on the skewer allows heat to circulate freely around each cube. Overcrowding prevents proper browning and can lead to steamed chicken instead of grilled.
Similarly, ensure ample space between skewers on the grill. This promotes even heat distribution and avoids hot and cold spots, resulting in perfectly cooked BBQ chicken skewers.
The Strategic Timing of the Glaze
Applying the BBQ sauce only during the last 5 minutes of grilling is a critical tip. Many BBQ sauces contain sugar, which can burn quickly over high heat, leading to a bitter, charred crust.
Brushing it on later allows the sauce to caramelize beautifully, forming a delicious, sticky glaze without scorching, enhancing the overall flavor of your grilled chicken recipe.
Why Resting is Non-Negotiable for Tender Chicken
When meat cooks, its muscle fibers contract, pushing moisture to the center. Cutting into it immediately causes those juices to escape, resulting in dry chicken.
Resting the skewers, even for just 5 minutes, allows the fibers to relax and the juices to redistribute throughout the meat. This process locks in moisture, guaranteeing succulent and tender Grilled Chicken Skewers.
Embracing the Instant-Read Thermometer
Visual cues alone are not always accurate for determining doneness in chicken. An instant-read thermometer is your best friend for food safety and optimal texture.
Insert the thermometer into the thickest part of a chicken piece, avoiding the skewer. Once it registers 165°F (74°C), your chicken is perfectly cooked, preventing both undercooking and over-drying.
Pre-Soak Wooden Skewers (No Charred Sticks!)
If you’re using wooden skewers, soaking them in water for at least 30 minutes (or even longer) is an absolute must. This saturates the wood, making it less likely to catch fire or char excessively on the hot grill.
A well-soaked skewer will keep your chicken securely threaded and prevent an unpleasant burnt wood taste, ensuring a clean presentation for your summer grilling masterpiece.
Troubleshooting Common Grilled Chicken Skewers Issues
Why Is My Chicken Dry?
Dry chicken often results from overcooking, insufficient resting time, or unevenly cut pieces. Overcooking allows too much moisture to escape, while skipping the rest prevents juices from redistributing.
To avoid this, always use an instant-read thermometer to cook to exactly 165°F (74°C), tent the skewers with foil and rest them for 5-10 minutes, and ensure all chicken pieces are cut uniformly before grilling.
My BBQ Sauce is Burning!
Burning BBQ sauce is typically caused by applying it too early in the cooking process. Sugars in the sauce caramelize and then quickly char over direct, high heat.
The solution is simple: brush the sauce on only during the last 5 minutes of grilling. Also, turn the skewers frequently during this final stage to ensure even caramelization without scorching.
Chicken Sticking to the Grill Grates
Chicken sticking to the grill can be frustrating and tear the meat. This usually happens if the grill isn’t hot enough, or if the grates aren’t clean and properly oiled.
Always preheat your grill to the recommended temperature before adding food. Additionally, ensure the grates are thoroughly cleaned and lightly oiled just before placing the skewers down, creating a non-stick surface.
Unevenly Cooked Skewers
If some pieces of chicken are cooked perfectly while others are still raw or overcooked, it’s often due to overcrowding the skewers or the grill, or inconsistent chicken piece sizes.
Ensure there’s a small gap between each chicken cube on the skewer. Also, leave enough space between skewers on the grill for even heat circulation. Most importantly, cut all chicken pieces into uniform 1-inch cubes.
Pairing & Presentation: Making it a Meal to Remember
While the zesty black bean and corn salad is a fantastic accompaniment, these versatile Grilled Chicken Skewers pair well with many other sides.
Serving Suggestions Beyond the Salad
Consider serving your skewers with grilled asparagus, zucchini, or bell peppers for an extra smoky vegetable boost. A simple corn on the cob, lightly seasoned and grilled, makes a classic summer pairing.
For a heartier option, a light rice pilaf or fluffy quinoa would absorb the delicious juices and glaze beautifully, rounding out the meal perfectly.
Creative Garnish Ideas
Beyond fresh cilantro, a squeeze of fresh lime juice over the finished skewers adds an extra layer of brightness. A sprinkle of red chili flakes can provide a subtle, welcome kick.
For a beautiful visual and flavor enhancer, consider a drizzle of extra BBQ sauce or a scattering of toasted sesame seeds before serving, making your BBQ chicken skewers even more appealing.
Prep Ahead & Storage: Smart Kitchen Practices
Can I Prep Skewers in Advance?
Yes, you can absolutely prep these Grilled Chicken Skewers ahead of time for ultimate convenience. Cut and season the chicken up to 24 hours in advance, storing it covered in the refrigerator.
Assemble the skewers up to 4 hours before grilling. If using wooden skewers, remember to soak them while you prep to save time on grilling day.
Storing Leftover Grilled Chicken Skewers
Store any leftover Grilled Chicken Skewers in an airtight container in the refrigerator within two hours of cooking. They will remain fresh and delicious for up to 3-4 days.
For longer storage, you can remove the chicken from the skewers and freeze it in an airtight container for up to 2-3 months. Thaw overnight in the refrigerator before reheating.
Reheating for Best Results
To reheat leftover chicken skewers without drying them out, avoid the microwave if possible. The best methods involve gentle, indirect heat.
Reheat in a preheated oven at 300°F (150°C) for about 10-15 minutes, or in an air fryer at 350°F (175°C) for 5-7 minutes until warmed through. This keeps the chicken tender and prevents it from becoming rubbery.
Frequently Asked Questions About Grilled Chicken Skewers
What’s the Best Internal Temperature for Grilled Chicken?
The safest and most recommended internal temperature for cooked chicken is 165°F (74°C). This temperature ensures any harmful bacteria are destroyed, making the chicken safe to eat.
Using an instant-read thermometer to verify this temperature in the thickest part of the meat is the only reliable way to guarantee both food safety and prevent overcooking for optimal juiciness.
Can I Use Chicken Thighs Instead of Breasts?
Absolutely! Boneless, skinless chicken thighs are an excellent alternative to breasts for Grilled Chicken Skewers. Thighs are naturally more forgiving and less prone to drying out due to their higher fat content.
They typically result in even juicier skewers, though they might require a slightly longer cooking time to reach the 165°F (74°C) internal temperature.
How Do I Prevent Wooden Skewers from Burning?
The best way to prevent wooden skewers from burning on the grill is to soak them thoroughly in water before use. Submerge them completely in water for at least 30 minutes, or even up to an hour.
This saturates the wood, making it resistant to the high heat of the grill and preventing unsightly charring or a smoky flavor from being imparted to your delicious summer grilling creation.
What are Some BBQ Sauce Alternatives?
If BBQ sauce isn’t your preference, there are many delicious alternatives for glazing your Grilled Chicken Skewers. Consider a savory teriyaki sauce for an umami kick, or a bright lemon-herb marinade for a fresher profile.
Honey mustard, a sweet and tangy glaze, or even a simple Italian dressing can also provide fantastic flavor. Adjust cooking times slightly as some glazes may caramelize faster than others.
Ready to Grill? Share Your Skewer Success!
Now you have all the knowledge and expert tips to create truly exceptional Grilled Chicken Skewers that are juicy, flavorful, and incredibly satisfying. This recipe transforms a simple meal into a memorable culinary experience, perfect for weeknights or weekend gatherings.
Don’t just take my word for it; fire up your grill and experience the difference these techniques make. I’d love to hear about your grilling triumphs, so please share your creations and experiences!
Grilled Chicken Skewers
Course: Main CourseCuisine: AmericanDifficulty: easy4
servings20
minutes15
minutes450
kcal35
minutesSay goodbye to dry chicken! This recipe reveals the secrets to perfectly tender and juicy grilled chicken skewers, coated in an irresistible BBQ glaze. Served alongside a vibrant, fresh salad, it’s a complete meal that’s easy to make and guaranteed to impress.
Ingredients
1.5 pounds boneless, skinless chicken breasts
1 cup favorite BBQ sauce
8 10-inch wooden or metal skewers (if wooden, soak in water for 30 minutes)
1 tablespoon olive oil
1/2 teaspoon salt
1/4 teaspoon black pepper
For the Salad:
6 cups mixed greens
1 cup cooked corn kernels (frozen, thawed, or canned, drained)
1 (15-ounce) can black beans, rinsed and drained
1/2 small red onion, thinly sliced
1 cup cherry tomatoes, halved
For the Dressing:
2 tablespoons olive oil
1 tablespoon lime juice
1/4 teaspoon salt
Pinch of black pepper
Fresh cilantro, for garnish
Directions
- Prepare the chicken: Pat the chicken breasts dry with paper towels. To ensure even cooking and prevent dryness, cut the chicken into uniform 1-inch cubes. Toss the chicken cubes with 1 tablespoon of olive oil, 1/2 teaspoon salt, and 1/4 teaspoon black pepper.
- Assemble skewers: Thread the seasoned chicken cubes onto the prepared skewers, leaving a small space between each piece for even cooking. Do not overcrowd.
- Preheat grill: Preheat your grill to medium high heat (about 400°F). Lightly oil the grill grates to prevent sticking.
- Grill the chicken: Place the chicken skewers on the preheated grill. Cook for 6 to 8 minutes, turning occasionally, until the chicken has good grill marks and is starting to cook through. This initial direct heat ensures browning without overcooking the inside too quickly.
- Apply BBQ sauce: During the last 5 minutes of cooking, brush the skewers generously with BBQ sauce. Continue to grill, turning frequently, until the sauce is caramelized and the chicken reaches an internal temperature of 165°F (74°C) with an instant-read thermometer. Applying the sauce at the end prevents it from burning before the chicken is cooked, sealing in moisture.
- Rest the chicken: Once cooked, remove the skewers from the grill and place them on a clean plate. Crucially, tent them loosely with foil and let them rest for at least 5 minutes before serving. This allows the juices to redistribute, guaranteeing tender, juicy chicken.
- Prepare the salad: While the chicken rests, combine the mixed greens, corn, black beans, red onion, and cherry tomatoes in a large bowl.
- Make the dressing: In a small bowl, whisk together 2 tablespoons olive oil, lime juice, 1/4 teaspoon salt, and a pinch of black pepper. Pour over the salad and toss gently to combine.
- Serve: Arrange the grilled chicken skewers alongside the fresh salad. Garnish with fresh cilantro.
Notes
- Remember to soak wooden skewers for 30 minutes if using, and rest the chicken for 5 minutes after grilling for optimal juiciness.


