
For years, I struggled with making a true Hearty Beef Stew, often ending up with rubbery meat despite hours of simmering.
The secret lies in a simple, deliberate process-flour dredging and consistent, low oven heat-that transforms tough chuck into fall-apart perfection.
This reliable method ensures you achieve that velvety texture and deeply flavored, mahogany-colored sauce every single time.
The Secret Weapon: Why Our Hearty Beef Stew is Never Chewy
This specific technique addresses the core culinary challenge of stew: ensuring the beef breaks down properly without drying out.
Identifying the Enemy: Connective Tissue and Dry Heat
Beef chuck contains high levels of collagen, a tough connective tissue that makes the muscle fibers resistant to quick cooking.
For another take on slow-braised beef, check out this slow-braised beef and apricot stew.
If exposed to high, fluctuating heat or inadequate moisture, the collagen tightens dramatically, resulting in chewy, dry meat.
The Flour Dredge: Initiating Tenderness and Building Body
The initial coating of flour serves two crucial functions for this Hearty Beef Stew.
It creates a perfect surface for searing, which locks in moisture, and it also contains starches that begin the thickening process for a rich sauce foundation the moment liquid is added.
The Magic of Low, Slow Cooking (325°F Oven Power)
Collagen needs time and consistent low heat (well below a vigorous boil) to dissolve fully into gelatin.
A sustained three-hour cook at 325°F in a covered Dutch oven guarantees this complete breakdown, providing unparalleled, melt-in-your-mouth tender beef.
Building Blocks of Comfort: Ingredients for Deep Flavor
Choosing the Right Cut: Beef Chuck Requirements
Beef chuck, specifically from the shoulder, is essential because its high collagen content is necessary to create that gelatinous, silky mouthfeel after slow cooking.
Ensure the meat is cut into uniform 1.5-inch cubes; this prevents smaller pieces from overcooking and drying out while waiting for the larger cubes to tenderize.
For truly tender beef, consider perfecting your technique with slow-simmered beef stew.
The Aromatic Trio: Onions, Carrots, and Celery (The Mirepoix Base)
This classic French base, known as mirepoix, provides the savory, slightly sweet, and aromatic foundation necessary for any great stew.
Cooking these vegetables until softened releases their flavor compounds and sets the initial savory profile.
Adding Umami Depth: Tomato Paste and Beef Stock
Cooking the tomato paste briefly concentrates its natural sugars and acids, developing a critical deep umami flavor that adds complexity to the final sauce.
Always use low-sodium beef stock or broth; since the stew reduces significantly over three hours, controlling the initial salt content is vital to prevent the finished dish from becoming overly concentrated and saline.
The Perfect Starchy Addition: Yukon Gold Potatoes
Yukon Golds are the ideal choice because their waxy structure allows them to hold their shape beautifully even after an hour of simmering.
They yield a creamy interior without dissolving entirely, keeping the stew clear and robust.
Essential Tools and Prepping for Success
The Non-Negotiable: Why a Dutch Oven is King
A heavy cast iron or enameled Dutch oven is superior because it retains and distributes heat incredibly well, which is crucial for achieving a deep sear.
Its consistent temperature management in the oven is vital for the long, low-temperature cooking required to tenderize the beef.
Prep Checklist for a Smooth Process
Mis en Place: Ensure all vegetables are chopped and measured before starting Step 1 of the cooking process.
Cubing Consistency: Cutting beef into consistent 1.5-inch cubes ensures even cooking, guaranteeing every piece reaches optimum tenderness simultaneously.
Mastering the Method: Step-by-Step Hearty Beef Stew Instructions
Phase One: The Flavor Lock and Foundation Building
Prepare and Coat the Beef: Toss the beef cubes with the specific quantity of flour, salt, and pepper until every piece is fully coated.
This is crucial for the tenderizing action and provides the necessary structure for the final sauce body.
Sear for Deep Caramelization: Heat the oil and sear the dredged beef in small batches over medium-high heat until deep brown on all sides.
Do not overcrowd the pan; searing creates the Maillard reaction, locking in moisture and providing essential deep brown color that translates to rich flavor in the final stew.
Sauté Aromatics and Paste: Reduce the heat to medium before adding the remaining oil, onion, carrots, and celery.
Cook until the vegetables are softened (about 8 minutes), vigorously scraping up the browned bits (fond) from the bottom of the pan to integrate that complex flavor into the sauce base.
Cook the tomato paste briefly with the minced garlic until fragrant to deepen its complex flavor profile and cook out any raw acidity.
Phase Two: The Slow Cook Transformation
Deglaze and Bring to a Simmer: Return the seared beef to the pot and pour in the beef stock, along with the remaining salt, pepper, and the bay leaf.
Stir well, ensuring all the flavor bits are incorporated into the liquid, and bring the mixture just to a gentle simmer, careful not to let it boil aggressively.
The Long, Low Oven Simmer: Cover the Dutch oven tightly and transfer immediately to a preheated 325°F oven, or maintain a very gentle stovetop simmer.
Cook undisturbed for 2 full hours. This steady, low temperature ensures the beef’s collagen breaks down properly into gelatin without the muscle fibers contracting.
Adding the Potatoes: Add the quartered potatoes and continue cooking, covered, for 1 hour more, or until both the potatoes are tender and the beef shreds easily with a fork.
Adding the potatoes later prevents them from turning mushy or disintegrating completely during the crucial initial tender beef preparation period.
Phase Three: Finishing and Serving
Adjusting the Sauce Thickness (Optional): If the stew is too thin, simmer uncovered for 15 minutes to naturally reduce the liquid volume.
Alternatively, prepare the cold water/flour slurry by whisking until smooth, pour it into the bubbling stew, and stir constantly until the desired thickness is reached. Always use cold water for the slurry to prevent lumps.
Final Steps: Remove the bay leaf before serving to avoid an overly herbaceous taste and ensure safety.
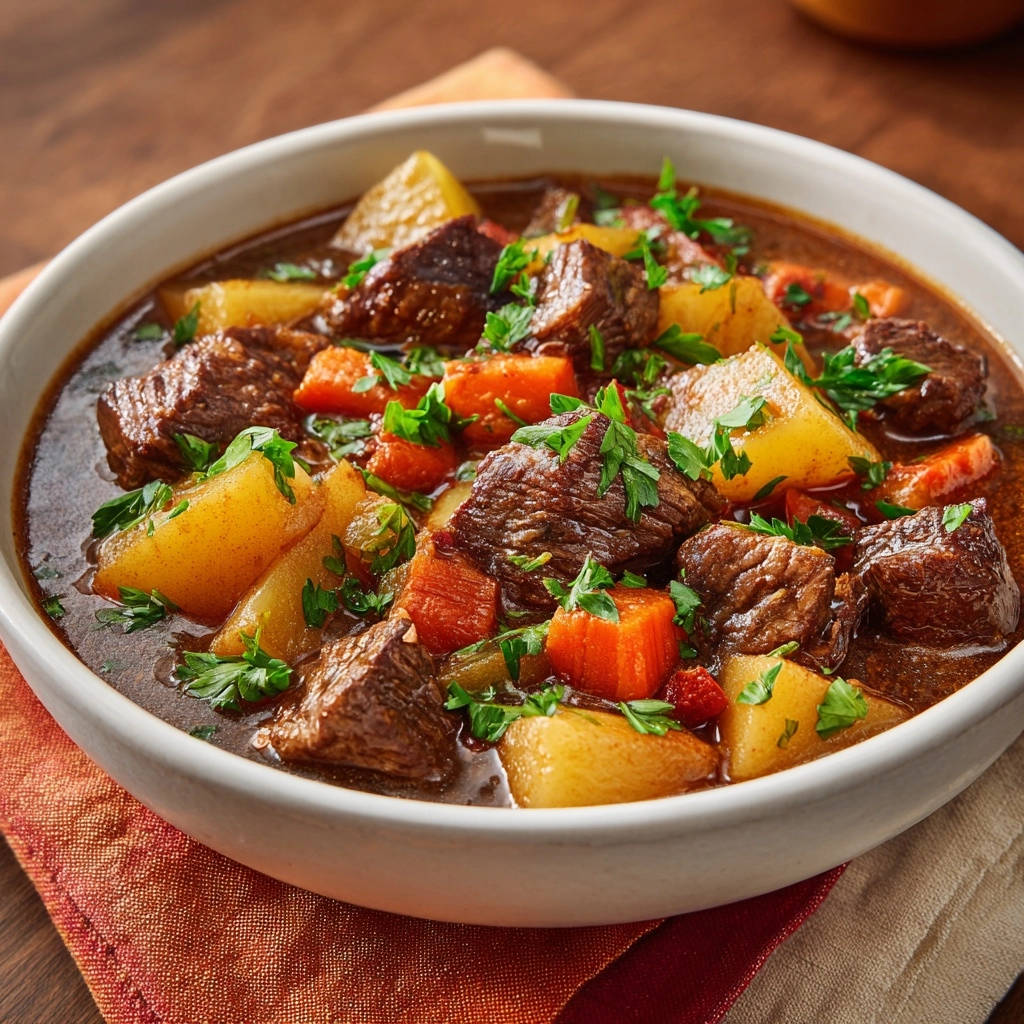
Ladle the rich stew into bowls and garnish generously with fresh parsley for brightness and freshness; the visual appeal of the vibrant green parsley completes the dish.
Round Out Your Meal
To complement your hearty beef stew, consider these dishes that bring different textures and flavors to the table.
- For a vibrant and healthy addition, try the Roasted Sweet Potato and Kale Power Salad, featuring earthy root vegetables and fresh greens.
- If you’re craving something comforting and cheesy, consider making Cheesy Garlic Pizza Bombs for a fun, handheld option.
Chef’s Corner: Pro Tips and Flavor Variations
Marinating for Extra Depth
While this recipe doesn’t require it, soaking the beef in a cup of dry red wine (like Cabernet Sauvignon) for 4 hours before dredging can add an incredible, complex layer of acidity and tannin.
Drain the beef thoroughly and pat it dry before flouring to ensure a proper, caramelized crust develops during searing.
The Advantage of Oven Cooking vs. Stovetop
Baking the stew in the oven ensures heat consistency on all sides, eliminating hot spots often found on a stovetop, which can lead to uneven cooking and tough, dried-out meat.
If you must use the stovetop, ensure the simmer is barely perceptible-it should look like only tiny bubbles occasionally breaking the surface.
Alternative Thickening Methods
If avoiding flour, replace the flour dredge with cornstarch and proceed with the sear as directed; this creates a lighter, but still effective crust.
For thickening at the end, use a cornstarch slurry (1 tablespoon cornstarch mixed with 2 tablespoons cold water) instead of the flour slurry for a glossy, gluten-free finish.
Boosting the Herb Profile
Tie a few sprigs of fresh thyme and rosemary together with kitchen twine and add them alongside the bay leaf in Step 4.
Remove this aromatic herb bundle with the bay leaf before serving for a richer, earthy aroma that beautifully complements the savory Hearty Beef Stew.
Troubleshooting Hearty Beef Stew: Common Problems Solved
Problem: The Sauce is Greasy or Oily
If a noticeable layer of fat collects on top, allow the stew to cool completely after cooking, ideally overnight in the refrigerator.
The fat will solidify, allowing you to easily skim it off with a large spoon before reheating and serving, resulting in a cleaner mouthfeel and flavor.
Problem: The Stew Tastes Flat or Undersalted
Seasoning is best done in stages, but if the final product tastes bland, avoid adding raw salt, which can make the flavor abrasive.
Instead, try adding a squeeze of fresh lemon juice or a splash of Worcestershire sauce; both ingredients introduce a necessary acidic or fermented note that instantly brightens the overall flavor.
Problem: The Meat is Still Chewy After 3 Hours
If the meat resists shredding when tested with a fork, it simply needs more time; connective tissues require precise temperature and duration to fully break down.
Return the stew to the oven, covered, and check again every 30 minutes until the beef is absolutely fork-tender and falling apart.
How to Serve, Store, and Elevate Your Stew Experience?
The Best Side Dishes for This Hearty Meal
Classic pairings include crusty French bread or sturdy sourdough for soaking up the immensely rich sauce.
Other excellent choices are simple buttered egg noodles, which absorb the gravy perfectly, or a light green salad to cut through the richness of the beef.
Handling Leftovers: Storage and Freezing Guidelines
Once cooled completely, store leftovers in an airtight container in the refrigerator for up to 4 days.
Hearty Beef Stew freezes exceptionally well; portion it into freezer-safe containers and store for up to 3 months. Thaw overnight in the fridge for best results.
Reheating Without Sacrificing Quality
Stew tends to thicken significantly when refrigerated due to the dissolved gelatin content.
When reheating, add a small splash of beef broth or water to thin the sauce back to the desired consistency. Reheat gently on the stovetop over low heat to maintain moisture.
Frequently Asked Questions About Beef Stew
Can I make this Hearty Beef Stew in a slow cooker?
Yes, but the critical flavor steps must happen first. Follow Steps 1, 2, and 3 (searing and sautéing) on the stovetop to build the necessary flavor foundation.
Then transfer everything to the slow cooker and cook on low for 6 to 8 hours, adding the potatoes during the last 2 hours of cooking.
What is the difference between beef stock and beef broth?
Stock is generally made from bones and connective tissue, giving it a richer body and higher gelatin content, which contributes to a silkier, more unctuous sauce when reduced.
Broth is made primarily from meat and vegetables. For this recipe, high-quality, low-sodium stock is strongly recommended for the best flavor and texture.
Should I peel the potatoes for this stew?
While the recipe calls for peeled Yukon Golds, you can certainly leave the skin on for a more rustic texture and added fiber and nutrients.
If leaving the skin on, ensure you scrub and wash the potatoes thoroughly before quartering them, removing any dirt or residual eyes.
This Hearty Beef Stew recipe guarantees that chewy, disappointing beef is a thing of the past.
Embrace the slow simmer-it is the ultimate act of patience and love in the kitchen that pays off tenfold in flavor.
Enjoy the rich rewards of this melt-in-your-mouth comfort food, and be sure to share your results!

Beef Stew
Course: Soups-StewsCuisine: AmericanDifficulty: medium6
servings25
minutes3
hours650
kcal180
minutesTired of chewy beef stew? This simple prep technique guarantees meltingly tender beef swimming in a deeply flavored, rich sauce. Follow the specific steps for a comforting bowl of perfect stew every time.
Ingredients
2.5 pounds beef chuck, cut into 1.5 inch cubes
1/4 cup all-purpose flour
1 teaspoon kosher salt, divided
1/2 teaspoon black pepper, divided
3 tablespoons vegetable oil, divided
1 large yellow onion, chopped
4 carrots, roughly chopped
3 celery stalks, roughly chopped
2 cloves garlic, minced
2 tablespoons tomato paste
4 cups beef stock or broth (low sodium)
1 bay leaf
1.5 pounds Yukon Gold potatoes, peeled and quartered
1/2 cup water, for thickening slurry (optional)
2 tablespoons fresh parsley, chopped for garnish
Directions
- Prepare the Beef for Maximum Tenderness: In a large bowl, toss the beef cubes with the 1/4 cup flour, 1/2 teaspoon salt, and 1/4 teaspoon pepper until every piece is completely coated. This crucial step is what initiates the tenderizing process and helps create a rich sauce foundation.
- Sear the Beef (The Flavor Lock): Heat 2 tablespoons of oil in a large Dutch oven over medium-high heat until shimmering. Working in small batches, add the flour-dredged beef, leaving space between pieces. Sear on all sides until deep brown and caramelized (about 2-3 minutes per side). Do not overcrowd the pan. Remove the seared beef to a separate plate and set aside.
- Build the Flavor Base: Reduce the heat to medium. Add the remaining 1 tablespoon of oil to the Dutch oven. Add the onion, carrots, and celery. Cook until softened, scraping up any browned bits from the bottom of the pot, about 8 minutes. Add the minced garlic and tomato paste and cook for 1 minute until fragrant.
- Deglaze and Combine: Return the seared beef to the pot. Pour in the beef stock and add the remaining 1/2 teaspoon salt, 1/4 teaspoon pepper, and the bay leaf. Bring the stew mixture to a simmer, then immediately reduce the heat to low, cover the pot, and transfer it to a 325 degrees F oven, or keep it simmering very gently on the stovetop.
- The Slow Cook: Allow the stew to simmer undisturbed for 2 hours. This long, low cook time guarantees the tough connective tissues in the beef break down completely, resulting in fall-apart tender meat.
- Add Vegetables: Add the quartered potatoes to the stew. If cooking on the stovetop, ensure the liquid is still gently simmering. Cover and continue cooking for 1 hour more, or until the potatoes are tender and the beef shreds easily with a fork.
- Finish the Sauce (Optional Thickening): If the sauce is not quite thick enough after cooking, remove the lid, turn up the heat slightly, and simmer for 15 minutes to reduce naturally. Alternatively, whisk 1 tablespoon of flour with 1/2 cup of cold water until smooth, pour into the simmering stew, and stir constantly until the sauce thickens slightly.
- Serve: Remove the bay leaf before serving. Ladle the hearty stew into bowls and garnish generously with fresh chopped parsley.
Notes
- The crucial step is tossing the beef thoroughly with flour before searing; this ensures maximum tenderness and builds the sauce foundation.


