
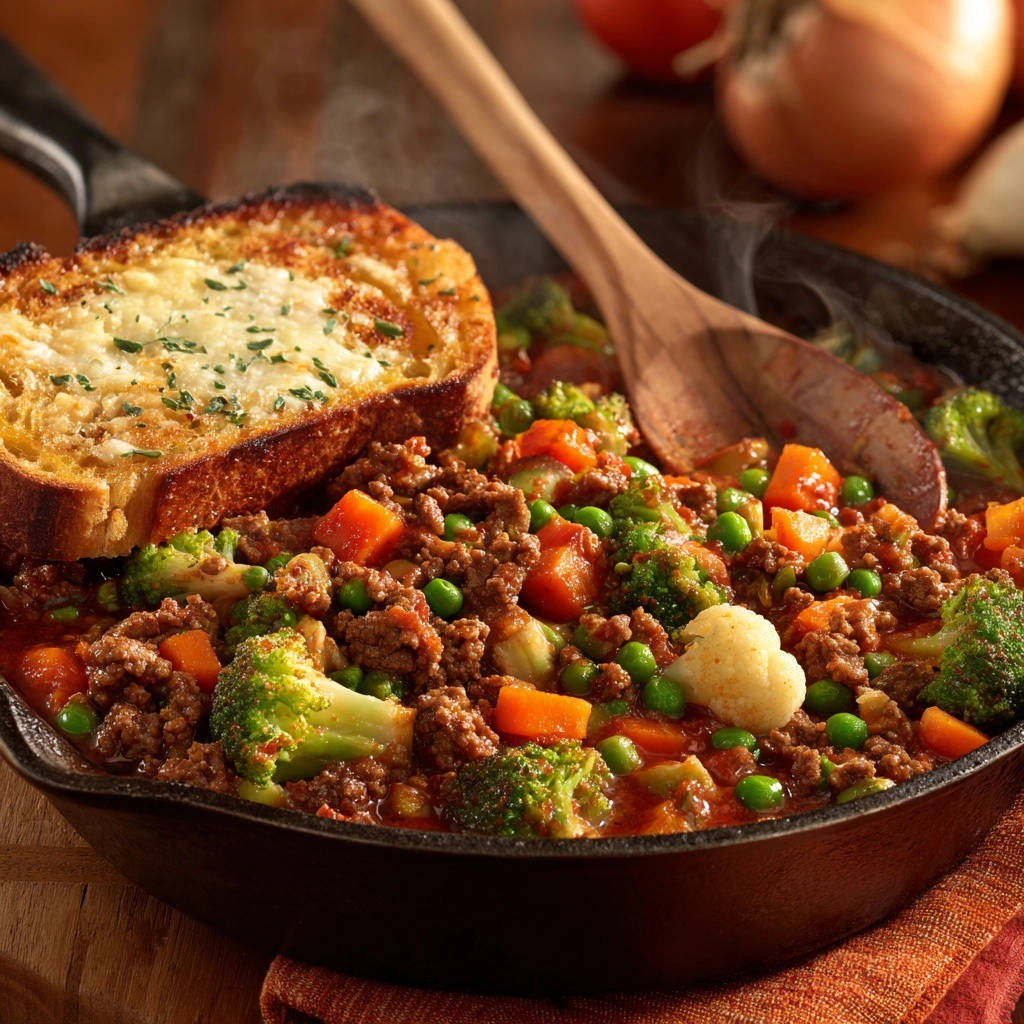
For years, I struggled with comforting skillet meals that inevitably left a pool of watery liquid at the bottom of the pan-a flavor killer that diminished the effort. After perfecting two key techniques-moisture control and flour activation-I developed this reliable recipe for a truly rich and thick Hearty Ground Beef and Veggie Skillet.
This method guarantees a savory sauce that clings beautifully to every piece of meat and vegetable, delivering maximum comfort without sacrificing quality or flavor intensity.
For a similar satisfying experience, explore this cheesy beef mushroom skillet.
Prep Time: 15 minutes
Cook Time: 25 minutes
Total Time: 40 minutes
Servings: 4
Why This Hearty Ground Beef and Veggie Skillet Should Be Your New Weeknight Standard
The Problem Solved: Guaranteeing a Perfectly Clinging Sauce
The common issue of watery skillets stems from released moisture and undrained fat. This recipe addresses both problems instantly.
We use a specialized technique-activating flour as a binder after draining the meat-which permanently eliminates thin, runny sauces and guarantees a rich, velvety consistency.
Efficiency Meets Comfort: Ready in Under an Hour
This is a true one-pan wonder ready in just 40 minutes, making it highly achievable even on the busiest evenings.
Minimal chopping and a controlled simmer mean maximum flavor development with minimal hands-on fuss, delivering ultimate comfort food efficiently.
More Than Just Dinner: The Comfort of Cheesy Toast
The buttery, broiled cheesy toast is not just a side; it’s an essential textural element that completes the meal.
For another way to achieve a delicious beef dinner, try a seared steakhouse dinner.
Placed directly atop the steaming skillet, it provides a crucial, melty, satisfying crunch that turns a simple dinner into a comforting experience.
Essential Building Blocks: Ingredients for Maximum Skillet Flavor
The foundation of any great meal starts with high-quality ingredients. Here are the core components used in this exceptional Hearty Ground Beef and Veggie Skillet:
- 1.5 pounds lean ground beef
- 1 medium onion and 2 cloves garlic
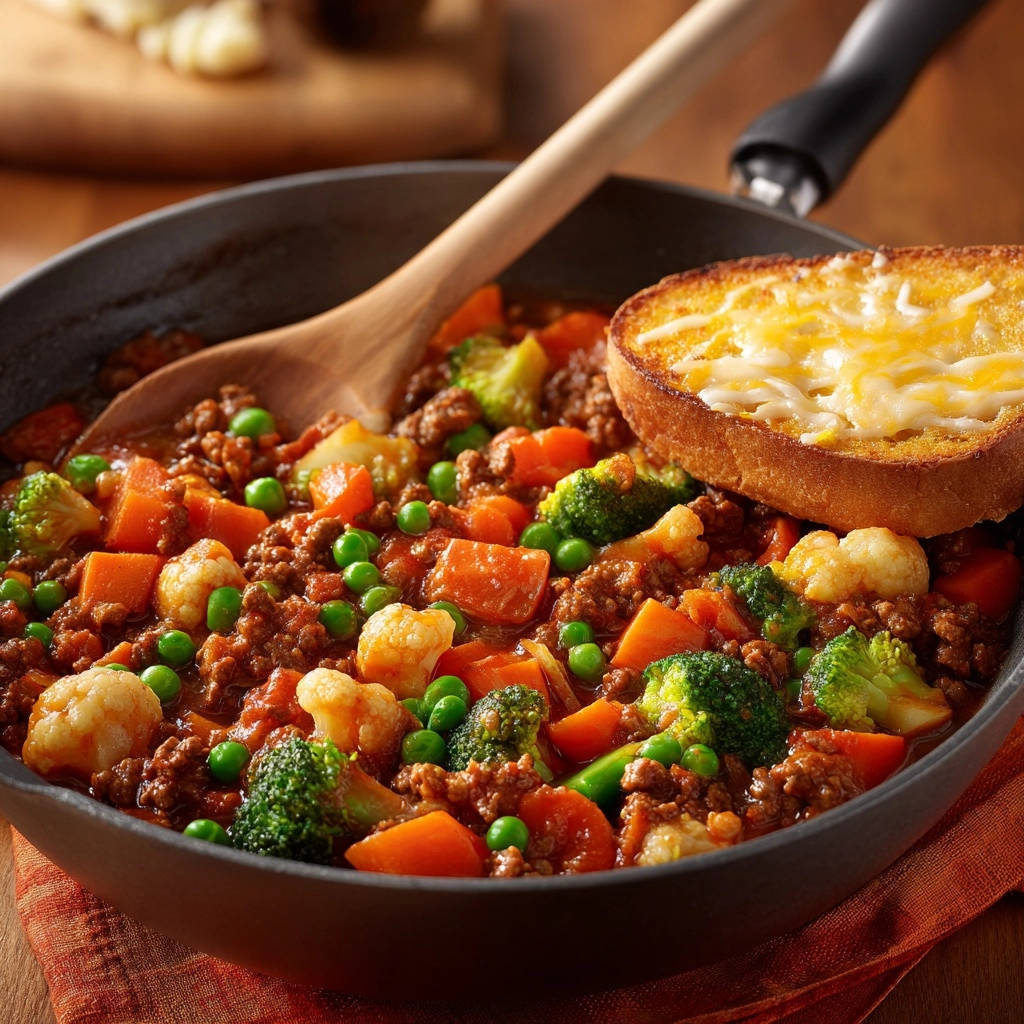
- 1 cup diced carrots, 1 cup broccoli florets, 1/2 cup cauliflower florets, 1/2 cup frozen peas
- 1/4 cup tomato paste and 1 teaspoon dried Italian seasoning
- 1 tablespoon all-purpose flour and 1.5 cups beef broth
- 4 slices thick-cut bread, butter, and 1/4 cup shredded cheese (mozzarella or white cheddar)
The Meat Foundation: Why Lean Ground Beef Works Best
Using lean ground beef (85/15 or leaner) reduces the initial fat, which is critical for moisture control.
Even with lean beef, thoroughly draining off all residual liquid and fat after browning is non-negotiable. Skipping this step introduces moisture that will thin the final sauce.
The Aromatic Depth: Onion, Garlic, and Tomato Paste
Onion and garlic create the initial layer of aromatic flavor.
Crucially, the tomato paste must be cooked for a full two minutes before any liquid is added, allowing it to caramelize. This intensifies the sweetness, deepens the color, and eliminates the raw or metallic acidity.
The Hidden Heroes: Flour, Broth, and Italian Seasoning
The single tablespoon of all-purpose flour is the recipe’s thickness guarantee. When properly incorporated, it acts as a quick internal roux.
High-quality, rich beef broth provides the savory liquid base, supporting the complex herbs in the Italian seasoning blend to create a deep, comforting profile.
Selecting the Perfect Veggie Medley
This combination uses a blend of slow-cooking root vegetables (carrots) and faster-cooking cruciferous vegetables (broccoli and cauliflower), providing excellent texture contrast.
Feel free to substitute seasonal equivalents like diced zucchini, green beans, or cubed butternut squash. If swapping, ensure tougher vegetables are added first.
What Else to Make?
Round out your meal with these complementary dishes.
- For a savory addition, consider this Thyme Beef Stuffing, bringing a moist texture to the table.
- To add a comforting bread element, try these Cheesy Garlic Pull-Apart Rolls for a fluffy yeast experience.
Mastering the Skillet: Step-by-Step Directions for Maximum Richness
Follow these precise steps to ensure your skillet develops maximum flavor and the perfect, clinging consistency.
- Prep the Meat (The Mandatory Moisture Control Start):
Heat the olive oil in a large skillet over medium-high heat and thoroughly brown the ground beef, breaking it up as you go. Crucially, drain off all excess liquid and fat before proceeding. This single action prevents the most common cause of watery sauce.
- Building the Flavor Base: Aromatics and Acidity Reduction:
Reduce the heat to medium. Add the diced onion and cook until softened, about five minutes, then add the garlic until fragrant. Stir in the tomato paste and Italian seasoning and cook for a full two minutes. This crucial cooking time reduces the raw acidity of the tomato paste and deepens the overall flavor profile.
- The Sauce Guarantee: Incorporating the Flour Binder:
Sprinkle the measured tablespoon of all-purpose flour over the meat and vegetable mixture. Stir vigorously for one minute until the flour completely coats everything. This step creates a thin, roux-like layer that guarantees a thick, clinging sauce upon simmering.
- Simmering the Skillet (Adding Liquid and Harder Veggies):
Pour in the beef broth and actively scrape up any browned bits (the fond) from the bottom of the pan-this is known as deglazing and adds massive flavor. Add the harder vegetables (carrots, broccoli, cauliflower) and bring the mixture to a slight bubble.
- Controlled Simmer for Perfect Consistency:
Reduce the heat to low, cover the skillet, and simmer for 10-12 minutes until the vegetables are tender-crisp. The sauce should be thick enough to firmly cling to the meat and vegetables, not run thinly to the bottom of the pan. Stir in the frozen peas during the final two minutes to ensure they heat through but maintain their color and texture.
- Preparing the Cheesy Toast Garnish:
While the skillet simmers, prepare the bread by lightly spreading butter onto one side of each slice, then topping with cheese and a sprinkle of dried herbs. Broil the toast for 1-2 minutes until the cheese is melted, bubbly, and the edges are golden brown. Watch closely, as broiler heat can vary significantly!
- Serving and Final Touches:
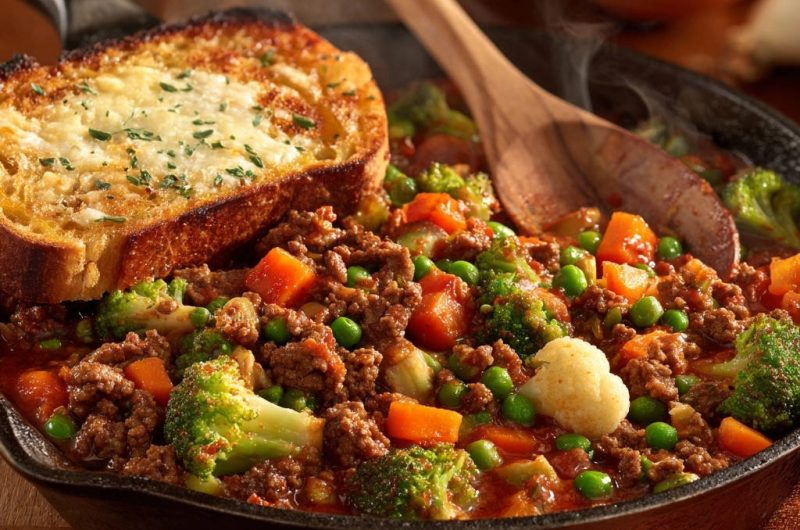
Serve the hearty skillet mixture hot and immediately top each serving, or the entire pan, with a slice of the buttery, cheesy toast. Garnish with additional fresh parsley or chives if desired.
The Two-Part Secret to Richness: Preventing a Watery Skillet
Achieving a rich, clinging sauce requires attention to these two crucial technical steps that elevate this Hearty Ground Beef and Veggie Skillet above others.
Technique 1: Mastering Moisture Control
Ground beef releases a combination of rendered fat and water as it cooks, particularly in a closed skillet. If this liquid is left in the pan, the sauce will always be thin because the flour cannot activate properly in a diluted environment.
Drain the meat until the pan is visually dry, retaining only a thin film of oil for sautéing the aromatics. This foundational step eliminates excess water that would otherwise fight your thickening agent.
Technique 2: Activating the Flour Binder
Flour must be “cooked out” briefly before the liquid is introduced, much like creating a quick, instant roux.
By sprinkling the measured flour over the hot meat and vegetables (Step 3) and stirring for a full minute, you are cooking out the raw taste and coating every ingredient. This ensures the thickening is smooth, clump-free, and immediate once the broth is added.
Chef’s Secrets: Elevating Your Hearty Ground Beef and Veggie Skillet
Use Quality Broth: Investing in high-quality, rich beef broth-or even demi-glace concentrate mixed with water-will dramatically deepen the umami flavor compared to thin, canned broth.
Sautéing the Tomato Paste: Ensure you cook the tomato paste for the full two minutes as directed in the recipe. This ‘pasting’ process removes the tinny taste associated with canned tomatoes and creates a sweet, concentrated umami base.
Deglazing is Key: When adding the broth, actively scrape up the fond (the browned, caramelized bits on the bottom of the pan). This concentrated flavor is essential and dissolves directly back into the sauce, enhancing richness without extra fat.
The Salt Test: Do not season the dish fully until after the 10-minute simmer is complete. Reducing the liquid concentrates all the flavors, meaning you might need significantly less salt than you think initially.
Customization and Adaptations for Every Diet
Making This Hearty Skillet Gluten-Free
To keep this dish gluten-free, substitute the all-purpose flour with a measured tablespoon of rice flour, following the exact same procedure in Step 3.
Alternatively, you can skip the flour and thicken the dish at the end by dissolving one tablespoon of cornstarch in two tablespoons of cold water. Stir this slurry into the simmering sauce during the last two minutes of cooking.
Swapping Out Proteins and Veggies
Ground turkey or ground chicken are excellent alternatives, though they may require an extra tablespoon of olive oil if they are very lean to help the flour activate. If using poultry, slightly increase the Italian seasoning or add a pinch of smoked paprika for depth.
Seasonal additions like kale, chopped bell peppers, or cubes of sweet potato integrate easily. Add softer vegetables (like bell peppers) during the last five minutes of simmering to prevent them from becoming overly soft.
Adding a Spicy Kick
For moderate, warming heat, stir in 1/4 teaspoon of chili flakes along with the dried Italian seasoning and tomato paste.
A quick dash of chipotle powder or your favorite smoky hot sauce at the end of cooking adds complexity and cuts through the richness of the beef.
Prep Ahead, Storage, and Reheating Hacks
Can I Make the Skillet Ahead of Time?
Yes, the Hearty Ground Beef and Veggie Skillet mixture can be cooked completely up to three days in advance, making this an ideal meal prep item.
Cool the skillet quickly after cooking, then store the mixture tightly covered in the refrigerator. Reheat gently on the stovetop when ready to serve.
Best Practice for Storing Leftovers
Always store the cheesy toast separately from the skillet mixture. The bread will become soggy and lose its textural appeal if kept with the sauced components.
The beef and veggie mixture is safe for 3-4 days when refrigerated in an airtight container.
Reheating Without Drying It Out
Reheat the skillet mixture gently over low heat, covered, stirring occasionally to prevent sticking.
If the sauce has tightened significantly overnight, add 1/4 cup of extra beef broth or water while reheating. This restores the desired clinging consistency without drying out the meat or vegetables.
Troubleshooting Common Hearty Ground Beef and Veggie Skillet Issues
Why is My Sauce Still Runny?
This nearly always traces back to inadequate draining of the ground beef in Step 1, introducing excess water into the final dish.
Alternatively, you may not have cooked the flour binder long enough in Step 3. The flour must coat the mixture fully before the broth is added.
My Vegetables Are Too Mushy
Mushy vegetables occur if the skillet was simmered too long or if the heat was too high. Ensure the skillet is on the lowest possible heat setting when covered for the controlled simmer.
To correct this in the future, add harder root vegetables earlier than softer, quick-cooking ones like peas or leafy greens.
The Sauce Tastes Too Bland
Blandness often indicates insufficient seasoning or poor flavor development in the base.
Make sure you fully caramelize the tomato paste in Step 2, and crucially, always taste and adjust the salt and pepper after the sauce has reduced during the final simmering step.
Ready to Impress? Share Your Hearty Ground Beef and Veggie Skillet Success!
This recipe truly transforms the weeknight dinner routine by eliminating the stress of thin, watery sauces that plague typical one-pan meals. Mastering the two simple techniques for the Hearty Ground Beef and Veggie Skillet ensures a deeply flavored, satisfying meal every single time.
Grab your skillet tonight and experience the joy of a perfectly rich, clinging sauce, topped with that mandatory slice of golden cheesy bread. It’s time to make this your family’s new favorite comfort meal.
Enjoy the richness!
Ground Beef and Veggie Skillet
Course: Main CourseCuisine: AmericanDifficulty: easy4
servings15
minutes25
minutes680
kcal40
minutesTired of watery skillet meals? This recipe uses a crucial technique to guarantee a thick, rich, and clinging sauce base. Loaded with vegetables and savory ground beef, it’s the ultimate comfort dish, finished perfectly with a slice of melted cheesy toast.
Ingredients
1 tablespoon olive oil
1.5 pounds lean ground beef
1 medium onion, diced
2 cloves garlic, minced
1 cup carrots, diced
1 cup broccoli florets
1/2 cup cauliflower florets
1/2 cup frozen peas
1/4 cup tomato paste
1 teaspoon dried Italian seasoning
1 tablespoon all-purpose flour (The thickening secret!)
1.5 cups beef broth
1 teaspoon salt
1/2 teaspoon black pepper
4 slices thick-cut bread
2 tablespoons butter, softened
1/4 cup shredded mozzarella or white cheddar cheese
1 teaspoon dried parsley or chives, for garnish
Directions
- Prep the Meat (Moisture Control Start): Heat the olive oil in a large cast iron skillet or heavy bottomed pan over medium-high heat. Add the ground beef and break it up. Cook thoroughly until deeply browned. Crucially, drain off all excess liquid and fat from the skillet before moving to the next step. Return the drained beef to the pan. This step is essential to preventing a watery sauce.
- Build the Flavor Base and Lock in Thickness: Reduce the heat to medium. Add the diced onion and cook until softened, about 5 minutes. Add the minced garlic and cook for 1 minute until fragrant. Stir in the tomato paste and Italian seasoning. Cook, stirring constantly, for 2 minutes. This step reduces the acidity of the tomato and creates a deep flavor base.
- The Sauce Guarantee: Sprinkle the 1 tablespoon of all-purpose flour over the meat and vegetable mixture. Stir well for 1 minute until the flour is completely incorporated and coats the meat and vegetables. This creates a roux-like binder that will guarantee a thick sauce.
- Simmer the Skillet: Pour in the beef broth, scraping up any browned bits from the bottom of the pan. Stir well until the mixture begins to bubble and thicken slightly. Add the carrots, broccoli florets, and cauliflower florets. Stir everything together.
- Controlled Simmer for Perfect Consistency: Reduce the heat to low, cover the skillet, and let it simmer for 10 to 12 minutes, or until the carrots and broccoli are tender-crisp. Check the thickness: the sauce should be rich and cling firmly to the meat and vegetables, not run thinly to the bottom of the pan. Stir in the frozen peas during the last 2 minutes of cooking. Season with salt and pepper to taste.
- Prepare the Cheesy Toast: While the skillet simmers, spread the softened butter lightly onto one side of each bread slice. Top the buttered side with the shredded cheese and a light sprinkle of dried parsley. Toast the bread under a broiler for 1 to 2 minutes, watching carefully until the edges are golden brown and the cheese is melted and bubbly.
- Serve Hot: Serve the hearty beef and vegetable skillet immediately with a large slice of the cheesy toast placed directly on top of the steaming skillet mixture. Garnish with additional fresh or dried herbs.
Notes
- Draining the excess liquid and fat from the ground beef (Step 1) is essential for achieving a thick, non-watery sauce.


