
If you’ve ever tried crafting your own wholesome bars, you know the frustration when they turn into a pile of crumbs. But trust me, I’ve cracked the code, and this recipe for Homemade Seed & Oat Bars delivers a perfectly bound, chewy-crisp bar that holds its shape, every single time.
Say goodbye to disappointing failures and hello to a reliable, satisfying snack that tastes incredible and is packed with goodness, ideal for busy mornings or a much-needed energy boost.
Beyond Basic: Why These Homemade Seed & Oat Bars Stand Out
These aren’t just any granola bars; they are a carefully engineered delight designed to be both delicious and incredibly sturdy. My method addresses the common pitfalls of homemade bars, ensuring your effort always results in success.
The Secret to No-Fail Binding and Shape Retention
The magic lies in a precise combination of warm binding agents and a critical pressing technique. This ensures every oat and seed is securely “glued,” making crumbling a thing of the past.
The thorough chilling process then solidifies this structure, guaranteeing bars that cut cleanly and hold their form beautifully.
Wholesome Goodness: Fueling Your Day Naturally
Packed with fiber-rich oats and nutrient-dense seeds, these Homemade Seed & Oat Bars are a powerhouse of natural energy. They provide sustained fuel without artificial additives, perfect for an on-the-go breakfast or a healthy snack.
You’ll feel good knowing exactly what’s in every bite, supporting your well-being with delicious, real food ingredients.
A Texture You’ll Crave: Chewy-Crisp Perfection
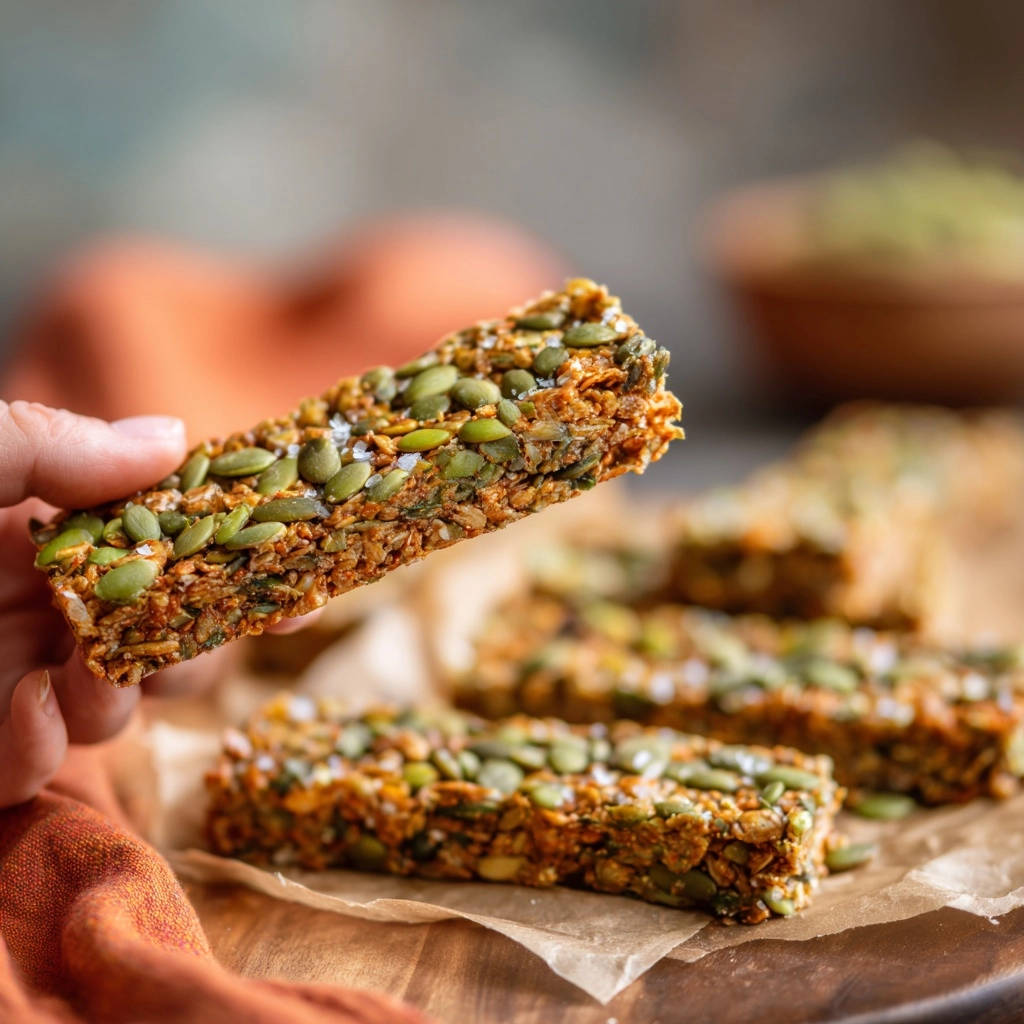
This recipe hits that sweet spot of texture. You get the satisfying chewiness from the rolled oats, perfectly contrasted with the delightful crunch of the various seeds.
A subtle sprinkling of flaky sea salt on top further enhances this textural harmony, making each bite an experience.
Gather Your Goodness: The Building Blocks of Flavor
Quality ingredients are the foundation of exceptional Homemade Seed & Oat Bars. Here’s what you’ll need and why each component is essential.
Oats & Seeds: The Heart of Your Bar
Rolled Oats (1.5 cups): These are the star, providing the bulk, satisfying chew, and essential fiber. Use old-fashioned rolled oats, not instant, for the best texture and structure.
Pumpkin Seeds (1/2 cup, divided): These vibrant green seeds offer a lovely crunch and a boost of healthy fats and minerals. Dividing them ensures some are incorporated throughout and some are sprinkled on top for visual appeal and added texture.
Mixed Seeds (1/4 cup): This is where you can customize! Sunflower, flax, or chia seeds add diverse nutrients, omega-3s, and a wonderful complexity of texture. Their smaller size helps them integrate seamlessly into the bar’s structure.
The Binding Agents: Sweetness & Structure
Creamy Peanut Butter or Almond Butter (1/2 cup): This is the primary “glue” that holds everything together, contributing richness, protein, and a delicious nutty flavor. Ensure it’s creamy, not chunky, for a smooth binder.
Maple Syrup (1/3 cup): Beyond natural sweetness, maple syrup is crucial for the perfect chewy texture and acts as a humectant, keeping the bars moist. Its sticky nature is key to the binding process.
Coconut Oil, Melted (2 tablespoons): This adds a subtle richness, helps the bars set firmly when chilled, and contributes to that desirable chewy-crisp finish. Melting it ensures it blends seamlessly into the wet mixture.
Flavor Enhancers: Vanilla & Sea Salt
Vanilla Extract (1 teaspoon): A touch of vanilla elevates all the other flavors, adding warmth and depth to the overall profile. Don’t skip it!
Fine Sea Salt (1/4 teaspoon): This tiny addition is a flavor secret weapon. It balances the sweetness of the maple syrup and enhances the nutty notes of the seeds and nut butter.
Flaky Sea Salt, for sprinkling: A final flourish that adds a delightful pop of salinity and a delicate crunch, brightening every bite.
Your Baking Arsenal: Tools for Homemade Seed & Oat Bars Success
Having the right tools makes the process smooth and ensures your bars turn out perfectly.
8×8 Inch Baking Pan: Crucial for the perfect bar thickness and portioning. A sturdy metal pan works best for even baking.
Parchment Paper: Your secret weapon for easy lifting and clean removal of bars. Don’t skip the overhang!
Large Mixing Bowls & Spatula: Essential for combining dry and wet ingredients thoroughly. A sturdy spatula is key for pressing.
Microwave-Safe Bowl or Small Saucepan: For gently warming the binding agents to ensure a smooth, cohesive mixture.
Wire Rack: For proper cooling, which is a vital step before chilling.
Mastering the Method: A Step-by-Step Guide to No-Fail Bars
Follow these detailed steps closely, paying attention to the critical techniques for perfectly bound Homemade Seed & Oat Bars.
- Prepare Your Pan & Oven:
Preheat your oven to 325°F (160°C). Line an 8×8 inch baking pan with parchment paper, ensuring an overhang on the sides. This overhang is crucial for effortless bar removal later, preventing sticking and crumbling.
- Combine Dry Ingredients:
In a large bowl, mix rolled oats, 1/4 cup pumpkin seeds, and mixed seeds. Stir well to ensure an even distribution of all dry components, which contributes to a uniform texture throughout the bars.
- Prepare the Wet Binder:
In a separate microwave-safe bowl or small saucepan, gently warm the nut butter, maple syrup, and melted coconut oil until smooth. Stir in vanilla extract and fine sea salt. This warming ensures the binder is fluid enough to coat all dry ingredients evenly, a key step for bar cohesion.
- Integrate Wet & Dry:
Pour the warm wet mixture over the dry ingredients. Using a sturdy spatula, mix thoroughly until every single oat and seed is evenly coated. This complete coating is paramount; it’s the “glue” that prevents your bars from crumbling.
- Press for Perfection:
Transfer the mixture to the prepared pan. This is arguably the most critical step for no-fail bars: press the mixture down very firmly and evenly into the pan. Use the back of a spoon or a flat-bottomed glass to compact it as much as possible, paying special attention to the corners and edges. Firm compression is the secret to a dense, perfectly bound bar.
- Top & Bake:
Sprinkle the remaining 1/4 cup pumpkin seeds and flaky sea salt over the top, gently pressing them in. Bake for 20-25 minutes, or until the edges are golden brown and the top is lightly toasted. Avoid overbaking, as this can lead to dry, hard bars.
For a similar touch of sweetness and nuts, consider these pistachio honey oat squares.
- Cool Completely:
Remove the pan from the oven and let the bars cool completely in the pan on a wire rack. Patience here is essential; rushing this step can compromise the bar’s structure.
- Chill for Setting:
Once at room temperature, transfer the pan to the refrigerator and chill for at least 2 hours, or preferably overnight. Full chilling allows the binding agents to set completely, guaranteeing clean cuts and bars that hold their shape perfectly without falling apart.
- Cut & Store:
Once thoroughly chilled, use the parchment paper overhang to lift the slab out. Place on a cutting board and cut into 12 bars. Store in an airtight container at room temperature for up to a week, or in the refrigerator for extended freshness. Proper storage maintains their texture and prevents them from drying out.
Chef’s Secrets: Elevate Your Homemade Seed & Oat Bars Game
These expert tips will ensure your Homemade Seed & Oat Bars are always a triumph.
Don’t Skimp on the Pressing: The recipe emphasizes firm pressing for a reason. Really lean into it with a flat-bottomed glass or the back of a measuring cup. This compression is vital for dense, non-crumbly bars.
Thoroughly Coat Every Dry Bit: Ensure every single oat and seed is coated with the wet mixture. This is the “glue” that holds everything together; an uncoated spot is a potential weak point for crumbling.
Patience with Chilling: While 2 hours is the minimum, an overnight chill in the refrigerator yields the best results. The binding agents need ample time to fully solidify, making for cleaner cuts and stronger bars.
Customize Your Seeds: Feel free to experiment with your favorite seeds! Sunflower, hemp, chia, and flax all work wonderfully. Just maintain the overall dry ingredient ratio.
Salt is Your Friend: Don’t underestimate the power of fine and flaky sea salt. It balances the sweetness and enhances all the nutty flavors. A generous sprinkle of flaky salt on top adds a lovely textural contrast and burst of flavor.
Solved! Common Homemade Seed & Oat Bars Problems
Troubleshooting common issues means you’ll always achieve perfect Homemade Seed & Oat Bars.
Why Are My Bars Crumbly and Falling Apart?
This is often due to insufficient pressing or incomplete coating of the dry ingredients. Ensure you press the mixture very firmly into the pan and that every oat and seed is thoroughly coated with the wet binder. Also, ensure adequate chilling time.
My Bars Are Too Soft/Hard, What Happened?
Soft bars usually mean they needed more baking time to dry out slightly or weren’t chilled long enough. Hard bars might be overbaked; keep an eye on the golden edges. Adjust baking time by a minute or two next time and ensure correct oven temperature.
The Bars Are Sticking to the Pan!
This is usually due to not lining the pan with parchment paper or not leaving enough overhang. Always use parchment paper, and make sure the overhang is generous enough to act as “handles” for lifting the slab out easily after chilling.
Your Canvas: Endless Homemade Seed & Oat Bars Variations
These versatile Homemade Seed & Oat Bars are just a starting point for your culinary creativity. Here are some ideas to make them your own.
Nut Butter Swaps & Beyond
Instead of peanut or almond butter, try cashew butter, sunflower seed butter (for nut-free), or even a combination. Be aware that different nut butters can slightly alter the final texture, so adjust the binding liquid (maple syrup/coconut oil) if needed.
Boosts & Mix-ins: Adding Extra Flavor & Texture
Consider adding 1/4 cup of mini chocolate chips, dried cranberries, chopped dried apricots, or shredded coconut to the dry mixture. Fold them in carefully to ensure even distribution without compromising the binding.
For an extra protein punch, you could also stir in a tablespoon of your favorite unflavored protein powder with the dry ingredients. You might also love our easy energy bites recipe for another quick, healthy boost.
Sweetener Adjustments
While maple syrup provides excellent flavor and binding, you can experiment with honey or agave nectar for different flavor profiles. Ensure you maintain the total liquid amount for proper binding.
Optimal Enjoyment: Storing & Serving Your Bars
Proper handling ensures your wholesome energy bars remain fresh and delicious.
Best Storage Practices for Freshness
Store your homemade seed and oat bars in an airtight container. They will last up to a week at room temperature, but for extended freshness and a firmer texture, keep them in the refrigerator for up to two weeks.
Creative Serving Suggestions
These bars are perfect on their own as a quick breakfast, a post-workout snack, or a lunchbox treat. You can also crumble them over yogurt or ice cream for added texture and flavor, or serve alongside a cup of coffee or tea.
Make-Ahead & Freezing Tips
These bars are excellent for meal prepping! You can make a double batch and freeze individual bars wrapped tightly in plastic wrap for up to 3 months. Thaw at room temperature for an hour or overnight in the fridge, making them a fantastic grab-and-go option.
Homemade Seed & Oat Bars: Your Questions Answered
Here are answers to common questions about making these satisfying bars.
Can I make these Homemade Seed & Oat Bars gluten-free?
Absolutely! Ensure you use certified gluten-free rolled oats. All other ingredients in this recipe are naturally gluten-free, making it easy to adapt for dietary needs.
Are these bars vegan-friendly?
Yes, this recipe is inherently vegan! It uses plant-based ingredients like rolled oats, seeds, nut butter, maple syrup, and coconut oil, making it suitable for a vegan diet.
How can I make these nut-free?
To make these bars nut-free, simply substitute the peanut or almond butter with sunflower seed butter (e.g., SunButter). This will maintain the crucial binding element without nuts.
What if I don’t have maple syrup?
While maple syrup provides a unique flavor and excellent binding, you can substitute it with honey or agave nectar. The texture and sweetness profile might vary slightly, but they will still hold together.
How long do Homemade Seed & Oat Bars stay fresh?
Stored in an airtight container, these bars will stay fresh for up to one week at room temperature, or up to two weeks when refrigerated. For longer storage, they can be frozen for up to 3 months.
Ready to Bake Your Best Homemade Seed & Oat Bars?
Armed with these expert tips and a foolproof method, you’re now ready to create the most delicious and perfectly bound Homemade Seed & Oat Bars your family (and taste buds) will ever encounter. Say goodbye to crumbly disappointments and hello to satisfying, wholesome goodness!
Don’t forget to share your creations with us on social media! We love seeing your baking triumphs. If you enjoyed this recipe, why not explore our collection of other apple walnut baked oatmeal cups or perhaps some delicious blueberry crumble bars for more delightful make-ahead treats?
Seed & Oat Bars
Course: SnacksCuisine: AmericanDifficulty: easy12
bars15
minutes25
minutes240
kcal120
minutesTired of crumbly homemade bars? Discover the secret to perfectly bound, chewy-crisp seed and oat bars that hold their shape. Enjoy these flavorful, satisfying snacks every time.
Ingredients
1.5 cups rolled oats
1/2 cup pumpkin seeds, divided
1/4 cup mixed seeds (such as sunflower, flax, or chia)
1/2 cup creamy peanut butter or almond butter
1/3 cup maple syrup
2 tablespoons coconut oil, melted
1 teaspoon vanilla extract
1/4 teaspoon fine sea salt
Flaky sea salt, for sprinkling
Directions
- Preheat your oven to 325 degrees Fahrenheit (160 degrees Celsius). Line an 8×8 inch baking pan with parchment paper, leaving an overhang on the sides to easily lift the bars out later.
- In a large bowl, combine the rolled oats, 1/4 cup of the pumpkin seeds, and the mixed seeds. Stir well to ensure everything is evenly distributed.
- In a separate microwave-safe bowl or small saucepan, gently warm the nut butter, maple syrup, and melted coconut oil until smooth and well combined. This can be done in 30-second increments in the microwave or over low heat on the stove. Stir in the vanilla extract and fine sea salt.
- Pour the warm wet mixture over the dry oat and seed mixture. Using a sturdy spatula, mix thoroughly until every single oat and seed is evenly coated with the sticky binder. This complete coating is crucial for the bars to hold together.
- Transfer the mixture to the prepared baking pan. The most critical step for achieving bars that never crumble is to press the mixture down very firmly and evenly into the pan. Use the back of a spoon or a flat-bottomed glass to compact it as much as possible, paying special attention to the corners and edges.
- Sprinkle the remaining 1/4 cup of pumpkin seeds and a generous pinch of flaky sea salt over the top. Gently press them down lightly into the mixture.
- Bake for 20 to 25 minutes, or until the edges are golden brown and the top is lightly toasted.
- Remove the pan from the oven and let the bars cool completely in the pan on a wire rack.
- Once at room temperature, transfer the pan to the refrigerator and chill for at least 2 hours (or preferably overnight). Chilling fully allows the binding agents to set completely, ensuring your bars will cut cleanly and hold their shape perfectly without falling apart.
- Once chilled, use the parchment paper overhang to lift the slab out of the pan. Place it on a cutting board and cut into 12 bars. Store in an airtight container at room temperature for up to a week, or in the refrigerator for longer freshness.
Notes
- Store in an airtight container at room temperature for up to a week, or in the refrigerator for longer freshness.


