
I remember the first time I truly perfected an Irresistible Coconut Cake – it wasn’t by chance. After years of chasing that elusive, impossibly light crumb, I unlocked a simple yet powerful technique that guarantees an unbelievably moist and fluffy texture every single time. This isn’t just a recipe; it’s your trusted guide to creating a truly exceptional tropical dessert that will captivate everyone.
Why This Coconut Cake Recipe Stands Above the Rest
Unlocking “Unbelievably Moist and Fluffy” Every Time
This Irresistible Coconut Cake recipe delivers on its promise of unparalleled moistness and fluffiness. We achieve this through meticulous attention to ingredient temperature and precise mixing techniques.
Each step is designed to incorporate and retain air within the batter, ensuring a tender, delicate crumb. You’ll never again face the disappointment of a dense or dry coconut cake.
The Simple Techniques for a Guaranteed Light Texture
Our recipe highlights specific methods crucial for an airy result. Extended creaming of butter and sugar traps vital air, creating the foundation for a light cake.
Careful sifting of dry ingredients eliminates lumps and evenly distributes leavening, contributing to a uniform rise. Gentle mixing after adding flour prevents gluten overdevelopment, which is key to maintaining tenderness.
Gathering Your Tropical Treasure: Key Ingredients
The Foundation: Flour, Sugar, and Leavening
All-purpose flour provides the essential structure for our cake. Sifting it removes any clumps, allowing for a smoother, more even batter and a finer crumb.
Granulated sugar not only sweetens but also attracts and holds moisture, ensuring a tender and moist cake. It contributes to the beautiful golden-brown crust as well.
Baking powder is our crucial leavening agent, creating the gas bubbles that give the cake its signature lift and airy texture. Salt balances the sweetness and enhances all the other flavors.
The Creamy Core: Butter and Eggs
Unsalted butter, softened to room temperature, is paramount for proper creaming. This process aerates the butter, forming pockets that capture air, which is fundamental for a light cake.
Large eggs, also at room temperature, emulsify seamlessly into the batter. They add richness, structure, and contribute to the cake’s tender texture, preventing it from drying out.
Liquid Gold: Milk and Flavor Extracts
Whole milk at room temperature adds essential moisture and richness, yielding a wonderfully tender crumb. Its fat content helps create a luxurious mouthfeel.
Vanilla extract offers a universally beloved foundational sweetness and aroma. Coconut extract amplifies the tropical essence, ensuring every bite bursts with authentic coconut flavor.
The Star: Shredded Coconut (for both cake and topping)
Shredded coconut plays a dual role, infusing the cake batter with subtle flavor and delightful texture. It adds a pleasant chewiness that enhances the overall experience.
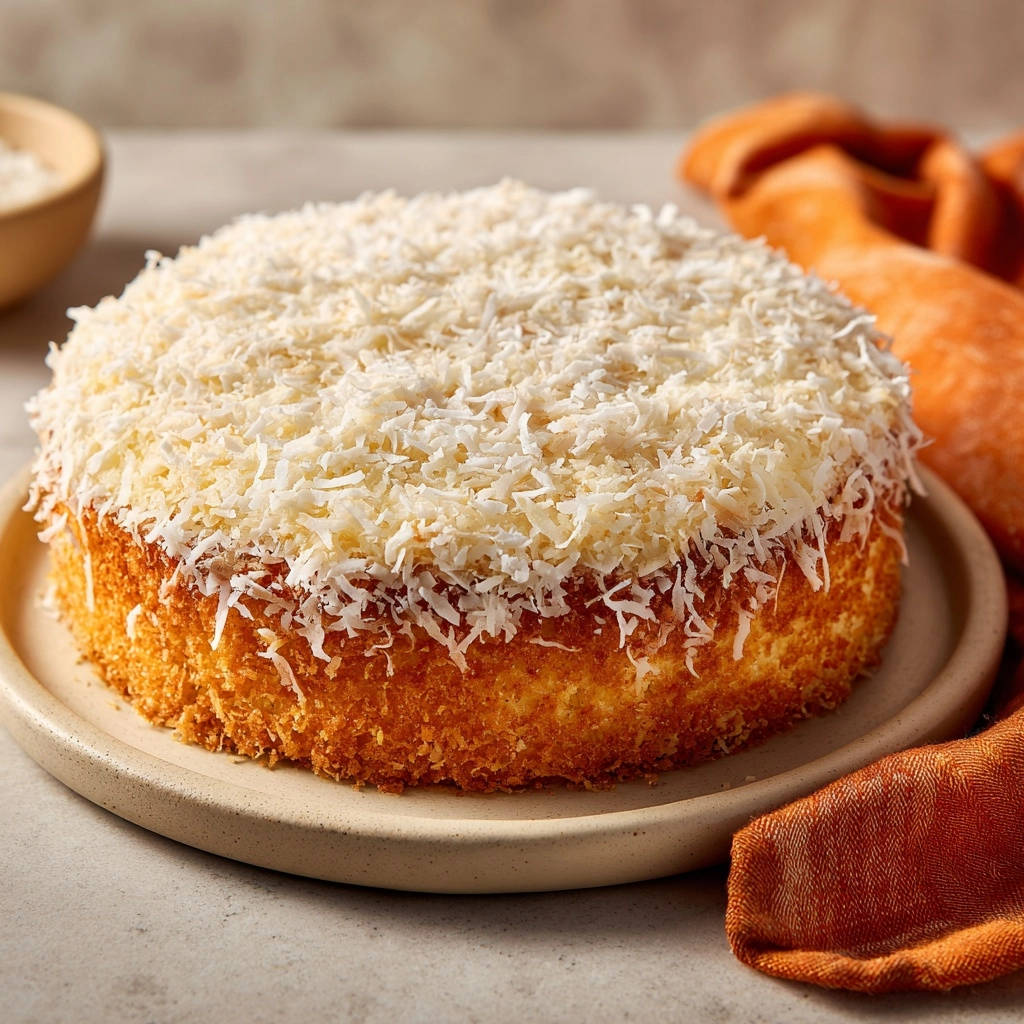
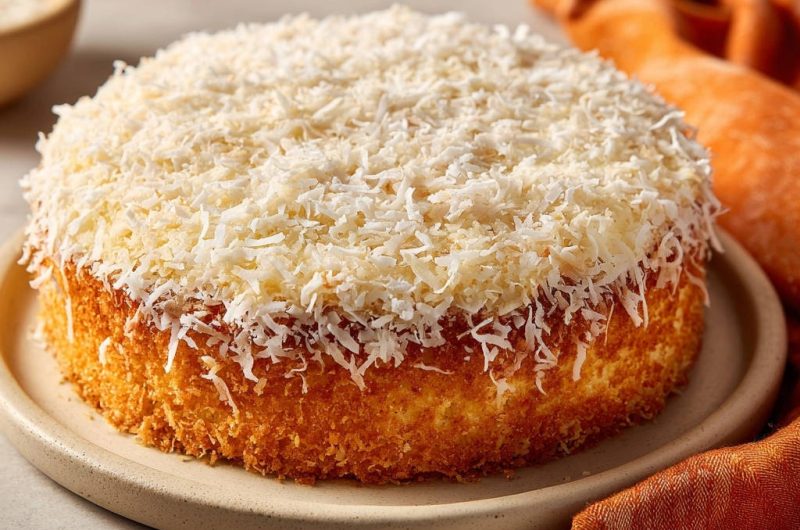
The generous topping of shredded coconut delivers an intense, vibrant coconut flavor and a beautiful visual appeal. You can use sweetened or unsweetened, depending on your sweetness preference.
Crafting the Optional Glaze
Our simple glaze, made from powdered sugar and milk, serves a practical purpose. It acts as a delicious adhesive, ensuring the shredded coconut topping sticks perfectly to the cake.
This thin layer also adds a touch of extra sweetness and a delicate sheen, complementing the robust coconut flavor.
Essential Tools for Your Baking Adventure
Must-Have Baking Equipment
9-inch Round Cake Pan: The standard size for this recipe, ensuring even baking and a beautiful presentation.
Mixing Bowls (Medium and Large): Necessary for separating wet and dry ingredients and for combining the batter efficiently.
Whisk: Ideal for sifting dry ingredients and preparing the simple glaze.
Electric Mixer: Crucial for creaming butter and sugar effectively, which is vital for the cake’s fluffy texture.
Wire Rack: Essential for cooling the cake evenly after baking, preventing a soggy bottom.
Measuring Cups and Spoons: Accurate measurements are key for consistent baking results.
Optional Gadgets for Next-Level Results
Kitchen Scale: For ultimate precision, especially with flour, a kitchen scale ensures perfect ingredient ratios every time.
Offset Spatula: Great for evenly spreading the batter into the pan and applying the glaze smoothly.
Cake Leveler: Helps create perfectly flat cake layers if you plan to stack and frost, though not strictly needed for this single-layer cake.
Your Path to Fluffy Perfection: Step-by-Step Baking Guide
- Prepare Your Workspace and Pan:
Preheat your oven to 350°F (175°C) and meticulously grease and flour your 9-inch round cake pan. A thoroughly prepared pan is critical for ensuring your beautiful Irresistible Coconut Cake releases cleanly, preventing any sticking.
- Sift Dry Ingredients for Aeration:
In a medium bowl, combine the all-purpose flour, baking powder, and salt, ensuring they are thoroughly sifted together. Sifting is your initial, vital move to aerate the flour, prevent lumps, and ultimately achieve a tender, uniform crumb.
- The Secret Weapon: Creaming Butter and Sugar:
In a large bowl, cream the softened unsalted butter and granulated sugar using an electric mixer on medium-high speed for 3 to 5 minutes. Continue until the mixture is visibly light, pale, and remarkably fluffy. This extended creaming is your secret weapon, a non-negotiable step that incorporates ample air into the batter, directly contributing to the cake’s wonderfully airy texture.
- Incorporate Eggs and Extracts:
Beat in the large eggs one at a time, mixing well after each addition until fully incorporated. Then, stir in the vanilla extract and coconut extract. This methodical addition ensures proper emulsification, creating a stable batter and evenly distributing the delightful tropical flavors throughout the cake.
- Alternating Wet and Dry: The Gentle Mix:
With your mixer on low speed, add the sifted dry ingredients to the wet mixture in three additions, alternating with the whole milk in two additions. Always begin and end with the dry ingredients. Mix only until just combined after each addition, gently scraping down the sides of the bowl as needed. It is crucial not to overmix at this stage, as overworking the gluten will result in a tough, dense cake, sacrificing its intended fluffy perfection.
- Fold in Shredded Coconut:
Gently fold 1 cup of the shredded coconut into the batter by hand until it is evenly distributed. Folding by hand is essential here; it preserves the precious air you’ve carefully built into the batter, maintaining the cake’s lightness.
- Pour and Prepare for Baking:
Pour the prepared batter evenly into your greased and floured 9-inch cake pan. Spreading the batter uniformly helps ensure an even bake, leading to a level cake that’s ready for its delicious topping.
- Bake to Golden Perfection:
Bake for 30 to 35 minutes in your preheated oven, or until a wooden skewer or toothpick inserted into the very center of the cake comes out completely clean. Avoid opening the oven door too frequently during the baking process, especially early on, as this can cause the cake to sink.
- Cooling with Care:
Allow the cake to cool in its pan for 10 minutes before carefully inverting it onto a wire rack to cool completely. This crucial resting period prevents the delicate cake from breaking during transfer and ensures it is stable for the final decorating stage. Patience here is key for a beautifully intact cake.
- The Tropical Finish: Glaze and Topping:
Once the cake is completely cool, whisk together the powdered sugar and milk to create a simple, thin glaze. Spread a thin, even layer of this glaze over the top of the cake. Then, generously press the remaining 1 cup of shredded coconut onto both the top and sides of the cake for a truly stunning, flavorful, and textured finish. This creates an inviting presentation for your delightful creation.
Mastering the Fluff: Expert Tips & Tricks for Success
The Creaming Method: Your Secret to Airiness
Don’t Skimp on Creaming Time: The 3-5 minutes dedicated to creaming butter and sugar is absolutely non-negotiable. This step traps essential air, which forms the very foundation of your fluffy cake. Visually, look for a pale, almost white color and a significantly increased volume in your mixture.
The Art of Gentle Mixing: Avoiding Dense Cake
Less is More for Flour: Once you introduce flour, mix only until just combined. Overmixing rapidly develops gluten, leading to a tough, rubbery cake. A few small streaks of flour are always preferable to a dense cake, as they will disappear during baking.
Room Temperature Matters: Ingredient Harmony
Warm Ingredients, Better Emulsification: Always ensure your butter, eggs, and milk are at true room temperature. This allows them to combine smoothly and efficiently, creating a stable emulsion that holds air much better and results in a wonderfully fine, tender crumb for your guaranteed moist classic coconut cake.
Cooling Patience: The Final Touches
Cool Completely Before Glazing: Attempting to glaze or frost a warm cake will inevitably lead to a melty, messy disaster. Allow your cake to cool fully and completely on a wire rack before any decorating. This patience ensures the glaze sets perfectly and the coconut adheres beautifully.
Troubleshooting Common Cake Conundrums
Why is My Cake Dry or Crumbly?
Overbaking is a primary culprit for a dry cake. Always use the toothpick test and remove the cake promptly once it comes out clean, as even a few extra minutes can make a difference.
Too much flour or insufficient liquid can also lead to dryness. Ensure accurate measurements, ideally using a kitchen scale for flour, and confirm all liquid ingredients are included as specified.
Help! My Cake is Dense and Heavy
Overmixing the batter once flour has been added develops gluten, resulting in a tough, dense texture. Mix only until just combined to keep the cake light.
Ingredients that are too cold won’t emulsify properly, affecting the batter’s ability to hold air. Always bring butter, eggs, and milk to room temperature before starting.
Uneven Rise or Sunken Center
An uneven oven temperature can cause parts of the cake to bake faster than others. Calibrate your oven if you suspect it runs hot or cold, or rotate the pan halfway through baking.
Opening the oven door too early or too frequently during baking can cause a sudden temperature drop, leading to a sunken center. Resist the urge to peek until the last 10-15 minutes.
Serving, Storing, & Customizing Your Tropical Treat
Elegant Serving Suggestions
Your Irresistible Coconut Cake is a showstopper on its own. For an extra touch of elegance, serve slices with a side of fresh berries, particularly raspberries or blueberries, which provide a lovely color contrast and tart counterpoint.
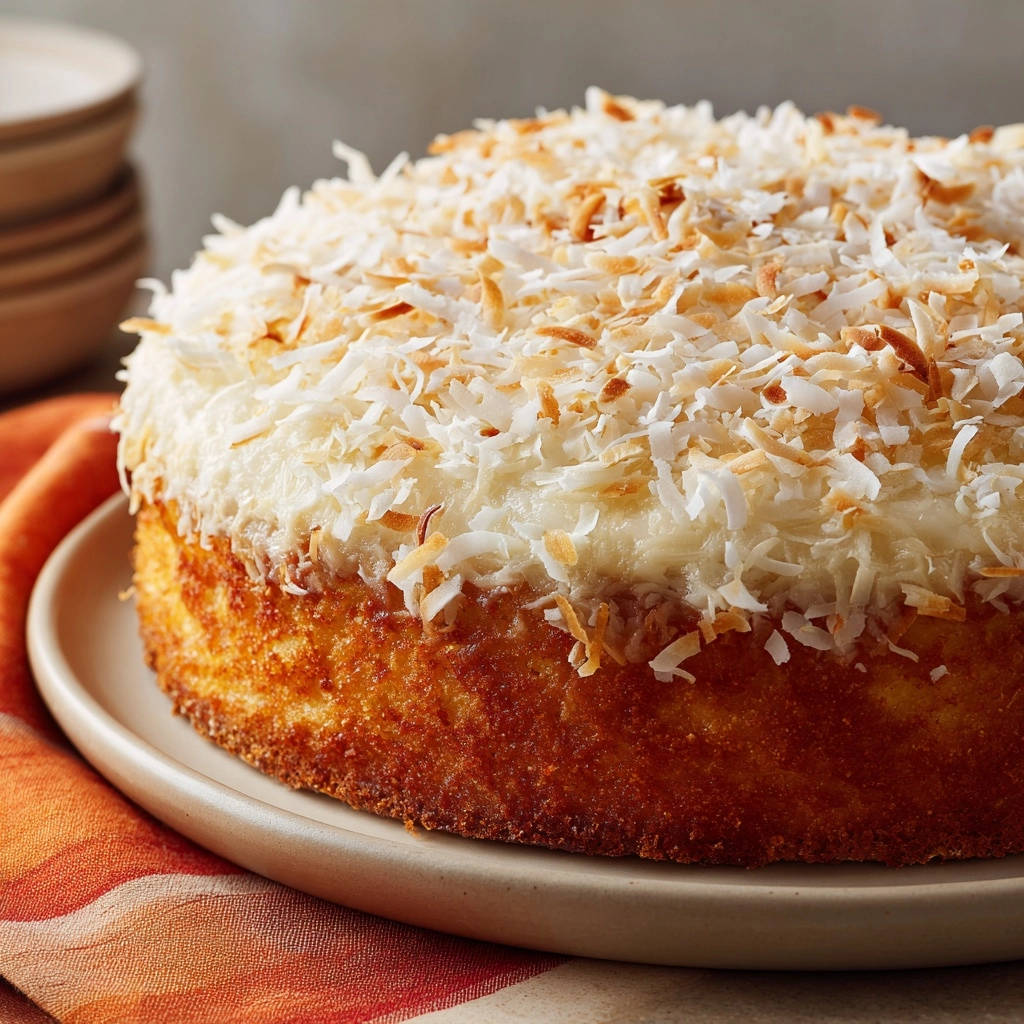
A small dollop of lightly sweetened whipped cream or a sprinkle of toasted coconut flakes can elevate the presentation and add another layer of texture. For a delightful variation, consider a slice alongside a scoop of vanilla bean ice cream.
Make-Ahead & Storage Solutions
This coconut cake stays beautifully fresh at room temperature for up to 3 days, stored under a cake dome or in an airtight container. If you live in a very warm or humid climate, or if it has a dairy-based frosting (beyond our simple glaze), refrigeration is best.
For longer storage, the cake freezes exceptionally well. Wrap individual slices or the entire cake tightly in plastic wrap, then in foil, and freeze for up to 2-3 months. Thaw at room temperature for several hours before serving.
Exciting Flavor Variations & Topping Ideas
Infuse your tropical treat with even more zest by adding a teaspoon of lime zest to the batter alongside the extracts. A touch of almond extract can also complement the coconut beautifully.
Consider pressing finely chopped toasted nuts, like pecans or macadamias, onto the glaze with the coconut for added crunch. For other delicious variations, you might enjoy trying an easy coconut bundt cake with a citrus glaze.
Frequently Asked Questions About Irresistible Coconut Cake
Can I Use a Different Type of Flour?
While all-purpose flour provides the ideal structure, you can substitute cake flour for an even more tender crumb. If using cake flour, you may need to increase the amount by a couple of tablespoons due to its lower protein content.
Self-rising flour is not recommended, as it contains leavening and salt, which would throw off the balance of this recipe.
Is There a Dairy-Free Alternative for Milk?
Yes, you can substitute dairy-free milk alternatives such as almond milk or soy milk. Be aware that this might subtly alter the cake’s richness and texture, but it will still be delicious.
Coconut milk (from a carton, not canned) can also be used to intensify the coconut flavor even further.
How Far in Advance Can I Bake This Cake?
For optimal freshness and flavor, we recommend baking this Irresistible Coconut Cake no more than 1-2 days in advance of serving. The flavors will have a chance to meld beautifully, and the texture will remain perfect.
If you need to bake further in advance, consider baking and cooling the cake, then wrapping it tightly and freezing it before glazing and topping.
Can I Freeze the Cake?
Absolutely! This coconut cake freezes very well. Once completely cooled, wrap the cake tightly in plastic wrap, then again in aluminum foil to prevent freezer burn.
It can be frozen for up to 2-3 months. To thaw, simply unwrap and let it come to room temperature on your counter for several hours before glazing and serving. This method is also excellent for achieving a truly moist result, much like our guide to achieving a truly moist chocolate cake.
Your Fluffy Creation Awaits: Share the Joy!
Now that you’re equipped with the secrets to a truly irresistible, unbelievably fluffy coconut cake, it’s time to preheat your oven and embark on this delicious journey. We’re confident this recipe will become a cherished favorite in your home, bringing smiles and tropical flavors to every gathering.
Don’t forget to share your baking triumphs with us! Tag us on social media or leave a comment below with your experience. We love seeing your incredible creations.
Coconut Cake
Course: DessertCuisine: AmericanDifficulty: easy8
servings20
minutes30
minutes350
kcal50
minutesDiscover the simple technique for a consistently light, airy, and moist cake, guaranteed every time. This recipe reveals the secrets to an unbelievably fluffy coconut cake, with a delicate coconut flavor and an optional glaze.
Ingredients
1 and 3/4 cups all-purpose flour
1 and 1/2 cups granulated sugar
1 tablespoon baking powder
1/2 teaspoon salt
1/2 cup unsalted butter, softened (room temperature is key!)
2 large eggs (room temperature)
1 cup whole milk (room temperature)
1 teaspoon vanilla extract
1 teaspoon coconut extract
2 cups shredded coconut, divided (1 cup for cake, 1 cup for topping)
For simple glaze (optional, for coconut adhesion): 1/4 cup powdered sugar, 1-2 tablespoons milk
Directions
- Preheat your oven to 350F (175C). Grease and flour a 9-inch round cake pan thoroughly.
- In a medium bowl, sift together the all-purpose flour, baking powder, and salt. Sifting helps to aerate the flour and prevent lumps, which is a critical first step for a tender crumb.
- In a large bowl, using an electric mixer, beat the softened butter and granulated sugar together on medium-high speed for 3 to 5 minutes, until the mixture is light, pale, and fluffy. This extended creaming process is your secret weapon for incorporating air into the batter, which is what gives the cake its wonderful, airy texture.
- Beat in the eggs one at a time, mixing well after each addition. Stir in the vanilla extract and coconut extract until fully combined.
- With the mixer on low speed, add the dry ingredients to the wet ingredients in three additions, alternating with the milk in two additions. Begin and end with the dry ingredients. Mix only until just combined after each addition, scraping down the sides of the bowl as needed. It is crucial not to overmix at this stage, as overmixing will develop the gluten and make your cake tough and dense instead of fluffy.
- Gently fold in 1 cup of the shredded coconut by hand until evenly distributed.
- Pour the batter into your prepared cake pan and spread evenly.
- Bake for 30 to 35 minutes, or until a wooden skewer or toothpick inserted into the center of the cake comes out clean.
- Let the cake cool in the pan for 10 minutes before carefully inverting it onto a wire rack to cool completely.
- Once the cake is completely cool, whisk together powdered sugar and milk for a simple glaze, if using. Spread a thin layer of this glaze over the top of the cake, then generously press the remaining 1 cup of shredded coconut onto the top and sides of the cake. Slice and enjoy your perfectly fluffy creation!
Notes
- Ensure butter, eggs, and milk are at room temperature for the best results and a truly fluffy cake.


