
I remember the frustration: sticky fingers, misshapen balls, and a mess that made me question if homemade truffles were even worth it. But then I discovered the game-changing secret to perfectly smooth, non-sticky Irresistible Coconut Truffles, and it transformed my kitchen. This recipe doesn’t just promise delicious results; it delivers perfectly rollable coconut truffles every single time, thanks to a simple, crucial chilling step.
Why These Irresistible Coconut Truffles Are Your New Favorite Treat
Say Goodbye to Sticky Struggles: The “Secret Weapon” Revealed
The primary benefit of this recipe is its ingenious method for eliminating the common sticky mess. By allowing the mixture to thoroughly chill, the butter and sugar firm up, making the rolling process effortless and clean.
You’ll achieve beautifully formed truffles without the usual frustration, making this an enjoyable baking experience.
Simple Ingredients, Stunning Results
You don’t need exotic ingredients to create something truly special. This recipe relies on pantry staples, transforming them into elegant, delicious homemade coconut candy that looks and tastes gourmet.
The simplicity ensures anyone can make these impressive treats, regardless of their baking experience.
Perfect for Every Occasion (or No Occasion At All!)
These Irresistible Coconut Truffles are incredibly versatile. They’re ideal for holiday platters, thoughtful edible gifts, or simply a sweet indulgence with your afternoon coffee.
Their delightful flavor and easy preparation make them a go-to treat for any moment, big or small.
Essential Ingredients for Irresistible Coconut Truffles Perfection
The Creamy Foundation: Butter & Sweetened Condensed Milk
Unsalted Butter, Softened: Using softened butter is non-negotiable for a smooth, homogenous mixture. It creams effortlessly, providing a rich base without over-mixing.
Sweetened Condensed Milk: This ingredient is key to the truffles’ luscious, chewy texture and intense sweetness. It acts as both a binder and a flavor enhancer, creating that signature creamy interior.
Sweetness and Structure: Powdered Sugar & Vanilla Extract
Powdered Sugar, Sifted: Sifting your powdered sugar prevents lumps, ensuring a silky-smooth truffle interior. It also contributes significantly to the final firm, yet tender, consistency of the mixture.
Vanilla Extract: A good quality vanilla extract elevates all the other flavors. It adds a warm, classic aroma and taste, making these sweet coconut bites truly irresistible.
The Star of the Show: Shredded Coconut
Shredded Coconut (Sweetened or Unsweetened): Sweetened shredded coconut provides extra flavor and moisture, enhancing the tropical essence. If you prefer less sweetness, unsweetened coconut works, but you might adjust the powdered sugar slightly.
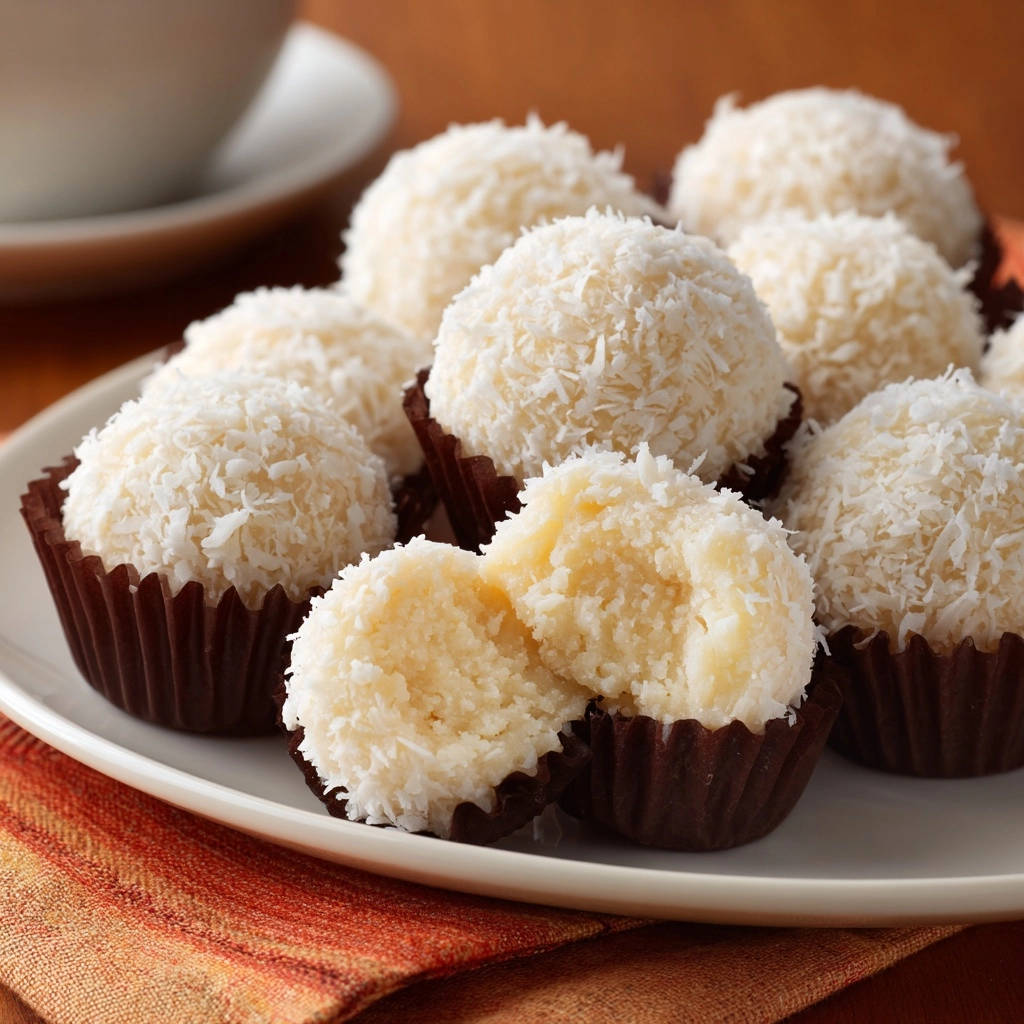
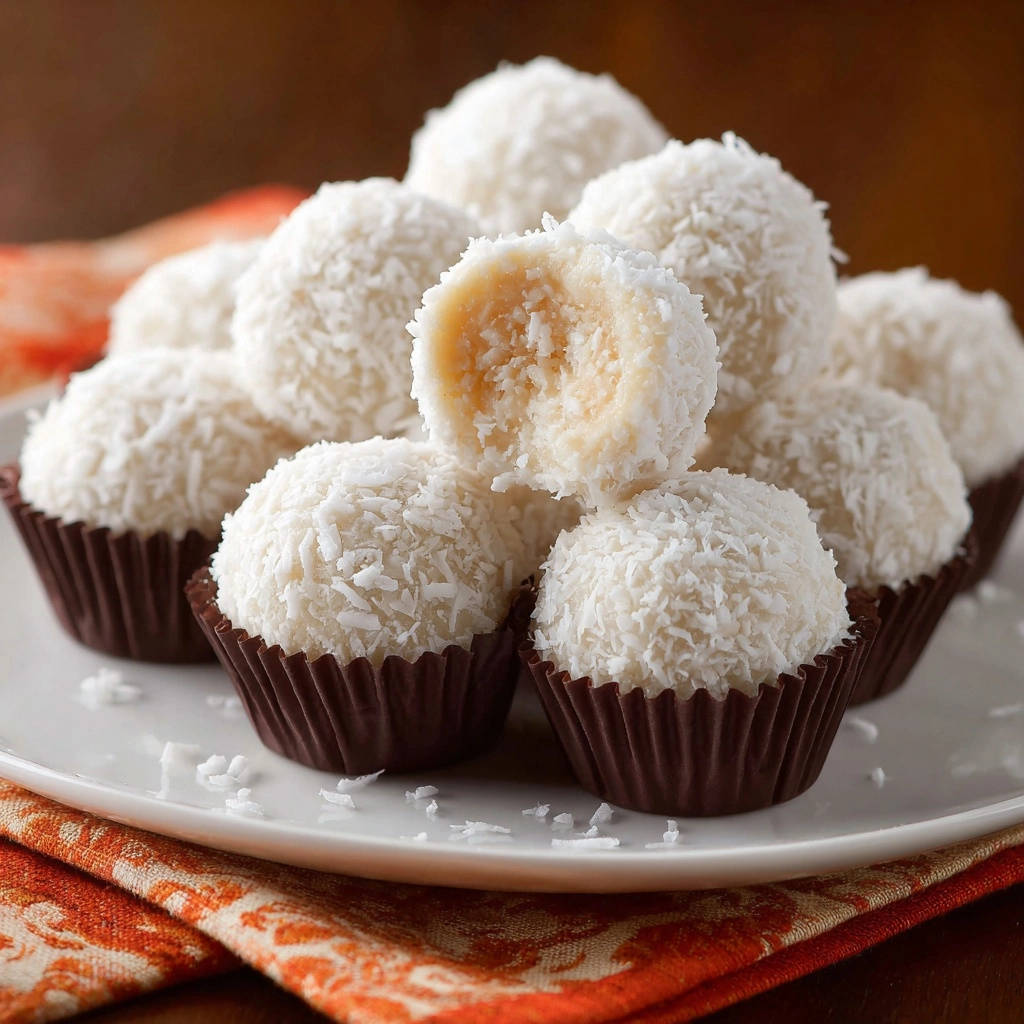
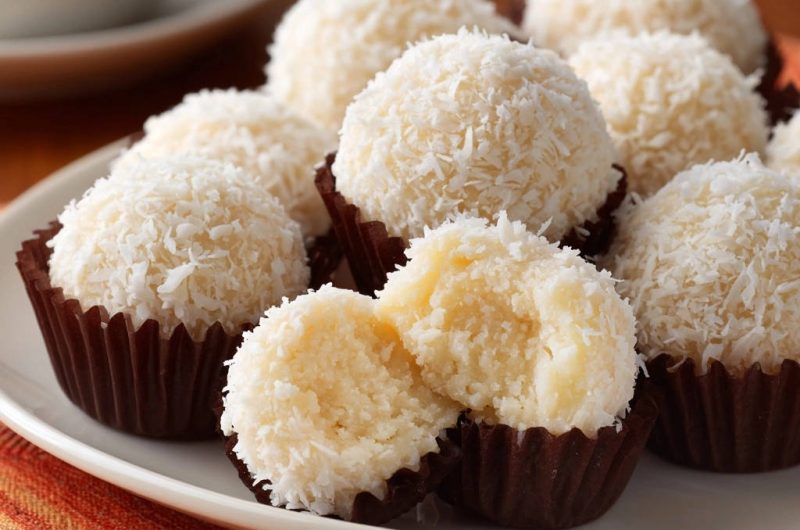
It’s used both in the truffle mixture and as the beautiful, snowy outer coating, giving a satisfying textural contrast.
Your Step-by-Step Guide to Perfectly Rollable Coconut Truffles
- Step 1: Beat the Butter to Fluffy Perfection
In a large mixing bowl, beat 1/2 cup of softened unsalted butter with an electric mixer. Continue until it’s noticeably light in color and fluffy, usually about 2 minutes. This aeration is crucial for a tender truffle.
- Step 2: Combine Wet Ingredients for a Smooth Base
Gradually add 1/2 cup of sweetened condensed milk and 1 teaspoon of vanilla extract to the beaten butter. Mix on low speed until everything is just well combined and uniform. Avoid over-mixing here.
- Step 3: Incorporate Sifted Powdered Sugar Gradually
Slowly add 3 cups of sifted powdered sugar, one cup at a time, mixing on low speed after each addition. The mixture will progressively thicken, forming a dense, dough-like consistency. Ensure all the sugar is fully absorbed.
- Step 4: Fold in the First Batch of Shredded Coconut
Gently fold in 1 1/2 cups of shredded coconut using a spatula. Mix until the coconut is evenly distributed throughout the thick mixture. This ensures every bite has that delightful coconut texture.
- Step 5: The “No-Stick Secret” – Crucial Chilling Time
This is your secret weapon for easy, non-sticky rolling. Cover the bowl tightly with plastic wrap and refrigerate the mixture for at least 1 hour. This critical chilling time allows the butter and sugar to firm up, making the mixture perfectly manageable and preventing it from sticking to your hands when rolling.
Don’t skip or rush this step; it truly makes all the difference for beautifully formed Irresistible Coconut Truffles.
- Step 6: Prepare Your Coating Station
While the truffle mixture chills, pour the remaining 1 cup of shredded coconut into a shallow dish or plate. This prepares your coating station, making the rolling process seamless.
- Step 7: Roll Your Perfectly Manageable Truffles
Lightly grease your hands with a tiny bit of butter or cooking spray. Take small portions of the chilled mixture, about 1 tablespoon, and roll them gently between your palms into smooth, compact balls.
If the mixture begins to soften and become difficult to handle, simply return it to the fridge for 5-10 minutes to firm up again before continuing.
- Step 8: Achieve a Beautiful, Even Coconut Coating
Roll each formed truffle in the shredded coconut you prepared, pressing gently to ensure a thorough and even coating. This not only adds flavor and texture but also gives the truffles their signature elegant look.
- Step 9: Chill and Serve Your Irresistible Coconut Truffles
Place the finished truffles in mini paper liners if desired, then refrigerate until you’re ready to serve them. These creamy coconut balls taste best when thoroughly chilled, allowing the flavors to fully meld and the texture to firm up perfectly.
Unlock the Secrets: Expert Tips for Flawless Coconut Truffles
Mastering the Chill: The Ultimate Key to Non-Sticky Rolling: For truly non-sticky rolling, ensure your mixture chills for at least 60 minutes, or even up to 2 hours. It should feel firm to the touch, not just cold. If you find it’s still too soft, pop it back in for another 15-20 minutes.
Perfecting Your Roll: Achieving Smooth, Uniform Truffles: A very light film of butter or neutral cooking spray on your hands prevents sticking and helps create a smooth surface. Use a small cookie scoop or measuring spoon (1 tablespoon size) for consistent portions, then roll gently with even pressure for uniform Irresistible Coconut Truffles.
Creative Coating Ideas: Beyond Basic Coconut: While classic coconut is wonderful, consider rolling your finished truffles in finely chopped toasted almonds, colorful sprinkles, or even a dusting of cocoa powder. For another delightful dessert, try a rich gooey chocolate cluster as an alternative coating!
Flavor Boosters: Elevate Your Truffle Game: Enhance the flavor by adding a touch of almond extract alongside the vanilla for a richer profile. A tiny pinch of sea salt in the mixture can also beautifully balance the sweetness. For a citrusy hint, fold in a teaspoon of fresh lime or orange zest with the coconut.
Troubleshooting Common Truffle Hurdles
Truffle Mixture Too Sticky or Soft?
If your mixture is too sticky to roll, it likely needs more chilling time. Refrigerate it for another 30 minutes to an hour. Ensure your butter was truly softened, not melted, which can throw off the consistency.
In very humid environments, you might need to add an extra tablespoon or two of sifted powdered sugar to absorb excess moisture.
My Truffles Aren’t Holding Their Shape
This often points to a mixture that isn’t firm enough or hands that are too warm. Ensure the mixture is well-chilled before you start. Roll quickly and gently, returning any softened portions to the fridge.
Compact rolling, pressing the mixture firmly but gently, also helps them hold their spherical form.
Uneven Coconut Coating
For an even coating, place enough shredded coconut in your shallow dish to fully submerge the truffle. Gently roll and press the truffle into the coconut, ensuring all sides are covered. Don’t be afraid to add more coconut to the dish as you go.
Storage & Make-Ahead Magic: Enjoying Your Truffles Longer
Optimal Storage for Freshness and Flavor
Store your Irresistible Coconut Truffles in an airtight container in the refrigerator for up to 1 week. This keeps them firm, fresh, and prevents them from drying out or absorbing other fridge odors.
Can You Make These Ahead? Absolutely!
These truffles are fantastic for making in advance. You can prepare the mixture and chill it for up to 2-3 days before rolling. Once rolled and coated, they can be stored in the fridge for up to a week, making them perfect for parties or holiday gifting. They also freeze beautifully for up to 2 months.
Best Serving Temperature for Irresistible Coconut Truffles
For the best texture and flavor, serve these truffles thoroughly chilled, straight from the refrigerator. The cold enhances their firm, chewy bite and keeps them from becoming too soft. You might also enjoy these refreshing strawberry coconut energy bites for another delightful cold treat.
Frequently Asked Questions About Homemade Coconut Truffles
Can I use unsweetened coconut instead of sweetened?
Yes, you can use unsweetened shredded coconut, but be aware it will result in a less sweet truffle. You might consider adding an extra 1/4 to 1/2 cup of powdered sugar to compensate for the lost sweetness, or perhaps an additional teaspoon of vanilla extract to boost flavor.
How long do homemade Irresistible Coconut Truffles last?
When stored properly in an airtight container in the refrigerator, your Irresistible Coconut Truffles will remain fresh and delicious for up to 7 days. For longer storage, they can be frozen for up to 2 months.
Are there any dairy-free alternatives for this recipe?
While this recipe relies on dairy for its classic texture, you can experiment with dairy-free alternatives. Use a good quality dairy-free butter stick and a sweetened condensed coconut milk for a vegan option. Be aware that the texture might vary slightly, but it can still be delicious.
Can I add other flavors or inclusions to the truffle mixture?
Absolutely! The base is very forgiving. Try folding in mini chocolate chips, finely chopped dried cranberries, or a teaspoon of orange or lemon zest for a bright twist. A touch of rum extract can also add a sophisticated flavor. For another fantastic dessert using coconut, consider this guaranteed moist classic coconut cake.
Ready to Create Your Own Irresistible Coconut Truffles?
Now that you’re armed with all the secrets, from the crucial chilling step to expert rolling tips, you’re ready to create truly Irresistible Coconut Truffles. Say goodbye to sticky messes and hello to perfectly formed, deliciously creamy bites that will impress everyone.
Go ahead, gather your ingredients, and transform simple pantry staples into an extraordinary treat. Don’t forget to share your creations and any new flavor twists you discover!
Coconut Truffles
Course: DessertCuisine: AmericanDifficulty: easy20
truffles15
minutes240
kcal60
minutesDiscover the secret to perfectly smooth, non-sticky coconut truffles every time. This recipe cracks the code for snow-white bites without the struggle, thanks to a crucial chilling step. Enjoy these sweet treats effortlessly!
Ingredients
1/2 cup unsalted butter, softened
1/2 cup sweetened condensed milk
3 cups powdered sugar, sifted
1 teaspoon vanilla extract
2 1/2 cups shredded coconut, divided
Directions
- In a large mixing bowl, beat the softened butter until light and fluffy.
- Gradually add the sweetened condensed milk and vanilla extract, mixing until well combined.
- Slowly add the sifted powdered sugar, one cup at a time, mixing on low speed until fully incorporated and the mixture forms a thick, dough-like consistency. Ensure the sugar is fully absorbed for the best texture.
- Fold in 1 1/2 cups of the shredded coconut until evenly distributed throughout the mixture.
- This is your secret weapon for easy, non-sticky rolling: Cover the bowl tightly with plastic wrap and refrigerate the mixture for at least 1 hour. This crucial chilling time allows the butter and sugar to firm up, making the mixture perfectly manageable and preventing it from sticking to your hands.
- Place the remaining 1 cup of shredded coconut in a shallow dish for coating.
- Lightly grease your hands with a tiny bit of butter or cooking spray. Take small portions of the chilled mixture (about 1 tablespoon) and roll them gently between your palms into smooth, compact balls. If the mixture starts to get too soft, pop it back into the fridge for a few minutes before continuing.
- Roll each truffle in the shredded coconut, pressing gently to ensure an even coating.
- Place the finished truffles in mini paper liners if desired, and refrigerate until ready to serve. They taste best when thoroughly chilled!
Notes
- For best texture and flavor, ensure truffles are thoroughly chilled before serving.


