
There is nothing more frustrating than pulling flat, dense biscuits from the oven, but achieving stunning, tall, flaky layers is simpler than you imagine. The secret to perfect Layered Buttermilk Biscuits with Cream and Curd lies in one crucial, simple folding technique that guarantees maximum height and flakiness every time.
Why This Biscuit Recipe Guarantees Light, Flaky Layers Every Time
The secret is the technique-not the ingredients. Unlike standard drop biscuits, we focus entirely on maintaining cold ingredients and the strategic layering method to ensure an exceptional rise.
The Triple-Fold Advantage: This fast, easy method involves quickly folding the dough into thirds three times. This action creates hundreds of thin, stacked layers without developing tough gluten, ensuring maximum vertical rise and tender interiors.
Frozen Butter is Non-Negotiable: Using rock-solid, frozen butter cubes is superior to merely cold butter. The cubes stay intact longer in the dough, leading to larger steam pockets during baking and thus, taller biscuits.
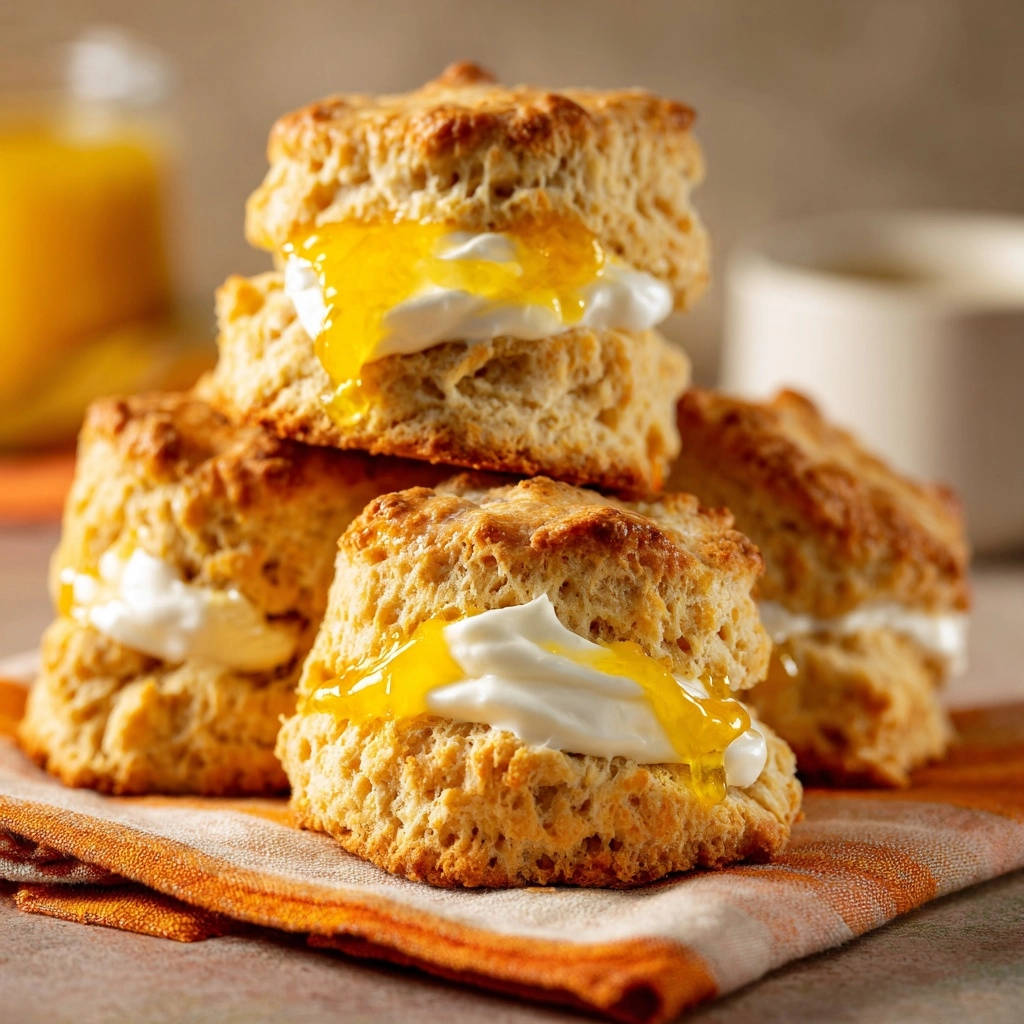
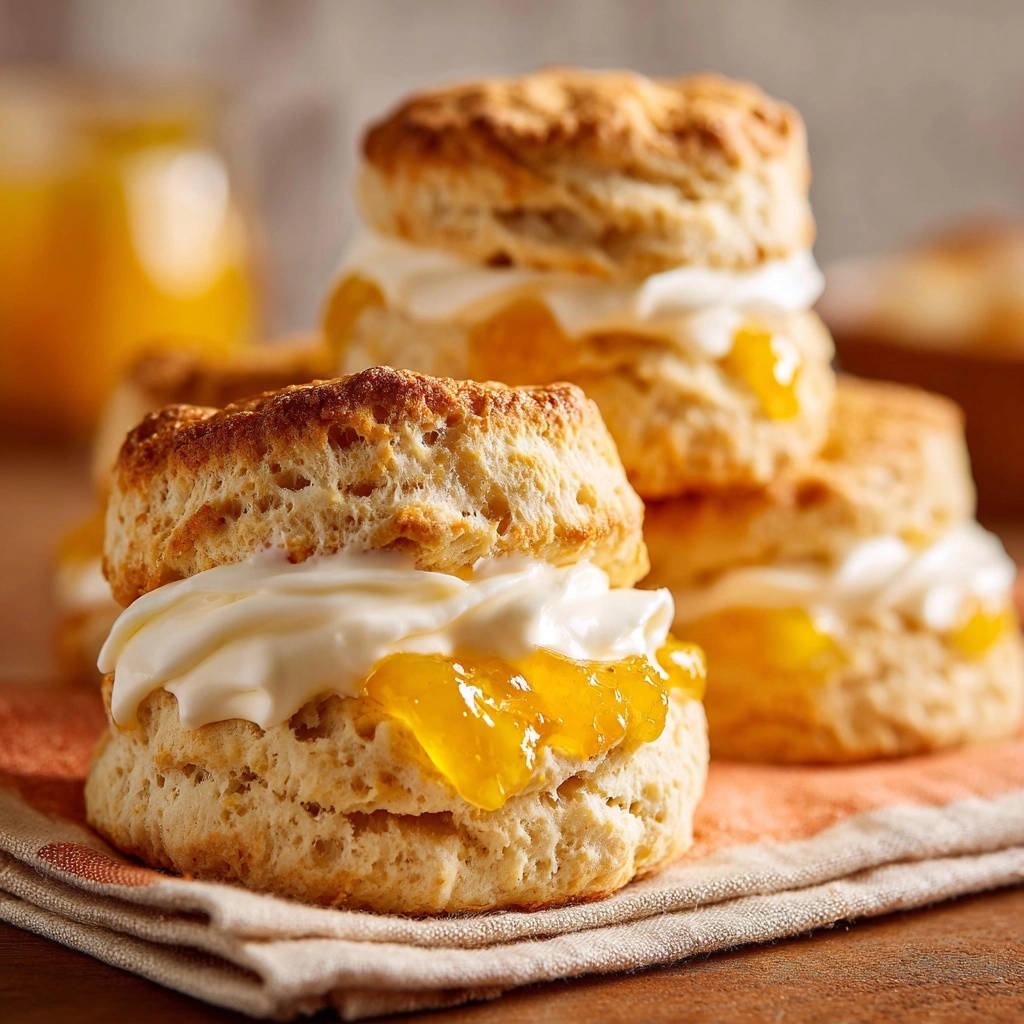
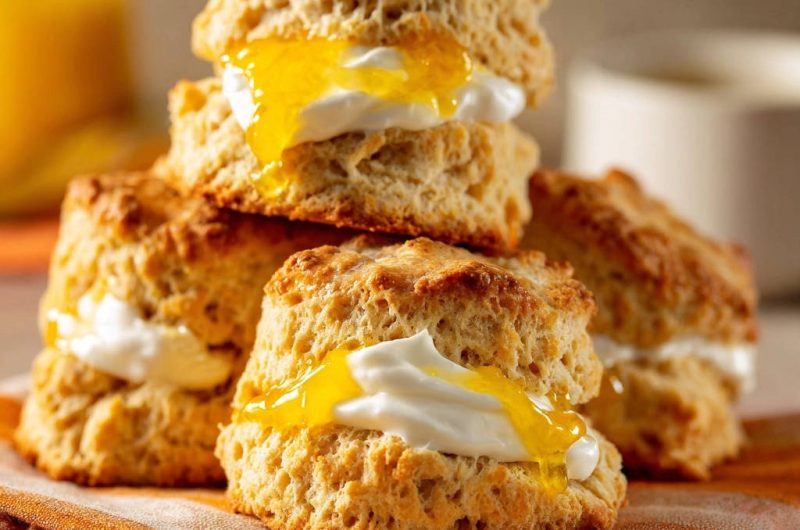
Effortless Elegance: How the simple addition of whipped cream and tangy lemon curd (or jam) transforms these light, fluffy biscuits into a stunning dessert or brunch feature, elevating the classic tea biscuit experience.
The Building Blocks: Importance of Cold Ingredients and Quality Curd
The Flour and Leavening Foundation
All-purpose flour provides the necessary structure, but its careful handling is key to preventing toughness.
Baking powder is essential here, providing the primary chemical lift that works alongside the steam created by the melting butter for a beautiful rise.
The Frozen Fat Factor: Why Butter Must Be Icy
Using frozen butter is the cornerstone of layering. The hard fat pieces are necessary to build structure and texture.
When the ice-cold butter hits the hot oven, it releases steam, which pushes the dough apart, creating the flaky pockets and ensuring the biscuits rise tall before the butter melts completely.
The Buttermilk Choice
Buttermilk’s acidity reacts strongly with the baking powder, boosting the rise for incredibly high biscuits.
Furthermore, buttermilk tenderizes the dough structure, leading to a much softer, more melt-in-your-mouth crumb than standard milk.
Elevating the Filling: Cream, Curd, or Jam
The heavy cream, stabilized and sweetened slightly with powdered sugar, provides a cooling, comforting counterpoint to the rich, warm biscuit.
The choice between bright lemon curd or tart apricot jam cuts through the richness and balances the entire flavor profile of the Layered Buttermilk Biscuits with Cream and Curd, adding vital zest.
Essential Gear for Perfect Layered Buttermilk Biscuits
Having the right tools ensures you handle the dough efficiently and keep the temperatures low, which is crucial for biscuit success.
Pastry Blender or Food Processor: Essential for quickly cutting the frozen fat into the dry ingredients. This prevents warm hands from melting the butter, keeping the crucial flakes intact.
Sharp Biscuit Cutter (2-3 inches): Crucial for clean, unsealed edges that promote maximum vertical rise. A dull cutter can compress the layers.
Parchment Paper: Prevents sticking and makes cleanup easier. It allows for efficient transfer and crucial chilling before baking.
Baking Sheet: A light-colored sheet is recommended for even heating and avoiding overly browned or burnt bottoms, ensuring consistent baking across the batch.
Step-by-Step: Achieving Layered Buttermilk Biscuits with Cream and Curd Perfection
- Preheat and Prepare the Dry Mix:
Preheat the oven to a high 425°F (220°C) and line your baking sheet with parchment. Whisk together the flour, sugar, baking powder, and salt thoroughly in a large bowl, ensuring the leavening agent is evenly distributed.
- Incorporate the Frozen Butter Quickly:
Add the frozen, cubed butter to the dry ingredients. Use a pastry blender or your fingertips to rapidly cut the butter into the flour until the mixture resembles coarse, pea-sized crumbs.
Crucial Tip: Remember, visible pieces of butter are vital-they create the steam pockets and layers. Do not overwork the mixture into a fine powder.
- Introduce the Cold Buttermilk:
Pour the measured, cold buttermilk into the center all at once. Use a fork to mix gently, folding the wet ingredients over the dry until the dough just barely comes together.
The mixture should look shaggy and wet in spots; avoid forming a smooth ball. Overmixing at this stage is the fastest way to develop gluten and ruin the eventual fluffiness.
- Execute the Sky-High Folding Technique (The Triple Fold):
Turn the shaggy dough out onto a lightly floured surface. Pat it gently into a rough rectangle, approximately ¾-inch thick.
Fold the dough into thirds like a letter (bring one short end to the middle, then fold the other short end over that). Rotate the folded dough 90 degrees, pat it down gently back to ¾-inch thickness, and repeat this fold and press motion two more times, for a total of three folds.
This stacking action mechanically creates hundreds of layers without the danger of overworking the dough, which would toughen the final product.
- Cut, Arrange, and Chill:
After the final fold, pat the dough to a final 1-inch thickness. Use a sharp cutter and press straight down-do not twist the cutter, as twisting seals the layers and prevents the lift.
Arrange the cut biscuits on the prepared sheet, ensuring their sides are touching slightly; this encourages vertical rise. Freeze the biscuits for 10 minutes; this critical chilling step guarantees the butter is completely cold before baking begins.
- Bake Until Golden:
Bake for 12 to 15 minutes, rotating the pan halfway through if you notice uneven browning, until the tops are golden and they have achieved a dramatic, fluffy rise.
- Whip the Cream Filling:
While the biscuits cool slightly, beat the heavy whipping cream and powdered sugar until stiff, stable peaks form. Stop beating as soon as the peaks hold their shape to prevent the cream from turning grainy.
- Assembly and Serving:
Once cooled slightly, slice the Layered Buttermilk Biscuits with Cream and Curd horizontally. Fill generously with the freshly whipped cream and finish with a bright spoonful of your chosen curd or jam. These treats are best served warm for the ultimate tender texture.
Mastering Biscuit Science: Crucial Tips for Height and Fluffiness
Why You Must Never Twist the Biscuit Cutter
Twisting a biscuit cutter seals the edges of the dough, effectively locking the layers together and preventing them from opening up and puffing in the heat. Always press straight down and pull straight up for clean, open sides that promise maximum lift.
The Key Temperature Check
If your kitchen is warm (above 72°F), place your flour and mixing bowl in the freezer for 15 minutes before starting. Every ingredient and tool that touches the dough should be as cold as possible to maximize the frozen butter’s effect.
Handling Overmixed Dough
If you accidentally mix the dough too long, resulting in a smooth, elastic texture, the resulting biscuit will bake flat and tough. There is no perfect fix, but wrapping it tightly and chilling it for 30 minutes can sometimes relax the gluten slightly, offering a minor chance of salvage.
Understanding the Power of “Shoulder to Shoulder” Baking
Arranging the biscuits so their sides touch slightly forces them to rise vertically rather than spread horizontally. This is a common baker’s secret for achieving truly tall, proud layers that lift one another up.
Beyond the Bake: Serving Suggestions and Make-Ahead Magic
Creative Curd and Jam Alternatives
While bright lemon curd offers a vibrant, tart contrast, consider experimenting with sweet strawberry or raspberry jam for a classic dessert feel. Alternatively, use orange marmalade for a beautiful bitterness.
For a savory twist perfect for dinner, skip the sugar and filling entirely, and serve the plain, buttery biscuits alongside hearty sausage gravy or a thick, meaty chili.
Make-Ahead Magic and Storage
Make Ahead (Freeze Before Baking): You can cut and arrange the raw biscuits on the baking sheet, wrap the entire sheet tightly in plastic wrap, and freeze them for up to one month. Bake the Layered Buttermilk Biscuits with Cream and Curd straight from the freezer, adding 3-5 minutes to the total baking time; there is no need to thaw.
Storage: Once baked, the biscuits are best enjoyed the same day while they are incredibly fresh. Store cooled, unfilled biscuits in an airtight container at room temperature for up to two days. Reheat briefly in a 350°F (175°C) oven to regain their delightful freshness.
Troubleshooting and Frequently Asked Questions (Layered Biscuits Edition)
Can I substitute milk for buttermilk?
Yes, but with caveats. If you must use regular milk, add 1 tablespoon of white vinegar or lemon juice to 3/4 cup of whole milk and let it stand for 5 minutes before using. This creates a quick sour milk substitute, which is necessary for the proper acidic reaction with the baking powder needed for lift.
Why are my biscuits dry?
Dryness is usually caused by one of two things: overmeasuring the flour (always spoon the flour into the measuring cup, then level it) or overbaking. Check your oven temperature with a thermometer and pull the biscuits the second the tops are golden brown, even if they seem slightly soft initially.
My biscuits spread instead of rising tall. What went wrong?
Spreading is almost always a temperature issue. Either the butter melted before baking (due to handling with warm hands or a warm kitchen environment), or you skipped the mandatory 10-minute freezer chill.
A quick freeze is essential because the cold dough prevents the butter from melting until the high heat of the oven allows the baking powder and steam to fully activate for maximum puff.
Can I use self-rising flour?
You can use self-rising flour, but you must omit the baking powder and salt called for in the recipe, as self-rising flour already contains those leavening and seasoning agents. However, for maximum control over the flavor and rise, the expert recommendation is always to stick to all-purpose flour and carefully measured agents.
Ready to Impress? Share Your Layered Buttermilk Biscuits Masterpiece!
Mastering the sky-high layers in these Layered Buttermilk Biscuits with Cream and Curd is truly a turning point in your baking journey. Once you achieve that perfect height and flakiness, there is no going back to the dense, dry rounds of the past.
If you’re enjoying shaping this dough, you might also appreciate a reliable recipe for moist homemade cornbread.
Embrace the chill, practice the simple triple fold, and get ready to serve a batch of these classic treats that will earn you endless praise. Don’t forget to tag us when you share your stunning, high-rising results!
Layered Buttermilk Biscuits
Course: BakingCuisine: AmericanDifficulty: medium8
biscuits20
minutes15
minutes350
kcal35
minutesSay goodbye to flat biscuits! This recipe guarantees stunning, tall, flaky layers by utilizing one crucial folding technique. Filled with whipped cream and bright lemon curd, these biscuits are a showstopper.
Ingredients
2 cups all-purpose flour, plus more for dusting
1 tablespoon granulated sugar
1 tablespoon baking powder
1 teaspoon fine sea salt
1/2 cup (1 stick) unsalted butter, cut into 1/2-inch cubes and frozen solid
3/4 cup cold buttermilk
1 cup heavy whipping cream (for filling)
2 tablespoons powdered sugar (for filling)
1/2 cup lemon curd or apricot jam (for filling)
Directions
- Prepare the Dry Mix and Butter: Preheat your oven to 425 degrees F. Line a baking sheet with parchment paper. In a large bowl, whisk together the flour, sugar, baking powder, and salt. Add the frozen butter cubes to the dry ingredients.
- Cut the Butter: Using a pastry blender or your fingers, quickly cut the butter into the flour until the mixture resembles coarse pea-sized crumbs. The key is to work fast so the butter stays as cold as possible. Visible pieces of butter are essential for height.
- Add Liquid: Pour in the cold buttermilk all at once. Use a fork to gently mix until the dough just comes together. Do not overmix. The dough will look shaggy, which is what you want.
- The Sky-High Folding Technique: Turn the shaggy dough out onto a lightly floured surface. Pat the dough gently into a rough rectangle, about 3/4 inch thick. This is the crucial step that prevents flatness: Fold the rectangle of dough like a letter into thirds (fold the short end toward the middle, then fold the other short end over that). Rotate the dough 90 degrees and gently pat it back down to a 3/4 inch thickness. Repeat this fold-and-press motion two more times, for a total of three folds. This stacking creates the layers without developing tough gluten.
- Cut and Chill: Pat the dough one last time to about 1 inch thickness. Use a sharp biscuit cutter (do not twist the cutter, as twisting seals the edges and prevents rising) to stamp out the biscuits. Place the cut biscuits onto the prepared baking sheet, ensuring the sides are lightly touching (this also helps them rise straight up). Place the entire sheet in the freezer for 10 minutes before baking to guarantee the butter is completely cold.
- Bake: Bake the chilled biscuits for 12 to 15 minutes, or until the tops are golden brown and they have achieved a high, fluffy rise.
- Finish the Filling: While the biscuits cool, beat the heavy whipping cream with the powdered sugar until stiff peaks form.
- Serve: Once the biscuits are cooled slightly, slice them horizontally, fill generously with whipped cream, and top with a spoonful of the yellow curd or jam. Serve immediately.
Notes
- For extra flaky biscuits, ensure your butter is truly frozen solid before cutting it into the flour, and avoid overworking the dough once the buttermilk is added.


