Who hasn’t dreamed of making those gorgeous, perfectly layered dessert bars you see in bakeries, only to have them turn into a crumbly, messy disaster when you try to cut them at home? I certainly used to struggle! This recipe for Layered Chocolate Dream Bars finally cracked the code, ensuring super neat, picture-perfect slices every single time.
Get ready to impress everyone with these stunning, utterly delicious chocolate dessert bars, crafted with a secret technique that guarantees flawless presentation and a symphony of flavors.
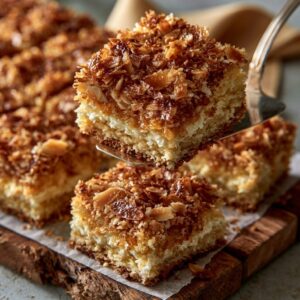
For more creamy bar ideas, check out these cinnamon swirl cheesecake bars.
Why These Layered Chocolate Dream Bars Will Be Your New Favorite
These aren’t just any chocolate treats; they offer a reliable path to dessert bar perfection. My recipe for Layered Chocolate Dream Bars stands out for its unique blend of ease and elegance, making it a go-to for any occasion.
Unveiling the “Picture-Perfect Slice” Secret
The hallmark of these bars is the ability to achieve incredibly clean, sharp slices without any crumbling or squishing. This recipe incorporates a crucial technique that ensures each layer holds its integrity beautifully, transforming a common baking challenge into a consistent triumph.
A Symphony of Textures and Flavors in Every Bite
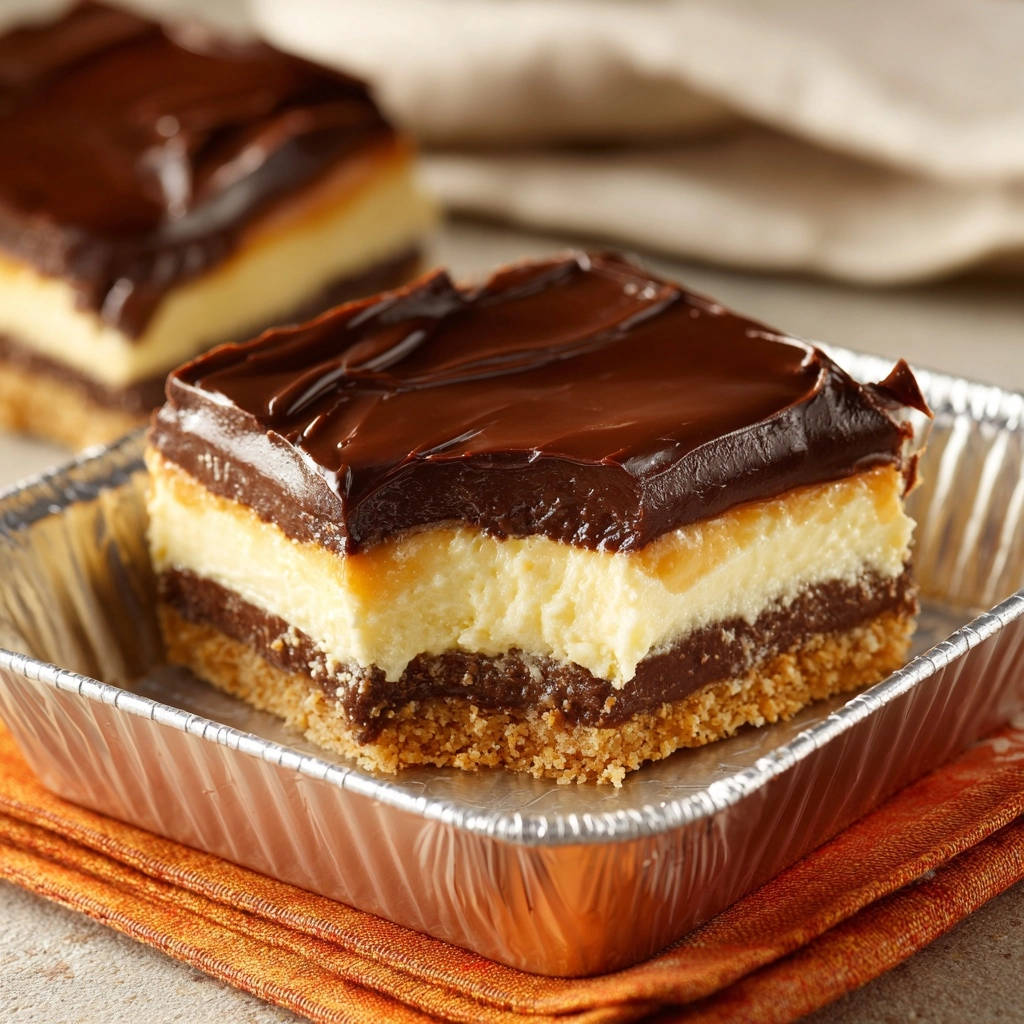
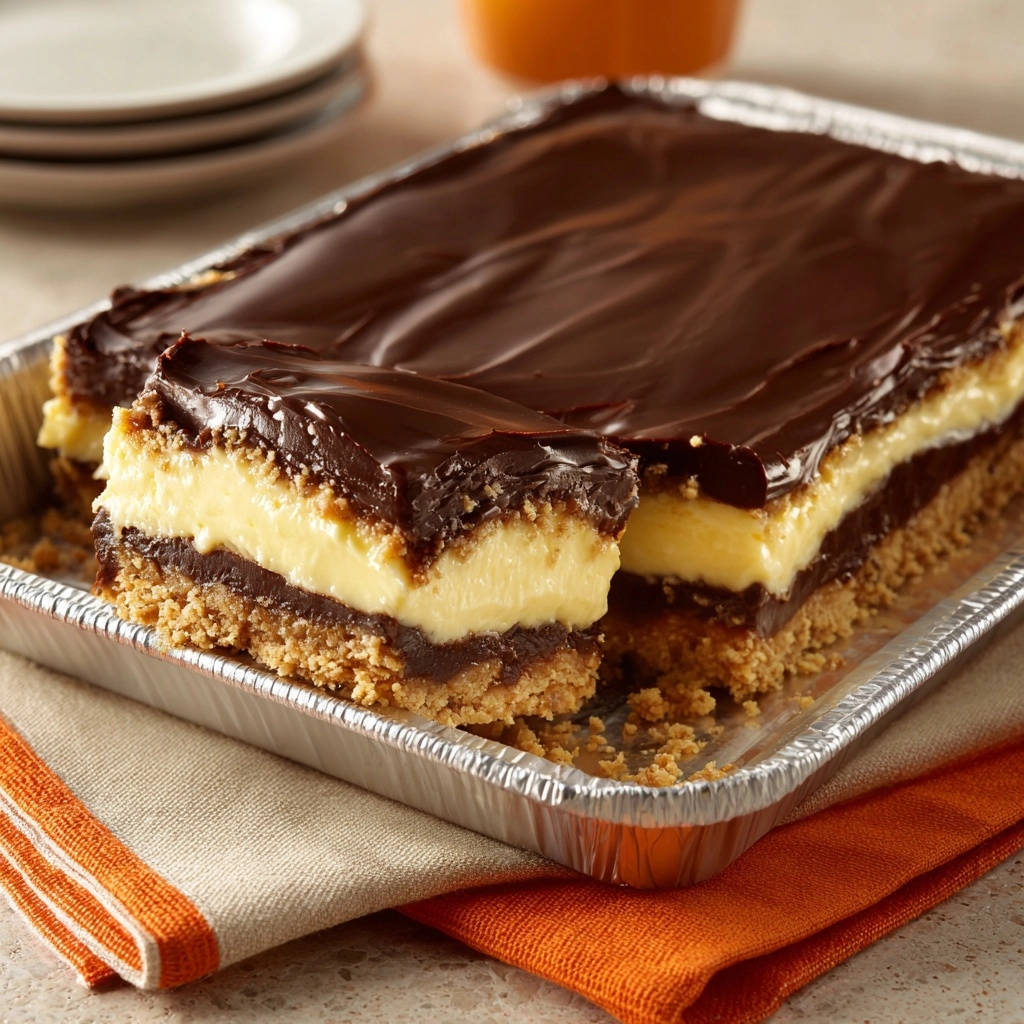
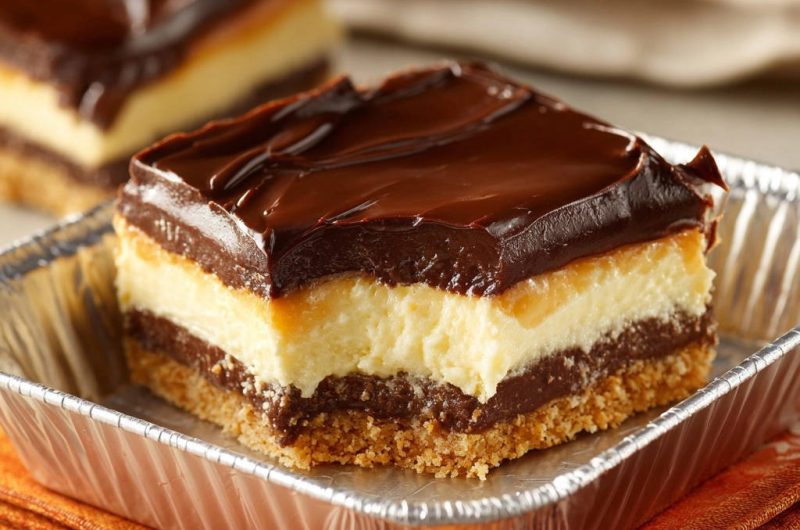
Experience the delightful contrast of a crisp graham cracker crust providing the perfect base. This is topped with a smooth, rich chocolate fudge layer, followed by a light and tangy cream cheese filling, all crowned with a glossy, decadent chocolate ganache. Every bite is a harmonious blend of creamy, sweet, and satisfying textures.
Effortless Elegance for Any Occasion
While these bars appear sophisticated and complex, the active preparation is surprisingly straightforward. The chilling time allows the flavors to meld and the layers to set, making them an ideal make-ahead dessert for entertaining or a luxurious treat to enjoy at home. These homemade dessert bars truly offer impressive results with manageable effort.
Crafting Your Dream Bars: Essential Ingredients and Tools
Creating these exquisite Layered Chocolate Dream Bars begins with selecting quality ingredients and having the right tools on hand. Each component plays a vital role in achieving the perfect texture and flavor balance.
The Sweet Foundation: Crust Ingredients Explained
The crust provides the essential base and textural contrast for these no-bake chocolate recipe bars.
Graham cracker crumbs offer a classic, slightly sweet, and sandy texture that holds up well. Ensure they are finely crushed for an even base.
Granulated sugar adds a touch of sweetness to balance the buttery richness. It helps achieve a firm, cohesive crust.
Melted unsalted butter is the critical binder. It coats the crumbs, allowing them to be pressed into a solid, stable foundation that won’t crumble when sliced.
Rich & Velvety: Inside the Chocolate Fudge Layer
This layer delivers intense chocolate flavor and a smooth, creamy texture.
Softened unsalted butter is essential for creating a smooth, airy fudge. It creams beautifully with the sugar and cocoa.
Unsweetened cocoa powder provides the deep, intense chocolate taste. Its unsweetened nature balances the powdered sugar for a richer, less cloying flavor.
Sifted powdered sugar is crucial for a lump-free, silky smooth fudge texture. Sifting removes any clumps and ensures an even consistency.
Milk helps to bring the fudge together, creating a spreadable, fluffy consistency. Start with the specified amount and adjust slightly if needed for perfect texture.
Creamy Indulgence: The Heart of Your Bars
The cream cheese layer adds a delightful tang and lightens the richness of the chocolate.
Softened cream cheese provides the characteristic tangy, rich flavor and creamy body. Softening it ensures a smooth, lump-free mixture.
Sifted powdered sugar ensures a perfectly smooth and sweet cream cheese filling. Sifting is key here to avoid any granular texture.
Vanilla extract enhances the overall sweetness and adds a warm, aromatic note. Use a good quality extract for the best flavor.
Milk helps achieve the ideal spreadable consistency for the cream cheese layer. It ensures the mixture is smooth but not too thin.
Whipped topping (like Cool Whip), thawed is a unique addition that makes this layer incredibly light and airy. Gently folding it in keeps the texture delicate and ethereal.
Glossy Finish: Deciphering the Ganache
The ganache topping provides a beautiful, shiny finish and a final layer of rich chocolate.
Semi-sweet chocolate chips are the base for the ganache, offering a balanced chocolate flavor that isn’t overly bitter or sweet. Quality matters for the best melting and taste.
Heavy cream is heated and poured over the chocolate chips. Its fat content emulsifies with the melted chocolate, creating a smooth, glossy, and pourable ganache that sets beautifully.
Beyond the Bowl: Essential Tools for Seamless Creation
Having the right equipment streamlines the process and contributes to perfect results for your Layered Chocolate Dream Bars.
8×8 inch pan: This size is ideal for achieving the perfect thickness for each layer. A square pan ensures neat, even slices.
Parchment paper or foil: Essential for lining the pan, leaving an overhang. This makes lifting the chilled bars out incredibly easy, preventing damage during removal.
Mixing bowls: Several bowls are needed for preparing each layer separately. Choose sizes appropriate for mixing quantities.
Electric mixer: Crucial for creaming butter and sugar, and beating the cream cheese layer until smooth and fluffy. A hand mixer or stand mixer works well.
Microwave-safe bowl: Used for melting the chocolate chips and heavy cream together for the ganache. Ensures controlled heating.
Sharp knife: Absolutely critical for the “clean slice secret.” A long, sharp chef’s knife or slicing knife will give the best results.
Your Journey to Layered Chocolate Dream Bars Perfection: A Step-by-Step Guide
Follow these detailed steps carefully to achieve impressive results with your homemade dessert bars. Patience with chilling times is key for structural integrity.
Building the Base: A Firm Foundation
In a medium bowl, combine the graham cracker crumbs, granulated sugar, and melted butter. Mix thoroughly until all crumbs are moistened and evenly coated.
Press this mixture firmly and evenly into the bottom of an 8×8 inch pan. Ensure the pan is lined with parchment paper or foil, leaving a generous overhang on the sides. This overhang is your handle for easy bar removal later.
Chill the crust in the refrigerator for at least 15 minutes. This crucial step allows the butter to solidify, setting the crust and preventing it from crumbling when the next layer is added.
Whipping Up the Fudge: Smooth and Decadent
In a separate bowl, combine the softened butter, unsweetened cocoa powder, and sifted powdered sugar. Cream these ingredients together using an electric mixer until the mixture is smooth and lump-free.
Gradually add the milk, beating until the fudge mixture becomes fluffy and well combined. This process incorporates air, making the fudge layer wonderfully light and spreadable.
Carefully spread this decadent chocolate fudge mixture evenly over the chilled crust. Return the pan to the refrigerator and chill for another 20 minutes to allow the fudge to firm up sufficiently before adding the next layer.
Creating the Creamy Center: Light and Luscious
In a large bowl, beat the softened cream cheese, sifted powdered sugar, vanilla extract, and milk together with an electric mixer. Continue mixing until the mixture is completely smooth and creamy, with no lumps of cream cheese remaining.
Gently fold in the thawed whipped topping using a spatula. Be delicate to maintain the airiness of the whipped topping, stopping as soon as no streaks remain. Overmixing will deflate the mixture.
Carefully spread this light and luscious cream cheese mixture over the chilled chocolate fudge layer. Take your time to ensure an even coating without disturbing the fudge layer. Place the pan back in the refrigerator for at least 30 minutes to firm up.
The Grand Finale: Crafting the Ganache
In a microwave-safe bowl, combine the semi-sweet chocolate chips and heavy cream. Microwave on high for 30 seconds, then remove and stir the mixture well.
Continue microwaving in short 15-second intervals, stirring thoroughly after each, until the chocolate is fully melted and the mixture is smooth and glossy. Be careful not to overheat the chocolate, as it can seize.
Allow the ganache to cool slightly for about 5-10 minutes. It should still be pourable but not piping hot, which could melt the cream cheese layer below.
The Art of Assembly and the Crucial Chill
Pour the slightly cooled ganache over the chilled cream cheese layer, spreading it evenly to cover the entire surface of the bars. Work quickly and gently to achieve a smooth, uniform top.
Refrigerate the Layered Chocolate Dream Bars for a minimum of 4 hours, or preferably overnight. This extended chill is absolutely CRUCIAL for allowing all layers to firm up completely. It’s the secret to achieving clean, distinct layers and prevents the bars from squishing when sliced.
Unlock the “Clean Slice Secret” for Stunning Bars Every Time
This technique is the game-changer for anyone making layered chocolate dessert bars. It guarantees professional-looking slices that will truly impress.
Why the Hot Knife Method Works Wonders
A hot, dry knife glides effortlessly through the layers, especially the firm chocolate ganache and fudge. The heat momentarily melts the chocolate on contact, creating a smooth path.
Wiping the knife completely dry after each dip prevents water from interacting with the chocolate, which can cause seizing or a dull finish. It also removes any residue, ensuring a clean cut for the next slice. This method prevents the ganache from cracking and ensures the delicate layers don’t stick or squish.
Step-by-Step for Flawless Cuts
Once your Layered Chocolate Dream Bars are thoroughly chilled (preferably overnight), lift them out of the pan using the parchment paper or foil overhang. Transfer them to a clean cutting board.
Fill a tall glass with very hot tap water. Dip a sharp knife, ideally a long, thin slicing knife, into the hot water for 10-15 seconds. This heats the blade sufficiently.
Immediately wipe the knife completely dry with a clean cloth or paper towel. Any moisture will dull your cut. Make a single, decisive cut through the bars, pressing straight down. Do not saw back and forth.
Repeat this precise process for each and every cut: dip the knife into hot water, wipe it completely dry, then make a single, clean slice. This patient method yields beautifully neat, non-cracked, and perfectly layered pieces every time.
Chef’s Secrets and Creative Twists for Your Dream Bars
Elevate your Layered Chocolate Dream Bars even further with these expert tips and delightful variations.
Mastering the Chill: Why Time is Your Ally
Do not rush the chilling process at any stage. Each chilling period allows the layers to set properly, preventing them from mixing or becoming too soft. The final, extended chill is the most critical for achieving structural integrity and those coveted clean cuts.
Texture Talk: Sifting for Superior Smoothness
Always sift your powdered sugar and cocoa powder. This simple step removes any lumps, guaranteeing incredibly silky smooth and uniform layers of fudge and cream cheese. It makes a significant difference in the final mouthfeel of these easy chocolate treats.
Customizing Your Layers: Flavor Variations
For an added depth of flavor, try incorporating a teaspoon of espresso powder into the chocolate fudge layer. A hint of orange zest or a dash of almond extract can brighten the cream cheese layer. For an adult version, a tablespoon of coffee liqueur or raspberry liqueur can be folded into the ganache.
Presentation Perfection: Garnishing Ideas
Enhance the visual appeal of your Layered Chocolate Dream Bars with simple garnishes. A dusting of cocoa powder or a few chocolate shavings on top adds elegance. Fresh raspberries or sliced strawberries provide a pop of color and tartness that beautifully complements the rich chocolate, creating stunning homemade dessert bars.
Solving Dream Bar Dilemmas: Troubleshooting Tips
Even expert recipe writers encounter occasional challenges. Here’s how to navigate common issues with your Layered Chocolate Dream Bars.
“My Layers Aren’t Firming Up!”
The most common culprit is insufficient chilling time. Ensure each layer gets its designated chill, and commit to the overnight refrigeration for the final set. If your kitchen is very warm, consider adding an extra 30 minutes to an hour to chilling times. Double-check your ingredient measurements, as too much liquid or not enough fat can affect setting.
“The Ganache Cracked When I Cut It!”
This usually happens if the ganache was poured when too hot, causing it to set too hard, or if the slicing technique was incorrect. Ensure the ganache cools slightly before pouring. Crucially, always use the hot knife slicing method, wiping the knife dry after each cut, to prevent cracking and achieve a smooth finish.
“My Crust is Too Crumbly/Hard!”
A crumbly crust might indicate insufficient melted butter or not enough pressing into the pan. Ensure the crumbs are fully moistened. If the crust feels too hard, it could be due to over-compacting or, if it were a baked crust (which this one isn’t), over-baking. Ensure you press firmly but not excessively with the back of a spoon or a flat-bottomed glass.
Enjoying Your Creation: Serving, Storage, and Prep Tips
Maximize the enjoyment and longevity of your delicious Layered Chocolate Dream Bars with these practical pointers.
Picture-Perfect Presentation: Serving Suggestions
For an elegant touch, serve individual bars on small dessert plates. A tiny dollop of unsweetened whipped cream or a single fresh berry alongside each bar adds visual appeal and a refreshing contrast. These gorgeous dessert layering technique bars are impressive enough to stand alone.
Keeping Them Fresh: Storage Guidelines
Store leftover Layered Chocolate Dream Bars in an airtight container in the refrigerator. This protects the layers from drying out and absorbing other fridge odors. Stacking them with parchment paper in between prevents sticking.
Plan Ahead: Make-Ahead Instructions
These bars are an excellent make-ahead dessert. You can prepare them up to 3-4 days in advance and store them, unsliced, in the refrigerator. Slice them just before serving for the freshest appearance and best texture. This makes them perfect for parties and gatherings.
Layered Chocolate Dream Bars FAQs
Addressing common questions to ensure your success with these easy chocolate treats.
Can I use a different size pan?
Using a different pan size will affect the thickness of your layers. An 8×8 inch pan gives the ideal thickness. If using a larger pan (e.g., 9×13 inch), your layers will be thinner, and you might consider increasing the ingredient quantities by 1.5 times to achieve similar thickness. Adjust chilling times accordingly.
What if I don’t have parchment paper?
While parchment paper with an overhang is highly recommended for easy removal, you can use aluminum foil sprayed well with cooking spray as an alternative. Ensure the foil also extends beyond the pan edges for lifting. The parchment provides a smoother finish to the bar sides.
Can I make these gluten-free?
Absolutely! Simply substitute regular graham cracker crumbs with your favorite brand of gluten-free graham cracker crumbs. The rest of the ingredients in this Layered Chocolate Dream Bars recipe are typically naturally gluten-free.
How long do these bars last?
When stored properly in an airtight container in the refrigerator, these Layered Chocolate Dream Bars will remain fresh and delicious for up to 5-7 days. For longer storage, you can freeze them for up to 1-2 months. Wrap individual bars tightly in plastic wrap, then place them in a freezer-safe bag or container.
Ready to Create Your Own Dream Bar Masterpiece?
You now possess the secrets to crafting truly exceptional Layered Chocolate Dream Bars. From the perfectly crisp crust to the decadent ganache, each layer promises a delightful experience, all brought together with the ultimate clean-slice technique.
Embrace the joy of creating these stunning chocolate dessert bars with confidence. Your friends and family will undoubtedly be impressed by your flawless dessert layering technique and the incredible taste.
Dive into your kitchen and bring these dream bars to life tonight! Share your creations and any questions in the comments below – I’d love to hear about your experience.
Chocolate Dream Bars
Course: DessertCuisine: AmericanDifficulty: easy12
bars30
minutes450
kcal1800
minutesNo more crumbly disasters! This recipe reveals the secret to making gorgeous, perfectly layered chocolate dessert bars that slice beautifully every time. Get ready to impress with stunning, bakery-quality treats.
Ingredients
For the Crust:
1 1/2 cups graham cracker crumbs
1/4 cup granulated sugar
1/2 cup unsalted butter, melted
For the Chocolate Fudge Layer:
1/2 cup unsalted butter, softened
1/2 cup unsweetened cocoa powder
2 cups powdered sugar, sifted
2 tablespoons milk
For the Cream Cheese Layer:
8 ounces cream cheese, softened
1/2 cup powdered sugar, sifted
1 teaspoon vanilla extract
2 tablespoons milk
1 cup whipped topping (like Cool Whip), thawed
For the Chocolate Ganache Topping:
1 cup semi-sweet chocolate chips
1/2 cup heavy cream
Directions
- Prepare the Crust: In a medium bowl, combine graham cracker crumbs, granulated sugar, and melted butter until well mixed. Press firmly into the bottom of an 8×8 inch pan lined with parchment paper or foil, leaving an overhang on the sides for easy removal. Chill in the refrigerator for at least 15 minutes to set.
- Make the Chocolate Fudge Layer: In a separate bowl, cream together the softened butter, cocoa powder, and sifted powdered sugar until smooth. Gradually beat in the milk until fluffy and well combined. Spread this mixture evenly over the chilled crust. Return the pan to the refrigerator and chill for another 20 minutes.
- Prepare the Cream Cheese Layer: In a large bowl, beat the softened cream cheese, sifted powdered sugar, vanilla extract, and milk until smooth and creamy. Gently fold in the thawed whipped topping until no streaks remain. Carefully spread this cream cheese mixture over the chilled chocolate fudge layer. Place the pan back in the refrigerator for at least 30 minutes.
- Create the Chocolate Ganache Topping: In a microwave-safe bowl, combine the chocolate chips and heavy cream. Microwave on high for 30 seconds, then stir. Continue microwaving in 15-second intervals, stirring after each, until the chocolate is melted and the mixture is smooth and glossy. Let cool slightly for about 5-10 minutes.
- Assemble and Chill: Pour the slightly cooled ganache over the chilled cream cheese layer, spreading it evenly to cover the entire surface. Refrigerate the bars for a minimum of 4 hours, or preferably overnight, to allow all layers to firm up completely. This extended chill is CRUCIAL for clean slicing!
- The Clean Slice Secret: When ready to serve, lift the bars out of the pan using the parchment paper or foil overhang. Place them on a cutting board. For perfect, clean slices every single time, fill a tall glass with very hot water. Dip a sharp knife into the hot water, wipe it completely dry with a clean cloth, and then make a single cut through the bars. Repeat this process for each cut: dip the knife, wipe it dry, then slice. This trick ensures the chocolate topping doesn’t crack and the layers don’t squish or stick to the knife, giving you beautiful, neat bars ready to serve!
Notes
- The clean slice secret involves dipping a sharp knife in hot water, wiping it dry, and then slicing for each cut to prevent cracking and sticking.