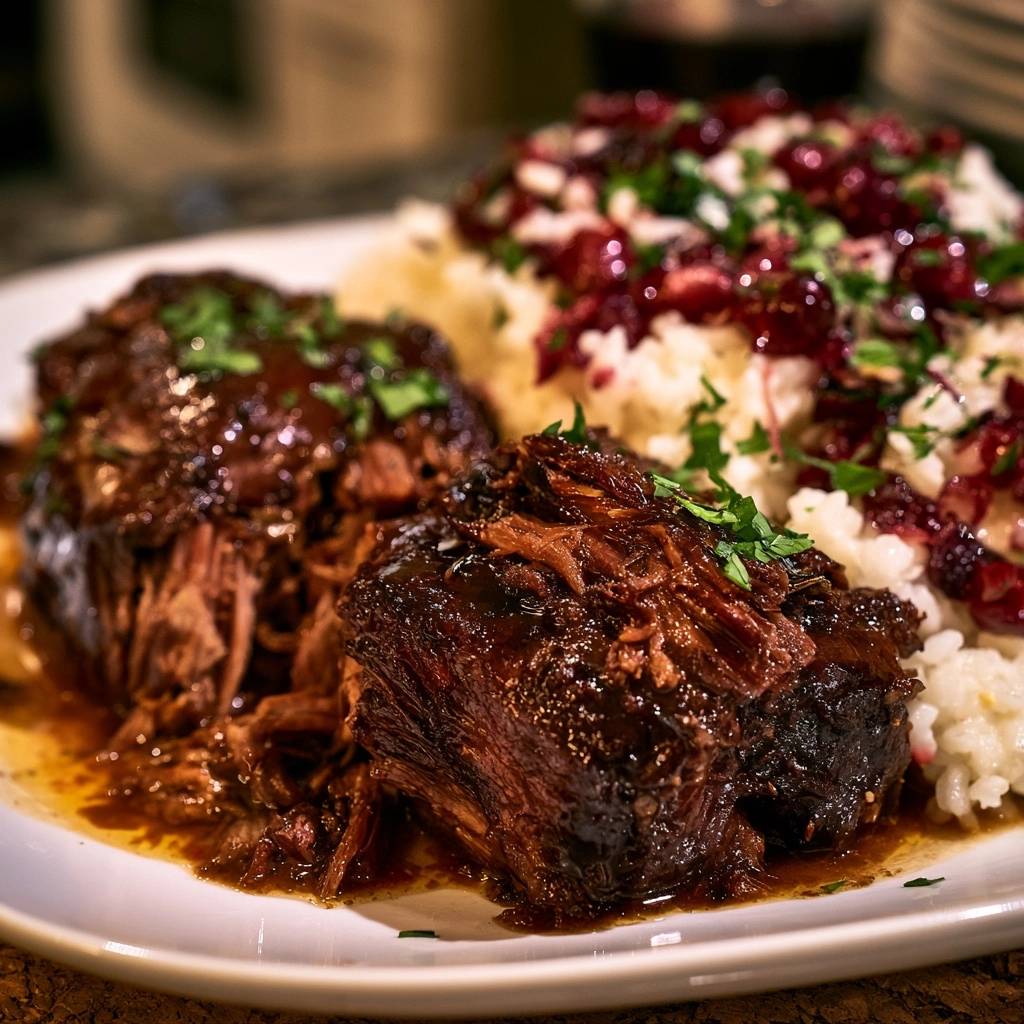
Imagine pulling a heavy pot from the oven and lifting the lid to reveal meat so tender it practically falls away from the bone at a mere suggestion. These Slow-Braised Glazed Short Ribs offer a deep, mahogany finish and a texture that feels more like butter than beef. Most home cooks struggle with short ribs that turn out stringy or tough, but the secret lies in the gentle breakdown of connective tissue through a controlled, low-moisture environment.
The goal here isn’t just to cook the meat, but to transform it into something luxurious and lacquered. By using a concentrated glaze rather than a thin poaching liquid, you ensure the beef retains its structural integrity while becoming incredibly soft. This method creates a rich, concentrated flavor that coats every fiber of the meat, rather than washing it away into a watery broth.
Expertise in braising comes down to one specific trick: the tight seal. If steam escapes during the three-hour journey in the oven, your ribs will dry out before the collagen has a chance to melt. Using a parchment paper “cartouche” directly on the surface of the liquid creates a pressurized environment that guarantees success every single time.
The Science of Collagen and Connective Tissue
Short ribs are a hardworking muscle group filled with tough connective tissue known as collagen. If you try to grill or pan-fry this cut like a steak, it will be nearly impossible to chew. However, when you subject collagen to low, steady heat between 160°F and 180°F, it undergoes a chemical transformation into gelatin.
This gelatin is what gives braised meats that silky, lip-smacking mouthfeel that everyone craves. Therefore, rushing the process is the enemy of a good short rib. You need those hours in the oven to allow the fibers to relax and the proteins to soften without seizing up from high heat.
In addition to heat, acidity plays a vital role in this transformation. The balsamic vinegar in this recipe doesn’t just add a tangy brightness; it helps weaken the protein bonds. This chemical assistance ensures that even the thickest “English cut” ribs become fork-tender by the time the timer dings.
Essential Components for Slow-Braised Glazed Short Ribs
Success starts at the butcher counter, where you should look for English-cut short ribs. These are cut parallel to the bone, providing a thick, rectangular block of meat that stands up beautifully during a long braise. Avoid the thin “Flanken” style often used for BBQ, as they lack the mass needed for this slow-cooking technique.
The liquid base is equally important for building a complex flavor profile. Beef bone broth is the preferred choice over standard stock because it contains natural gelatin, which adds body to your final glaze. When combined with soy sauce, you get a massive hit of umami that deepens the color of the meat to a stunning dark brown.
Don’t overlook the aromatics like smashed garlic. These simple additions infuse the fat of the beef with a subtle sweetness that balances the heavy savory notes. Using fresh, high-quality ingredients ensures that the reduction doesn’t taste muddy or overly salty after it concentrates in the oven.
Selecting the Right Beef Short Ribs
When shopping, look for ribs with heavy marbling—those thin white flecks of fat within the red muscle. This intramuscular fat melts during the braise, basting the meat from the inside out. You want a high meat-to-bone ratio so your guests aren’t left with a plate full of bones and very little dinner.
Thickness is your best friend for even cooking. Try to select ribs that are roughly the same size so they all reach that “melt-in-your-mouth” stage at the same time. If you have one giant rib and three small ones, the smaller pieces will overcook before the large one is ready.
The Role of Balsamic and Brown Sugar
The combination of balsamic vinegar and brown sugar creates a gastrique-style base. This is a classic culinary technique where sugar and acid are balanced to create a sauce that is both sweet and sharp. It is essential for cutting through the natural richness and high fat content of the beef.
As the liquid reduces, the sugars caramelize, creating that iconic lacquered look. The vinegar provides a necessary “bite” that wakes up your palate. Without this acidity, the dish would feel too heavy and one-dimensional after just a few bites.
Required Equipment for Heat Retention
A heavy-bottomed Dutch oven is the MVP of this recipe. Cast iron is excellent at holding heat and distributing it evenly, which prevents “hot spots” that could scorch the bottom of your ribs. If your pot is too thin, the liquid might boil too vigorously, leading to tough meat.
A tight-fitting lid is the second requirement. You want to trap every drop of moisture inside the pot to create a self-basting environment. If you suspect your lid has a loose fit, don’t worry; simply place a layer of heavy-duty aluminum foil over the pot before pressing the lid down to create an airtight seal.
Using a “cartouche,” or a circle of parchment paper placed directly on the liquid, is a pro move. It prevents the top of the meat from drying out while still allowing the sauce to reduce slightly. This small step makes a massive difference in the final texture of the beef’s surface.
Step-by-Step: Achieving the Perfect Maillard Sear
Before the ribs ever touch the pan, you must pat them bone-dry with paper towels. Moisture is the enemy of a good sear; if the meat is damp, it will steam instead of browning. A dry surface allows the Maillard reaction to occur quickly, creating a flavorful crust and a deep mahogany color.
Heat your oil until it is shimmering but not smoking. Place the ribs in the pan and leave them alone for at least 3 minutes. If you try to flip them and they stick, they aren’t ready yet. Once a dark brown crust has formed, rotate them to sear every single side, including the ends.
Avoid overcrowding the Dutch oven during this stage. If you put too many ribs in at once, the temperature of the pan will drop, and the meat will release juices and boil. Work in batches if necessary to ensure every rib gets that beautiful, caramelized exterior that provides the foundation for the sauce.
Deglazing and Building the Braising Base
After searing, you will notice dark, stuck-on bits at the bottom of your pot. This is called “fond,” and it is pure flavor gold. After pouring off the excess fat, add your smashed garlic and let it soften for just a minute until it smells amazing, but be careful not to let it turn bitter and black.
Pour in your beef broth and use a wooden spoon to scrape up all that fond. As the liquid hits the hot pan, it will bubble and lift those caramelized bits into the sauce. This step ensures that all the hard work you put into the sear actually ends up in the final glaze.
Once the bottom of the pot is clean, stir in the balsamic, brown sugar, and soy sauce. The liquid should look dark and smell intensely aromatic. This is the “bath” that will transform your beef over the next few hours, so make sure everything is well-incorporated before the ribs go back in.
The Low-Moisture Braise Technique
A common mistake is submerging the ribs completely in liquid. For this recipe, the liquid should only reach about one-third to halfway up the sides of the meat. This “low-moisture” approach allows the bottom of the rib to braise in the liquid while the top roasts in the dry heat of the oven.
This dual-action cooking creates a complex texture. The submerged part becomes incredibly tender, while the exposed top develops a concentrated, sticky crust. It is the best of both worlds, providing a variety of textures in every single forkful.
Once the ribs are nestled back in the pot, apply your parchment cartouche and the lid. This setup ensures that the steam stays close to the meat, keeping it moist while the flavors in the liquid become more and more concentrated as the hours pass.
Managing Oven Temperature for Maximum Tenderness
Setting your oven to 300°F might feel low, but it is a biological necessity for this cut of meat. At this temperature, the heat penetrates the meat slowly enough that the muscle fibers don’t “clench” and squeeze out all their moisture. It is a gentle process that rewards patience.
During the first hour, the meat is simply warming through. By the second hour, you will notice the aroma filling your kitchen as the fat begins to render. In the final hour, the collagen finally gives up its struggle and melts into gelatin, which is when the magic truly happens.
You will know the ribs are done when they pass the “fork-tender” test. If you insert a fork and it meets any resistance at all, they need more time. The meat should feel like it wants to slide right off the bone with almost no effort on your part.
Crafting the Honey-Macerated Cranberry Relish
While the beef is the star, the honey-macerated cranberry relish is the perfect supporting actor. Short ribs are incredibly rich and fatty, so you need something bright and acidic to balance the plate. Fresh cranberries provide a tart pop that cuts right through the heavy glaze.
Maceration is a simple process where you toss the chopped fruit with honey and a pinch of salt. The honey draws out the natural juices of the cranberries, creating a light syrup and softening the fruit’s firm texture. This happens naturally at room temperature while your meat finishes in the oven.
Using fresh cranberries is vital here. Canned versions are often too sweet and mushy, lacking the vibrant “zing” needed to contrast the savory beef. This relish adds a beautiful ruby-red color to the final dish, making it look as good as it tastes.
Reducing the Liquid into a Lacquered Glaze
Once the ribs are tender, carefully remove them from the pot. You will likely see a layer of clear fat floating on top of the liquid. Use a wide spoon to skim this off and discard it. If you skip this step, your final glaze will feel greasy on the tongue rather than silky.
Bring the remaining liquid to a simmer on the stovetop. As the water evaporates, the sauce will thicken and darken. You are looking for a “nappe” consistency, which is a fancy way of saying the sauce should be thick enough to coat the back of a spoon without immediately running off.
This reduction process takes about 10 to 12 minutes. Watch it closely toward the end, as the high sugar content means it can go from “perfectly syrupy” to “burnt” very quickly. The result should be a deep, dark glaze that looks like polished mahogany.
The Importance of the 15-Minute Rest
Resting isn’t just for steaks; it is crucial for braised meats too. When you take the ribs out of the oven, the muscle fibers are tight. If you serve them immediately, the juices will run right out, leaving the meat feeling dry despite being cooked in liquid.
By returning the ribs to the thickened glaze and letting them sit for 15 minutes, you allow the fibers to relax. As they cool slightly, they act like a sponge, pulling that concentrated, flavorful glaze back into the center of the meat. This ensures every bite is succulent and moist.
During this rest period, spoon the glaze over the ribs repeatedly. This builds up layers of flavor and creates that stunning “lacquered” finish. By the time you are ready to plate, the ribs will be glistening and perfectly seasoned from the inside out.
Troubleshooting Common Braising Obstacles
If your meat is still tough after three hours, don’t panic. Every cow is different, and some cuts simply have more connective tissue than others. The solution is almost always more time. Put the lid back on and give it another 30 minutes; eventually, that collagen will break down.
If your glaze tastes too salty, it’s likely because the liquid reduced a bit too much. You can easily fix this by stirring in a splash of water or a little extra beef broth to thin it out and mellow the flavors. Always taste your sauce before serving to ensure the balance is just right.
For a sauce that feels too thin even after reducing, you might have had a bit too much liquid to start with. Continue simmering it on medium-high heat. The goal is a syrupy texture that clings to the meat, so don’t be afraid to let it bubble until it reaches that stage.
What to Do if the Meat is Dry
If the meat feels dry or “chalky,” it usually means the oven was too hot or it cooked for too long. To save the dish, shred the meat into smaller chunks and toss them directly into the warm glaze. This “shred and soak” method allows the dry fibers to absorb the sauce, masking the overcooked texture.
Next time, ensure your lid is perfectly sealed and your oven temperature is accurate. Using an oven thermometer is a great way to verify that your “300°F” setting isn’t actually running at 350°F, which is a common culprit for dry braises.
Adjusting the Glaze Consistency
If you are in a rush and the sauce isn’t thickening fast enough, you can use a tiny bit of cornstarch mixed with water as a last resort. However, the flavor is much better when you achieve thickness through natural reduction. The concentrated sugars and gelatin provide a superior mouthfeel.
If the glaze is too thick or sticky, a teaspoon of balsamic vinegar or a squeeze of lemon juice can loosen it up. This also adds a fresh hit of acidity right at the end, which can brighten the entire dish before it hits the table.
Serving Suggestions and Texture Contrasts
Fluffy white rice is the perfect partner for these ribs because it acts as a neutral canvas for the intense glaze. The grains soak up the extra sauce, ensuring not a single drop of that flavorful liquid goes to waste. You could also use a creamy polenta or a smooth cauliflower purée for a similar effect.
The cranberry relish provides a crunchy, tart contrast to the soft, savory beef. To finish the plate, a generous handful of finely chopped fresh parsley is essential. It provides “olfactory brightness,” cutting through the heavy aromas of the braise with a clean, grassy scent.
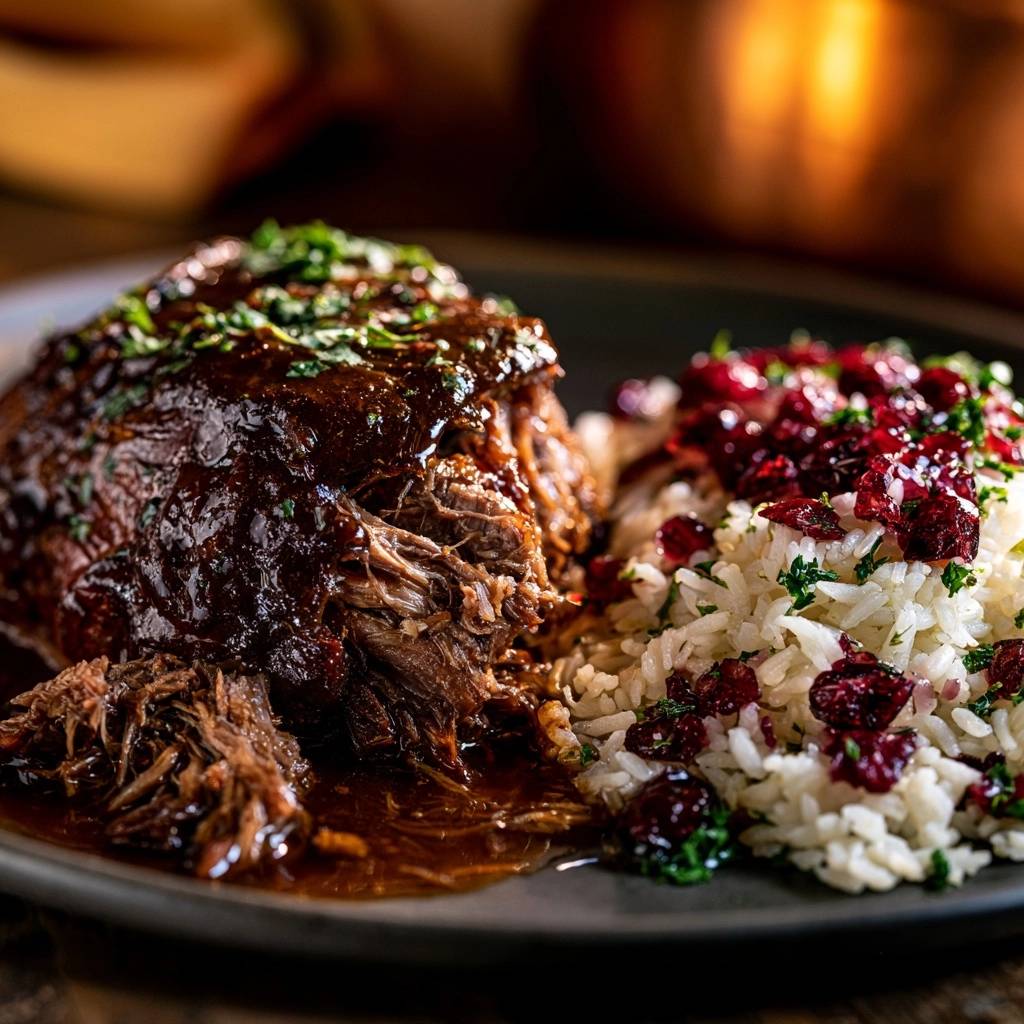
When plating, place a large scoop of rice in a shallow bowl, nestle the rib on top, and spoon over plenty of glaze. Top with the relish and parsley. The contrast of the dark meat, white rice, and bright red cranberries makes for a restaurant-quality presentation that will impress any guest.
Make-Ahead Strategies and Storage
Braised short ribs are famous for tasting even better the next day. As the dish sits in the fridge, the flavors continue to meld and deepen. If you are hosting a dinner party, consider making these a day in advance to save yourself stress and improve the flavor.
To store, let the ribs and sauce cool to room temperature before transferring them to an airtight container. They will stay fresh in the refrigerator for up to three days. One benefit of chilling them is that the fat will solidify on top, making it incredibly easy to lift off and discard before reheating.
When you are ready to eat, reheat the ribs gently in a covered pot over low heat. Add a splash of beef broth or water to loosen the glaze. Avoid the microwave if possible, as it can heat the meat unevenly and cause it to become rubbery.
Expert Tips for Professional Results
For the most accurate results, use a meat thermometer to check the internal temperature of the beef. You are looking for roughly 205°F. At this specific temperature, the collagen has fully dissolved, but the meat hasn’t yet begun to fall apart into mush.
Try the “Fork Twist” test: insert a fork into the center of the meat and give it a gentle turn. If the fork rotates easily and the meat fibers separate without effort, you have achieved perfection. If the meat follows the fork, it needs more time in the oven.
Never use “cooking vinegar” or low-quality balsamic. Since the sauce reduces so significantly, any “off” flavors in your ingredients will be magnified. Use a balsamic vinegar that you would be happy to eat on a salad; the quality of the acid directly impacts the quality of the glaze.
Finally, always finish the dish with a tiny pinch of flaky sea salt right before serving. This final seasoning wakes up the sugars in the glaze and the richness of the beef, making all the flavors pop. It is the small details that separate a good home-cooked meal from a professional-grade masterpiece.
How should I store and reheat leftover short ribs?
Store your leftover short ribs in an airtight container in the refrigerator for up to 3 days. It is best to store them submerged in their glaze to keep the meat from drying out. To reheat, place the ribs and sauce in a small pot with a splash of beef broth, cover with a lid, and warm over low heat on the stovetop until the meat is heated through. Avoid the microwave, as it can toughen the delicate fibers of the beef.
Why are my short ribs still tough after 3 hours of cooking?
If the meat is still tough, it simply hasn’t finished the process of breaking down the collagen into gelatin. This can happen if the ribs were particularly thick or if your oven runs slightly cool. The solution is patience; put the lid back on and continue braising for another 30 to 45 minutes. As long as there is liquid in the pot, the meat will eventually become tender. Never try to fix toughness by increasing the heat, as this will only dry the meat out.
Can I use a different type of vinegar if I don’t have balsamic?
Balsamic is preferred for its unique sweetness and dark color, but you can substitute it with a mix of red wine vinegar and an extra tablespoon of brown sugar. Apple cider vinegar also works in a pinch, though it will provide a fruitier, sharper flavor profile. Avoid plain white distilled vinegar, as its acidity is too harsh and lacks the complex sugar profile needed to create a proper lacquered glaze.
What is the best way to degrease the sauce?
The easiest way to remove excess fat is to use a wide, shallow spoon to skim the clear oil from the surface of the liquid once the ribs are removed. If you have time to make the dish a day in advance, you can refrigerate the entire pot; the fat will rise to the top and harden into a solid white layer that you can simply lift off with a fork. This results in the cleanest, most flavorful glaze possible.
Can I make this recipe in a slow cooker instead of an oven?
Yes, you can use a slow cooker, but you will miss out on the roasting effect that the oven provides to the exposed tops of the ribs. To adapt, perform the searing and deglazing steps in a pan first, then transfer everything to the slow cooker. Cook on “Low” for 7 to 8 hours. You will still need to move the liquid to a stovetop pot at the end to reduce it into a thick glaze, as slow cookers do not allow for evaporation.
Is there a substitute for beef bone broth?
If you cannot find beef bone broth, a high-quality beef stock is the next best option. To mimic the richness of bone broth, you can add a teaspoon of unflavored gelatin powder to the stock before adding it to the pot. This ensures your final glaze has that signature sticky, luxurious consistency that defines a professional braise.
Slow-Braised Glazed Short Ribs
Course: Main CourseCuisine: AmericanDifficulty: easy4
servings20
minutes3
hours180
Minutes680
kcalAmerican
Ingredients
3 pounds bone-in beef short ribs (English cut)
2 tablespoons vegetable oil
1 cup beef bone broth
1/2 cup balsamic vinegar
1/4 cup brown sugar
1 tablespoon soy sauce (for deep color and umami)
4 cloves garlic, smashed
2 cups white rice, cooked
1 cup fresh cranberries
2 tablespoons honey (for the cranberry relish)
1/4 cup fresh parsley, finely chopped
Salt and coarse black pepper to taste
Directions
- Preheat and Prep: Preheat your oven to 300°F (150°C). This low temperature is critical to prevent the proteins from seizing and becoming tough. Pat the ribs bone-dry with paper towels.
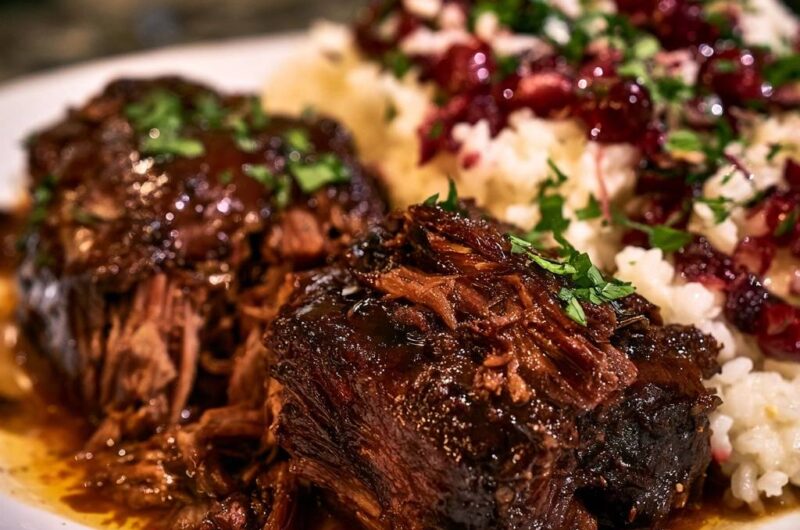
- The Sear: Generously season all sides of the short ribs with salt and pepper. Heat oil in a heavy Dutch oven over medium-high heat. Sear the ribs for 3 to 4 minutes per side until a deep, dark brown crust forms. This Maillard reaction is essential for the final color shown in the image. Remove ribs and set aside.
- Deglaze: Pour off excess fat, leaving about 1 tablespoon. Add garlic and cook for 1 minute until fragrant. Stir in the beef broth, balsamic vinegar, brown sugar, and soy sauce. Use a wooden spoon to scrape the bottom of the pan to release the flavorful browned bits (fond).
- The Low-Moisture Braise: Return the ribs to the pot. The liquid should only come about one-third to halfway up the sides of the meat. Do not submerge them. This allows the top of the meat to roast and glaze while the bottom braises.
- The Seal: Cover with a piece of parchment paper pressed down to the surface of the liquid (a cartouche), then add a tight-fitting lid. If your lid is loose, place a piece of foil over the pot before putting the lid on to create a perfect seal.
- Slow Cook: Braise in the oven for 3 to 3.5 hours. The meat is done when it is “fork-tender”-it should yield completely to a fork with zero resistance and begin to pull away from the bone.
- The Cranberry Relish: While the meat braises, roughly chop the fresh cranberries. Toss them with 2 tablespoons of honey and a pinch of salt. Let them macerate at room temperature; this softens their tartness and creates the vibrant topping seen in the image.
- The Glaze Reduction: Remove the ribs carefully and set them on a plate. Skim the fat from the cooking liquid. Bring the remaining liquid to a simmer on the stovetop over medium heat for 10-12 minutes until it reduces into a thick, syrupy, dark glaze.
- The Rest: Return the ribs to the pot and spoon the glaze over them. Let the meat rest in the glaze for 15 minutes before serving. This allows the fibers to relax and reabsorb the moisture.
- Assembly: Serve the ribs over a bed of fluffy white rice. Spoon extra glaze over the meat until it looks lacquered. Top the rice and meat with the prepared cranberry relish and a heavy garnish of fresh parsley for brightness and contrast.
Notes
- The low-moisture braise and the 15-minute rest period are essential to prevent the meat from becoming tough or stringy.