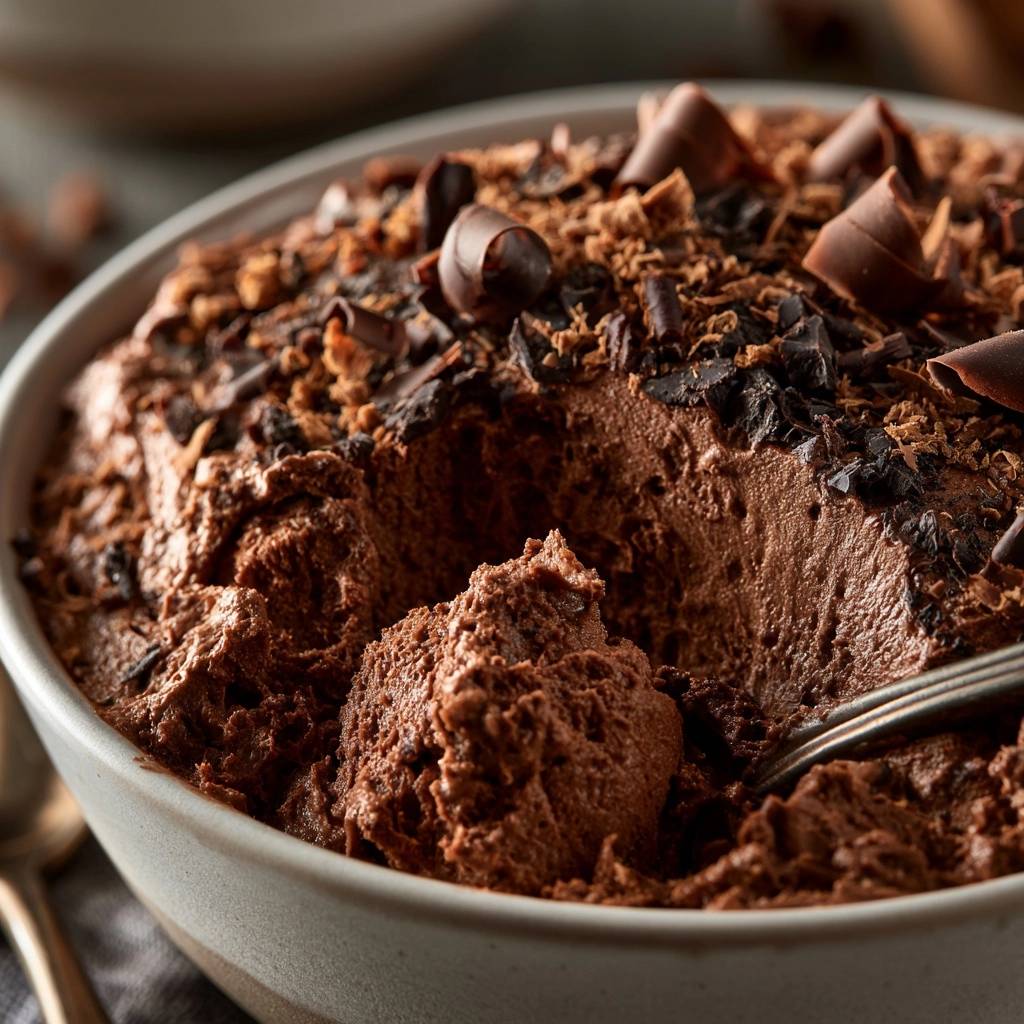
Imagine a dessert so light it feels like a cloud, yet so intensely chocolatey it lingers on your palate like a fine truffle. A perfect mousse should offer a sharp contrast between its airy, aerated structure and a deep, cocoa-driven richness. However, many home cooks find themselves staring at a bowl of grainy, separated chocolate or a puddle of liquid that refuses to set.
The frustration of seized chocolate is real, but it is entirely avoidable with the right technique. Most recipes rely on just folding chocolate into cream, which often leads to a greasy mouthfeel. By using a professional custard-base method, you create a stable emulsion that guarantees a velvet-smooth finish every single time.
The secret to this professional-grade result is the temperature bridge. You cannot simply mix hot chocolate with cold cream and expect a smooth result. By tempering the ingredients and using egg yolks for stability, you ensure the fats and liquids bond perfectly without a single grain in sight.
The Anatomy of a Velvet Texture
Achieving a world-class mousse is a lesson in the science of emulsion. Chocolate is a complex mixture of cocoa solids and cocoa butter, which are notoriously finicky when introduced to moisture. If a single drop of cold water hits warm chocolate, it can seize into a gritty clump. This recipe avoids that disaster by creating a “temperature bridge” through a warm cream and egg yolk custard.
This custard acts as a buffer, slowly bringing the chocolate up to a stable temperature while introducing fats that keep the mixture fluid. The high fat content in the heavy cream and the yolks is what creates that luxurious, lingering mouthfeel. When you eat this mousse, the fats melt at body temperature, releasing the chocolate flavor slowly across your tongue rather than disappearing instantly.
Furthermore, the air bubbles trapped in the whipped cream provide the structural “lift.” Without a stable chocolate base, those bubbles would collapse under the weight of the cocoa. The emulsion we build here is strong enough to hold those bubbles in place, resulting in a dessert that is dense in flavor but light as a feather in texture.
Why High-Percentage Cacao Matters
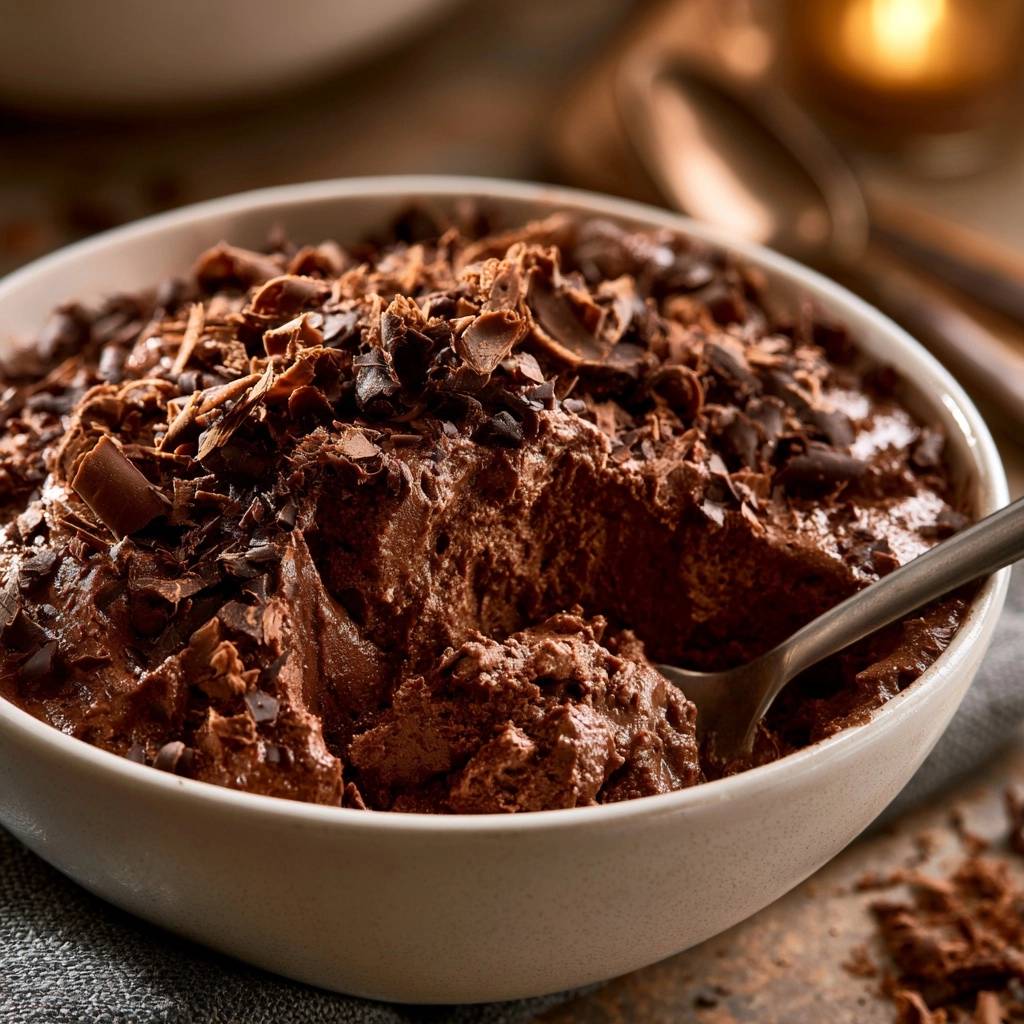
When making a Decadent Dark Chocolate Mousse, the quality of your chocolate is the most important factor. I recommend staying within the 60-70% cacao range. This percentage provides a sophisticated balance of bitterness and sweetness that defines a true dark chocolate experience.
Lower-quality chocolate or standard milk chocolate contains higher levels of sugar and milk solids, which can interfere with how the mousse sets. Avoid using standard “baking chips” found in the cookie aisle. These chips often contain stabilizers designed to help them hold their shape under high heat, which prevents them from melting into the silky consistency we need for a mousse.
The Role of Egg Yolks in Stability
Egg yolks are the unsung heroes of a stable mousse because they contain lecithin. Lecithin is a natural emulsifier that has the unique ability to bind water-based ingredients (like the moisture in cream) with fat-based ingredients (like cocoa butter). This creates a seamless ganache that won’t separate.
By whisking the yolks into the cream and heating them gently, you are essentially creating a thin Crème Anglaise. This cooked base provides a structural backbone that a simple chocolate-and-cream mixture lacks. It results in a mousse that holds its shape for days in the fridge without weeping or becoming rubbery.
Essential Components for Decadent Dark Chocolate Mousse
Quality ingredients are the foundation of this dish. You must use heavy whipping cream with at least 36% fat content. Standard “whipping cream” often has a lower fat percentage and won’t hold the stiff peaks necessary to give the mousse its height and airy volume.
Your egg yolks must be at room temperature before you begin. Cold yolks can cause the warm cream to drop in temperature too quickly, leading to uneven cooking. If you forgot to take them out of the fridge, just place the whole eggs in a bowl of warm water for five minutes before cracking them.
Don’t skip the pinch of salt! While it might seem counterintuitive in a sweet dessert, salt is a powerful flavor enhancer. It cuts through the inherent bitterness of the dark chocolate and brightens the overall profile, making the cocoa taste more “chocolatey” and less flat.
Precision Tools for Aerated Results
To get that professional look, a fine-mesh strainer is your best friend. Even the most careful cook might end up with a tiny bit of overcooked egg in their custard. Pouring the hot mixture through a strainer over the chocolate ensures that your base is perfectly liquid and free of any debris.
For the whipped cream, I highly recommend using a chilled metal bowl. Metal retains cold better than glass or plastic, which helps the fat globules in the cream stay firm as you incorporate air. This leads to faster whipping and more stable peaks that won’t deflate when you start the folding process.
When it comes time to combine everything, put the whisk away and grab a silicone spatula. A whisk is too aggressive for the final stage and will pop the very air bubbles you worked so hard to create. A flexible spatula allows you to scrape the bottom of the bowl and fold the mixture gently.
Step-by-Step: Crafting the Custard Base
The tempering process requires your full attention for about five minutes. You’ll whisk the cream, yolks, and sugar over medium-low heat. You are looking for a specific visual cue: the mixture should thicken just enough to coat the back of a spoon. If you run your finger through the coating on the spoon, the trail should remain clear.
Whatever you do, do not let the mixture boil. If you see bubbles breaking the surface, remove it from the heat immediately. Boiling will scramble the eggs, and while the strainer can catch the big pieces, the flavor will be ruined. Keep the heat low and keep that spatula moving constantly to ensure even cooking.
Achieving the Glossy Ganache Finish
Once you pour the hot custard over your chopped chocolate, patience is key. Let it sit undisturbed for two full minutes. This allows the heat to penetrate the chocolate evenly to the core. If you start stirring too soon, you’ll cool the custard down before the chocolate has melted, leading to those dreaded lumps.
When you do start stirring, use a small whisk and start in the very center of the bowl. Make tiny circular motions, gradually widening the circle as the mixture darkens and becomes glossy. This “center-out” technique creates a perfect emulsion, resulting in a ganache that looks like liquid silk.
The Art of Folding Without Deflating
Folding is where most people lose the “mousse” and end up with a “pudding.” To prevent this, use the “sacrificial scoop” method. Take about a quarter of your whipped cream and stir it vigorously into the chocolate ganache. This lightens the heavy chocolate and makes it more compatible with the rest of the fluffy cream.
Now, add the remaining cream and use a gentle over-and-under motion. Cut through the center with your spatula, scrape the bottom, and fold the mixture over the top. Rotate the bowl as you go. Stop the moment you see no more white streaks. Over-mixing at this stage will deflate the air and leave you with a dense, heavy dessert.
Troubleshooting Common Mousse Obstacles
If your mousse looks like a “grainy mess,” the chocolate likely overheated or came into contact with a stray drop of water. You can sometimes save this by whisking in a teaspoon of warm cream, but prevention is always better. Ensure your bowl is bone-dry before adding the chocolate.
If your result is “the soup,” one of two things happened: either your whipped cream didn’t reach stiff peaks, or your chocolate ganache was still too hot when you started folding. The ganache should be cool to the touch but still pourable. If it’s too warm, it will melt the fat in the whipped cream instantly.
Unlike many commercial versions, this recipe doesn’t use gelatin. Gelatin can often give mousse a “rubber texture” that feels bouncy rather than creamy. By relying on the egg yolks and the natural setting properties of cocoa butter, you get a much more sophisticated, melt-in-your-mouth experience.
Flavor Profiles and Sophisticated Variations
Once you master the base, you can play with the flavors. For a morning kick, whisk a teaspoon of instant espresso powder into the hot cream before adding the yolks. The coffee notes will deepen the chocolate flavor without making it taste like a latte.
You could also add a drop of food-grade peppermint oil for a refreshing finish or some fresh orange zest for a classic citrus-chocolate pairing. Just remember to add these extracts or zests at the very end, after the ganache has cooled, to keep the flavors bright and volatile.
Optimal Chilling and Serving Temperatures
Patience is the final ingredient. While the mousse might look set after an hour, it needs at least two hours (and ideally four) for the cocoa butter to fully crystallize. This chilling time is what creates the firm yet airy texture that defines a great mousse.
However, don’t serve it straight from the fridge! Take the bowls out about 5 to 10 minutes before you plan to eat. This short “tempering” period allows the cocoa butter to soften slightly. When the mousse is slightly closer to room temperature, the chocolate flavors are much more vibrant and the texture is even creamier.
Garnishing for Visual and Textural Contrast
A great dessert should have a bit of crunch to contrast the softness. Cocoa nibs are perfect for this. They offer a nutty, roasted bitterness that cuts right through the richness of the cream. They also look incredibly professional scattered across the top.
For the chocolate shavings, use a standard vegetable peeler on the edge of a room-temperature chocolate bar. If the chocolate is too cold, it will just crumble; if it’s slightly warm, you’ll get beautiful, long curls. A light dusting of cocoa powder through a sieve can also add a matte, elegant finish to your masterpiece.
How long does this chocolate mousse stay fresh in the fridge?
You can store this mousse in the refrigerator for up to 3 days. Make sure to cover the individual serving bowls tightly with plastic wrap to prevent the mousse from absorbing any odors from the fridge. While it is safe to eat after 3 days, the texture may begin to lose some of its airiness and become slightly more dense over time.
Why did my mousse turn out grainy instead of smooth?
Graininess usually happens for two reasons: either the chocolate “seized” because a tiny bit of water got into the bowl, or the egg yolks were cooked too quickly and scrambled. To avoid this, ensure all your equipment is completely dry and keep the heat on medium-low while thickening the custard. Using a fine-mesh strainer when pouring the custard over the chocolate is the best insurance policy against a grainy texture.
Can I use a different type of chocolate like milk or white chocolate?
You can, but you will need to adjust the sugar and the ratio. Milk and white chocolate have much higher sugar and milk solid content and lower cocoa butter, which means they don’t set as firmly as dark chocolate. If you switch to milk chocolate, I recommend reducing the added sugar in the cream and potentially adding an extra egg yolk to help with the set.
Can I freeze chocolate mousse for later?
I do not recommend freezing this mousse. Because it relies on a delicate emulsion of dairy fat and egg yolks, the freezing and thawing process will cause the water and fat to separate. This results in a grainy, watery mess once thawed. It is always best enjoyed fresh or within a few days of being chilled in the refrigerator.
What is the best way to fix a mousse that is too runny?
If your mousse is runny after 4 hours of chilling, it likely means the cream wasn’t whipped to stiff peaks or the ganache was too warm when folded. You can try to save it by gently folding in a little more stiffly whipped cream, but be careful not to overwork it. If it still won’t set, it makes an incredible chocolate sauce for cake or ice cream!
Decadent Dark Chocolate Mousse
Course: DessertCuisine: FrenchDifficulty: easy4
servings20
minutes5
minutes25
Minutes380
kcalFrench
Ingredients
6 ounces high-quality dark chocolate (60-70% cacao), finely chopped
1 1/2 cups heavy whipping cream, divided
2 large egg yolks, room temperature
3 tablespoons granulated sugar, divided
1 teaspoon vanilla extract
Pinch of salt
Extra chocolate shavings and cocoa nibs for garnish
Directions
- Place the finely chopped chocolate in a heat-proof glass bowl.
- In a small saucepan, whisk together 1/2 cup of the heavy cream, the egg yolks, 1 tablespoon of sugar, and a pinch of salt. Heat over medium-low heat, stirring constantly with a spatula, until the mixture thickens slightly and coats the back of a spoon (about 160°F). Do not let it boil or the eggs will scramble.
- Immediately pour the hot custard through a fine-mesh strainer over the chopped chocolate. Let it sit for 2 minutes, then whisk gently starting from the center until the mixture is completely glossy and smooth. Stir in the vanilla extract. Let this ganache base cool to room temperature (about 15 minutes); it should be cool to the touch but still fluid.
- In a separate chilled bowl, combine the remaining 1 cup of heavy cream and the remaining 2 tablespoons of sugar. Whip using a hand mixer on medium-high speed until stiff peaks form.
- To ensure a smooth texture, take one large spoonful of the whipped cream and stir it vigorously into the cooled chocolate ganache. This lightens the density of the chocolate so it incorporates easily without seizing.
- Gently fold the remaining whipped cream into the chocolate mixture using a rubber spatula. Use a slow over-and-under motion to keep the air bubbles intact. Stop as soon as no white streaks remain.
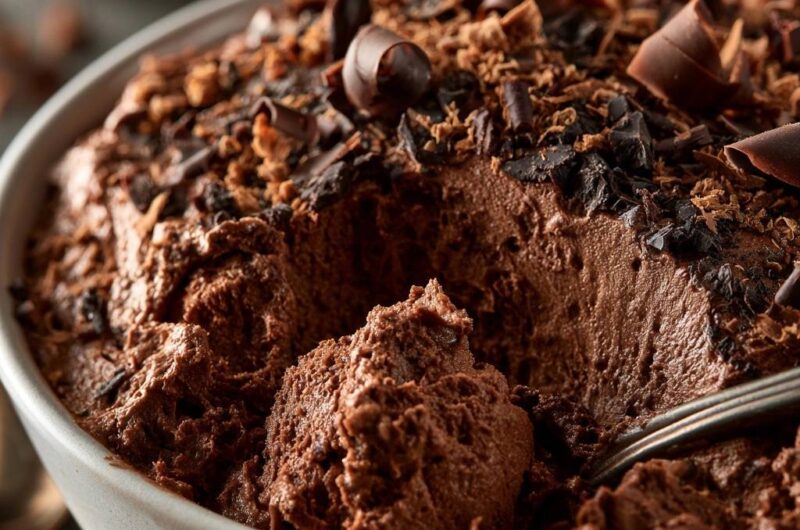
- Spoon the mousse into serving bowls and chill for at least 2 hours to set. Before serving, top generously with chocolate shavings and cocoa nibs to match the rich, textured finish shown in the image.
Notes
- The secret to success is cooling the ganache to room temperature before folding in the whipped cream and using high-quality chocolate with 60 to 70 percent cacao.