
Nothing ruins a party spread faster than a tray of “stuffed” breads that have completely deflated. You know the scene: the cheese has escaped through a tiny crack, leaving behind a hollow dough shell and a burnt, crusty mess on your baking sheet. It is a common frustration that turns a great idea into a kitchen fail. These Cheesy Garlic Pizza Bombs are the ultimate handheld appetizer, designed specifically to solve that messy problem once and for all.
The secret lies in the Zero Leakage Method, a technique that focuses on structural integrity and temperature control. Instead of just folding dough over cheese and hoping for the best, we treat these like little culinary vaults. By managing steam pressure and reinforcing the seams, you get a perfect, explosive cheese pull every single time. It is the kind of snack that makes people stop talking and start reaching for seconds.
I’ve found that the real trick to professional results is understanding how dough reacts to heat. Most people fail because they use room-temperature cheese that liquefies before the dough has a chance to set its shape. By flash-freezing your cheese centers, you create a thermal delay. This allows the pizza dough to puff and brown into a sturdy container before the cheese inside even thinks about melting. It is a simple shift in timing that changes everything.
The Physics of the Perfect Pizza Bomb
When you put dough in a hot oven, the moisture inside begins to turn into steam. This steam needs somewhere to go, and it creates internal pressure that pushes against the walls of your pizza bomb. If there is a weak point in your dough or a seam that isn’t perfectly fused, that pressure will find it. This is exactly why most stuffed breads “blow out” in the oven, leaving you with a puddle of grease and a sad, empty roll.
High-moisture fillings are the primary enemy of a successful seal. If you put marinara sauce inside the dough with the cheese, the water content in the sauce creates excessive steam almost instantly. This moisture also prevents the dough from sticking to itself when you pinch it shut. By keeping the sauce on the outside, you eliminate the internal “steam engine” that causes most leaks. The dough stays dry enough to bond with itself, creating a permanent seal.
The Zero Leakage Method relies on thermal dynamics to protect your snack. By compressing the cheese into dense balls and chilling them, you increase their thermal mass. In a 400°F oven, the outer layer of dough cooks and hardens relatively quickly. Because the cheese starts at a much lower temperature, it reaches its melting point only after the dough has formed a rigid, protective shell. This ensures the gooey center stays exactly where it belongs.
Essential Components for Cheesy Garlic Pizza Bombs
Quality ingredients are the foundation of this recipe, but their function is just as important as their flavor. I recommend a blend of sharp cheddar and mozzarella. The cheddar provides a punchy, salty flavor that stands up to the dough, while the mozzarella gives you that iconic, stretchy “cheese pull” that everyone loves. Using shredded cheese rather than a solid cube allows you to compress the air out, making the center more stable.
Your choice of dough is the next critical factor. While homemade dough is lovely, refrigerated pizza dough is a fantastic time-saver that offers great elasticity. However, you must let it sit on the counter for about 20 minutes before working with it. Cold dough is stubborn and tends to snap back, which makes it nearly impossible to get a thin, even wrap around your cheese. Room temperature dough stretches easily and pinches shut with much less effort.
Selecting the Right Marinara Consistency
Since we are applying the sauce to the exterior, the consistency of your marinara is paramount. You want a thick, rich sauce that sits on top of the dough rather than running down the sides. If your favorite sauce is a bit watery, simmer it in a small pan for five minutes to reduce the moisture. A thick sauce stays put and caramelizes in the oven, creating a concentrated pizza flavor that mimics a wood-fired pie.
The Role of Garlic-Infused Fats
Butter is the secret to that golden, bakery-style crust. Unlike oil, which can make the dough feel greasy, butter contains milk solids that brown beautifully in the oven. When you mix garlic powder and dried oregano into melted butter, the heat “blooms” the spices, releasing their aromatic oils. This ensures that every bite of the crust is seasoned deeply, rather than just having spices sitting on the surface.
Step-by-Step: Executing the Zero Leakage Method
Success with this recipe is all about the preparation of the core. You cannot just toss a pile of loose cheese into the dough and expect it to stay put. You need to be intentional with every layer of the build to ensure that the final product is as beautiful as it is delicious.
Phase 1: Compressing and Chilling the Core
Start by mixing your shredded cheeses in a bowl. Take a small handful and squeeze it firmly in your palm, rotating it until it forms a tight, marble-sized sphere. You want to pack it as tightly as possible to remove any air pockets. Once you have 12 balls, pop them into the freezer for about five minutes. This “flash-chill” is the secret weapon. It doesn’t freeze the cheese solid, but it makes the core cold enough to resist melting during the first few crucial minutes of baking.
Phase 2: Dough Manipulation and the Double Seal
Divide your room-temperature dough into 12 equal portions. Flatten each one into a thin circle, making sure the edges are slightly thinner than the center. Place a chilled cheese ball in the middle and pull the edges of the dough up and over the top. Pinch the dough together firmly. Now, here is the pro move: roll the ball between your palms to smooth the seam, then pinch that same area one more time. This double-seal technique creates a reinforced bond that steam cannot penetrate.
Phase 3: Top-Loading Flavor for Visual Impact
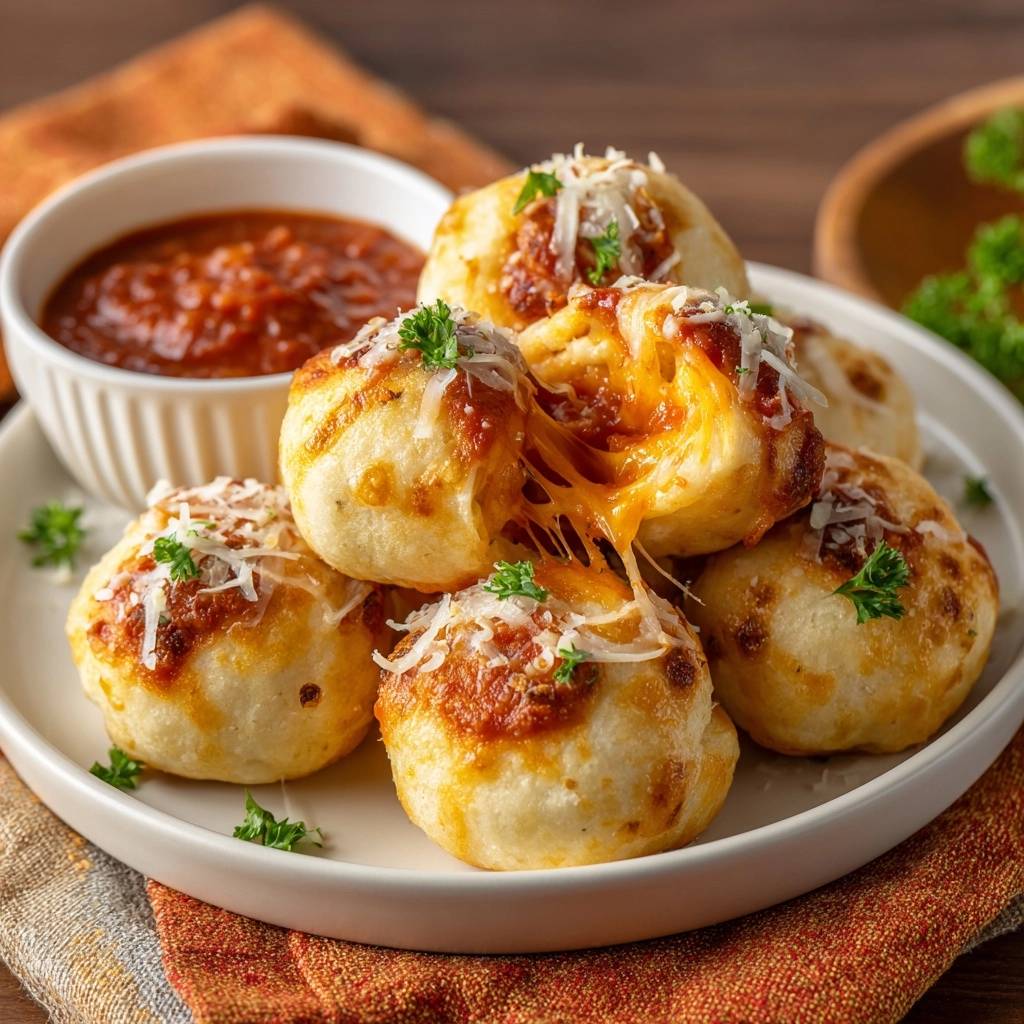
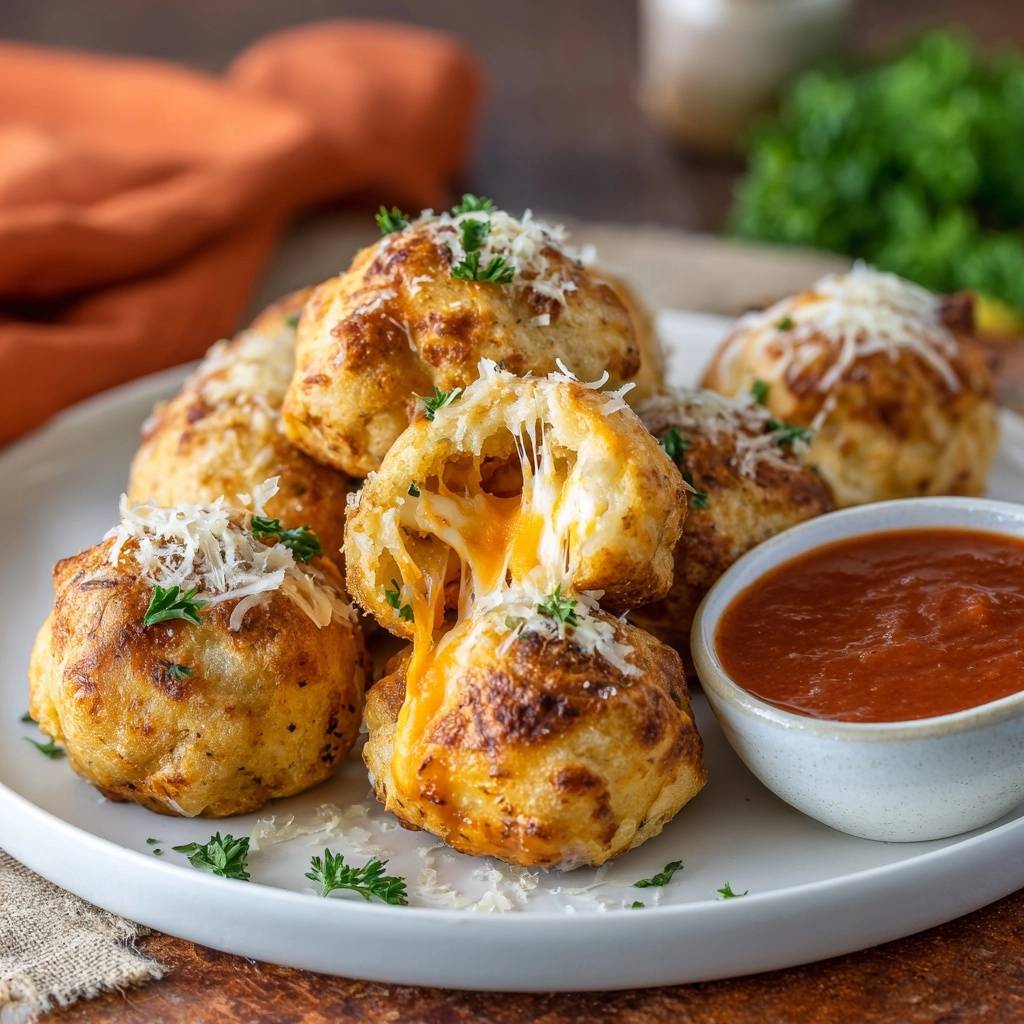
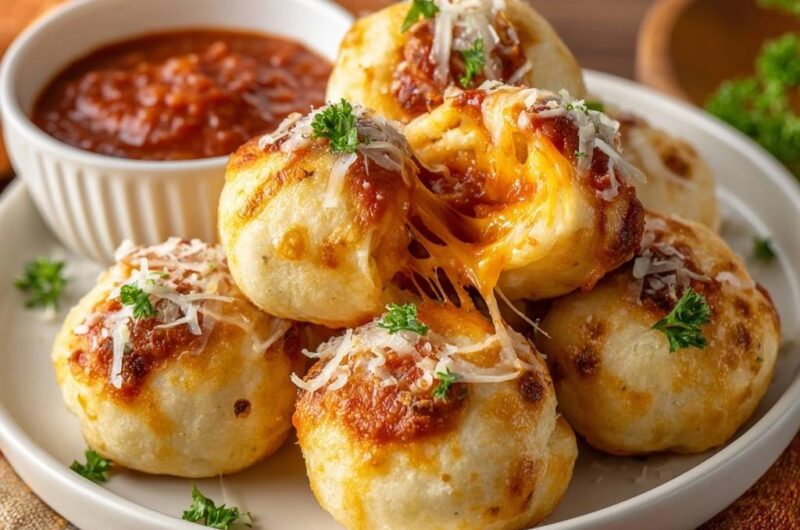
Once your balls are sealed, place them seam-side down on your prepared baking sheet. This uses the weight of the cheese ball to help press the seal shut during the bake. Brush them generously with your garlic butter. Now, take a small spoon and dab a tiny bit of marinara right on the top. Sprinkle a little parmesan over the sauce. This “top-loading” gives you all the visual cues of a pizza without the structural risk of putting wet sauce inside the dough.
Critical Equipment for Successful Baking
You might think any old pan will do, but parchment paper is absolutely non-negotiable here. Even with the best sealing technique, a tiny bit of butter or cheese might escape, and parchment ensures your pizza bombs don’t stick or tear when you try to lift them. It also helps distribute heat evenly across the bottom of the dough, preventing those dreaded burnt spots while the tops are still pale.
A heavy-duty, rimmed baking sheet is also a must. Thin pans tend to warp or “pop” in a 400°F oven, which can cause your pizza bombs to roll around and break their delicate seals before they have set. A sturdy pan holds its shape and provides a consistent thermal base. If you find your oven has hot spots, rotate the pan halfway through the baking time to ensure every bomb gets that perfect golden-brown finish.
Troubleshooting Common Stuffed Dough Failures
If you find that your dough is still raw or doughy in the center, your cheese balls were likely too large. The dough needs enough space to cook through before the cheese gets too hot. Keep your cheese cores to about the size of a large marble. Another common issue is the “flat bomb,” where the dough doesn’t puff. This usually happens if your oven isn’t truly at 400°F. Use an oven thermometer to verify the temp; that high heat is what triggers the “oven spring” in the dough.
What if a seal breaks mid-bake? Don’t panic. If you see a little cheese starting to bubble out, just leave it alone. Trying to “patch” it while it is hot will only make a bigger hole. The parchment paper will catch the leak, and once it cools slightly, you can usually tuck the escaped cheese back toward the bomb. Most of the time, the double-seal and seam-down placement will prevent this entirely, but a true 400°F environment is your best insurance policy.
Flavor Variations and Vegetarian Swaps
Once you master the Zero Leakage Method, you can get creative with the fillings. For a “White Pizza” version, you can use a mix of ricotta and mozzarella. However, ricotta is very wet, so you must strain it through cheesecloth first to remove every drop of excess moisture. Add some chopped spinach, but make sure you squeeze the spinach dry in a paper towel until it is practically a powder. Moisture is the enemy of the seal!
For another cheesy delight, consider these powdered sugar fried cheese squares.
A “Pesto Infusion” is another great option. Instead of putting the pesto inside, brush the finished pizza bombs with a pesto-butter mixture as soon as they come out of the oven. This keeps the dough crisp while delivering that punchy basil flavor. You can also swap the cheddar for pepper jack if you want a little kick. Just remember the golden rule: keep the high-moisture ingredients on the outside to protect the structural integrity of the dough.
Make-Ahead Strategies and Storage Logistics
These are fantastic for parties because you can do most of the work in advance. You can prep the cheese balls and the dough circles a few hours ahead of time. You can even assemble the bombs, place them on the baking sheet, cover them tightly with plastic wrap, and keep them in the fridge for up to four hours. Just wait to add the butter and sauce until right before they go into the oven so the dough doesn’t get soggy.
If you have leftovers, store them in an airtight container in the refrigerator for up to three days. To reheat, avoid the microwave if you want to maintain the texture. Microwaves make pizza dough rubbery and tough. Instead, pop them back into a 350°F oven or an air fryer for 5 minutes. This crisps the exterior back up and gets the cheese center gooey again. I don’t recommend freezing these after they are baked, as the texture of the dough degrades significantly.
Expert Tips for Professional Presentation
The difference between a “home cook” snack and a “restaurant-quality” appetizer is the finish. When these come out of the oven, they will already look great, but a second layer of toppings makes them spectacular. Immediately after removing the tray from the oven, sprinkle the remaining parmesan cheese over the hot bombs. The residual heat will help it stick without melting it completely, creating a beautiful snowy texture.
Finally, add a shower of fresh curly parsley. The bright green color pops against the red sauce and golden dough, making the dish look fresh and vibrant. Serve them while they are still warm so the cheese is at its peak meltiness. Place the remaining marinara in a small bowl in the center of your platter for dipping. This creates a communal, interactive eating experience that always makes these the first thing to disappear at any gathering.
Frequently Asked Questions
Can I use pre-made biscuit dough instead of pizza dough?
You can use canned biscuit dough, but the texture will be significantly different. Biscuit dough is much more buttery and flaky, whereas pizza dough is chewy and lean. If you use biscuits, be extra careful with the seal, as biscuit dough tends to pull apart in layers. You may also need to lower the oven temperature to 375°F to prevent the bottoms from browning too quickly.
Why did my cheese not melt fully in the center?
This usually happens if the cheese balls were frozen solid rather than just chilled, or if they were made too large. If the core is too cold or too dense, the heat won’t reach the center before the outside of the dough is done. Stick to a 5-minute chill in the freezer and ensure your cheese balls are no larger than a standard marble for a perfect melt.
How do I prevent the bottoms from burning while the tops brown?
If your oven runs hot on the bottom, try doubling up your baking sheets. Placing one baking sheet inside another creates an insulating layer of air that protects the bottom of your pizza bombs from direct heat. Also, ensure you are using parchment paper, which acts as a minor heat buffer. Always bake on the middle rack for the most even heat distribution.
Can I add meat like pepperoni inside?
Yes, you can add meat, but you must dice it very finely. Large chunks of pepperoni or sausage have sharp edges that can pierce the dough as it expands, leading to a blowout. Mix the finely minced meat directly into the cheese before forming your balls. This keeps the meat “suspended” in the cheese and protects the dough walls from being punctured.
What is the best dipping sauce pairing?
While a classic thick marinara is the traditional choice, these are incredibly versatile. A creamy garlic dip or a spicy ranch also pairs beautifully with the garlic butter crust. If you want to lean into the “pizza” theme, a warm pesto or even a balsamic glaze drizzle can add a sophisticated touch. Just make sure your dipping sauce is served warm to match the temperature of the bombs.
Cheesy Garlic Pizza
Course: AppetizerCuisine: AmericanDifficulty: easy4
servings15
minutes12
minutes310
kcal27
MinutesThese pizza bombs use a specific double-seal technique and a cold cheese center to ensure the cheese stays locked inside. Topped with garlic butter, marinara, and parmesan, they are the ultimate mess-free party snack.
Ingredients
1 pound refrigerated pizza dough at room temperature
1 cup shredded sharp cheddar cheese
1/2 cup shredded mozzarella cheese
1/2 cup thick marinara sauce (divided: 1/4 cup for topping, 1/4 cup for dipping)
2 tablespoons melted butter
1 teaspoon garlic powder
1/2 teaspoon dried oregano
1/4 cup finely shredded parmesan cheese (for topping)
Fresh curly parsley for garnish
Directions
- Preheat your oven to 400 degrees F and line a baking sheet with parchment paper.
- In a small bowl, mix the cheddar and mozzarella. The secret to the Zero Leakage Method is to tightly compress the cheese into small, firm balls about the size of a large marble. Place these cheese balls in the freezer for 5 minutes while you prep the dough. Cold cheese melts slower, allowing the dough to set its structure before the cheese expands.
- Divide your pizza dough into 12 equal pieces. Flatten each piece into a thin circle.
- Place one chilled cheese ball in the center of each dough circle. (Note: Do not put sauce inside the ball, as the moisture will cause the steam to burst the dough; the sauce is applied to the exterior for the visual effect shown in the image).
- To prevent leaks, pull the edges of the dough over the cheese and pinch firmly to seal. Roll the ball between your palms to smooth the seam, then pinch it a second time. This double seal is the only way to guarantee a mess-free bake.
- Place the dough balls seam-side down on the baking sheet.
- Mix the melted butter, garlic powder, and oregano. Brush the tops of the dough balls generously with the garlic butter.
- Using a small spoon, dab a small amount of marinara sauce onto the very top of each dough ball. Sprinkle half of the parmesan cheese directly onto the sauce spot.
- Bake for 10 to 12 minutes or until the dough is puffed and the cheese/sauce on top is bubbling and slightly browned.
- Remove from the oven. Immediately sprinkle with the remaining parmesan cheese and fresh parsley to match the visual texture in the image. Serve warm with the remaining marinara for dipping.
Notes
- Do not put sauce inside the dough balls as the moisture will cause them to burst; apply sauce only to the exterior. Compressing the cheese into firm balls and freezing them for 5 minutes ensures they melt slower than the dough cooks.


