
Nothing ruins a cozy dinner faster than a bowl of rice that’s swimming in a pool of orange grease. We’ve all been there, expecting a fluffy, savory meal but ending up with a heavy, oil-soaked mess that feels like a brick in your stomach. The secret to a truly elite beef and rice bowl isn’t just the seasoning; it’s the way you handle the fat and the specific order in which you build your layers.
This recipe focuses on a high-heat searing technique that transforms humble ground beef into deeply caramelized, savory crumbles. By managing the moisture and fat correctly, you ensure the rice stays light and airy while the cheese creates that glossy, flowing melt you crave. It’s a fast, reliable way to get a high-quality meal on the table without the greasy aftermath.
For a similar comforting meal, consider trying Southern Black Eyed Peas and Sausage next.
The real pro move here is the “undisturbed sear.” Most people start stirring the meat the second it hits the pan, which actually causes it to steam rather than brown. If you let that beef sit flat against the hot metal for a full four minutes, you develop a dark crust that packs more flavor than any bottled sauce ever could. That crust is the foundation of a perfect bowl.
For another comforting beef dish, check out these slow-simmered rosemary beef tips.
The Science of Non-Greasy Beef Bowls
When you cook ground beef, a chemical transformation called the Maillard reaction occurs between amino acids and reducing sugars. This only happens at high temperatures when moisture is absent. If you crowd the pan or stir too much, the meat releases its juices and “stews” in its own liquid, resulting in a grey, rubbery texture and a lack of depth.
By allowing the beef to sear undisturbed, you create complex flavor compounds that are savory and slightly nutty. However, this process also renders out a significant amount of liquid fat. If this fat isn’t dealt with, the physics of rice absorption will take over. Rice grains are like tiny sponges; they will eagerly soak up any liquid they touch.
If that liquid is pure rendered fat, it coats the starch molecules and destroys the grain structure. This leads to a mushy, disintegrated texture that feels unpleasantly oily on the tongue. Removing the excess fat before adding your aromatics and spices ensures that the flavor base coats the meat rather than drowning the rice. This separation of textures is what makes the dish feel light yet satisfying.
Essential Components for the Perfect Melt
Success starts with the right beef. You want to look for 90/10 or 93/7 lean ground beef. While higher fat blends like 80/20 are great for burgers, they release too much oil for a rice-based bowl. Using a leaner cut gives you more control over the final moisture content and ensures the beef stays chunky and distinct.
The rice choice is equally important. Short-grain or medium-grain white rice is the gold standard here because it has a higher starch content than long-grain varieties like Basmati. This starch makes the rice slightly sticky, allowing you to pack it into a sturdy base that can support the weight of the beef and cheese without collapsing into a pile of loose grains.
Freshly Shredded Cheddar vs. Pre-Shredded Bags
If you want that thick, flowing cheese melt, you have to grate your own cheese. Pre-shredded bags are coated in cellulose or potato starch to prevent the strands from clumping in the package. These anti-caking agents also prevent the cheese from melting into a smooth, cohesive layer, often leaving you with a grainy or waxy finish.
A block of sharp cheddar provides a much better flavor punch and a superior melt. The sharpness cuts through the richness of the beef, while the natural fats in the cheese emulsify perfectly under the broiler. Use a thick grate for the best results; thin wisps of cheese tend to burn or disappear too quickly.
Aromatics and the Concentrated Flavor Base
Tomato paste is the secret weapon for adding umami without adding liquid. When you first add it to the pan, it will look bright red and smell slightly metallic. You must cook it for a few minutes until it shifts to a deep brick red. This process, called “pincé,” caramelizes the natural sugars in the tomatoes and deepens the flavor.
Once the paste is cooked out, it acts as a glue for your spices. The smoked paprika and onion powder bloom in the residual heat, creating a thick, concentrated coating that clings to the beef. This ensures every bite is packed with flavor, but nothing “leaks” down into the rice to make it soggy.
Step-by-Step: Searing and Fat Management
Start by getting your skillet very hot. Whether you use cast iron or stainless steel, the oil should be shimmering before the beef touches the pan. Lay the beef in a single, flat layer and resist the urge to touch it. You’ll hear a loud sizzle; that’s the sound of flavor being created. After four minutes, the bottom should be dark brown and crispy.
Once you’ve achieved that sear, break the meat into uniform crumbles. Add your diced onions now. The onions will release a small amount of moisture, which helps pick up the browned bits (the fond) from the bottom of the pan. Sauté until the onions are soft and translucent, which usually takes about three or four minutes.
What to Try Next
Round out your meal with these comforting dishes.
- For a rich ground beef experience, consider making Thyme Beef Stuffing, which offers a wonderfully moist texture.
- Another satisfying option is the Honey-Glazed Meatball Cornbread Stuffing, perfect for its hearty flavors.
At this point, you’ll see a pool of liquid in the pan. This is the critical moment. Even if you used lean beef, there will be rendered fat and moisture from the onions. You must remove this to protect the integrity of your rice. If you leave it in, the entire bowl will feel heavy and greasy.
The Paper Towel Technique for Clean Rice
The easiest way to drain the fat is to tilt the pan so the liquid pools on one side. Use a large spoon to scoop it out, or carefully dab it with a folded paper towel held by tongs. You want the meat to be moist but not sitting in a puddle. This ensures the rice stays fluffy and clean when you assemble the bowls.
For extra insurance, you can even transfer the cooked beef to a plate lined with a paper towel for a moment while you wipe the pan. However, dabbing the pan directly is usually enough. This small step is the difference between a restaurant-quality bowl and a greasy home-cooked failure.
Building the Concentrated Spice Coating
With the fat removed, add your garlic and tomato paste. Stir constantly for about two minutes. You’ll notice the aroma change from raw garlic to something sweet and savory. Add the Worcestershire sauce and spices next. The Worcestershire acts as a deglazer, lifting any remaining flavor from the pan and incorporating it into the meat.
The spices should smell fragrant almost immediately. Because there isn’t excess oil, the spices and tomato paste will form a thick, savory “lacquer” over the beef. This concentrated flavor profile is designed to stand up against the neutral taste of the white rice, creating a balanced bite every time.
Assembly: Creating the Sturdy Rice Base
When you’re ready to serve, fluff your hot rice with a fork. Divide it into four oven-safe bowls. Instead of just piling it in loosely, use the back of a spoon to lightly pack the rice down. You aren’t trying to mash it, just creating a stable, slightly compressed bed for the toppings.
This sturdy base prevents the beef and cheese from sinking to the bottom of the bowl. It also helps the rice retain its heat. It is vital that the rice is steaming hot during assembly. That residual steam helps soften the cheese from underneath, ensuring a uniform melt throughout the entire layer.
Achieving the Glossy Broiled Cheese Finish
The broiler is the fastest way to get that perfect, glossy cheese finish. Place your assembled bowls on a baking sheet and slide them under the broiler. This should only take 60 to 120 seconds. You are looking for the cheese to turn shiny and fluid, not for it to brown or bubble excessively.
If you brown the cheese too much, it becomes “leathery” and loses that flowing consistency. Keep a close eye on it through the oven window. If you don’t have oven-safe bowls, simply pile the beef and cheese on the rice and cover the bowl with a tight lid for two minutes. The trapped steam will melt the cheese beautifully.
Avoiding Common Beef and Rice Pitfalls
One of the biggest mistakes is using cold rice. If the rice is cold, the cheese won’t melt properly, and the beef will lose its heat too quickly. Always ensure your rice is freshly cooked or thoroughly reheated until steaming before you start the assembly process.
If you find your beef is too salty, don’t panic. You can stir in a little extra tomato paste or a splash of water to dilute the seasoning. Also, avoid using high-fat meat like 80/20. The sheer volume of grease in that blend is difficult to manage and often results in a “heavy” flavor that overpowers the aromatics.
Flavor Variations and Protein Swaps
You can easily adapt this bowl to suit your cravings. For a zesty version, swap the parsley for fresh cilantro and add a squeeze of lime juice over the beef. If you like heat, sauté some finely diced jalapeños with the onions or add a dash of cayenne pepper to the spice mix.
If you want to try a different protein, ground lamb is a fantastic substitute that offers a richer, more earthy flavor. Ground turkey or chicken also works well, though you may need to add an extra teaspoon of oil since they are much leaner than beef. Just follow the same searing rules to keep the texture right.
Optimal Side Dish Pairings
Since this bowl is rich and cheesy, you want a side dish that offers acidity or crunch to balance the palate. A simple vinegar-based cucumber salad is a perfect choice. The sharp tang of the vinegar cuts right through the savory beef and melted cheddar, refreshing your taste buds between bites.
Steamed broccoli with a heavy squeeze of lemon or a bright, citrusy slaw also works beautifully. The goal is to provide a “high note” of flavor to contrast the “low notes” of the beef and rice. Avoid heavy, starchy sides like potatoes, as the rice already provides plenty of heartiness.
Make-Ahead Prep and Storage Logistics
This is an excellent meal prep dish, but you should store the components separately. Keep the cooked beef in one airtight container and the rice in another. If you store them together, the rice will absorb the moisture from the beef over time and become soft.
When you’re ready to eat, reheat the rice with a damp paper towel draped over the top to keep it from drying out. Heat the beef separately, then assemble and add the cheese fresh. This ensures the textures stay exactly as they were intended. Both the beef and rice will stay fresh in the fridge for up to three days.
Expert Tips for Presentation
Presentation matters, even for a simple bowl. Use fresh curly parsley for the garnish. Unlike flat-leaf parsley, curly parsley has a lot of “loft” and volume, which adds a beautiful pop of green and a nice textural contrast to the smooth cheese. Chop it finely and sprinkle it generously.
The choice of bowl also makes a difference. Deep, narrow bowls are better than wide, shallow ones because they trap the heat more effectively. This keeps the rice and beef hot until the very last bite, ensuring the cheese stays in its melted, glossy state throughout your meal.
Frequently Asked Questions
Can I use brown rice instead of white?
Yes, you can use brown rice, but keep in mind that it has a much firmer, nuttier texture. It won’t “pack” as easily as short-grain white rice, so your base might be a bit looser. You will also need to adjust your cooking time for the rice itself, as brown rice typically takes 40 to 45 minutes to cook compared to 15 to 20 for white.
What if I don’t have a cast iron skillet?
A stainless steel skillet is your next best option. It conducts heat very well and allows for excellent browning. Avoid using non-stick pans for the searing step if possible, as they don’t allow the meat to develop that deep, caramelized crust (the fond) as effectively as unfinished metal surfaces.
How do I prevent the garlic from burning?
Garlic burns very quickly and becomes bitter, which can ruin the whole dish. The key is timing. Never add the garlic at the beginning with the beef. Wait until the beef is browned and the onions are soft. Only cook the garlic for about 30 to 60 seconds—just until you can smell it—before adding the tomato paste and other liquids to cool the pan down.
Can I add vegetables directly to the beef?
You can, but be careful with high-moisture vegetables like zucchini or mushrooms. If you add them too early, they will release water and prevent the beef from searing. It is better to sauté vegetables separately and stir them in at the end, or use low-moisture options like finely chopped bell peppers that can cook quickly with the onions.
Cheesy Ground Beef and Rice Bowls
Course: Main CourseCuisine: AmericanDifficulty: easy4
servings10
minutes20
minutes580
kcal30
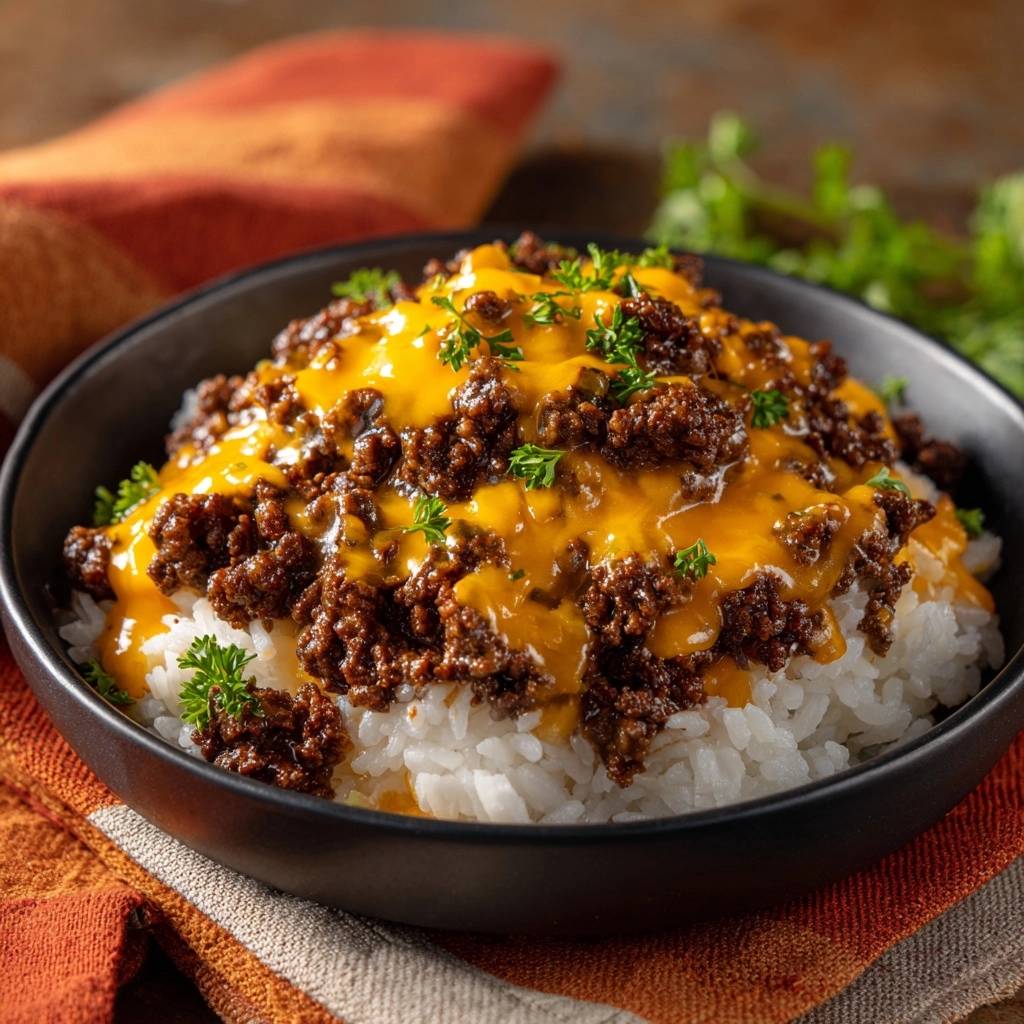
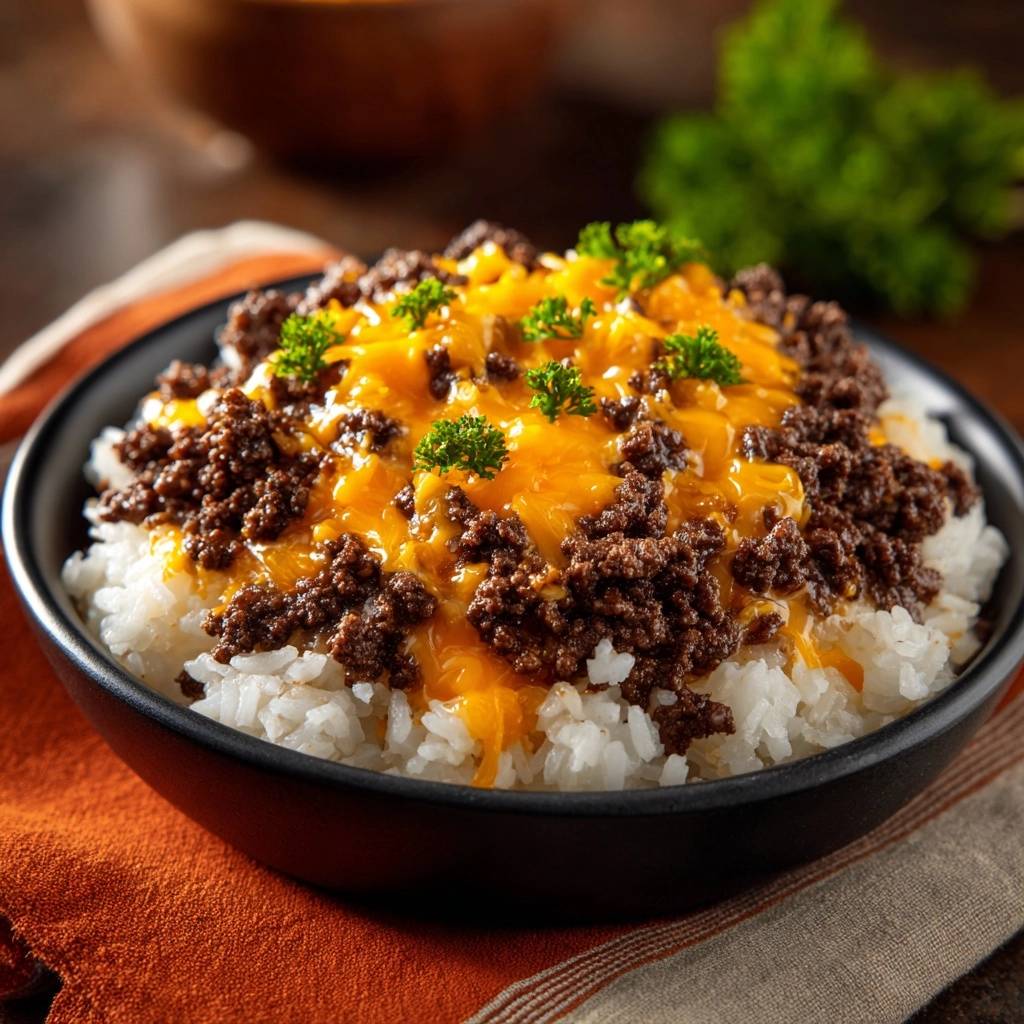
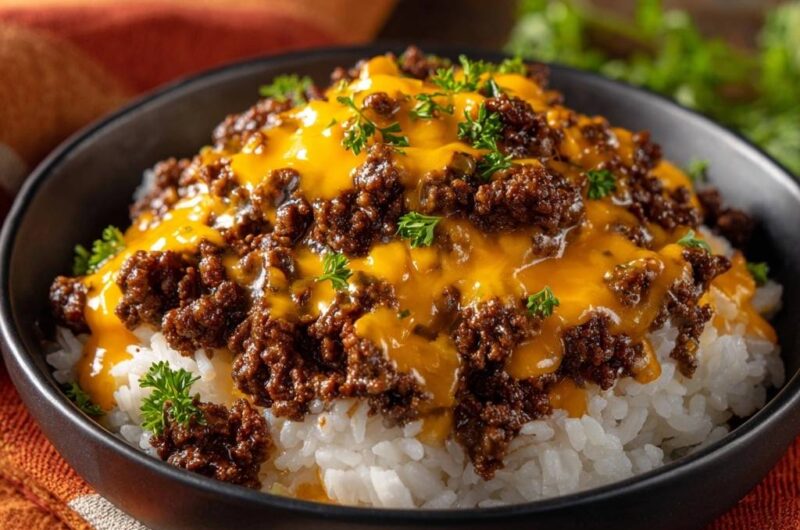
MinutesA hearty and satisfying meal featuring deeply browned lean ground beef, aromatic spices, and melted sharp cheddar cheese served over a bed of fluffy white rice. The technique focuses on draining excess fat to ensure a non-greasy texture.
Ingredients
1 pound lean ground beef (90/10 or 93/7)
3 cups cooked short-grain or medium-grain white rice (hot)
2 cups sharp cheddar cheese, freshly shredded (thick grate)
1 tablespoon neutral oil (like avocado or vegetable oil)
1 small yellow onion, finely diced
2 cloves garlic, minced
2 tablespoons tomato paste
1 tablespoon Worcestershire sauce
1 teaspoon smoked paprika
1 teaspoon onion powder
Salt and black pepper to taste
1/2 cup fresh curly parsley, chopped for garnish
Directions
- Heat the oil in a large stainless steel or cast iron skillet over medium-high heat until shimmering. Add the ground beef in a single flat layer. To solve the greasy rice problem, let the meat sit undisturbed for 4 minutes. This creates a dark, caramelized crust that locks in flavor and prevents the meat from “stewing” in its own juices.
- Break the meat into small, uniform crumbles using a wooden spoon. Add the diced onion and sauté for 3-4 minutes until the onion is translucent and the beef is fully browned.
- Crucial Step: Tilt the pan and use a spoon or folded paper towel to drain every drop of excess liquid and rendered fat. Removing this liquid now is what prevents the rice from becoming mushy and greasy later.
- Stir in the garlic, tomato paste, Worcestershire sauce, smoked paprika, and onion powder. Cook for 2 minutes, stirring constantly, until the tomato paste turns a deep brick red and coats the beef in a thick, concentrated flavor base. Season generously with salt and pepper.
- Fluff your hot rice and divide it into four oven-safe bowls. Pack the rice slightly to create a sturdy base.
- Top the rice with a generous mound of the beef mixture. Immediately sprinkle the shredded cheddar cheese over the beef.
- Visual Match Step: Place the bowls under a broiler for 1-2 minutes, or cover the bowls with a tight lid for 2 minutes if the beef and rice are steaming hot. This ensures the cheese achieves the thick, flowing, glossy consistency shown in the image.
- Garnish heavily with fresh curly parsley and serve immediately.
Notes
- To prevent greasy rice, ensure you drain all rendered fat after browning the beef. Using freshly shredded cheese rather than pre-shredded will result in a smoother, glossier melt.


