
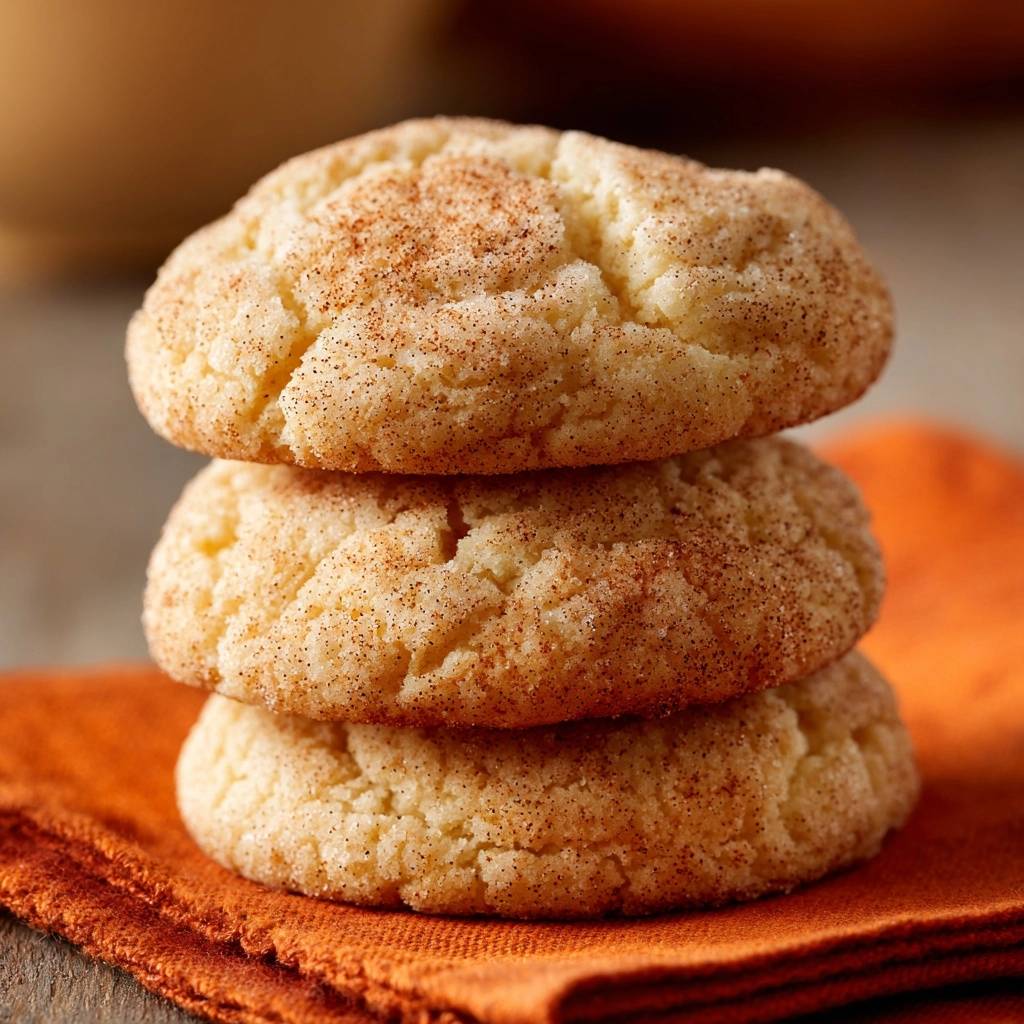
Imagine biting into a cookie that offers a sharp, crackly snap of cinnamon sugar before giving way to a center as soft as a cloud. That specific textural contrast defines a perfect snickerdoodle, yet so many home bakers end up with a greasy, flat mess that sticks to the pan. When the bottom of your cookie turns out soggy or oily, it ruins the entire experience of that iconic, tangy crumb.
The secret to avoiding the dreaded “soggy bottom” isn’t just about the ingredients; it’s about controlling the temperature of your fats and the surface of your pan. Most recipes fail because they allow the butter to melt into a puddle before the flour structure has a chance to set. This version focuses on a specific chilling method and high-heat blast to ensure your cookies stay thick, pillowy, and perfectly dry on the base.
Expert bakers know that the real magic happens when you manage the thermodynamics of the dough. By using cool butter and a chilled resting period, you create a barrier that prevents the fats from leaking out instantly. This results in a cookie that stands tall with those beautiful, rustic cracks across the top rather than spreading into a thin, oily disc.
The Chemistry of Cream of Tartar and Texture
If you leave out the cream of tartar, you aren’t making a snickerdoodle; you’re just making a basic sugar cookie. This acidic byproduct of winemaking is the soul of the recipe. It provides that signature “tang” that cuts through the heavy sweetness of the cinnamon-sugar coating, giving the cookie its sophisticated flavor profile.
Beyond flavor, cream of tartar serves a vital chemical purpose when it meets baking soda. This pairing creates a powerful leavening reaction that pushes the dough upward quickly, resulting in a light, airy crumb rather than a dense, chewy one. It’s this rapid lift that helps create the classic crinkled surface as the cookie puffs and then settles.
Furthermore, the acidity in cream of tartar prevents the sugar in the dough from crystallizing into large, crunchy bits. This ensures the interior remains incredibly soft and velvety. Without this specific ingredient, the texture would be gritty and the cookie would lose its characteristic “pillowy” mouthfeel that we all crave.
Essential Components for Classic Cinnamon Snickerdoodles
Success starts with the state of your butter. You want it “softened but cool,” which usually means about 65°F. If you press your thumb into the stick, it should leave an indentation without sliding through or feeling greasy. Butter that is too warm won’t hold the air bubbles created during the creaming process, leading to a heavy, flat cookie.
Large eggs act as your primary emulsifier, binding the fats and liquids together into a cohesive dough. It’s best to use room-temperature eggs so they incorporate smoothly without curdling the cool butter. This ensures a uniform batter that rises evenly in the oven’s heat.
All-purpose flour provides the necessary protein structure to hold everything together. While it might be tempting to use cake flour for softness, you need the strength of all-purpose flour to support the high sugar content. This prevents the cookies from collapsing under their own weight as they bake at high temperatures.
Selecting the Right Cinnamon and Sugar Grade
For the coating, the quality of your cinnamon matters immensely. Most grocery stores sell Cassia cinnamon, which has a bold, spicy punch that stands up well to the sugar. If you prefer a more delicate, floral aroma, you can use Ceylon cinnamon, though you may need to use a bit more to achieve that classic dark-speckled look.
The granule size of your sugar also dictates the “crackle” effect. Standard granulated white sugar is ideal because the crystals are large enough to provide a distinct crunch against the soft dough. Always check your baking soda for freshness by dropping a pinch into vinegar; if it doesn’t fizz violently, your cookies won’t get the lift they need.
Why Pan Selection Prevents Greasy Cookie Bottoms
The type of pan you use is just as important as the ingredients in the bowl. Light-colored aluminum baking sheets are the gold standard for snickerdoodles. They reflect heat evenly, allowing the cookie to bake at a steady pace without the bottom overheating before the middle is done.
Dark non-stick pans are the enemy of a crisp, dry cookie base. These pans absorb radiant heat far too quickly, which causes the butter in the bottom of the dough to melt and fry the base of the cookie. This results in a scorched, greasy bottom that feels oily to the touch rather than clean and crisp.
Always line your light-colored pans with parchment paper. This creates a thin layer of insulation and prevents the sugar coating from sticking and tearing the bottom of the cookie. Avoid greasing the pan with butter or spray, as this extra fat contributes directly to the “soggy bottom” issue you’re trying to avoid.
Step-by-Step: Mixing and Aerating the Dough
Start by creaming your butter and sugar for at least three to five minutes. You are looking for a visible transformation; the mixture should turn from a dense yellow to a pale, almost white color with a fluffy texture. This process beats air into the fat, which is essential for a light cookie.
Once you add your eggs and vanilla, beat only until the yellow streaks disappear. Over-beating at this stage can introduce too much liquid air, which might cause the cookies to puff and then deflate. Keep the mixer on a medium-low speed to maintain control over the emulsion.
When adding the dry ingredients, stop the mixer the moment you see no more white streaks of flour. If you overwork the dough here, you’ll develop the gluten in the flour. This turns a soft, pillowy snickerdoodle into a tough, bread-like disc that is difficult to chew.
The Critical Role of Chilling Snickerdoodle Dough
Chilling the dough for 30 minutes is a non-negotiable step for the perfect texture. This rest period allows the flour to fully hydrate, which creates a more uniform crumb. More importantly, it firms up the butter so it takes longer to melt once it hits the 400-degree oven.
If you bake the dough while it’s warm, the fat will liquefy and spread across the pan before the edges have a chance to set. Chilled dough holds its shape, ensuring the cookies stay thick and mounded. This height is what gives you that wonderful contrast between the crisp exterior and the soft, steamy center.
You can even see the difference in the final product. Chilled dough results in deep, beautiful cracks and a matte finish. Room-temperature dough often results in a shiny, greasy surface with very few cracks and a much thinner profile that lacks the classic snickerdoodle “heft.”
For another chewy treat, consider these sea salt chocolate cookies.
Achieving the Signature Cinnamon Sugar Crust
The ratio of three tablespoons of sugar to one tablespoon of cinnamon provides the perfect balance of sweetness and spice. When rolling your chilled dough into one-inch balls, make sure they are perfectly round. This ensures they expand evenly in all directions during the bake.
Drop each ball into the cinnamon-sugar mixture and roll it around until every square millimeter is covered. You want a thick coating, as some of the sugar will melt into the dough while the rest stays on the surface to create that iconic crackly crust. Don’t be afraid to give them a second roll if they look patchy.
Place the balls on the sheet exactly as they are. Do not press them down with your hand or a fork. The high heat of the oven will cause them to spread naturally. By leaving them in a ball shape, you force the heat to work from the outside in, which creates the signature cracked aesthetic as the center expands.
Precision Baking and the Carryover Cooking Method
A 400-degree oven might seem high, but it’s the secret to the snickerdoodle’s unique texture. This “flash bake” sets the edges quickly, locking in the shape, while the short duration prevents the middle from drying out. It creates a crisp shell that protects the soft interior.
You must pull the cookies out when they look slightly underbaked. The edges should be set and matte, but the centers will still look a bit puffed and soft. If the centers look fully cooked in the oven, the cookies will be hard and crunchy once they cool down.
Carryover cooking is your best friend here. The residual heat inside the cookie will finish cooking the center while it sits on the cooling rack. This method ensures the middle stays moist and tender while the outside develops that characteristic snap.
Proper Cooling Techniques to Maintain Crispness
As soon as the cookies come out of the oven, let them sit on the pan for only a minute to firm up, then move them to a wire rack. If you leave them on the hot baking sheet, the heat from the pan will continue to cook the bottoms. This often leads to over-browning and a loss of that delicate texture.
Leaving cookies on a flat surface like a pan or a counter traps steam underneath them. This moisture has nowhere to go, so it re-absorbs into the bottom of the cookie, making it soft and soggy. A wire rack allows air to circulate 360 degrees around the cookie.
This airflow “locks” the bottom crust, ensuring it stays dry and crisp. You’ll notice that cookies cooled on a rack have a much better shelf life because they aren’t starting off with excess moisture trapped in the base. It only takes a few minutes, but it makes a world of difference.
Troubleshooting Common Snickerdoodle Texture Issues
If your cookies turned out flat, your butter was likely too soft or your baking soda has lost its potency. Always start with cool butter and check your expiration dates. Another culprit for flat cookies is a warm baking sheet; never place raw dough onto a pan that is still hot from the previous batch.
Tough cookies are almost always the result of overmixing. Once the flour goes in, use a gentle hand or the lowest setting on your mixer. You want to combine the ingredients just until the flour disappears. If you’ve worked the dough too much, the gluten will make the cookies chewy in a bready way rather than a soft way.
If the bottoms are burnt but the tops are raw, your oven rack might be too low. Move it to the center position to ensure even heat distribution. Also, check your pan color; if you’re using dark pans, you may need to lower the oven temperature by 25 degrees to compensate for the extra heat absorption.
Finally, if your cookies lack that classic “tang,” you might have forgotten the cream of tartar or used an old container. This ingredient doesn’t just provide flavor; it’s essential for the chemical reaction that creates the cookie’s unique texture. Without it, you’re just eating a cinnamon-flavored sugar cookie.
Storage and Moisture Control for Longevity
To keep your snickerdoodles crisp for up to five days, store them in an airtight container once they are completely cool. If you put them away while they are even slightly warm, the trapped steam will turn the crisp cinnamon-sugar coating into a tacky, sticky mess.
If your cookies become too hard after a few days, you can place a single slice of white bread in the container. The cookies will absorb the moisture from the bread, softening them back up to their original pillowy state. Just be sure to remove the bread after 24 hours so it doesn’t get moldy.
In humid environments, the sugar coating can become damp. To prevent this, you can add a small food-safe silica packet to the container. This helps regulate the internal environment and keeps that outer “crackle” intact even when the weather isn’t cooperating.
Make-Ahead Strategies and Freezing Instructions
Snickerdoodle dough freezes beautifully, making it perfect for “on-demand” baking. Roll the dough into balls and coat them in the cinnamon sugar, then freeze them on a tray until solid. Once frozen, transfer the balls to a heavy-duty freezer bag for up to three months.
When you’re ready for a treat, you can bake them directly from the freezer. You don’t even need to thaw them! Just place the frozen balls on your prepared baking sheet and add about two minutes to the total baking time. This ensures the center gets warm without burning the edges.
If you have already baked the cookies and want to freeze them, wrap them individually in plastic wrap and store them in a container. To thaw, let them sit at room temperature for about 30 minutes. You can pop them in a toaster oven for 60 seconds to restore that “just-baked” warmth and crispness.
How should I store leftover snickerdoodles?
Store your cookies in an airtight container at room temperature for up to 5 days. Ensure they are completely cool before sealing the lid, or the residual steam will make the cinnamon-sugar coating sticky. For longer storage, these cookies freeze well for up to 3 months in a freezer-safe bag. Do not refrigerate them, as the cold air can dry out the centers and make them stale faster.
Why did my cookies spread too much and turn out flat?
The most common reason for spreading is butter that was too warm or greasy before mixing. If the butter is near its melting point, it won’t hold air, and the cookies will collapse in the oven. Another culprit is skipping the 30-minute chilling step. Chilling solidifies the fat, ensuring the cookie holds its height. Also, ensure you aren’t using “tub” margarine or butter spreads, which have a higher water content than stick butter.
Can I make these without cream of tartar?
While you can technically substitute cream of tartar with a mixture of lemon juice or white vinegar, it will change the texture and flavor. For every 1 teaspoon of cream of tartar, you would use 2 teaspoons of lemon juice. However, for the authentic “tang” and pillowy lift of a classic snickerdoodle, cream of tartar is highly recommended. If you omit it entirely and use baking powder instead, you will end up with a standard sugar cookie rather than a snickerdoodle.
Why are the bottoms of my cookies greasy or burnt?
This usually happens if you use a dark-colored or thin non-stick baking sheet. Dark pans absorb heat rapidly, which fries the bottom of the cookie before the middle can bake. To fix this, use a light-colored aluminum pan and line it with parchment paper. Additionally, make sure you aren’t greasing the parchment paper, as the dough already contains enough fat to release easily from the surface.
Can I use a different type of sugar for the coating?
Standard granulated white sugar is best for the classic “crackle” finish. Using brown sugar in the coating will result in a softer, more caramelized exterior that lacks the signature snap. If you want a deeper flavor, you can use organic cane sugar, which has slightly larger crystals and a hint of molasses, but avoid powdered sugar as it will simply dissolve into the dough and disappear.
Snickerdoodles
Course: DessertCuisine: AmericanDifficulty: easy24
cookies15
minutes10
minutes145
kcal55
MinutesA classic snickerdoodle recipe focused on achieving a thick, soft texture and a perfectly dry, crisp base by utilizing chilled dough and immediate wire rack cooling.
Ingredients
1 cup unsalted butter, softened but still cool to the touch
1 1/2 cups granulated sugar
2 large eggs
2 teaspoons vanilla extract
2 3/4 cups all-purpose flour
2 teaspoons cream of tartar
1 teaspoon baking soda
1/4 teaspoon salt
3 tablespoons granulated sugar (for coating)
1 tablespoon ground cinnamon (for coating)
Directions
- In a large bowl, cream together the butter and 1 1/2 cups sugar until light and fluffy. Add eggs and vanilla, beating until fully combined.
- Sift together the flour, cream of tartar, baking soda, and salt. Gradually add the dry ingredients to the wet mixture until a thick dough forms.
- To solve the soggy bottom issue, you must chill the dough for at least 30 minutes. This solidifies the fats so they do not leak out instantly in the oven.
- Preheat your oven to 400 degrees F. Use a light-colored aluminum baking sheet lined with parchment paper. Avoid dark non-stick pans, as they absorb too much heat and cause the bottoms to scorch and become greasy.
- Mix the coating sugar and cinnamon in a small bowl. Roll the chilled dough into 1-inch balls and roll them generously in the cinnamon sugar.
- Place balls 2 inches apart on the prepared baking sheet. Do not press them down.
- Bake for 8 to 10 minutes. The secret to the perfect texture is removing them when the edges are set but the centers still look slightly underbaked.
- Immediately move the cookies to a wire cooling rack. Leaving them on the hot pan is the number one cause of soggy bottoms, as the residual heat creates steam. Cooling on a rack allows air to circulate, locking in that signature soft crunch.
Notes
- Avoid dark non-stick pans as they absorb too much heat. Moving cookies immediately to a wire rack is essential to prevent soggy bottoms caused by residual pan heat.


