
Imagine pulling a tray of giant, spiraled pastries out of the oven, the scent of warm cocoa and toasted sugar filling your kitchen. You reach for the center roll, expecting that classic, pillowy resistance, but instead, you find a doughy, raw mess at the core. It’s the ultimate breakfast heartbreak. Most home cooks struggle with “upgrading” store-bought dough because the added moisture from extra fillings often prevents the center from baking through properly.
These Cookies and Cream Cinnamon Rolls solve that frustration by leaning into a sophisticated, textural profile that feels like a high-end bakery find. We aren’t just tossing in some chocolate; we’re re-engineering the bake. By introducing a dark cocoa spiral and a specific cream-pouring technique, you get a roll that is structurally sound, deeply flavored, and incredibly indulgent.
The secret to this recipe’s success lies in the “Anti-Soggy Bottom” philosophy. Most people make the mistake of drenching the tops of their rolls in liquid, which leads to a greasy, flat base. Instead, we use a room-temperature heavy cream pour around the base. This creates a stable emulsion with the cinnamon sugar, ensuring the bottom of your roll is caramelized and rich rather than wet and limp.
Essential Components for Cookies and Cream Cinnamon Rolls
To pull off this transformation, you need ingredients that work in harmony. The heavy whipping cream is the most critical player here. It must be at room temperature before it hits the pan. If you use cold cream, it will shock the dough and slow down the rise, leading to a dense, gummy texture. When room-temperature cream meets the heat of the oven, it binds with the sugar to create a thick, dulce-de-leche-style sauce.
Dark cocoa powder is another non-negotiable for that authentic “Oreo” aesthetic. Standard Dutch-process cocoa is fine, but a truly dark or black cocoa powder provides that signature deep color and slightly salty, chocolatey bite that contrasts beautifully with the sweet icing. It turns a standard cinnamon spiral into a striking visual masterpiece.
Finally, don’t toss the icing that comes in the tube! We use it as a base, but we upgrade it with softened cream cheese and real butter. This adds the necessary tang and fat content to balance the sugar. Freshly softened cream cheese ensures your frosting is velvety and smooth, rather than lumpy or overly translucent.
Selecting the Right Chocolate Sandwich Cookies
While the classic Oreo is the gold standard, you can use organic or generic chocolate sandwich cookies. However, keep an eye on the filling. Cookies with “double” or “mega” stuf can add too much vegetable oil to the rolls as they melt. Stick to a standard filling-to-wafer ratio to keep the moisture levels predictable.
When it comes to prep, put away the food processor. You want a coarse crumb, not a fine dust. Using a rolling pin to crush the cookies in a bag gives you varied sizes. Those larger chunks provide a satisfying crunch that survives the heat of the oven, whereas a fine powder would simply dissolve into the dough.
The Role of Heavy Cream in Dough Hydration
The science of the “heavy cream pour” is fascinating. In a standard bake, the moisture in the dough evaporates quickly, sometimes leaving the edges dry. By adding heavy cream to the bottom of the dish, you create a high-fat steam environment. This fat protects the starch molecules in the flour, keeping them tender.
As the rolls bake, the cream reduces and thickens. It doesn’t just sit there; it interacts with the cinnamon and sugar that leaks out of the rolls. This creates a self-basting effect. The result is a roll that is incredibly moist on the inside with a bottom that tastes like a premium chocolate caramel.
The Science of the Anti-Soggy Bottom Technique
The biggest mistake in “viral” cinnamon roll hacks is pouring the cream directly over the tops of the rolls. This washes away the cinnamon sugar and creates a soggy, pale crust. By pouring the cream *around* the rolls, you allow the tops to brown and crisp through dry heat while the bottoms braise in the cream. This dual-zone cooking method is the key to structural integrity.
Your choice of baking dish also matters significantly here. A ceramic or glass dish is preferred over metal. Ceramic holds onto heat more consistently and distributes it slowly. This slow climb in temperature gives the heavy cream enough time to emulsify with the sugar before the dough sets. In a thin metal pan, the bottom might scorch before the cream has a chance to thicken into that desired sauce.
This technique also stabilizes the high sugar content. Sugar is hygroscopic, meaning it pulls moisture from the air and the dough. Without the cream to “catch” that melting sugar, it would simply turn into a hard, jagged candy shell on the bottom of your pan. The cream keeps everything soft and scoopable.
Step-by-Step: Preparing the Cookies and Cream Spirals
Start by gently unrolling your refrigerated dough. You don’t need to flatten it completely; just open the spiral enough to see the “nooks and crannies.” Dust the inside with your dark cocoa powder and a handful of cookie crumbs. This ensures that the chocolate flavor is baked into every single layer, not just sitting on top.
When you roll them back up, do it tightly but without stretching the dough. If you pull too hard, you’ll tear the gluten strands, and the rolls won’t rise as high. Handle the dough while it’s still slightly cool from the fridge. If it gets too warm, it becomes sticky and difficult to manage, losing that clean spiral shape.
Once they are tucked into the pan, give them a little space. They need room to expand and soak up that cream. As they grow, they will eventually touch, creating those soft, pull-apart edges that everyone loves. This is the moment where the transformation from “canned dough” to “artisan pastry” really begins.
The Precision Baking and Temperature Stagger
Bake these at 350°F. Around the 20-minute mark, you’ll notice the kitchen starts to smell like a chocolate factory. This is your cue to check the progress. The tops should be a deep, toasted golden brown. If they look pale, they aren’t done, and the center will likely be doughy.
For a different kind of sweet indulgence, check out these chocolate chip cheesecake brownie bites.
Use the “Firm Touch Test.” Gently press the center of the middle roll with a spoon or your finger. It should feel springy and firm, not soft or squishy. You should also see that the heavy cream has been almost entirely absorbed, leaving behind a bubbling, thick glaze at the bottom of the dish.
Crafting the Ultimate Cream Cheese Frosting Upgrade
While the rolls are finishing, whisk your softened cream cheese and butter until they are completely homogenous. Slowly add the powdered sugar and the provided icing. If you see the mixture starting to look “curdy,” it’s likely because your butter was too cold. Just keep whisking; it will eventually smooth out into a glossy ribbon.
The consistency is vital. You want it thick enough to hold its shape but loose enough to drape. If it’s too stiff, add milk one teaspoon at a time. You’re looking for a “slow pour” consistency—when you lift the whisk, the frosting should fall back into the bowl and hold its shape for a few seconds before disappearing.
Achieving the Perfect Frosting Drape
Patience is your best friend here. Let the rolls cool for at least 5 to 7 minutes. If you frost them the second they come out, the fat in the frosting will melt, and you’ll end up with a transparent, oily glaze. By waiting, the frosting sits on top of the roll, creating that thick, iconic bakery look.
As the frosting hits the warm (but not hot) surface, it will naturally soften and begin to drape down the sides. This is the perfect time to shower the rolls with your remaining cookie crumbs. The wet frosting acts as a glue, ensuring every bite has that signature chocolate crunch.
Troubleshooting Common Cinnamon Roll Failures
If your rolls are getting too dark on top but the center still feels soft, don’t panic. Simply tent the pan loosely with a piece of aluminum foil. This reflects the direct heat away from the surface while allowing the ambient heat to continue cooking the dough through to the center.
Runny frosting is usually a result of over-mixing or using butter that was melted rather than softened. You can easily fix this by whisking in an extra tablespoon of powdered sugar. Conversely, if your cookies on top turn soggy too quickly, it’s likely because the rolls were still steaming too much when you applied the topping. Let them vent a bit longer next time.
Make-Ahead Strategies and Storage Solutions
You can absolutely prep these the night before. Assemble the rolls in the pan, but do not add the heavy cream yet. Cover them tightly with plastic wrap and refrigerate. In the morning, let them sit on the counter for 20 minutes to take the chill off, pour the cream around them, and bake as directed.
Store any leftovers in an airtight container at room temperature for up to two days, or in the fridge for four. To reheat, avoid the microwave if possible, as it can make the dough rubbery. Instead, pop them in a 300°F oven or an air fryer for a few minutes. This restores the fluffiness of the dough and the crunch of the cookie topping.
Expert Tips for Bakery-Style Presentation
To get that “skyscraper” height, make sure your baking dish isn’t too large. If the rolls have too much room to spread out, they will grow wide instead of tall. Crowding them slightly forces the dough upward, creating those impressive, towering spirals you see in professional bakeshops.
For a final touch of elegance, use a fine-mesh sieve to dust a tiny bit of extra cocoa powder or “cookie dust” over the finished frosting. It creates a beautiful contrast against the white cream cheese. When serving, use a sharp serrated knife to saw through the rolls rather than pressing down, which preserves the airy structure of the crumb.
Frequently Asked Questions
Can I use homemade dough instead of refrigerated?
Yes, you can use this heavy cream method with a standard yeast or brioche dough. However, you must ensure your homemade dough has finished its second rise in the pan before you add the cream. Because homemade dough is often lighter than refrigerated dough, it may absorb the cream faster, so start checking for doneness about 5 minutes earlier than the recipe suggests.
Why is my heavy cream not absorbing?
If the cream is still liquid at the end of the bake, your oven might be running cold, or you may be using a very deep glass pan that shields the bottom from heat. Ensure your oven is fully preheated to 350°F. If using glass, you might need to extend the bake time by 3 to 5 minutes to allow the bottom of the dish to reach the temperature necessary for the cream to emulsify.
How do I keep the cookie crumbs crunchy?
The key is the “Late Topping” rule. Never bake the cookies on top of the frosting; always add them after the frosting has been spread on the warm rolls. The moisture in the frosting will eventually soften the cookies, so if you are serving these later, wait to add the crumbs until right before you put them on the table.
Can I substitute the heavy cream with milk?
I don’t recommend substituting milk or half-and-half. The high fat content in heavy whipping cream (at least 36%) is what allows it to thicken into a sauce. Milk has too much water and not enough fat, which will likely result in a watery, “soggy bottom” rather than the rich, caramelized base this recipe is designed to create.
What is the best way to crush the cookies?
The best method is placing the cookies in a heavy-duty freezer bag and using a rolling pin or the bottom of a heavy skillet to whack them. This creates a mix of fine dust and chunky pieces. A food processor tends to turn the filling and the wafer into a paste, which won’t give you the textural contrast that makes these rolls so special.
Cinnamon Rolls
Course: Breakfast and DessertCuisine: AmericanDifficulty: easy6
large rolls20
minutes25
minutes480
kcal45
MinutesA decadent twist on classic cinnamon rolls featuring chocolate sandwich cookies and a special baking technique that prevents doughy centers and greasy bottoms.
Ingredients
1 package refrigerated jumbo cinnamon roll dough (5 or 6 count)
1/2 cup heavy whipping cream, room temperature
12 chocolate sandwich cookies (Oreo style), crushed into coarse crumbs
4 ounces cream cheese, softened
2 tablespoons unsalted butter, melted
1 cup powdered sugar
1 teaspoon vanilla extract
1-2 tablespoons milk (as needed for consistency)
1/4 cup dark cocoa powder (for the “dark” spiral look)
Directions
- Preheat your oven to 350°F (175°C). Grease a 9×9 inch ceramic or glass baking dish.
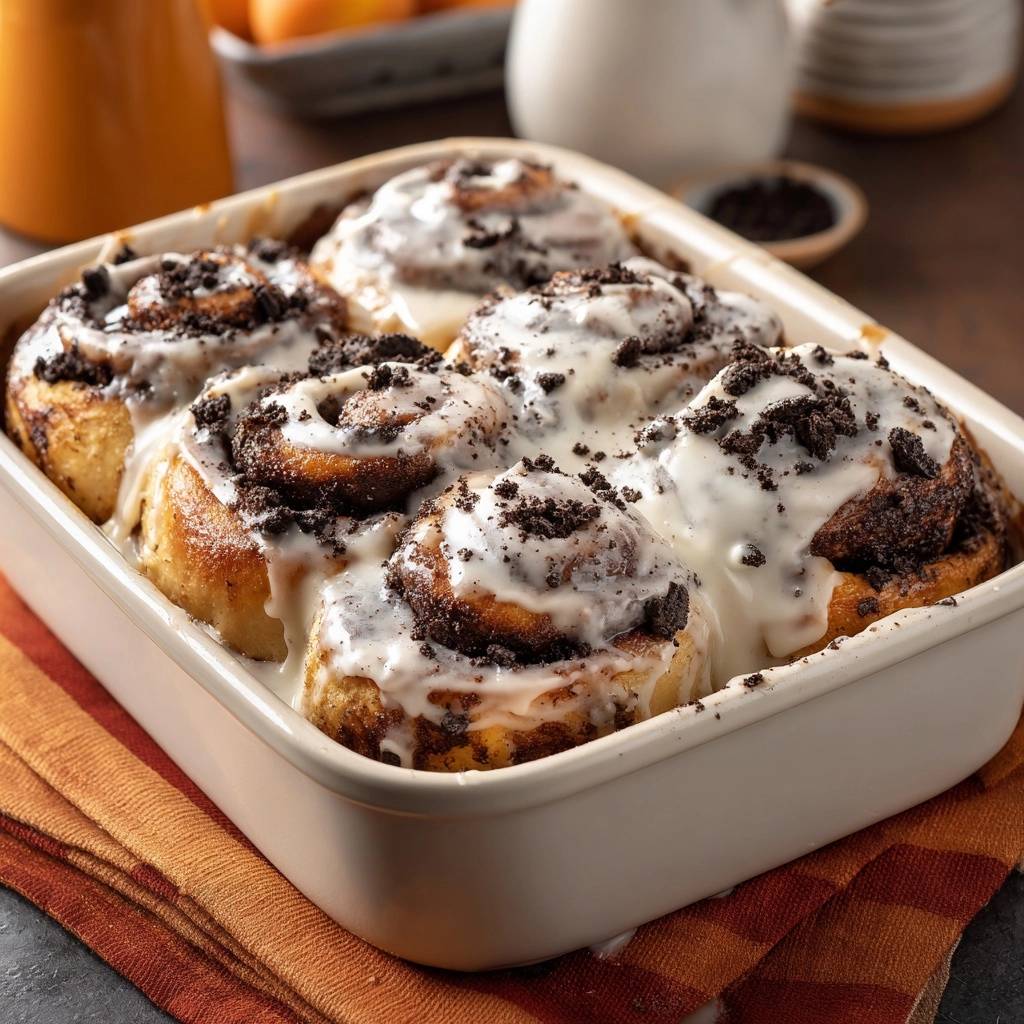
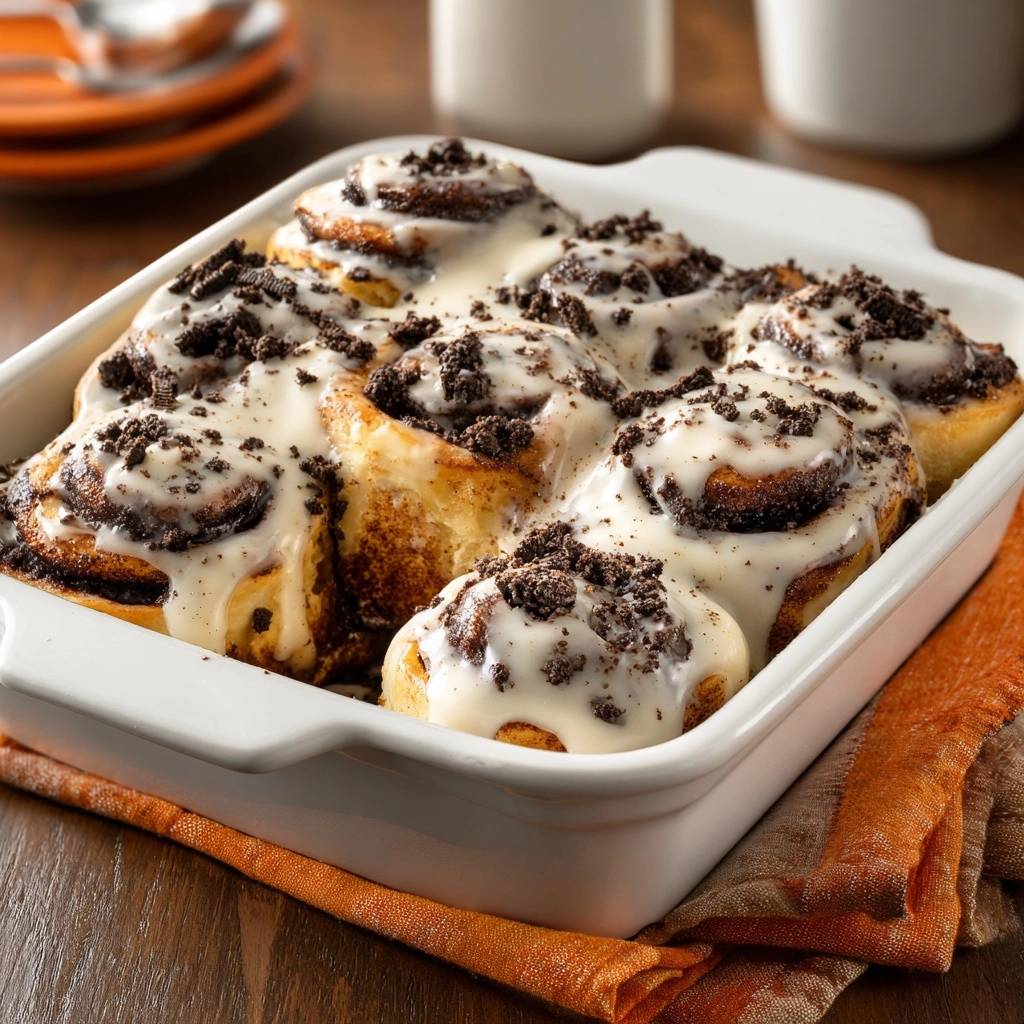
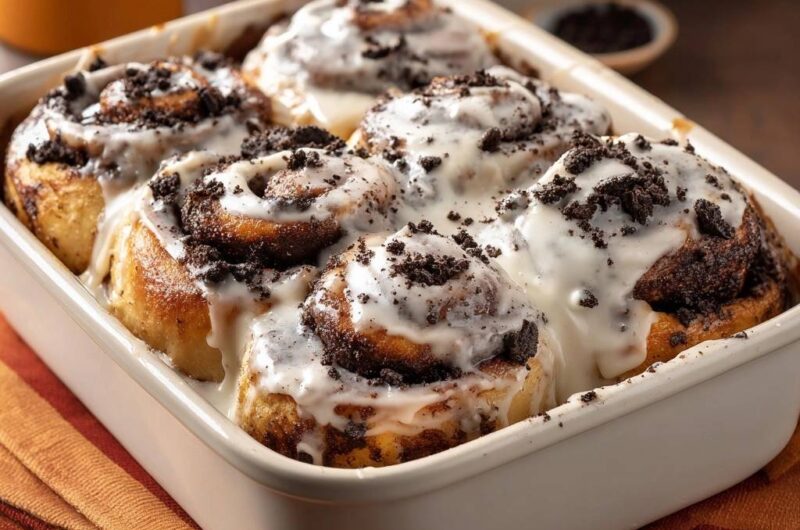
- Open the cinnamon roll package and set the included icing aside. Unroll each roll slightly and sprinkle a teaspoon of dark cocoa powder and some crushed cookie crumbs into the inner layers, then roll them back up tightly. This ensures the dark “cookies and cream” color is visible in the spiral.
- Place the rolls in the prepared dish. To solve the soggy bottom issue, pour the heavy whipping cream into the bottom of the pan around the rolls, not over the top. This allows the cream to emulsify with the cinnamon sugar at the base, creating a thick caramel-like sauce rather than a watery pool.
- Bake for 24 to 28 minutes. The rolls are done when the centers are firm to the touch and the tops are a deep, toasted golden brown. The heavy cream should be fully absorbed into the base of the rolls.
- While baking, prepare the frosting. Whisk together the softened cream cheese, melted butter, powdered sugar, vanilla, and the icing that came with the rolls. Add milk one tablespoon at a time until the frosting is thick but pourable.
- Remove the rolls from the oven. Let them cool for 5 to 7 minutes. This cooling period is vital; if you frost them immediately, the icing will break and become oily.
- Pour the cream cheese frosting generously over the warm rolls, allowing it to drape down the sides as seen in the image.
- Immediately top with the remaining crushed chocolate cookies so they adhere to the wet frosting for a signature crunch.
Notes
- Pouring the heavy cream around the rolls instead of over them prevents a soggy texture. Let the rolls cool for 5 to 7 minutes before frosting to prevent the icing from becoming oily.


