
Most home cooks have a love-hate relationship with chicken breasts. We love the lean protein, but we hate the “rubber tire” texture that usually comes with it. If you’ve ever found yourself needing a glass of water just to swallow a dry piece of poultry, you aren’t alone. The problem isn’t the meat; it’s the method.
This recipe changes the game by introducing a “steam-finish” technique that feels like a cheat code for juicy meat. By searing the chicken to get a crust and then immediately trapping moisture with chicken broth, you create a humid environment that gently finishes the interior. The result is a breast that is actually tender enough to cut with a butter knife.
The secret to this dish’s success lies in the temperature control. I’ve found that most people pull their chicken off the heat too late, fearing undercooked meat. However, by using the broth-steam method, you ensure the internal temperature hits that perfect 165°F mark without the exterior becoming tough or leathery. It’s the ultimate fix for the dry meat epidemic.
The Physics of Juicy Pan-Seared Chicken
Achieving a restaurant-quality sear requires understanding the Maillard reaction. This is the chemical process where amino acids and sugars react under high heat to create that deep brown, savory crust. Without it, your chicken lacks the complex flavor profile needed to stand up to a rich garlic cream sauce.
Before the chicken even touches the pan, you must pound it to a uniform 1-inch thickness. This isn’t just about venting frustration; it’s a structural requirement. Chicken breasts are naturally tapered, meaning the thin end overcooks while the thick center stays raw. Pounding ensures every square inch hits the heat at the same time.
The “steam-finish” is your insurance policy. When you add chicken broth to a hot pan and cover it, you’re creating a pressurized moisture-lock. This prevents the protein fibers from tightening up and expelling their natural juices. Instead of the heat attacking the meat from the outside-in, the steam surrounds it, cooking it evenly and gently.

Essential Components for the Garlic Cream Base
Quality ingredients are the backbone of this comfort meal. While you might be tempted to grab any potato, Yukon Golds are the superior choice for a “velvet” texture. They have a naturally buttery flavor and a medium starch content that creates a creamy puree without the graininess sometimes found in Russets.
When it comes to the sauce, fat is your friend. Using high-fat heavy cream rather than milk or half-and-half is vital for emulsion stability. The higher fat content prevents the sauce from breaking or curdling when it meets the heat and the salt from the Parmesan cheese. It creates a coating that clings to the chicken rather than pooling at the bottom of the plate.
Don’t underestimate the dried herbs. While fresh is often best, dried oregano and thyme have a concentrated oil content that blooms beautifully when toasted in the residual chicken fat. This creates a base layer of earthy flavor that cuts through the richness of the dairy.
Selecting the Right Poultry Cut
If you can find it, always opt for air-chilled chicken. Most budget poultry is water-chilled, meaning the meat absorbs excess liquid during processing. When that water hits your hot oil, it turns to steam immediately, preventing a golden crust. Air-chilled chicken stays dry on the surface, allowing for a much better sear.
The Role of Aged Parmesan in Sauce Viscosity
Parmesan cheese serves two purposes here: flavor and physics. It acts as a natural thickener, binding the cream together as it melts. However, you must avoid the “shaker” style powdered cheese. Those products contain anti-caking agents like cellulose that prevent them from melting smoothly.
Freshly grated Parmesan melts into the lipid phase of the cream, creating a glossy, cohesive sauce. If you use the pre-shredded stuff, you’ll likely end up with a grainy texture or a clump of cheese at the bottom of your skillet. Take the extra sixty seconds to grate it yourself; your palate will thank you.
Preparing the Velvet-Texture Potato Foundation
The biggest mistake people make with mashed potatoes is leaving them wet. After you drain your boiled potatoes, return them to the hot pot over very low heat for about two minutes. You’ll see steam rising; that’s the residual moisture evaporating. This “dry-mash” technique ensures the potatoes absorb the butter and cream rather than just sitting in water.
Once the potatoes are dry, mash them while they are still piping hot. Cold potatoes develop a gummy, glue-like texture because the starches behave differently as they cool. Aim for a generous ratio of butter to cream to achieve that professional-grade puree that feels like silk on the tongue.
Step-by-Step: Searing and Steaming the Chicken
Start by heating your oil until it is shimmering but not smoking. If the oil isn’t hot enough, the chicken will stick and tear. Place the seasoned breasts in the pan and leave them alone. Resist the urge to peek; they need those four minutes of uninterrupted contact to develop a crust that releases naturally from the pan.
Avoid overcrowding the skillet. If the chicken pieces are touching, the temperature of the pan will drop, and the meat will gray and boil in its own juices. Work in batches if necessary. Once you have that golden color, pour in the broth. The sizzle will be loud, but that’s exactly what you want.
Immediately trap that steam with a tight-fitting lid. This is the moisture-lock phase. By reducing the heat to low, you allow the internal temperature to climb slowly. This prevents the outer layers from becoming tough while the center finishes. Once it hits 165°F, remove it immediately to rest.
Building the Pan-Sauce from Fond
After removing the chicken, you’ll see brown bits stuck to the bottom of the pan. This is “fond,” and it is concentrated flavor gold. When you melt the butter and add the garlic, use a whisk to scrape those bits up. This deglazing process incorporates all that roasted chicken flavor directly into your cream sauce.
To make the most of those flavorful pan drippings, consider trying these golden, tender pan-seared cabbage wedges next.
Pour in the cream and bring it to a gentle simmer. You are looking for small bubbles around the edges, not a rolling boil. If you boil the sauce too hard, the fats can separate, leaving you with an oily mess. Whisk in the Parmesan slowly, watching as the sauce transforms from a thin liquid into a thick, glossy coating.
The sauce is ready when it passes the “spoon test.” Dip a spoon in and run your finger through the back; if the line stays clean, the emulsion is perfect. If it’s too thin, let it simmer for another minute. If it’s too thick, a tablespoon of broth will loosen it right back up.
Avoiding Common Texture Mistakes
If your sauce looks thin, don’t panic and add flour. Just keep simmering. Reduction is the best way to thicken a cream sauce without changing the flavor profile. Conversely, if the sauce becomes too thick and “gloopy,” whisk in a splash of broth or water to bring back that silky flow.
Resting the chicken is mandatory. If you slice it the second it comes out of the pan, all those juices you worked so hard to keep inside will flood out onto the plate. This ruins the aesthetic of your mash and leaves the meat dry. Give it five minutes; the fibers will relax and hold onto that moisture.
Flavor Variations and Herb Substitutions
While minced garlic is classic, you can use roasted garlic for a mellower, sweeter profile. Simply mash the roasted cloves into the butter before adding the cream. It adds a depth of flavor that feels incredibly sophisticated for a weeknight meal.
If parsley isn’t your favorite, try fresh chives for a mild onion bite or tarragon for a French-leaning, licorice-like finish. If the sauce feels a bit too heavy or “flat,” a tiny squeeze of fresh lemon juice at the very end can cut through the lipids and brighten the entire dish.
Optimal Side Dish Pairings
Because this dish is incredibly rich and creamy, you need something with acid or bitterness to balance the plate. Charred broccolini with a squeeze of lemon is a fantastic choice. The slight bitterness of the greens acts as a palate cleanser between bites of the decadent garlic sauce.
A crisp arugula salad with a simple vinaigrette also works wonders. The peppery bite of the arugula cuts right through the heavy cream. If you want something sweeter, honey-glazed carrots provide a nice color contrast and a different kind of earthy sweetness that complements the thyme and oregano.
Storage and Reheating for Meal Prep
Cream sauces can be tricky to reheat because they tend to break. The best way to revive this meal is to do it low and slow. Use a small saucepan over low heat and add a splash of water or milk to the sauce as it warms. This helps re-emulsify the fats and keeps it smooth.
Store the mashed potatoes in a separate container if possible. Potatoes absorb moisture as they sit, so they might soak up all your sauce if stored together. When reheating the mash, add a tiny pat of butter to bring back that velvet texture. This dish stays delicious in the fridge for up to three days.
Expert Troubleshooting and Technical FAQ
Why did my cream sauce curdle?
Curdling usually happens when the heat is too high or the cream is added to a very acidic environment. In this recipe, it most often occurs if the pan is scorching hot when the cream hits it. To fix a broken sauce, remove it from the heat immediately and whisk in a tablespoon of room-temperature heavy cream to bring the emulsion back together.
Can I use chicken thighs instead of breasts?
Yes, chicken thighs are actually more forgiving because they have a higher fat content. You will need to sear them for about 6-7 minutes per side to render the skin or fat properly. They can also handle a slightly higher internal temperature (up to 175°F) without drying out, making them a great choice for beginners.
How do I achieve a deeper golden crust?
Moisture is the enemy of the sear. Use paper towels to pat the chicken bone-dry before you apply the seasonings. If the surface of the meat is wet, it will spend the first few minutes in the pan boiling off that water instead of browning. Also, ensure your oil is shimmering hot before the meat touches the skillet.
What if I don’t have a heavy-bottomed skillet?
Thin aluminum pans don’t hold heat well and often have “hot spots” that can burn your garlic. If you are using a thinner pan, you’ll need to be much more active with your heat management. Turn the flame down slightly sooner than the recipe suggests and move the chicken around if you notice one side browning much faster than the other.
Plating for Visual Impact
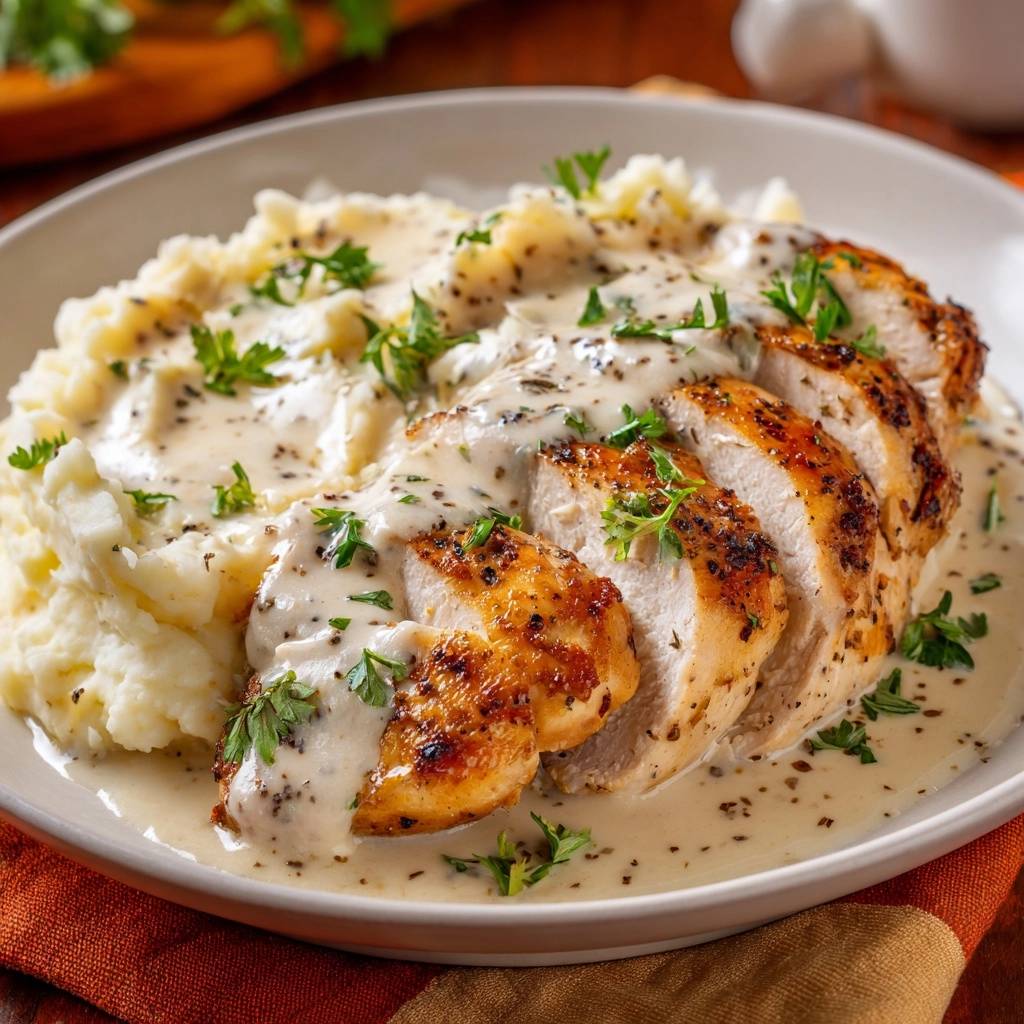
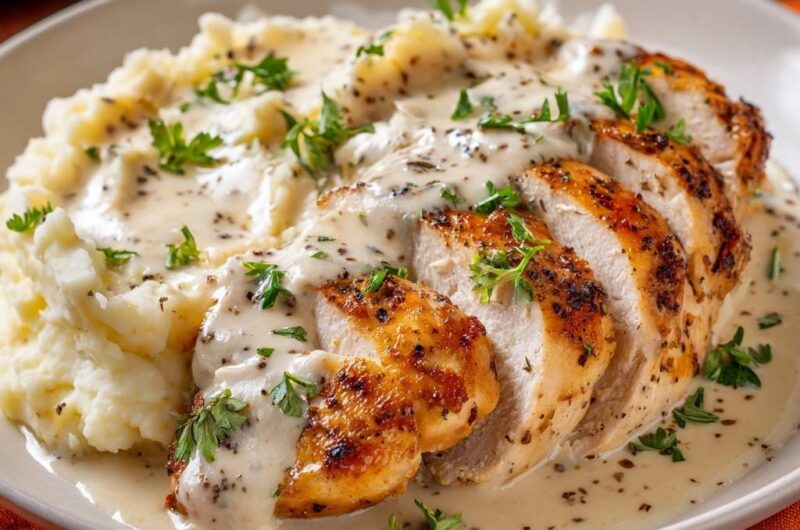
To make this look like a five-star meal, use the “medallion” slicing technique. Slice the rested chicken on a slight bias into thick pieces. This shows off the juicy interior and makes the portion look more substantial. Start with a generous bed of the velvet mash, using the back of a spoon to create a small well in the center.
Nestle the chicken medallions into that well, slightly overlapping them. When you pour the garlic cream sauce, aim for the center of the chicken so it cascades down onto the potatoes. This “nesting” method keeps the components together and ensures every bite has the perfect ratio of meat, starch, and sauce.
Finally, don’t be shy with the garnish. A heavy dusting of fresh parsley and a few cracks of black pepper provide a vital color contrast against the white cream and yellow potatoes. It makes the dish pop and signals to your guests that this isn’t just a basic chicken dinner—it’s a masterpiece of home cooking.
Pan-Seared Chicken
Course: Main CourseCuisine: AmericanDifficulty: easy4
servings15
minutes25
minutes540
kcal40
MinutesA comforting and foolproof meal featuring pan-seared chicken breasts finished in chicken stock to ensure moisture, paired with smooth mashed potatoes and a decadent Parmesan garlic cream sauce.
Ingredients
2 lbs Yukon Gold or Russet potatoes, peeled and cubed
4 large boneless skinless chicken breasts (pounded to even 1-inch thickness)
2 tablespoons olive oil
1 teaspoon garlic powder
1 teaspoon dried oregano
1/2 teaspoon dried thyme
Salt and cracked black pepper to taste
4 tablespoons unsalted butter, divided
4 cloves garlic, minced
1.5 cups heavy cream
1/2 cup chicken broth
1/2 cup freshly grated Parmesan cheese (for sauce thickness and color)
1/4 cup fresh parsley, chopped
Directions
- Place potatoes in a large pot of salted water. Bring to a boil and cook for 15 minutes or until fork-tender. Drain well and return to the hot pot for 2 minutes over very low heat to cook off excess moisture. Mash with 2 tablespoons of butter and 1/2 cup of the heavy cream until smooth and velvety. Season with salt to taste and keep warm.
- While potatoes boil, season chicken breasts generously on both sides with salt, pepper, garlic powder, oregano, and thyme.
- Heat olive oil in a large heavy-bottomed skillet over medium-high heat. Once shimmering, sear the chicken for 4-5 minutes per side until a deep, golden-brown crust forms.
- To ensure the chicken never dries out, pour the chicken broth into the pan around the chicken. Immediately cover with a tight-fitting lid and reduce heat to low. Let steam for 5-6 minutes until the internal temperature reaches 165°F. Remove chicken to a cutting board and let it rest for at least 5 minutes.
- In the same skillet (do not wipe it out), melt the remaining 2 tablespoons of butter. Sauté minced garlic for 30 seconds until fragrant. Pour in the remaining 1 cup of heavy cream and bring to a gentle simmer, scraping up the browned bits from the bottom of the pan. Whisk in the Parmesan cheese and simmer for 3 minutes until the sauce is thick and glossy.
- Slice the rested chicken into thick medallions. Arrange a generous bed of mashed potatoes on a plate, place the sliced chicken on top, and pour the garlic cream sauce over the meat and potatoes. Garnish heavily with fresh parsley and extra cracked black pepper to match the visual finish.
Notes
- Pounding the chicken to an even 1-inch thickness is crucial for even cooking. Letting the chicken rest for 5 minutes after steaming allows the juices to redistribute for maximum tenderness.


