
We have all been there. You pull a golden, beautiful piece of chicken out of the pan, take a bite, and it feels like chewing on a pencil eraser. It is frustrating because chicken breast is notoriously fickle, swinging from raw to rubbery in a matter of seconds. Most home cooks struggle with this because they treat the meat with too much direct, aggressive heat for too long.
The solution is a professional technique I call the velvet-sear method. By creating a delicate flour barrier and finishing the chicken gently in a bubbling pool of citrus and cream, you transform a basic protein into something buttery and soft. This dish brings together the sharp, briny pop of capers with a rich, velvety sauce that feels like it belongs in a high-end French bistro rather than your Tuesday night kitchen.
The secret to success here is all about the timing of your sear. You want to pull the chicken out of the pan while the center is still slightly underdone. This allows the residual heat to finish the job while the chicken rests, ensuring the protein fibers never tighten up into that dreaded tough texture. Trust me, once you master this temperature dance, you will never go back to plain grilled breasts again.
The Science of the Velvet-Sear Technique
When chicken hits a hot pan, the muscle fibers react like tiny springs, tightening and squeezing out moisture. This is why high-heat cooking often results in dry meat. The velvet-sear method interrupts this process by using a light dusting of flour to insulate the chicken from the harsh metal surface.
Furthermore, we utilize the principle of carry-over cooking. By removing the chicken chunks once they are golden on the outside but still tender in the middle, we prevent the internal temperature from spiking. The meat finishes cooking during the final simmer in the sauce, which keeps the juices locked inside the flour coating.
Why Flour Coating Prevents Rubbery Texture
The flour does more than just brown; it undergoes starch gelatinization. As the chicken cooks, the flour absorbs the natural juices escaping the meat, creating a thin, savory seal. This seal acts as a thermal buffer, slowing down the heat transfer to the delicate interior of the chicken bite.
In addition, that flour doesn’t just stay on the chicken. As you simmer the meat in the lemon and cream, the starch releases into the liquid. This naturally thickens the sauce without the need for a heavy roux, ensuring every millimeter of the chicken is draped in a silky, flavorful coating.
The Role of Temperature Control
Success in this recipe requires two distinct heat phases. Firstly, you need medium-high heat to achieve that beautiful Maillard reaction—the browning that creates deep flavor. However, you must be quick; this phase is only about the exterior color, not the internal doneness.
Secondly, you must drop the heat for the sauce-building phase. If you keep the pan screaming hot when you add the cream and lemon, the sauce will break and the chicken will overcook. A gentle, low-heat simmer allows the flavors to meld while the chicken reaches a perfect, juicy 165°F internal temperature.
Essential Components for Lemon Caper Sauce
A great sauce is a balance of fat, acid, and salt. Because capers are naturally salty from their brine, I always recommend using low-sodium chicken broth and unsalted butter. This gives you total control over the final seasoning, preventing the dish from becoming an salt bomb.
Freshness is the other non-negotiable factor. Use real lemons, not the bottled juice, as the oils from the fresh fruit provide a floral aroma that bottled versions lack. The heavy cream provides the body, while the butter adds a glossy finish that makes the sauce look professional.
For bright citrus notes similar to these lemon capers, consider trying lemon garlic pepper chicken for juicy results.
Selecting the Best Chicken Cut
While you can use thighs, boneless skinless chicken breasts are the traditional choice for this preparation. The lean meat provides a clean canvas for the bright lemon and salty capers. The key is cutting them into uniform 1.5-inch chunks.
This specific size is the “sweet spot” for surface area. It is small enough to cook through quickly during the final simmer, but large enough to maintain a juicy center. If the pieces are too small, they will overcook during the initial sear; if they are too large, the sauce won’t penetrate the meat effectively.
The Importance of Non-Pareil Capers
When shopping, look specifically for “non-pareil” capers. These are the smallest variety, roughly the size of a peppercorn. Because they are small, they have a more delicate texture and a more concentrated, floral tang compared to the larger, tougher varieties.
Always drain your capers before adding them to the pan. The brine they sit in is incredibly acidic and salty, which can throw off the balance of your cream sauce. A quick drain ensures you get the briny pop of the caper itself without the harshness of the pickling liquid.
Using Turmeric for Visual Appeal
You might notice that restaurant sauces often have a vibrant, appetizing golden hue. While the butter and cream provide some color, a tiny pinch of turmeric is the secret “culinary cosmetic” used by chefs. It doesn’t change the flavor profile significantly in this small amount.
Instead, the turmeric works with the fats in the cream to create a deep, sun-drenched yellow. It makes the dish look as rich as it tastes. Without it, the sauce can sometimes look a bit pale or greyish once the chicken juices mix in.
Step-by-Step: Preparing Creamy Lemon Caper Chicken Bites
Cooking this dish is a sensory experience. You should hear a gentle sizzle, smell the toasted garlic, and see the sauce transform from a thin liquid into a thick, spoon-coating glaze. Pay close attention to how the ingredients change as they hit the pan.
Phase 1: Dredging and the Initial Sear
Start by tossing your chicken chunks in the seasoned flour until they are fully coated. It is vital to shake off any excess flour before they hit the oil. Too much flour will create a gummy, pasty mess in the pan rather than a crisp, golden crust.
When you add the chicken to the skillet, do not crowd the pan. If the pieces are touching, they will steam instead of sear, and you will lose that golden color. Work in batches if you have to, ensuring each piece has enough space to develop a beautiful brown crust in the olive oil and butter.
Phase 2: Building the Pan Sauce and Deglazing
After removing the chicken, you will see brown bits stuck to the bottom of the pan. This is called “fond,” and it is concentrated flavor gold. When you pour in the chicken broth and lemon juice, use a wooden spoon to scrape those bits up immediately.
This process, known as deglazing, incorporates all that toasted chicken flavor back into the liquid. As the garlic softens in the butter, the kitchen will start to smell incredible. This is the foundation of your sauce, so make sure the pan is completely clean of those stuck-on bits.
Phase 3: Emulsifying the Cream and Final Simmer
Now, lower the heat and stir in the heavy cream. You want to see the sauce begin to thicken slightly as it simmers. This is called the “nappe” stage, where the sauce is thick enough to coat the back of a spoon without immediately running off.
Once the sauce is glossy and thick, slide the chicken and any juices from the plate back into the skillet. The flour on the chicken will finish thickening the sauce to a velvet consistency. Simmer it just long enough for the chicken to heat through and the flavors to marry into one cohesive bite.
Troubleshooting Common Texture Issues
Even the best cooks run into trouble sometimes. If your sauce feels too thin, simply let it simmer for another minute or two without the chicken to reduce the liquid. If it becomes too thick or “gloppy,” whisk in a tablespoon of broth to loosen it back up.
The most common mistake is burning the garlic. Garlic turns bitter the moment it goes from golden to dark brown. If your pan is too hot and the garlic burns, it is better to wipe the pan out and start the sauce phase over than to ruin the entire dish with a bitter aftertaste.
Fixing a Broken or Curdled Sauce
A sauce “breaks” when the fat separates from the liquid, usually because the heat was too high or the lemon juice was too acidic for the cream. You will see oily streaks or a grainy texture. Don’t panic; you can usually save it with a bit of vigorous whisking.
Remove the pan from the heat and add a teaspoon of warm water or a splash more cream. Whisk rapidly to re-emulsify the fats. The goal is to bring the temperature down slightly and use mechanical action to pull the sauce back into a smooth state.
Adjusting the Acid-to-Fat Balance
Before serving, always take a small spoonful of the sauce to taste. If it feels too heavy or “fatty” on your tongue, it needs more acid. Add a tiny squeeze of fresh lemon juice right at the end to brighten the flavors and cut through the cream.
Conversely, if the sauce is so sharp it makes you wince, you need more fat. Stir in a cold pat of butter. The cold butter will melt slowly and create a creamy bridge between the sharp lemon and the savory chicken, mellowing out the entire profile.
Flavor Variations and Ingredient Swaps
This recipe is a fantastic base for experimentation. If you aren’t a fan of garlic, try using finely minced shallots for a softer, sweeter onion flavor. You can also add a pinch of red pepper flakes if you want a subtle Mediterranean heat to contrast the creamy sauce.
Dairy-Free and Gluten-Free Modifications
For those avoiding gluten, you can easily swap the all-purpose flour for a 1-to-1 gluten-free flour blend or even almond flour. Almond flour won’t thicken the sauce as much, so you may need to simmer the liquid a bit longer to reach the desired consistency.
If you need to go dairy-free, use a high-quality cashew cream or full-fat coconut milk. While coconut milk will add a slight tropical undertone, it pairs surprisingly well with lemon and capers. Just be sure to use the canned version for the necessary fat content.
Herb Substitutions for Fresh Parsley
Fresh parsley is the classic choice because it adds a clean, grassy finish that cuts through the richness. However, fresh dill is a spectacular alternative that leans into the “pickled” vibe of the capers. It makes the dish feel very bright and summery.
Fresh chives are another great option, providing a very mild onion bite that complements the garlic. Whatever you choose, make sure to add the herbs at the very last second. Fresh herbs lose their vibrant color and delicate flavor if they cook in the sauce for too long.
Optimal Pairings for Creamy Chicken
Since this dish features a generous amount of sauce, you want to serve it with something that can act as a sponge. You don’t want a single drop of that lemon-caper goodness to go to waste on the plate.
Starch Bases: Pasta, Rice, or Bread
Linguine or fettuccine are the gold standards here, as the long strands provide plenty of surface area for the sauce to cling to. If you prefer rice, a simple basmati or jasmine rice works well to soak up the cream without competing with the flavors.
My personal favorite, however, is a thick slice of toasted sourdough bread. There is something incredibly satisfying about using a crusty piece of bread to swipe the last bits of sauce from the bottom of the bowl. It turns a simple meal into a comforting feast.
Vegetable Sides to Balance the Richness
Because the sauce is rich and creamy, I like to pair it with vegetables that have a bit of “snap” or bitterness. Roasted asparagus with a touch of salt is a perfect companion. The earthy flavor of the asparagus balances the bright citrus of the chicken.
A simple arugula salad with a light vinaigrette is another winner. The peppery bite of the arugula provides a refreshing contrast to the heavy cream. Avoid overly buttery side dishes, as you already have plenty of rich fats in the main course.
Expert Tips for Storage and Reheating
Cream sauces can be tricky to store because they tend to thicken significantly as they cool. If you have leftovers, store them in an airtight container in the fridge. The sauce will likely look like a thick jelly the next day, but don’t worry, it will liquefy again once heated.
When reheating, avoid the microwave if possible. The uneven heat of a microwave can cause the cream to separate and the chicken to become rubbery. Instead, place the leftovers in a small skillet over low heat and add a splash of chicken broth to loosen the sauce.
Freezing Guidelines for Cream-Based Dishes
I generally do not recommend freezing this dish once the cream has been added. Dairy has a tendency to “split” or become grainy when frozen and thawed, which ruins that velvety texture we worked so hard to achieve.
If you want to meal prep, you can sear the chicken and freeze it separately. When you are ready to eat, make the sauce fresh in a pan and drop the frozen chicken bites in to simmer. This ensures the sauce stays perfectly smooth and the chicken remains tender.
How to Scale the Recipe for Large Groups
If you are doubling this recipe for a dinner party, the most important rule is to sear the chicken in multiple batches. If you dump three pounds of chicken into one pan, the temperature will drop instantly, and the meat will boil in its own juices rather than searing.
Use a very wide skillet or a braising pan for the sauce. A larger surface area allows the liquid to reduce faster, which is helpful when you are working with larger volumes of broth and cream. This keeps the cooking process efficient and prevents the chicken from sitting in the heat for too long.
How do I store leftovers and will they freeze well?
Store leftovers in an airtight container in the refrigerator for up to 3 days. I do not recommend freezing this dish because the heavy cream sauce often separates and becomes grainy or oily when thawed and reheated. For the best results, enjoy it fresh or within a few days of cooking.
Why is my chicken still tough or rubbery?
The most common reason for tough chicken is overcooking it during the initial sear. Remember, the chicken should only be golden on the outside and still slightly underdone in the middle when you first remove it from the pan. If you cook it 100% through during the sear, the final simmer in the sauce will push it into the “rubbery” zone. Also, ensure you are cutting the pieces into uniform 1.5-inch chunks so they cook at the same rate.
Can I use something other than heavy cream?
If you want a lighter version, you can use half-and-half, but the sauce will be thinner and more prone to curdling if boiled. For a dairy-free option, full-fat canned coconut milk or cashew cream are the best substitutes. Avoid using skim or 2% milk, as they lack the fat content necessary to create a stable, thick emulsion with the lemon juice.
What can I use if I don’t have capers?
If you don’t have capers, the best substitute is chopped green olives or even finely diced dill pickles. You are looking for that salty, briny, and acidic “pop” to balance the richness of the cream. If you omit them entirely, add an extra teaspoon of lemon juice and a pinch more salt to help mimic that flavor profile.
My sauce is too thin, how do I thicken it?
If the sauce hasn’t reached your desired thickness, let it simmer for an extra 2-3 minutes on medium-low heat before adding the chicken back in. This allows the water in the cream and broth to evaporate, concentrating the fats and starches. You can also whisk in a small pat of cold butter at the very end, which adds body and a glossy finish.
Is the turmeric necessary for the flavor?
No, the turmeric is primarily used for color. It gives the sauce a beautiful, restaurant-style golden hue. If you don’t have it on hand, you can leave it out; the dish will still taste delicious, though the sauce will be a much paler, creamy white color.

Creamy Lemon Caper Chicken
Course: Main CourseCuisine: AmericanDifficulty: easy4
servings10
minutes15
minutes360
kcal25
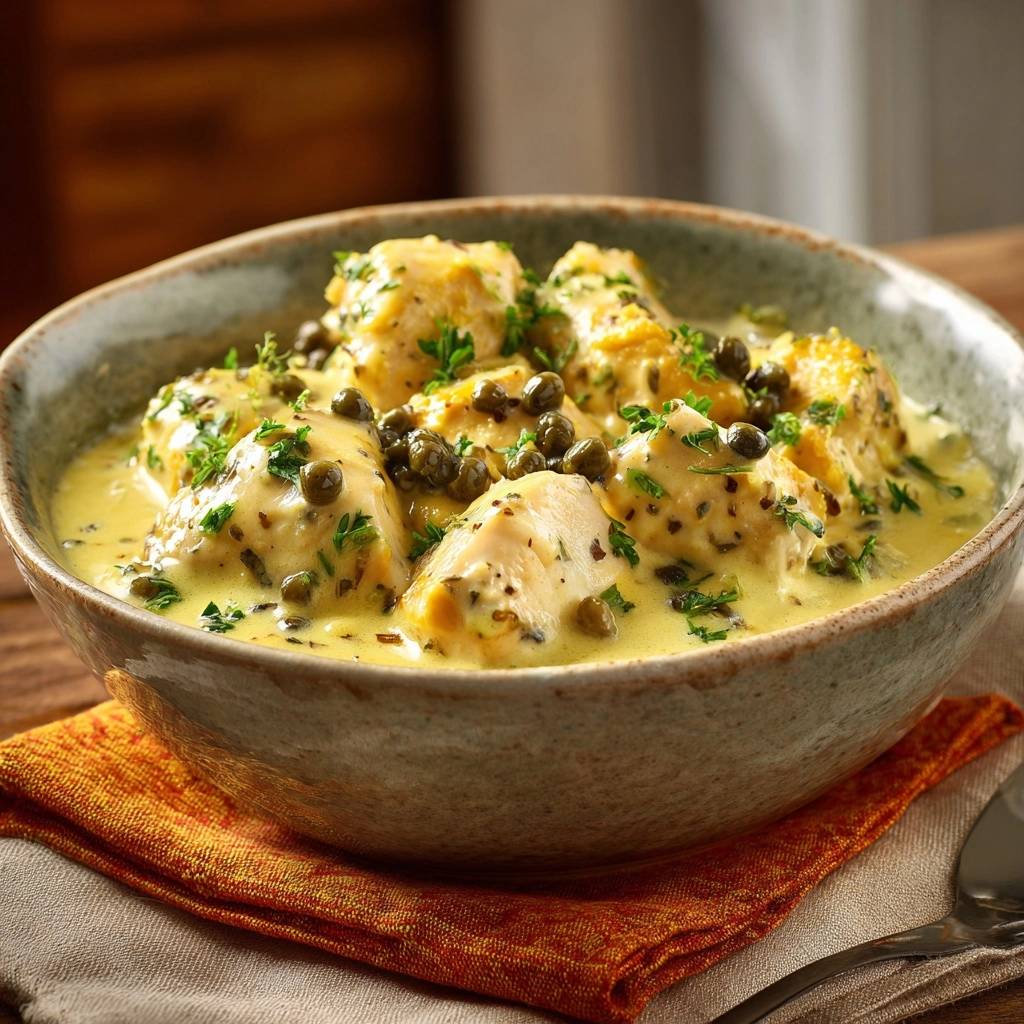
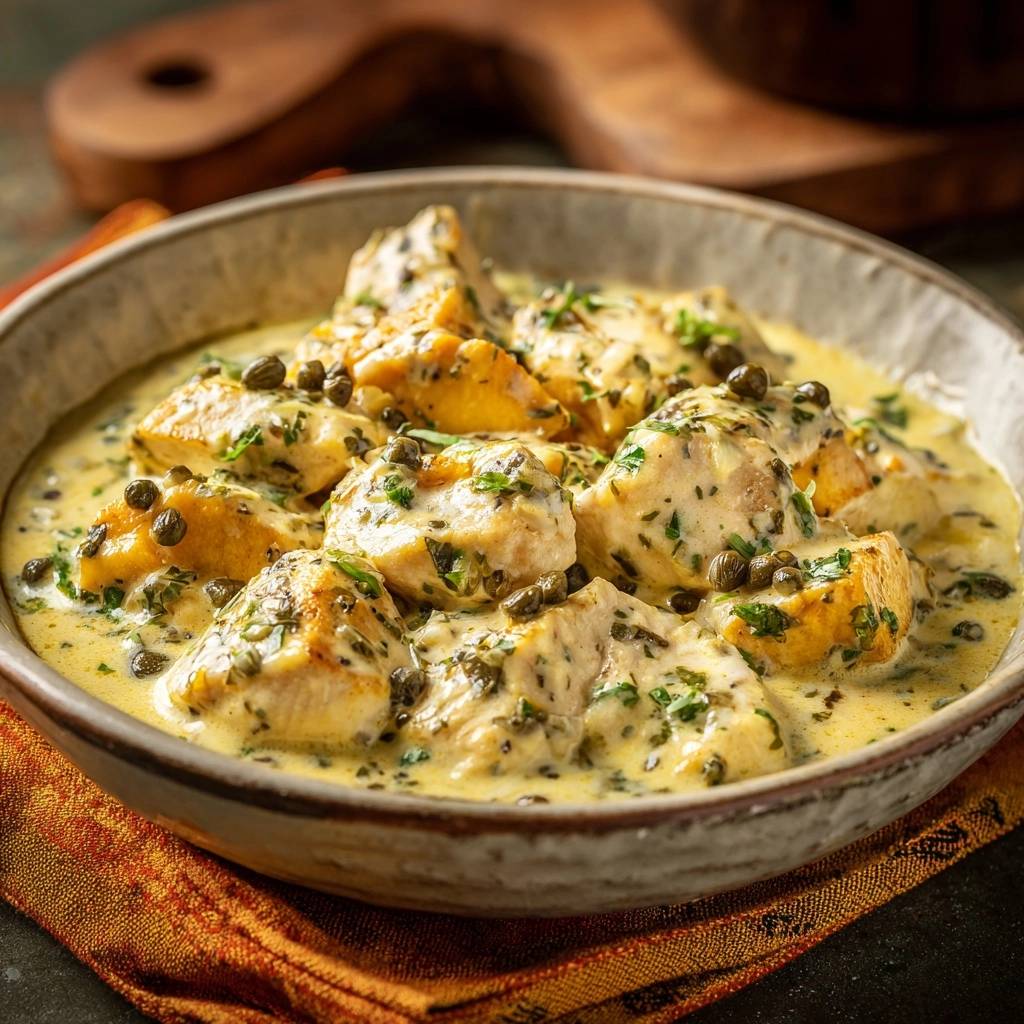
MinutesThis dish features tender chicken breast chunks seared to perfection and simmered in a vibrant, creamy lemon and caper sauce. The secret technique ensures the meat remains buttery soft and juicy.
Ingredients
1.5 lbs boneless skinless chicken breasts, cut into 1.5-inch chunks
3 tablespoons all-purpose flour
1/2 teaspoon salt
1/2 teaspoon cracked black pepper
1/2 teaspoon dried oregano
2 tablespoons olive oil
4 tablespoons unsalted butter, divided
3 cloves garlic, minced
1/2 cup low-sodium chicken broth
1/4 cup fresh lemon juice
1/4 teaspoon turmeric (for the vibrant yellow hue shown in the image)
4 tablespoons non-pareil capers, drained
1/2 cup heavy cream
3 tablespoons fresh parsley, finely chopped
Directions
- In a medium bowl, toss the chicken chunks with flour, salt, pepper, and dried oregano until evenly coated. This flour barrier protects the meat from direct heat and creates the base for the silky, thick sauce.
- Heat olive oil and 1 tablespoon of butter in a large skillet over medium-high heat. Add the chicken in a single layer. Sear for 2-3 minutes per side until golden brown but not fully cooked through. Remove chicken to a plate immediately to keep it tender.
- Lower the heat to medium. In the same skillet, melt the remaining 3 tablespoons of butter. Add minced garlic and cook for 1 minute until fragrant.
- Pour in the chicken broth, lemon juice, and turmeric. Use a wooden spoon to scrape the bottom of the pan to release the flavorful browned bits (fond).
- Stir in the capers and heavy cream. Bring to a gentle simmer for 3 minutes, whisking occasionally, until the sauce reduces and thickens into a rich, yellow velvet consistency.
- Return the chicken and any accumulated juices to the skillet. Reduce heat to low and simmer gently for 3 to 4 minutes. This low-temperature finish ensures the chicken reaches the perfect internal temperature without becoming dry or rubbery.
- Garnish heavily with fresh parsley. Serve in a warm bowl as-is, or over pasta or crusty bread to soak up the extra sauce.
Notes
- The turmeric is used primarily for a vibrant yellow hue. Serve over pasta or with crusty bread to enjoy the extra sauce.


