
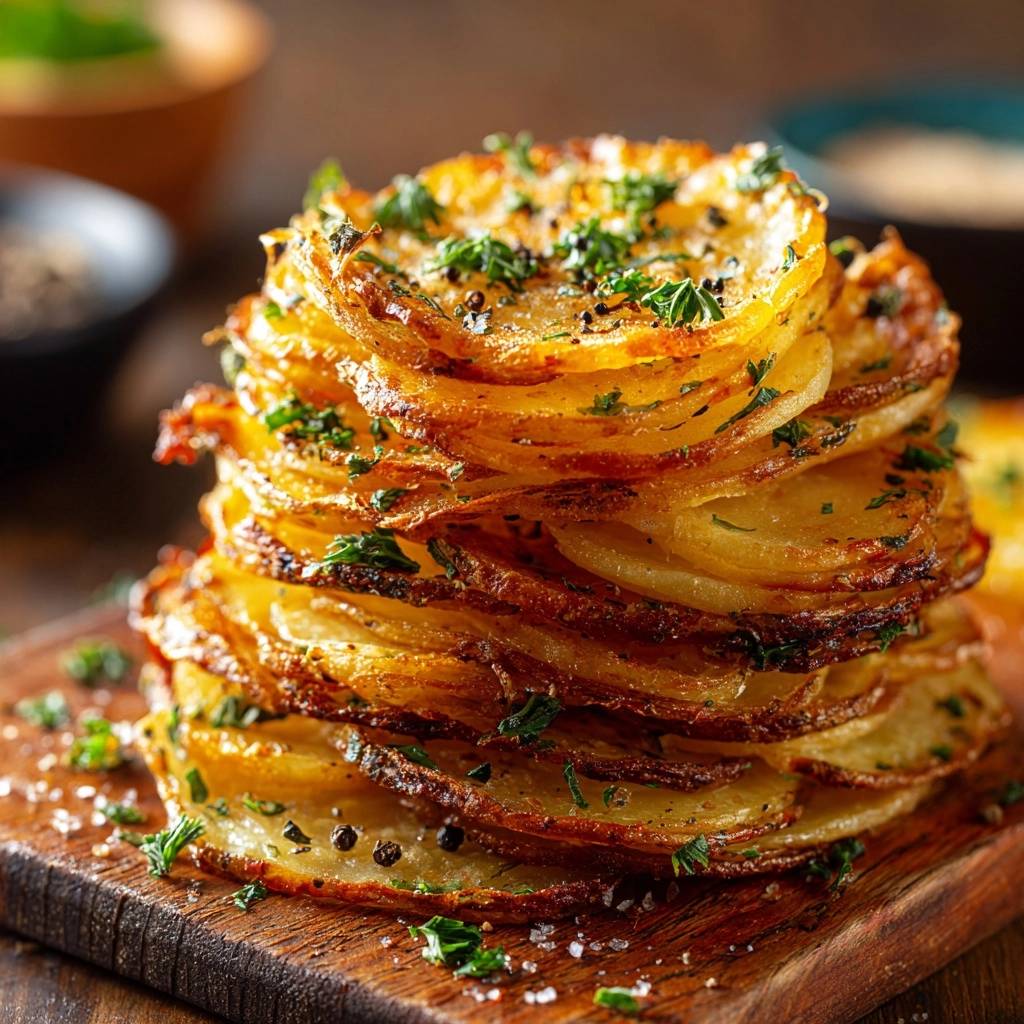
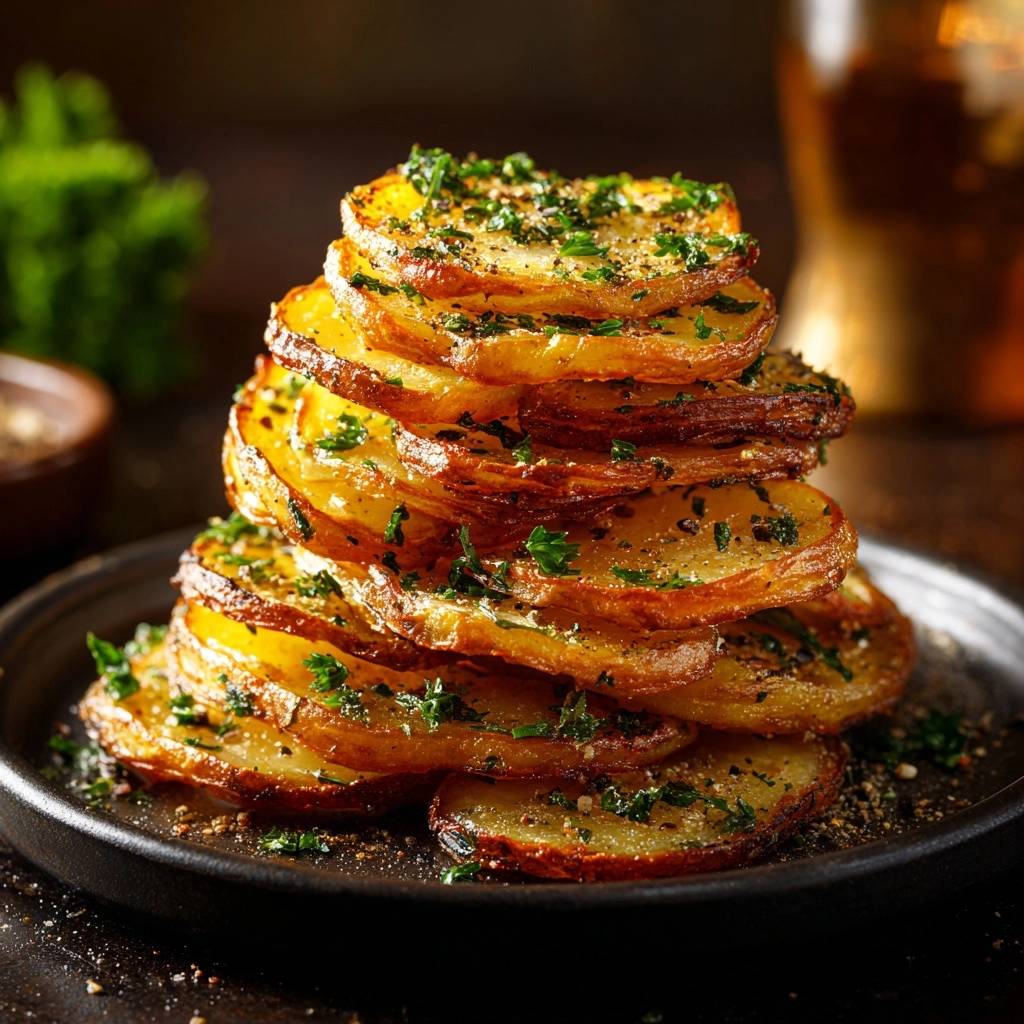
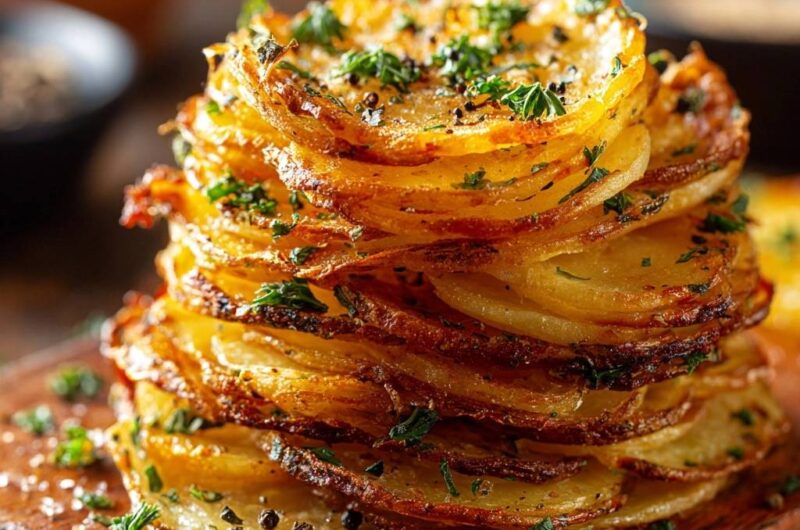
You’ve likely experienced the disappointment of a potato gratin that looks stunning on the surface but hides a mushy, greasy interior. Most potato stacks fail because they trap steam between the layers, turning what should be a crisp delight into a gummy mess. We’re aiming for a “shattered glass” texture—a crunch so delicate and sharp it resonates with every bite.
The secret to achieving this uniform golden brown perfection isn’t just high heat; it’s about aggressive moisture management. By changing how we handle the starch and how we layer the fat, we can ensure that every single slice roasts individually rather than steaming in a pile. This recipe transforms the humble potato into a structural masterpiece that stays upright and stays crunchy.
If you want to master this dish, you have to respect the rinse. Rinsing the sliced potatoes in cold water removes the surface starch that usually acts like a sticky glue. This one simple step ensures the slices remain distinct and allows the garlic-infused fats to coat every millimeter of the potato surface for maximum crisping power.
The Anatomy of a Perfect Potato Stack
The foundation of a great stack starts with the Yukon Gold potato. While Russets are great for fluffiness, they often fall apart when sliced this thin. Yukon Golds have a medium starch content and a naturally buttery flavor that holds its shape under the intense heat of a 55-minute roast. They provide that creamy interior “snap” while the edges transform into golden chips.
Precision is your best friend here. You must aim for a 1/16th inch thickness. If the slices are too thick, the heat won’t penetrate the center of the stack fast enough to crisp the middle before the tops burn. A uniform thickness ensures that every stack in your muffin tin finishes cooking at the exact same second.
Essential Components for Maximum Crunch
We use a specific blend of melted butter and extra virgin olive oil to coat these potatoes. Butter provides that unmistakable rich, nutty flavor and aids in browning through its milk solids. However, butter alone can burn during a long roast. Adding olive oil raises the overall smoke point, allowing the stacks to endure the high oven temperature without turning bitter or charred.
The finely grated Parmesan cheese is more than just a salty flavor booster; it’s a textural binder. Because it’s dry and granular, it creates tiny gaps of “friction” between the potato slices. These gaps prevent the potatoes from suctioning together, which allows the hot air and fat to circulate deep into the center of the stack.
If you enjoy the cheesy richness from Parmesan, you’ll want to try this garlic parmesan zucchini bake.
Fresh herbs are non-negotiable for the best aromatic profile. Fresh thyme and parsley offer a bright, earthy contrast to the heavy fats. If you use dried herbs, they often taste dusty or burnt after an hour in the oven. Fresh herbs release their oils slowly, infusing the butter as it bubbles between the layers.
Why Fat Selection Dictates Final Texture
Using only butter often results in a “soggy-bottom” effect because the water content in butter can steam the bottom layers. By cutting the butter with olive oil, you’re introducing a pure fat that encourages frying rather than steaming. This combination ensures the base of the stack, which sits in the bottom of the tin, gets just as crispy as the exposed top.
The Science of Starch and Moisture Management
The “Starch-Rinsing Hack” is the most important part of this process. When you slice a potato, you break open cells and release amylose starch. If left on the surface, this starch becomes a sticky paste when heated, sealing the slices together. By soaking the slices in cold water for five minutes, you wash that paste away. You’ll see the water turn cloudy—that’s the enemy of crispiness leaving the building.
After the soak, you must be obsessive about drying. I recommend laying the slices out on a clean kitchen towel and pressing another towel firmly over the top. Any residual water trapped between the layers will turn into steam the moment it hits the oven. Steam is the primary cause of sogginess. You want the potatoes to roast in fat, not boil in their own juices.
Think of the physics: steam expands and pushes layers apart in a messy way, while roasting shrinks the potato and concentrates the sugars. By removing the water, you allow the Maillard reaction—the chemical reaction between amino acids and reducing sugars—to happen across the entire surface area of every slice. This is how you get that deep, savory flavor and the characteristic crunch.
Equipment: Why the Muffin Tin is Mandatory
A standard baking dish allows heat to hit the potatoes only from the top and bottom. A muffin tin, however, provides 360-degree heat conduction. Each individual well acts like a mini-oven, radiating heat directly into the sides of the potato stack. This lateral heat is what crisps the edges that are tucked away inside the stack.
You also need a mandoline. It’s nearly impossible to hand-cut four large potatoes into perfectly even 1/16th inch rounds with a knife. If your slices vary in thickness, the thin ones will burn while the thick ones remain raw. The mandoline guarantees the mathematical uniformity required for this specific technique to work.
Step-by-Step: Preparing the Crispy Garlic Potato Stacks
Before you even touch a potato, get your “mise en place” ready. Have your butter melted, your garlic minced, and your muffin tin greased. Potatoes begin to oxidize and turn brown or gray the moment they are exposed to air. Working quickly and having your ingredients staged prevents this discoloration and keeps the flavor fresh.
For more cheesy, garlic-infused goodness, check out these cheesy garlic pizza bombs.
Phase 1: Precision Slicing and The Cold Soak
Set your mandoline to the thinnest setting and slice the peeled potatoes directly into a large bowl. Once finished, cover them with cold tap water. Agitate the slices with your hands to ensure they aren’t sticking together. You’ll notice the water becoming opaque and milky within a minute; this is exactly what you want to see.
Phase 2: The Drying and Seasoning Process
Drain the potatoes and use the towel-press method to get them bone-dry. Transfer them to a clean, dry bowl and pour in the butter, oil, garlic, and herbs. Toss them thoroughly so every slice is glistening. Add the Parmesan cheese last. If you add the cheese while the potatoes are still damp or before the oil, it will clump into a thick paste rather than coating the slices evenly.
Phase 3: Strategic Layering and Oven Positioning
When you fill the muffin tin, don’t stop at the rim. These stacks will shrink by about 25% as the water evaporates and the layers compress. Build them about half an inch above the top of the tin. Place the tin on the middle rack of the oven. This position ensures even air circulation above and below the tin, preventing the bottoms from scorching before the tops are golden.
Troubleshooting Common Texture Failures
If you notice the tops are browning too quickly while the centers still feel firm when poked with a knife, don’t panic. Simply “tent” the muffin tin with a piece of aluminum foil. This reflects the direct heat away from the tops while allowing the internal temperature to continue rising, softening the potato centers until they are tender.
Sometimes stacks might “slide” or tilt to one side as they bake and shrink. If you see a stack leaning, use a fork to gently push it back into the center of the well halfway through the cooking time. The cheese and butter will eventually act as a glue to hold the corrected shape as they finish roasting.
Flavor Variations and Herb Substitutions
Once you master the base technique, you can play with the flavor profile. For a smoky kick, add a teaspoon of smoked paprika to the butter mixture. This gives the stacks a deep red hue and a campfire aroma that pairs beautifully with grilled meats. Just ensure the paprika is well-mixed so it doesn’t clump and burn.
A “Rosemary and Lemon” version is incredibly refreshing. Swap the thyme for finely minced fresh rosemary and add the zest of one lemon to the oil. The citrus oils cut through the richness of the butter. Another high-end option is to finish the stacks with a dusting of truffle salt immediately after they come out of the oven for an earthy, luxurious aroma.
Optimal Pairings for Crispy Potato Sides
These stacks are the ultimate side dish for anything with a savory sauce. Because they are so crunchy, they hold up well next to a juicy roasted chicken or a seared steak. The garlic and Parmesan profile also complements roasted lamb or even a hearty mushroom risotto if you’re looking for a vegetarian feast.
Round Out Your Meal
To complement your crispy garlic potato stacks, consider these vibrant vegetable and grain dishes.
- For a bright and hearty addition, try this roasted sweet potato and kale power salad, which shares a love for roasted vegetables.
- Another excellent choice is the crispy Brussels and sweet potato quinoa power bowl, offering a satisfying mix of textures and complementary roasted flavors.
The structural integrity of these stacks makes them great for dinner parties. They look elegant on the plate and don’t slump into a pile of mash. They act as a perfect vessel for soaking up pan juices or a red wine reduction without losing their initial crunch on the exterior layers.
Make-Ahead Logistics and Reheating Instructions
While these are best served fresh, you can par-bake them if you’re hosting a crowd. Bake them for about 35 minutes until they are just starting to brown, then let them cool. When you’re ready to serve, pop them back into a 400°F oven for 15 minutes to finish the crisping process. This “double-fry” effect actually makes them even crunchier.
To reheat leftovers, avoid the microwave at all costs; it will turn your hard-earned crunch into a soggy sponge. Use an air fryer at 350°F for 5 minutes or a toaster oven. This dry heat reactivates the fats and recrisps the edges perfectly. Store any leftovers in an airtight container in the fridge for up to three days.
Expert Tips for Professional Results
Don’t rush the removal process. Let the stacks rest in the muffin tin for at least five minutes after you pull them out of the oven. This resting period allows the proteins in the cheese to firm up, which acts as the “mortar” holding your potato “bricks” together. If you pull them too soon, they might fall apart.
Use a small offset spatula or a thin butter knife to gently loosen the edges before lifting. If you greased the tin well, they should pop right out. Finally, always finish with a pinch of flaky sea salt. The large salt crystals provide a final pop of flavor that highlights the sweetness of the roasted garlic and the nuttiness of the Parmesan.
Frequently Asked Questions
Can I use Russet potatoes instead of Yukon Gold?
You can, but the texture will be different. Russets are starchier and drier, which means they will be fluffier on the inside but more prone to breaking apart. Yukon Golds provide a waxier, creamier interior that holds the “stack” shape much better during the long roasting process. If you use Russets, be extra careful when removing them from the tin.
My stacks are sticking to the tin; what happened?
This usually happens for two reasons: either the tin wasn’t greased well enough, or the Parmesan cheese melted and caramelized against the metal. To prevent this, ensure you use a good quality cooking spray and try to keep the cheese mixed into the potatoes rather than having large clumps sitting at the very bottom of the well. Letting them rest for five minutes also helps the cheese release from the sides.
Can I make these without a mandoline?
It is very difficult. The success of this recipe relies on the slices being paper-thin (1/16th inch). If you use a knife, the slices will likely be thicker and uneven, leading to a situation where the outside is burnt and the inside is still raw. If you must use a knife, sharpen it well and take your time to get the slices as translucent as possible.
How do I keep the garlic from burning and turning bitter?
The trick is in the layering. By mixing the minced garlic into the butter and oil and then tossing the potatoes, the garlic gets trapped between the layers of potato. This protects the garlic from the direct heat of the oven. The garlic “confits” in the fat between the slices rather than roasting on the surface, which keeps it sweet and aromatic.
Why did my stacks shrink so much?
Potatoes are about 80% water. As they roast for nearly an hour, that water evaporates, causing the cells to collapse and the slices to thin out. This is a natural part of the concentration of flavor and texture. This is why we recommend stacking the raw potatoes about half an inch above the rim of the muffin tin—they will settle down to the perfect height by the time they are done.
Potato Stacks
Course: Side DishCuisine: AmericanDifficulty: medium4
servings20
minutes55
minutes240
kcal75
MinutesA specialized recipe for garlic and parmesan potato stacks that uses a specific rinsing and layering method to ensure a uniform, crunchy texture throughout every slice.
Ingredients
4 large Yukon Gold potatoes, peeled
3 tablespoons unsalted butter, melted
2 tablespoons extra virgin olive oil (higher smoke point for better crisping)
1/2 cup finely grated Parmesan cheese (acts as a crisping binder)
2 cloves garlic, finely minced
1 teaspoon fresh thyme, chopped
1 tablespoon fresh parsley, finely chopped
1 teaspoon sea salt
1/2 teaspoon cracked black pepper
Cooking spray
Directions
- Preheat your oven to 375°F (190°C). Lightly grease a standard muffin tin with cooking spray.
- Use a mandoline to slice the potatoes into paper-thin rounds (approx. 1/16th inch). This is the first step to solving the texture issue; thick slices will never crisp through.
- Place the potato slices in a bowl of cold water for 5 minutes. This is the critical hack: rinsing away the excess surface starch prevents the slices from sticking together into a gummy, soggy mass.
- Drain the potatoes and pat them completely dry with a clean kitchen towel. Any leftover water will create steam, which leads to sogginess.
- In a large bowl, whisk together the melted butter, olive oil, minced garlic, thyme, salt, and pepper. Add the dry potato slices and toss thoroughly.
- Add the finely grated Parmesan cheese last and toss again. The cheese creates “friction” between the layers, preventing them from sealing shut and allowing heat to penetrate the center of the stack.
- Stack the slices into the muffin tin cups, filling them about half an inch above the rim, as they will shrink significantly during baking.
- Bake for 45 to 55 minutes. The muffin tin walls conduct heat directly into the sides of the stack, while the oil/butter mixture roasts the centers. The stacks are done when the edges are deep golden brown and the centers are tender when pierced with a knife.
- Let the stacks rest in the tin for 5 minutes to firm up. Carefully lift them out with a butter knife or small offset spatula. Garnish with fresh parsley and extra sea salt before serving.
Notes
- The secret to the crunch is rinsing the starch off the potato slices and patting them completely dry to prevent steaming. Using a muffin tin helps conduct heat to the sides of the stacks for even browning.


