
We’ve all been there. You spend twenty minutes perfectly breading chicken, only to watch that beautiful crunch vanish the moment a sauce touches it. It’s heartbreaking to see a golden, shatteringly crisp crust turn into a gummy, pale mess in seconds.
The problem isn’t your breading; it’s the physics of steam and sugar. Most recipes have you toss the chicken directly into a hot pan with the sauce, which effectively steams the crust from the outside in. This recipe fixes that with a specific “Anti-Soggy Coating Secret” that keeps the crunch alive.
The real trick lies in the 10-minute rest period after breading. By letting the cutlets sit on a wire rack before they ever hit the oil, you allow the flour and egg proteins to hydrate and bond. This creates a structural “glue” that prevents the breading from sloughing off in the pan.
The Physics of the Perfect Chicken Crunch
Frying is essentially a race between moisture leaving the chicken and the crust hardening. As the chicken cooks, internal juices turn into steam. If your breading isn’t porous enough, that steam gets trapped, making the underside of the crust wet and soggy.
Our method relies on a strict separation of the frying and glazing stages. By keeping the chicken away from the simmering sauce until the very last second, we ensure the Panko stays dry. This thermal management is what separates a professional cutlet from a soggy home-cooked one.
Why Panko Outperforms Standard Breadcrumbs
Traditional breadcrumbs are tiny, uniform spheres that pack together tightly, creating a dense, heavy shell. Panko, however, consists of large, jagged flakes with a massive amount of surface area. These flakes create “oil pockets” during frying, which results in a much lighter, airier crunch.
Because Panko is processed into slivers rather than crumbs, it doesn’t absorb as much grease. This means you get a cleaner mouthfeel and a crust that stands up better to the weight of a honey-soy glaze. It’s the difference between a heavy armor and a light, crisp shield.
The Role of Starch Hydration in Adhesion
If you’ve ever had the breading fall off your chicken in one giant piece, you skipped the hydration step. When you let the breaded cutlets rest for 10 minutes, the moisture from the egg wash seeps into the flour and Panko. This creates a unified layer that won’t separate when the meat shrinks during cooking.
Always use a wire rack for this resting period. If you leave the chicken on a flat plate, the bottom side will become damp and sticky. Airflow is your best friend when you’re trying to build a crust that actually sticks to the meat.
Essential Components for Crispy Glazed Chicken Cutlets
Success starts with your choice of fat. You need a neutral oil with a high smoke point, like canola or grapeseed oil. Avoid olive oil here; its low smoke point means it will break down and impart a bitter flavor before the chicken is even cooked through.
The glaze requires a balance of honey for sweetness, soy sauce for salt, and apple cider vinegar for acid. The vinegar is the unsung hero, as it cuts through the richness of the fried breading. Without that acidic hit, the dish can feel one-note and overly heavy.
Selecting and Preparing the Poultry
Uniformity is the key to juicy chicken. If one end of your breast is an inch thick and the other is a quarter-inch, the thin part will be dry as a bone by the time the center is safe to eat. Use a meat mallet or a heavy skillet to pound the chicken to a consistent half-inch thickness.
Pounding the meat also breaks down tough muscle fibers. This results in a cutlet that you can almost cut with a fork. It’s a small extra step that makes a massive difference in the final texture of the dish.
The Aromatics: Garlic, Onion, and Pepper
We don’t just season the chicken; we season every single layer of the dredge. Adding garlic and onion powder to the Panko ensures that the flavor is embedded directly into the crunch. It creates a savory profile that stands up to the bold, sweet glaze.
Don’t be shy with the black pepper in the flour layer, either. Since the flour is the first thing to touch the meat, it acts as the primary seasoning base. Layering your spices this way ensures the chicken tastes great even without the sauce.
The Glaze: Balancing Sweet, Salty, and Acid
The honey provides the body of the sauce, but the cornstarch slurry provides the “cling.” Without cornstarch, the glaze would just run off the chicken and pool at the bottom of the plate. You want a sauce that behaves like a thick syrup, coating the ridges of the Panko.
Whisk the cornstarch with cold water before adding it to the simmering honey and soy. If you dump dry cornstarch into a hot liquid, it will clump instantly. This slurry ensures a smooth, translucent finish that looks as good as it tastes.
Step-by-Step: The Double-Dredge and Fry Technique
This process is all about organization. Set up your three bowls in a row: flour, then egg, then Panko. This “assembly line” keeps the kitchen clean and ensures every cutlet gets the exact same treatment for consistent results.
Phase 1: The Three-Station Coating System
To avoid “club hand”—where your fingers become breaded along with the chicken—use the wet hand/dry hand method. Use your left hand for the dry flour and Panko, and your right hand for the wet egg wash. It keeps the process much cleaner and more efficient.
When you get to the Panko station, don’t just toss the chicken in the crumbs. Press down firmly with the palm of your hand. You want to pack those flakes into the egg wash to create a dense, craggy barrier that won’t flake off in the oil.
Phase 2: Managing Oil Temperature and Depth
You need about half an inch of oil in a heavy-bottomed skillet. A cast-iron or heavy stainless steel pan is best because it holds heat well. If the temperature drops too much when you add the chicken, the breading will soak up oil like a sponge and become greasy.
Aim for 350°F. If you don’t have a thermometer, dip the end of a wooden spoon into the oil. If it bubbles steadily around the wood, you’re ready to fry. If it pops and splatters violently, it’s too hot; if it does nothing, keep waiting.
Phase 3: The Golden Brown Transformation
Once the chicken hits the pan, leave it alone. Resist the urge to poke or move it for at least three minutes. This allows the crust to set and brown deeply. You’re looking for a rich, mahogany gold color before you flip.
Flip only once. Every time you turn the chicken, you risk tearing the breading or dropping the oil temperature. Use tongs to gently turn the cutlets, then cook for another 3 to 4 minutes until the internal temperature hits 165°F.
The Flash-Glaze Method for Maximum Texture
This is the most important part of the recipe. Instead of tossing the fried chicken into the saucepan, keep the chicken on a clean wire rack. This allows air to circulate around the entire cutlet, keeping the bottom just as crisp as the top.
Reducing the Sauce to a Translucent Sheen
Watch the sauce closely as it simmers. Once you add the slurry, it will turn from a cloudy brown to a clear, dark amber. This is the cornstarch activating. It should be thick enough to coat the back of a spoon without immediately dripping off.
If the glaze gets too thick, just whisk in a teaspoon of water to loosen it up. You want it to be pourable but viscous. It should look like liquid silk when you drizzle it over the golden chicken.
The Wire Rack Cooling Strategy
Never drain fried chicken on paper towels. While it seems like a good idea to soak up grease, the paper towels actually trap steam against the bottom of the chicken. This is the fastest way to get a soggy bottom.
By using a wire rack, the steam can escape freely. This keeps the Panko “shatteringly” crisp. Drizzle the glaze over the chicken while it’s on the rack, then move it to a plate immediately to serve.
For more ideas on achieving that perfect crispiness every time, check out these golden chicken cutlets.
Troubleshooting Common Coating Failures
If your breading is falling off, you likely had too much excess flour on the chicken before the egg wash. Always shake the cutlet vigorously after the flour dredge. You only want a thin, dusty coating so the egg can actually grab onto the meat.
If the chicken is dry, it’s almost always an issue of overcooking. Chicken breasts are lean and can go from juicy to chalky in sixty seconds. Use a digital thermometer to pull the chicken at 160°F; the carryover heat will bring it to the safe 165°F while it rests.
Preventing a Greasy Aftertaste
A greasy cutlet is usually the result of low oil temperature. If the oil isn’t hot enough to instantly sear the exterior, it seeps into the breading. Always let the oil come back up to temperature between batches.
Also, make sure you aren’t using too much oil. You aren’t deep-frying; you’re shallow-frying. The oil should only come halfway up the side of the cutlet. This allows the top to “breathe” while the bottom crisps up.
Correcting a Broken or Thin Glaze
If your glaze looks watery on the plate, it didn’t simmer long enough with the cornstarch. The starch needs to reach a certain temperature to “bloom” and thicken. Give it another minute of bubbling on the stove.
However, if it becomes a thick, tacky paste, you’ve over-reduced it. Simply whisk in a splash of apple cider vinegar or water. This will restore the shine and make it easy to drizzle again.
Optimal Side Dishes for Crispy Cutlets
Since the chicken is rich and savory, you want sides that offer a clean contrast. Avoid anything too mushy or heavy, like mashed potatoes, which can make the whole meal feel weighed down. You want textures that complement the crunch.
Steamed Greens and Grains
Jasmine rice is the perfect vessel for catching any extra honey-soy glaze. It’s light and aromatic, providing a neutral base for the bold chicken. For greens, try quick-steamed bok choy or broccolini with a squeeze of lime.
These vegetables provide a fresh, snappy texture that balances the fried coating. Plus, they look beautiful on the plate next to the dark, glossy glaze and golden chicken.
Refreshing Slaws and Acidic Salads
A simple slaw made with shredded cabbage, ginger, and rice vinegar is a game-changer here. The crunch of the raw cabbage echoes the crunch of the Panko, while the vinegar cleanses your palate between bites.
You could also serve this with a bright cucumber salad. Thinly sliced cucumbers with a bit of salt and sesame oil provide a cooling effect that works perfectly with the savory-sweet profile of the glaze.
Storage and Reheating for Retained Crunch
Leftover fried chicken is notoriously difficult to reheat, but it’s not impossible. Whatever you do, stay away from the microwave. The microwave heats the water molecules inside the meat, which turns into steam and turns your crust into a wet sponge.
The Oven or Air Fryer Recovery Method
The best way to reheat these cutlets is in a 375°F oven or air fryer. Place the chicken on a wire rack and heat for about 5-8 minutes. This dry heat will recrisp the Panko and warm the chicken through without drying it out.
If you have extra glaze, store it in a separate container. Reheat the glaze in a small pan with a splash of water, then drizzle it fresh over the recrisped chicken. It will taste almost as good as the day you made it.
Freezing Breaded (Uncooked) Cutlets
You can actually prep these ahead of time! Bread the chicken through the Panko step, then place the raw cutlets on a baking sheet in the freezer for an hour. Once they are firm, transfer them to a freezer bag.
When you’re ready to eat, you can fry them straight from frozen. Just add an extra 2 minutes of cook time per side. This is a fantastic way to have a high-quality dinner ready on a busy weeknight.
Expert Tips for Professional Results
Always use a digital meat thermometer. It is the only way to guarantee juicy chicken every single time. Pulling the chicken at the right moment is the difference between a good meal and a great one.
Don’t skip the fresh parsley at the end. While it seems like a simple garnish, the hit of fresh, “green” flavor cuts through the sugar in the honey and the fat in the oil. It brightens the entire dish and makes the flavors pop.
Why Fresh Parsley Matters
Fried foods can sometimes feel “heavy” on the tongue. Fresh herbs provide a burst of chlorophyll and essential oils that act as a palate cleanser. Curly parsley also adds a nice bit of texture and a vibrant color contrast to the dark glaze.
If you don’t have parsley, fresh cilantro or even thinly sliced green onions work beautifully. The goal is to add a layer of freshness to the finished plate right before it hits the table.
The Importance of Batch Cooking
It is tempting to cram all four cutlets into the pan at once to save time. Don’t do it. Crowding the pan causes the oil temperature to plummet, and the chicken will end up steaming rather than frying.
Cook in two batches of two. This gives the chicken plenty of “elbow room” so the steam can escape. Between batches, wait a minute for the oil to return to 350°F. Your patience will be rewarded with a much better crust.
Frequently Asked Questions
How do I store leftovers so they don’t get soggy?
Store the chicken and the glaze in separate airtight containers in the refrigerator for up to 3 days. If you’ve already glazed the chicken, place it on a piece of parchment paper inside the container. To reheat, use an air fryer or oven at 375°F until the crust is firm again. Never use a microwave, as it will permanently soften the breading.
Why did my breading fall off the chicken?
This usually happens for two reasons: either the chicken was too wet before the flour dredge, or you didn’t let the breaded chicken rest. Make sure to pat the chicken dry with paper towels before starting. Most importantly, the 10-minute rest on a wire rack allows the egg and flour to form a structural bond that keeps the Panko attached during frying.
Can I use something other than honey for the glaze?
Yes, you can substitute maple syrup or brown sugar for the honey. Maple syrup will give it a slightly more earthy, woody sweetness, while brown sugar will create a deeper, molasses-like flavor. If using brown sugar, you may need to add a tablespoon of water to help it dissolve into a smooth syrup.
What is the best way to tell if the oil is hot enough without a thermometer?
The most reliable “old school” method is the wooden spoon trick. Dip the handle of a wooden spoon into the oil. If bubbles start to rise steadily from the wood (like a glass of soda), the oil is around 350°F. If it bubbles violently, turn the heat down. If no bubbles appear, the oil is too cold and will result in greasy chicken.
Can I make this recipe gluten-free?
Absolutely. Replace the all-purpose flour with a 1:1 gluten-free flour blend and use gluten-free Panko-style crumbs (usually made from rice or corn). Also, ensure you use tamari or a gluten-free liquid aminos instead of standard soy sauce. The technique remains exactly the same, and the results are just as crispy.
Why is my glaze too thick or clumpy?
If the glaze is clumpy, the cornstarch slurry wasn’t mixed thoroughly with cold water before being added to the hot liquid. If it’s just too thick (like a paste), it simply simmered too long. Whisk in a teaspoon of water or apple cider vinegar at a time until it reaches a glossy, pourable consistency that coats a spoon nicely.
Chicken Cutlets
Course: Main CourseCuisine: AmericanDifficulty: easy4
servings15
minutes12
minutes410
kcal27
MinutesA specialized chicken recipe designed to maintain a crunchy exterior even when coated in a thick honey and soy glaze. By using a wire rack resting period and a specific drizzling technique, these cutlets stay crisp and savory.
Ingredients
4 boneless skinless chicken breasts, pounded to half-inch thickness
1 ½ cups Panko breadcrumbs
½ cup all-purpose flour
2 large eggs, beaten with 1 tablespoon water
1 teaspoon garlic powder
1 teaspoon onion powder
½ teaspoon salt
½ teaspoon black pepper
½ cup honey
¼ cup soy sauce
1 tablespoon apple cider vinegar
1 teaspoon cornstarch (mixed with 1 teaspoon cold water)
Neutral vegetable oil for shallow frying (canola or grapeseed)
1 bunch fresh curly parsley, chopped for garnish
Directions
- Prepare three shallow bowls. Place flour mixed with salt and pepper in the first, the egg wash in the second, and Panko mixed with garlic and onion powder in the third.
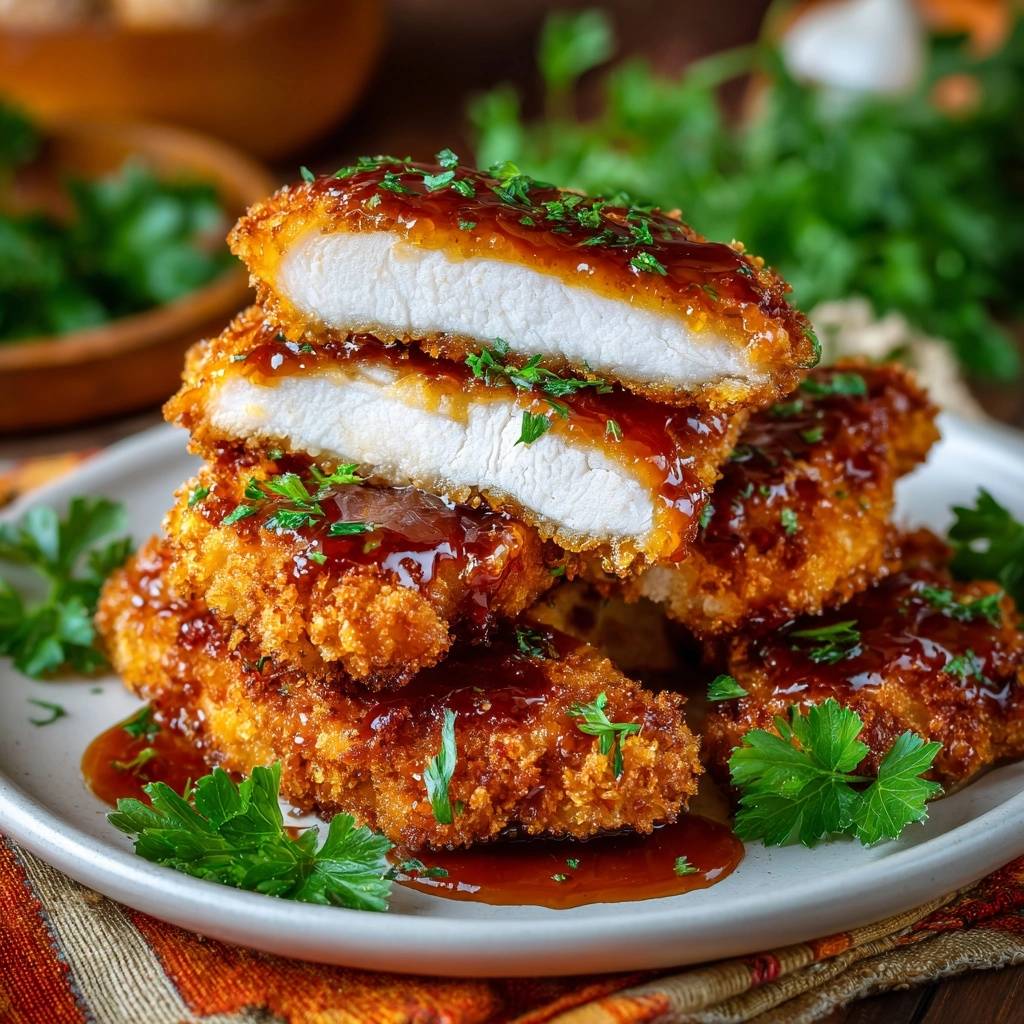
- Dredge each chicken cutlet in flour, shaking off the excess. Dip into the egg wash, then press firmly into the Panko. To achieve the thick, craggy crust shown in the image, press the crumbs in hard to create a dense barrier. Let the breaded chicken rest on a wire rack for 10 minutes before cooking; this hydrates the starches and ensures the crust adheres perfectly during frying.
- Heat half an inch of oil in a large heavy-bottomed skillet over medium-high heat until it reaches 350°F (175°C). If the oil isn’t hot enough, the breading will absorb grease and become heavy. Fry the cutlets for 3 to 4 minutes per side until deep golden brown and the internal temperature reaches 165°F.
- While the chicken cooks, whisk honey, soy sauce, and vinegar in a small saucepan over medium heat. Once simmering, whisk in the cornstarch slurry. Simmer for 1-2 minutes until the sauce transforms into a thick, translucent glaze that can coat the back of a spoon.
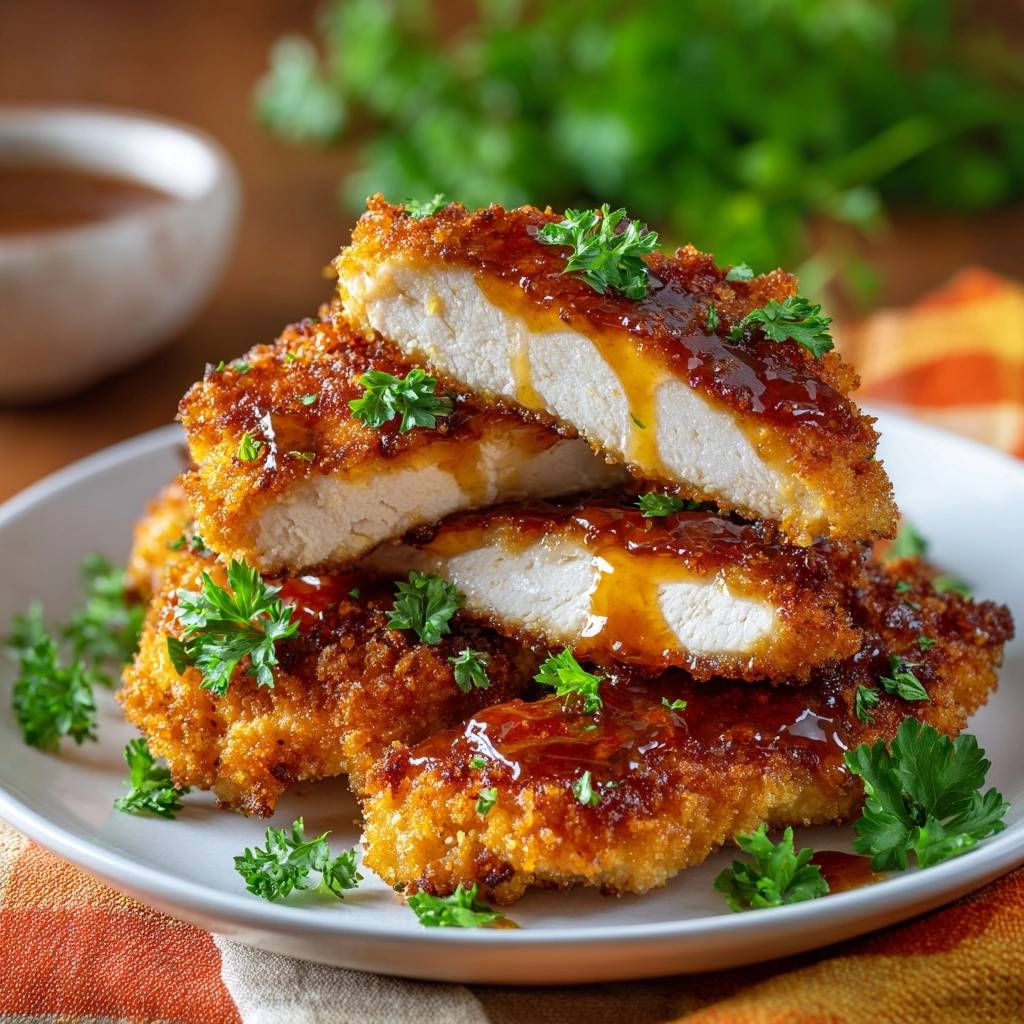
- To solve the soggy bottom problem, remove chicken from the pan and place it back on a clean wire rack. Drizzle the warm glaze over the chicken immediately before serving. Never toss the chicken in a pan with the sauce, as the residual heat and steam will destroy the crust.
- Slice the cutlets on a bias to reveal the juicy interior, garnish generously with fresh chopped parsley, and serve immediately with extra glaze on the side.
Notes
- Letting the breaded chicken rest for 10 minutes before frying is crucial for crust adhesion. Always drizzle the glaze over the chicken on a wire rack rather than tossing in a pan to prevent the breading from steaming and becoming soft.


